SHED MATTERS 2
-
PanBiker

- Site Administrator

- Posts: 16537
- Joined: 23 Jan 2012, 13:07
- Location: Barnoldswick - In the West Riding of Yorkshire, always was, always will be.
Re: SHED MATTERS 2
Quite possibly China, its worked perfectly OK until recently, we have had a few years out of it but the original design was bound to fail, make of that what you will I suppose. When I was selling IT I knew of one particular compact LED laser printer which was fitted with what was known unofficially with an "Armageddon chip". The only one on the board with no markings or PCB notation. All variants of this particular machine eventually rocked up with a "worn out" message on the display unit and dead in the water. This generally happened at around 3 to 4 years regardless of the page count. There was actually nothing to wear out in the machine, all moving parts were nylon and 90% of them were replaced when you replaced the toner and drum mechanism which also carried most of the paper transport. The PCB that the kill chip lived on was not available as a spare. It was nice little printer though, small upright footprint which would just fit at the side of your PC and monitor, ideal for a compact office setup, I bought two of them despite the know lifespan.
Ian

Re: SHED MATTERS 2
I was given an Epson photo printer/scanner that had a message on the screen basically saying "send me back to Epson and buy a new printer". I cleaned out the ink overflow pot and input a reset code I got from t'internet. It's still working now after at least 8 years, although lacking some of its funcionality due to there being no Windows 10 drivers for it.
Kev
Stylish Fashion Icon.

Stylish Fashion Icon.

-
Stanley

- Global Moderator

- Posts: 90679
- Joined: 23 Jan 2012, 12:01
- Location: Barnoldswick. Nearer to Heaven than Gloria.
Re: SHED MATTERS 2
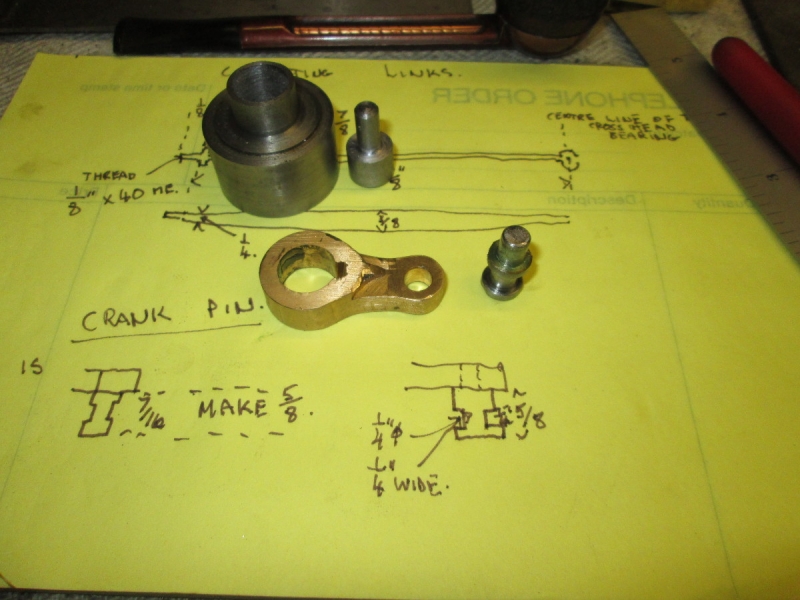
Kev, I have been thinking about the crank cock-up. My first instinct is to blame myself for turning the end off the shaft but whilst a bit of length there would help, I didn't take anywhere near enough off to cause the problem. The basic fault is that the casting for the crank was so mean and didn't have enough metal in it. I could make a new crank and use the old crank pin but it would look funny. As it is I shall rescue the crank by making a new crank pin for it......
Stanley Challenger Graham
Stanley's View
scg1936 at talktalk.net
"Beware of certitude" (Jimmy Reid)
The floggings will continue until morale improves!
Stanley's View
scg1936 at talktalk.net
"Beware of certitude" (Jimmy Reid)
The floggings will continue until morale improves!
-
Stanley
- Global Moderator
- Posts: 90679
- Joined: 23 Jan 2012, 12:01
- Location: Barnoldswick. Nearer to Heaven than Gloria.
Re: SHED MATTERS 2
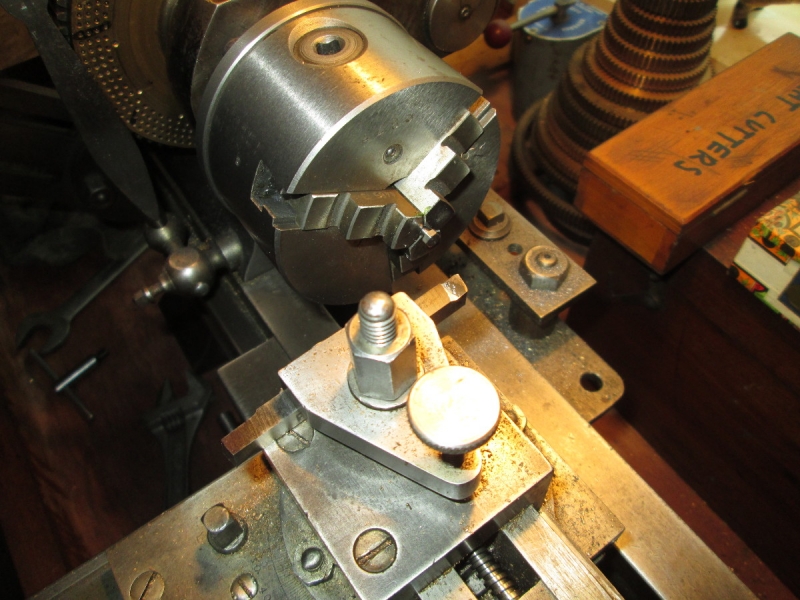
I didn't bother to heat the crank to break the Loctite, I made a little fixture and shoved it out with no problem.
Then a bit of re-measuring and checking before I got into Mrs Harrison and a bit of careful turning.
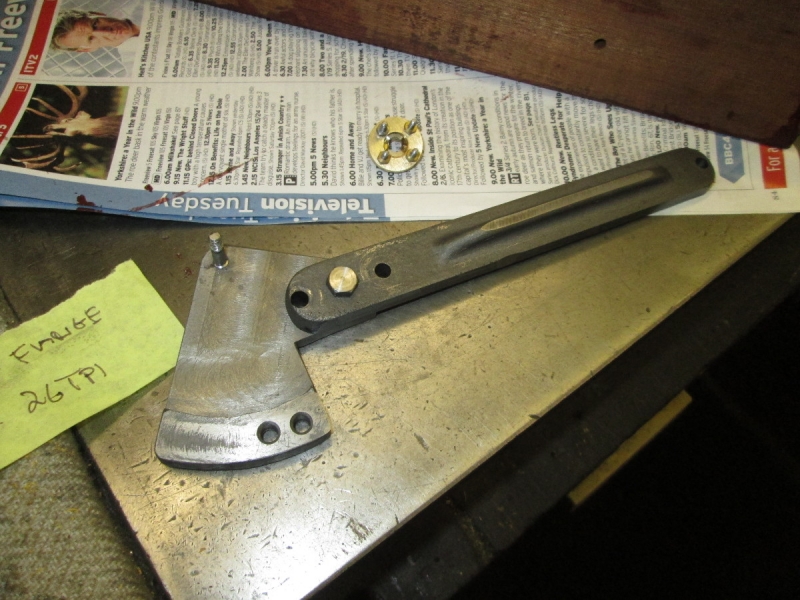
Spot the difference.....
The pin was a nice press fit, I used a nut as an anvil so I could make sure it was fully pressed home.
Now where to go next?
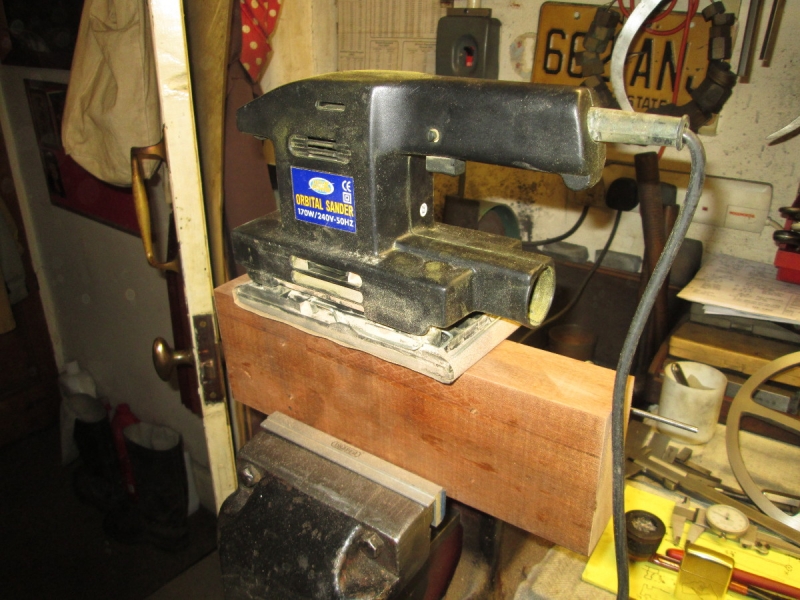
Hee hee, you didn't expect that did you! Let me explain.... I realised that one thing I had forgotten was that the engine bed was only on dowels and it was about time it was fastened down permanently. This led to sorting out the screws, longer dowels for locating it and sorting out my little gadget that drills a pilot hole for the screw and countersinks the hole at the same time. Then I had to take the flywheel shaft out yet again, a good thing because it will be easier to press the crank back on. This led to another matter, the engine bed has got a bit dirty and I had already decided to make it pretty at some point. This is the point so I got my orbital sander out and cleaned the base up.
I soon had a coat of satin finish stain on it and it's looking a bit better. It can have 24 hours to dry.....
That was it really for this morning. I cleaned my paint brush and put it and the stain away. Shifted the newly varnished engine and bed down onto Johnny's big lathe so I didn't accidentally catch it and called it a day. Not bad stuff and once I have fastened the bed to the base board it will be ready for more work on the motion.
Stanley Challenger Graham
Stanley's View
scg1936 at talktalk.net
"Beware of certitude" (Jimmy Reid)
The floggings will continue until morale improves!
Stanley's View
scg1936 at talktalk.net
"Beware of certitude" (Jimmy Reid)
The floggings will continue until morale improves!
-
Stanley
- Global Moderator
- Posts: 90679
- Joined: 23 Jan 2012, 12:01
- Location: Barnoldswick. Nearer to Heaven than Gloria.
Re: SHED MATTERS 2
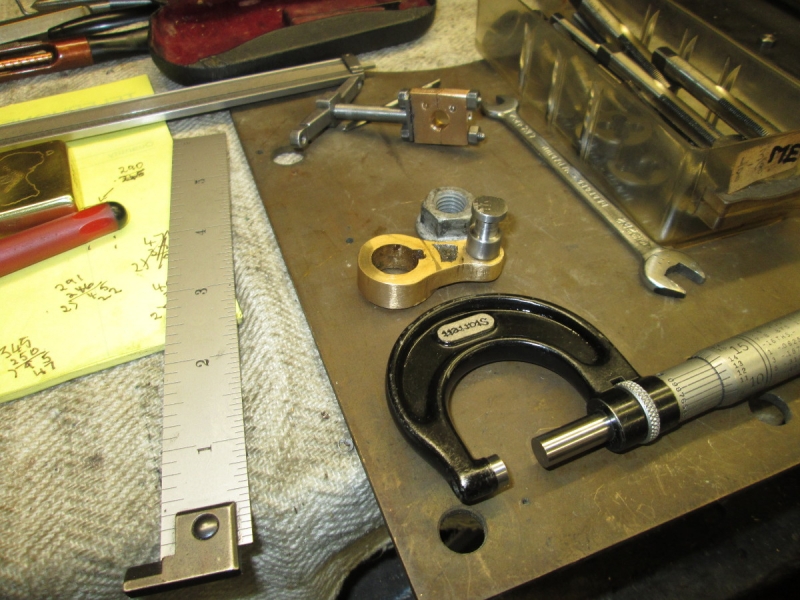
I had some cooking to do and wrote an article as well so it was after 8AM when I got in the shed but this didn't bother me because I knew the stain wasn't dry on the bed so it would be a mistake to press on with fixing it permanently today. Besides, there were plenty of little jobs demanding attention. One job remained to be done on the crosshead. It needed drilling and tapping 1/8" X 40tpi, the old Model engineer Thread. It's very useful to have a full range of taps and dies especially in the small sizes because one is always exactly right.

Another job I wanted to do was make sure the holes in the baseboard were an easy fit for the mounting screws and also to countersink the holes.
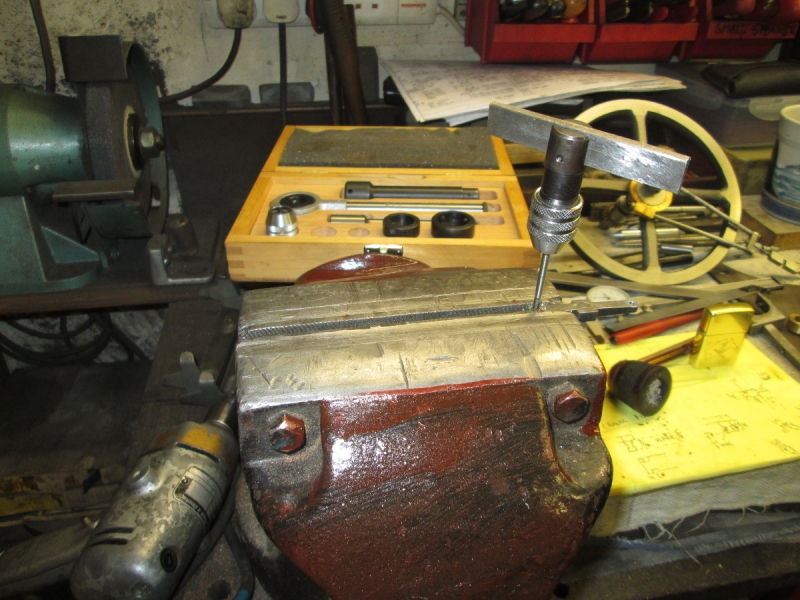
Then I turned my attention to the engine.... While I have it separate I want to fit the exhaust flange and pipe because I know this is going to be a fiddly job and having full access to it makes things as easy as they can be.
Here's the little bugger! I had never finished properly fitting the flange bolts....
Here it is ready for fitting, all the flange bolts are a free fit and will tighten up easily. I found a suitable piece of pipe and started to consider how much room I had, there is a lot going on down this side of the engine, Con rods, eccentric rods and of course the flywheel. After a good coat of looking over I decided that the design with the exhaust coming out and bending downwards was the route to a lot of pain. I've made an executive decision, it's going uphill! This has the added advantage that it might mean that instead of the weird shaped connecting rod shown on the drawing, I can get away with a straight rod which will be much better.
I was kicking myself for dismantling the entablature yet again when I remembered how close the flywheel runs to it so I will ease it a bit tomorrow to get round this.
It's been a bitty morning but good stuff done. I am a happy bunny.....
Stanley Challenger Graham
Stanley's View
scg1936 at talktalk.net
"Beware of certitude" (Jimmy Reid)
The floggings will continue until morale improves!
Stanley's View
scg1936 at talktalk.net
"Beware of certitude" (Jimmy Reid)
The floggings will continue until morale improves!
-
Stanley
- Global Moderator
- Posts: 90679
- Joined: 23 Jan 2012, 12:01
- Location: Barnoldswick. Nearer to Heaven than Gloria.
Re: SHED MATTERS 2
I didn't start the morning as promised. I skipped the quadrant and went straight to the exhaust pipe as I had thoughts about it since yesterday. It turned out that I was still wrong and in the end I decided not to bother with putting a bend in it and routing it as in the drawing. I decided to bottle out and just put a stub on it. If someone at a later date wants to get into pipework, feel free, they are welcome!
After I had made the stub and fitted it I addressed the fixing of the flanged connection to the cylinder. I ran into all sorts of problems and in the end decided that instead of following the original plan of a straight bolted flange I would thread the holes in the cylinder flange and use set screws. Then I found that there wasn't enough room on the outlet side for the set screw heads so I had to alter the tiny 6BA bolts by turning the heads down until they fitted and putting a slot in them to drive them home. So I moved operations into the front room and turned them down on Johnny's 1917 lathe.
Then I had to tap the holes in the cylinder flange.
Here we are at closing time, next I have to slot the screws and cut them to the size needed to fasten the flange but not foul the cylinder casting. Hopefully I will reach a conclusion tomorrow.
Stanley Challenger Graham
Stanley's View
scg1936 at talktalk.net
"Beware of certitude" (Jimmy Reid)
The floggings will continue until morale improves!
Stanley's View
scg1936 at talktalk.net
"Beware of certitude" (Jimmy Reid)
The floggings will continue until morale improves!
-
Stanley
- Global Moderator
- Posts: 90679
- Joined: 23 Jan 2012, 12:01
- Location: Barnoldswick. Nearer to Heaven than Gloria.
Re: SHED MATTERS 2
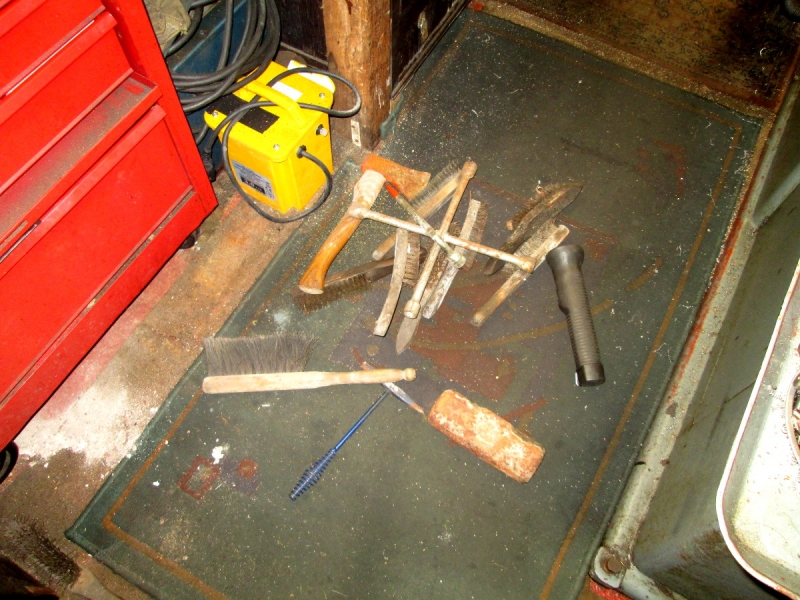
You might wonder what is going on here..... I was looking for an essential to my next move and couldn't find it. In the course of the search I emptied the space under the Stack-on chest and found this lot. God knows where so many worn out wire brushes came from. I had a cull and binned all bar three. While I was down there I vacuumed under the cabinet and around the vice and the grinder and while I was at it emptied Henry the shop vac. Then I remembered where the small vice was, on a shelf near the HM!
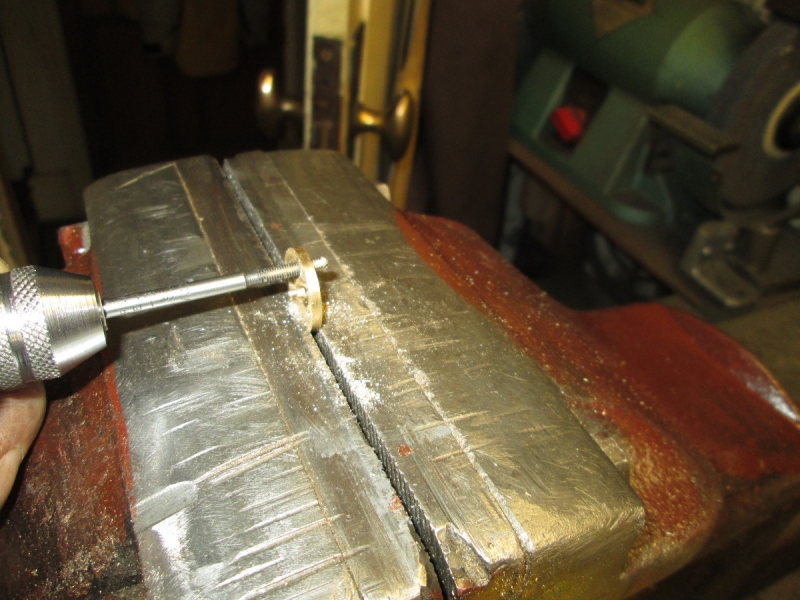
This is a handy trick if you're working with something very small. My big vice is great but this smaller one is better for tiny articles like these screws. I Laid all four of them out on a strip of insulting tape and folded it across the other side so the threads are protected. Then I cut the slots with a junior hacksaw.
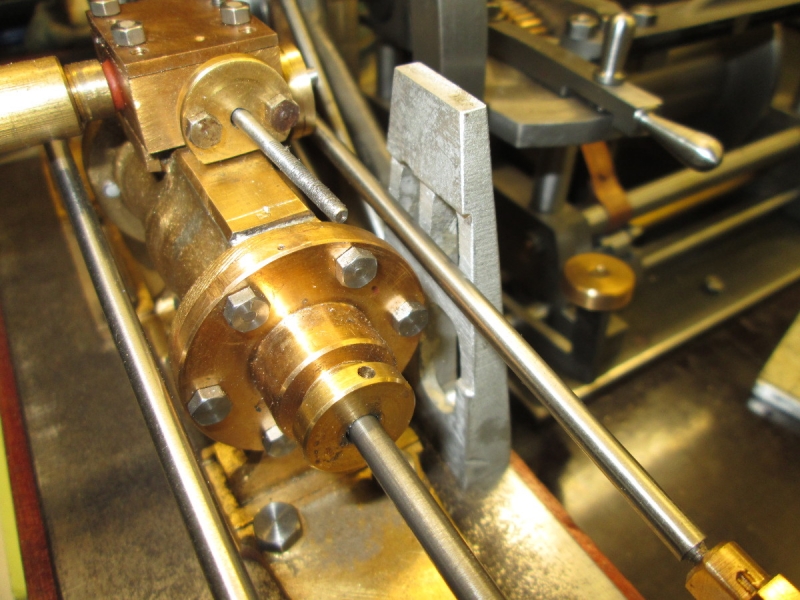
The slots worked a treat and I fitted all four set screws and then I made a stub of copper pipe for the exhaust outlet and fitted it to the outside flange. That let me put the unit in the chuck where I sawed the excess off the set screws and turned the ends down flat.
The next job was to fit the base flange to the cylinder. This took 30 minutes! It was just so small and fiddly but in the end, after taking the stand for the valve gear off I managed it. Thank God I decided to do it now, it would be virtually impossible with the bed installed on the base board.
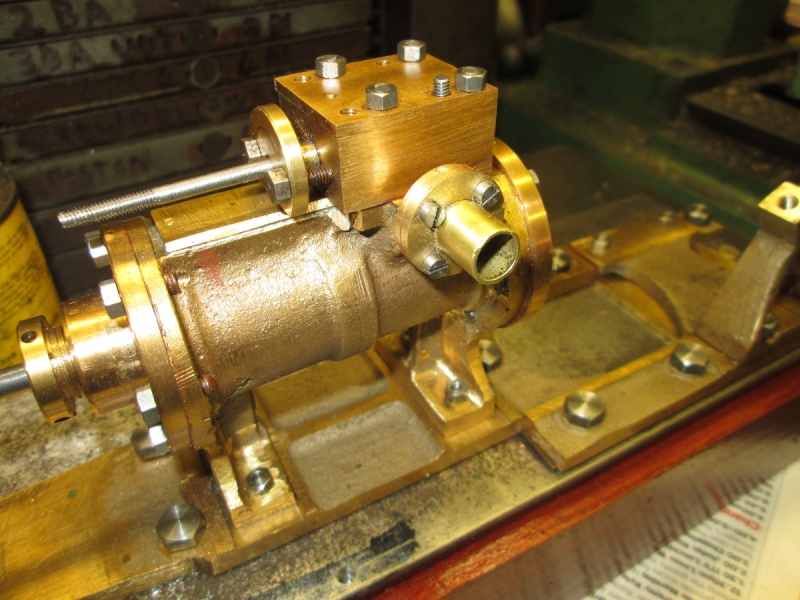
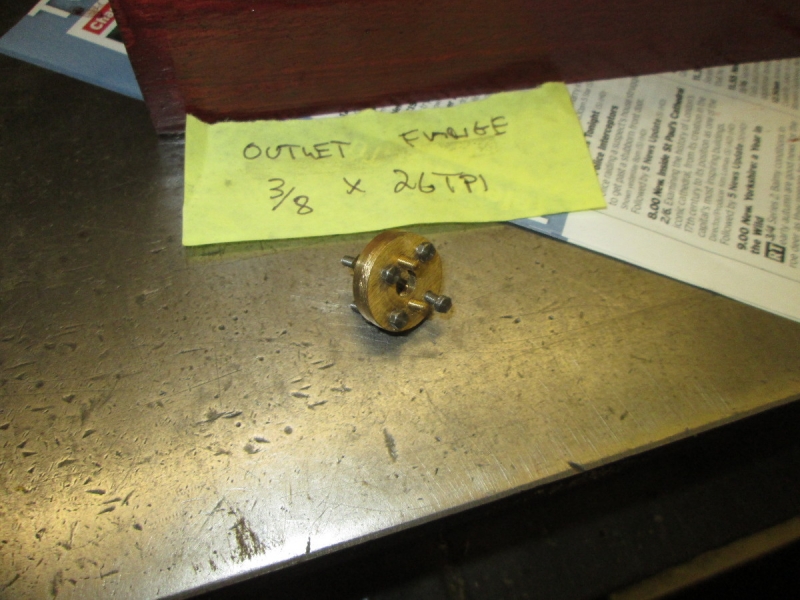
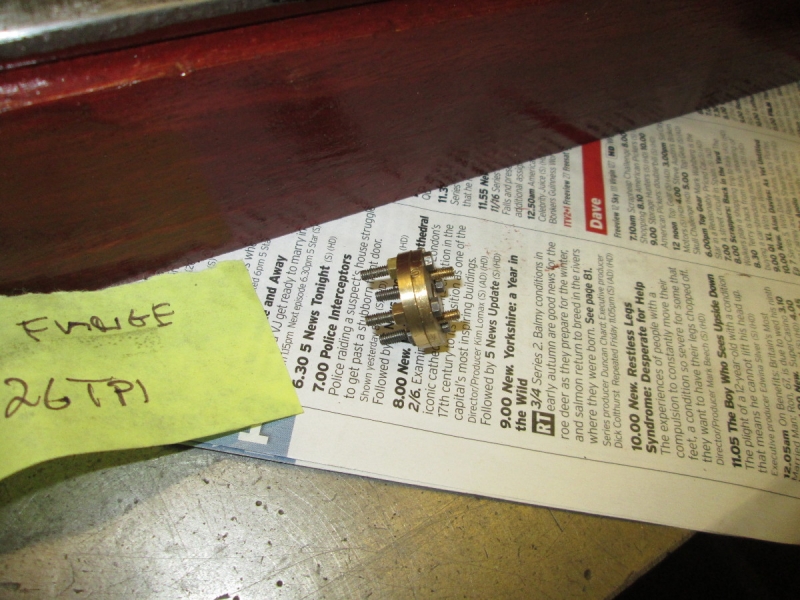
Installing the outlet flange was a doddle compared with the base because of all the preparation. I'm quite pleased with it, it looks to scale and just right. By the way the base and the faces of the flange are sealed with Stag compound.
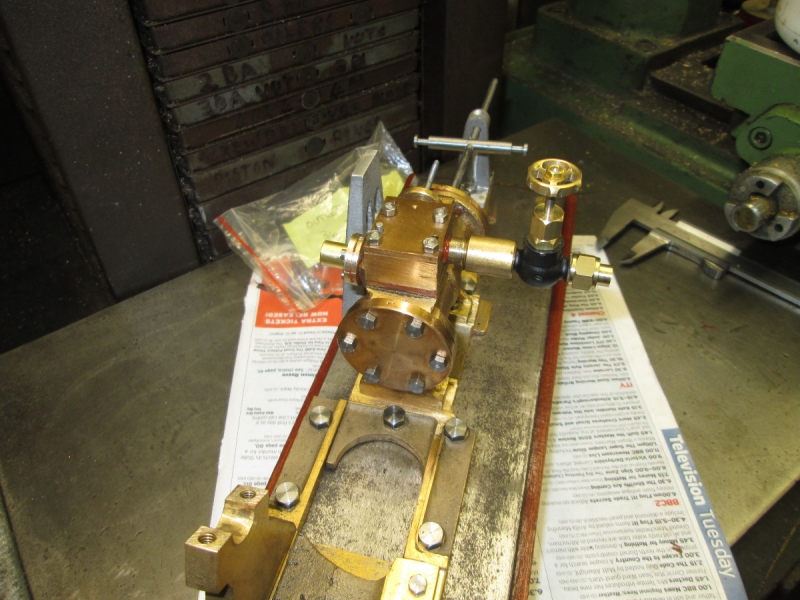
My next move wasn't on the schedule but I decided to install the steam valve on the steam chest. The drawing calls for a complicated arrangement so that the valve can be remotely controlled. There is going to be quite enough going on on top of the cylinder for this lad so I made a simple adapter 1/4" X 26tpi to 1/8" BSP and fitted the valve like this and checked that the protrusion into the chest wasn't fouling the valve. I can cross that one off the list now! Tomorrow I'll take a look at the rabbit and decide which way to proceed with the rebuilding of the engine and fixing it to the bed permanently...... Three tiring hours in the shed but I am quite pleased. No cock-ups and good progress I think.
Stanley Challenger Graham
Stanley's View
scg1936 at talktalk.net
"Beware of certitude" (Jimmy Reid)
The floggings will continue until morale improves!
Stanley's View
scg1936 at talktalk.net
"Beware of certitude" (Jimmy Reid)
The floggings will continue until morale improves!
-
Stanley
- Global Moderator
- Posts: 90679
- Joined: 23 Jan 2012, 12:01
- Location: Barnoldswick. Nearer to Heaven than Gloria.
Re: SHED MATTERS 2
Apologies to the congregation. Household matters have overtaken me this morning, It's free leccy day so I have two loads of washing to do and cooking as well. I might even run the vacuum round. These things have to be done. I promise I will do better tomorrow!
Stanley Challenger Graham
Stanley's View
scg1936 at talktalk.net
"Beware of certitude" (Jimmy Reid)
The floggings will continue until morale improves!
Stanley's View
scg1936 at talktalk.net
"Beware of certitude" (Jimmy Reid)
The floggings will continue until morale improves!
-
Stanley
- Global Moderator
- Posts: 90679
- Joined: 23 Jan 2012, 12:01
- Location: Barnoldswick. Nearer to Heaven than Gloria.
Re: SHED MATTERS 2
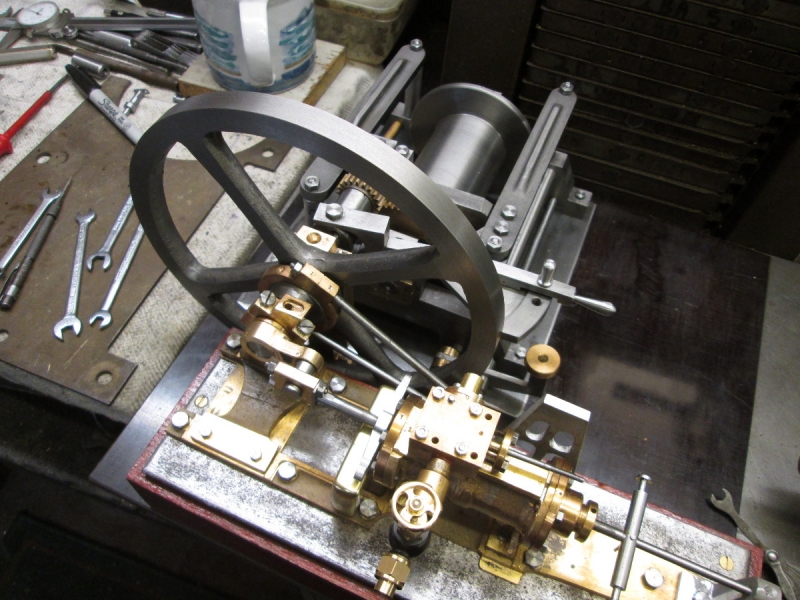
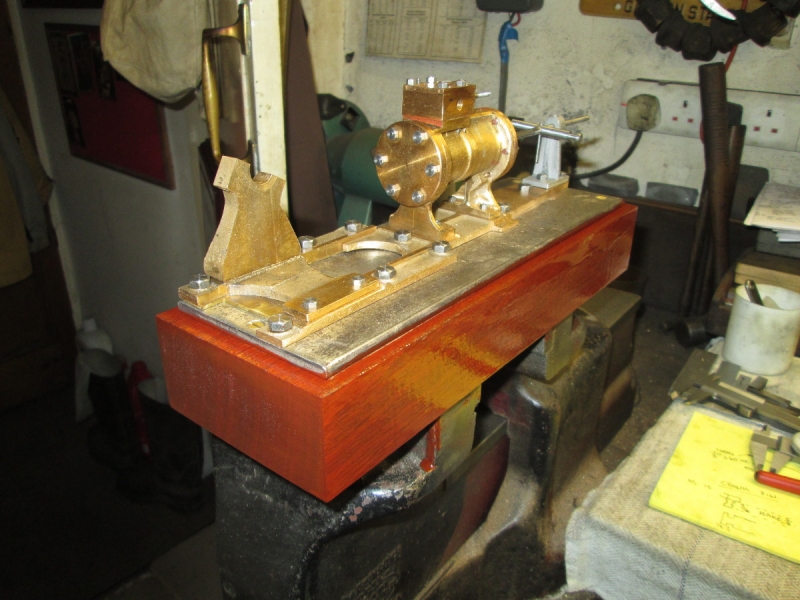
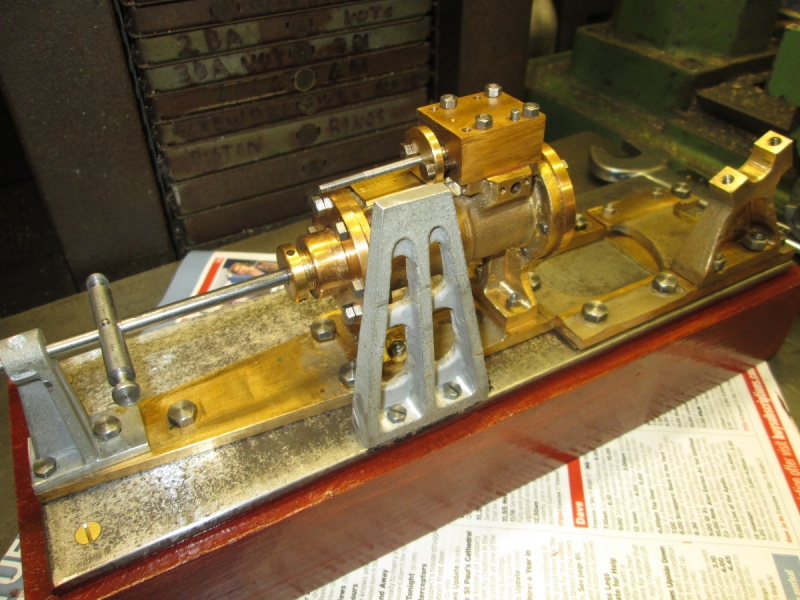
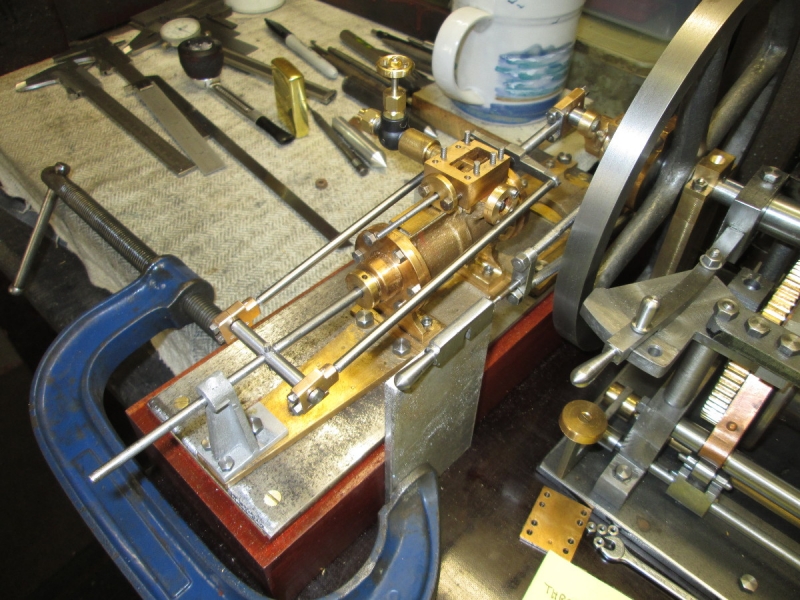
The first thing I did this morning was knock the corner off the quadrant and refit it to the winch. Once I had the entablature knitted back together I addressed the permanent fixing of the wooden engine bed to the base. Next job was fitting the crank and installing the flywheel shaft. Then I went forward re-fitting all the bits I had ready.
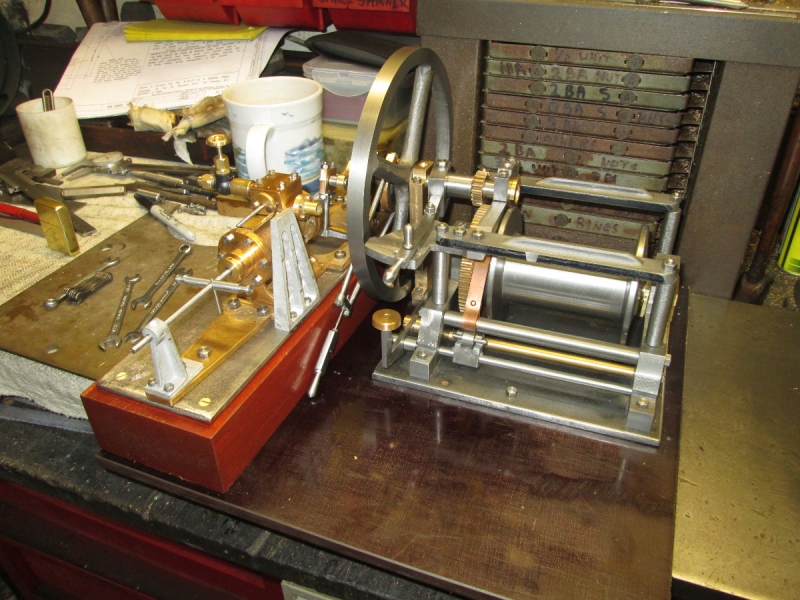
Here's where I was at 09:30. I'm ready to make and fit the two side connecting rods between the crank crosshead and the crosspiece on the tail rod. I am definitely not going with the design on the drawing as it is impossibly fiddly, my eyes wouldn't cope with it. Trouble is I haven't got a clear idea if what the solution is going to be..... I have put the problem to the Design Committee.... Let's see what they come up with while I am asleep.
Stanley Challenger Graham
Stanley's View
scg1936 at talktalk.net
"Beware of certitude" (Jimmy Reid)
The floggings will continue until morale improves!
Stanley's View
scg1936 at talktalk.net
"Beware of certitude" (Jimmy Reid)
The floggings will continue until morale improves!
-
Stanley
- Global Moderator
- Posts: 90679
- Joined: 23 Jan 2012, 12:01
- Location: Barnoldswick. Nearer to Heaven than Gloria.
Re: SHED MATTERS 2
The design Committee have come up trumps again. They informed me they had a solution this morning and I like it.....
I saw a Youtube video of a man using a big tap for a hob to make a worm wheel last night. So simpl,e and effective. You can always learn something!
I saw a Youtube video of a man using a big tap for a hob to make a worm wheel last night. So simpl,e and effective. You can always learn something!
Stanley Challenger Graham
Stanley's View
scg1936 at talktalk.net
"Beware of certitude" (Jimmy Reid)
The floggings will continue until morale improves!
Stanley's View
scg1936 at talktalk.net
"Beware of certitude" (Jimmy Reid)
The floggings will continue until morale improves!
-
Stanley
- Global Moderator
- Posts: 90679
- Joined: 23 Jan 2012, 12:01
- Location: Barnoldswick. Nearer to Heaven than Gloria.
Re: SHED MATTERS 2
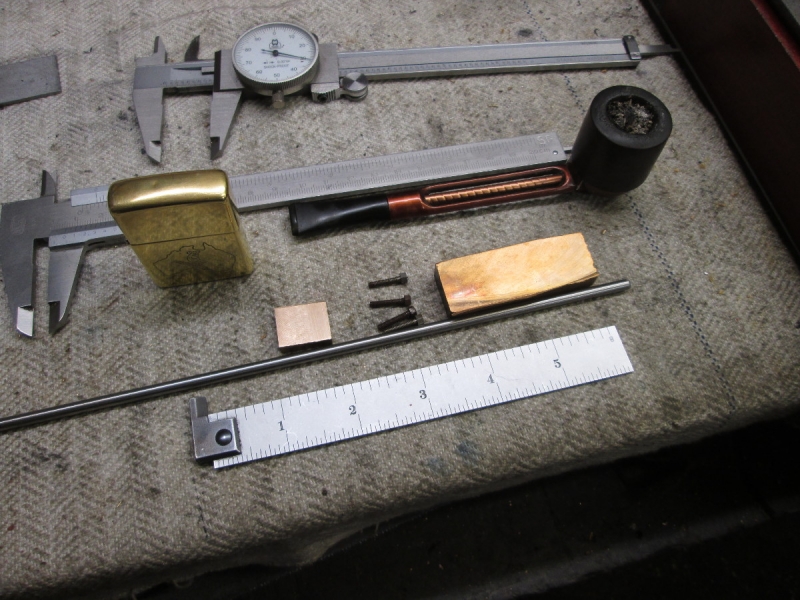
You'll see what the solution was as we go forwards. The first thing I did was sam up the materials....
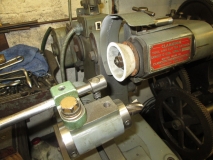
The next thing was to touch up my favourite cutter. Time spent sharpening tools is never wasted. Notice that I dressed the stone first.

The next was the usual stages of carefully milling the blanks down to the required sizes. Before I did this I did my fag packet drawing and so I know exactly where I am going.
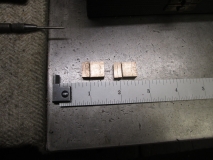
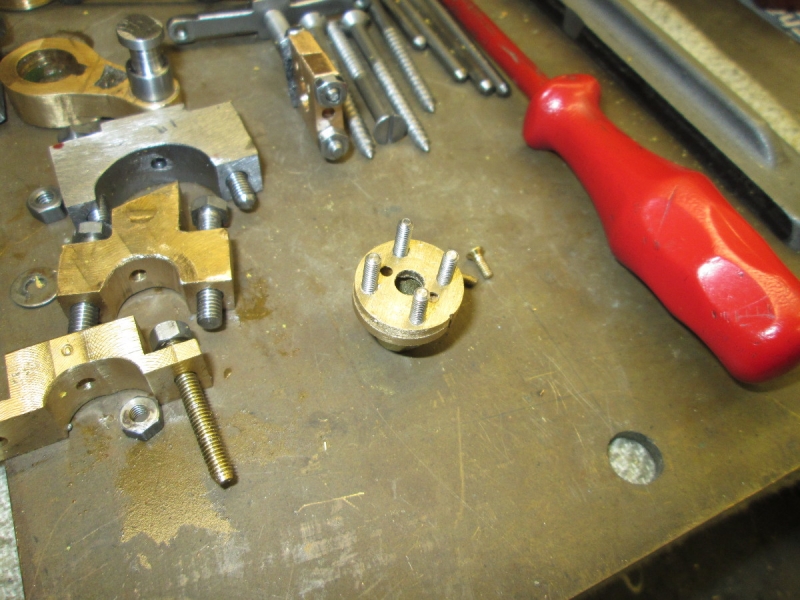
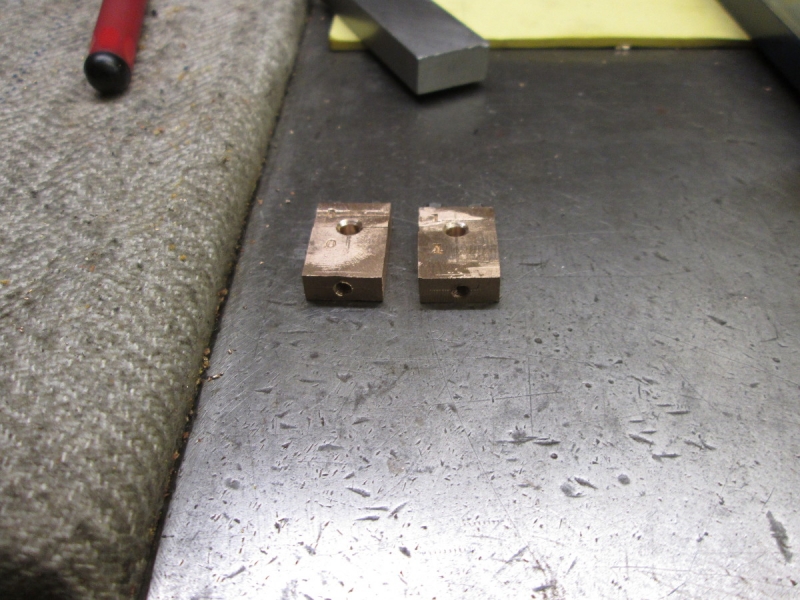
Here I have the blanks cut to their initial shape. There is more metal to come off them yet, they are tiny!
You will have realised that I'm not going down my usual route of making the bearings in one piece and then splitting them after the initial boring. The main reason for this is that they are so small that gripping them once they are bored will almost certainly distort them. I have put registers on all four parts so that there will be no mix ups! Here I am boring clearance holes for the 8BA setscrews I am going to use. They are not going right through but will be screwed into a blind threaded hole in the other half.
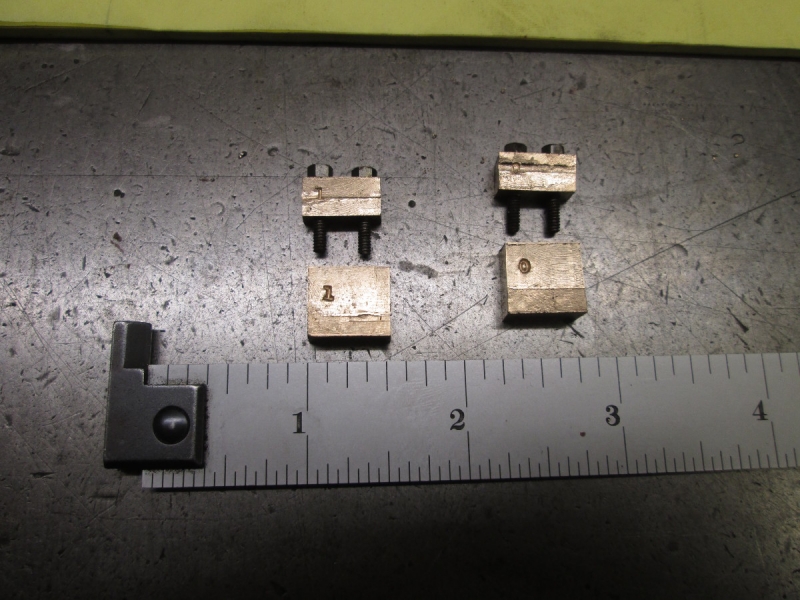
Here's where I finished up, more to do on them tomorrow!
Stanley Challenger Graham
Stanley's View
scg1936 at talktalk.net
"Beware of certitude" (Jimmy Reid)
The floggings will continue until morale improves!
Stanley's View
scg1936 at talktalk.net
"Beware of certitude" (Jimmy Reid)
The floggings will continue until morale improves!
-
Stanley
- Global Moderator
- Posts: 90679
- Joined: 23 Jan 2012, 12:01
- Location: Barnoldswick. Nearer to Heaven than Gloria.
Re: SHED MATTERS 2
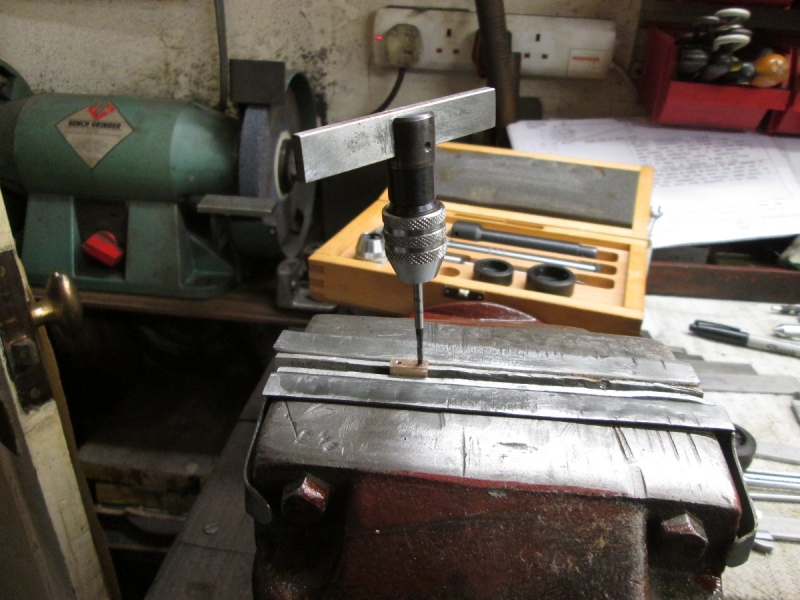
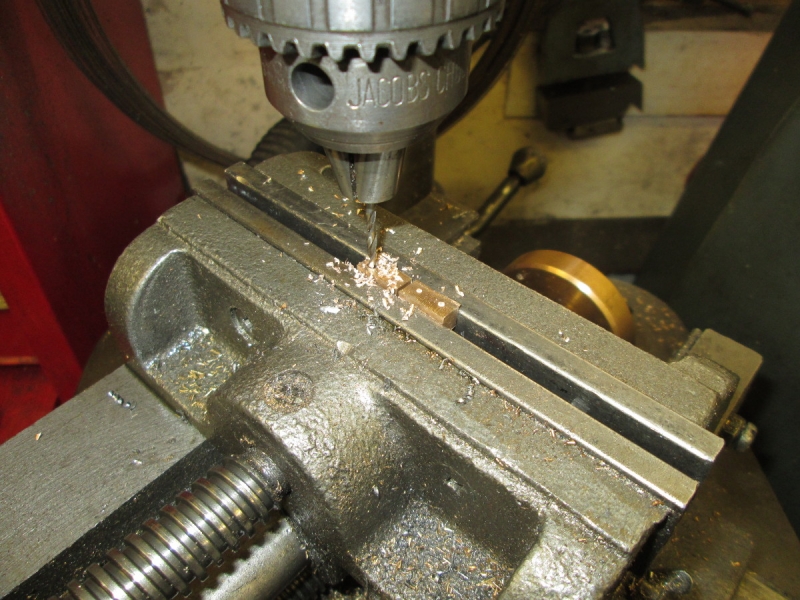
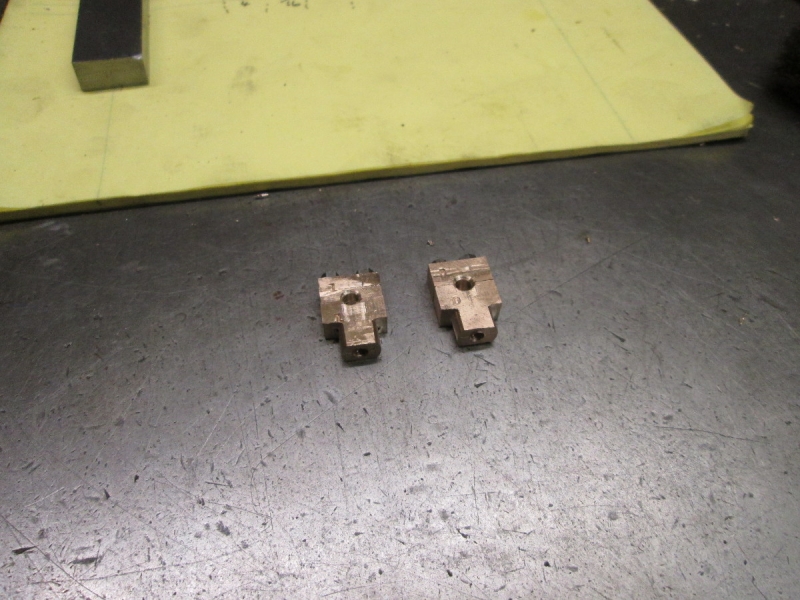
On with the bearings.... First job was to transfer punch the locations of the holes and then drill them tapping size. Then tap them. Nowt to it!
Until you get careless and this happens.... It's a long time since I broke a tap and it was my fault, must do better! No point pissing about trying to get the broken 1/4" out, easiest way was to ditch the part and make another. Far quicker than struggling with a broken tap.
The left hand one is the new part.
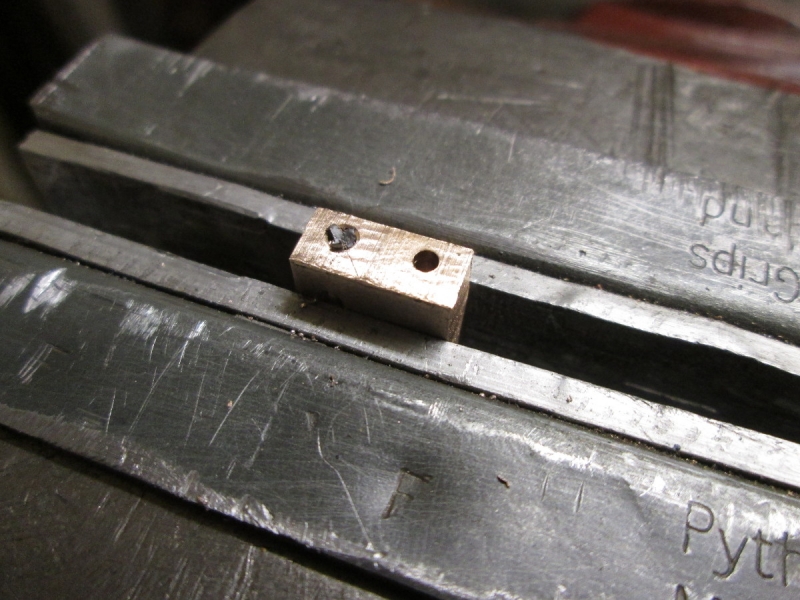
Next job was to bore 1/8" for the bearing and countersink the bores. Then centre the end, drill and tap 1/8" X 40, the old Model engineer's thread. This will accept the end of the connecting rod to the crank crosshead.
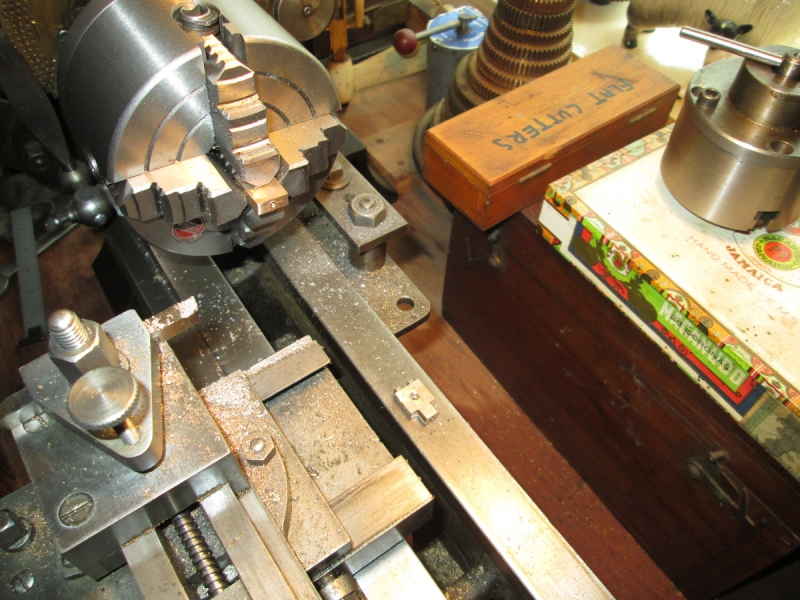
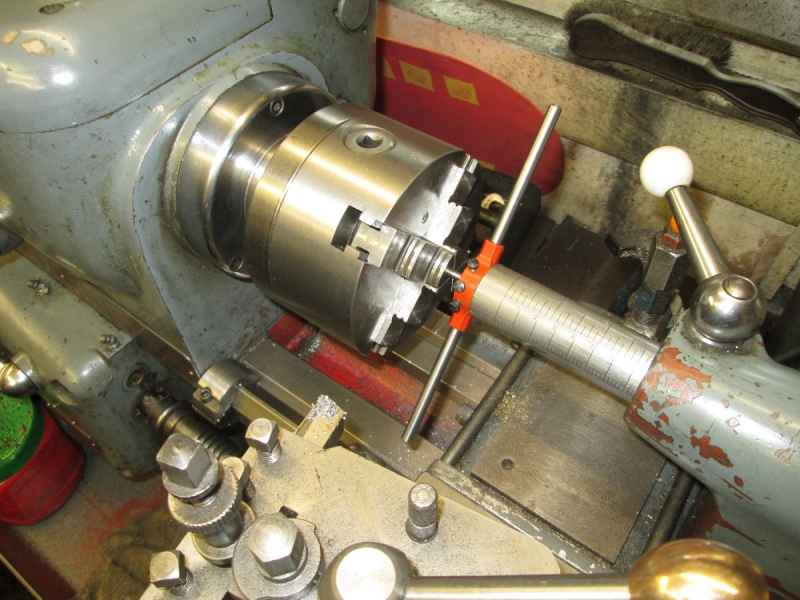
Then into the front room and put the 4 jaw on Johnny's 1927 lathe. I wanted to turn a spigot on the end for the rod to screw into. The one on the bed is done, the other is centred and ready for shaving.
Here we are at knocking off time..... the bearings want some finishing before we go any further. That will be the first job tomorrow.......
Stanley Challenger Graham
Stanley's View
scg1936 at talktalk.net
"Beware of certitude" (Jimmy Reid)
The floggings will continue until morale improves!
Stanley's View
scg1936 at talktalk.net
"Beware of certitude" (Jimmy Reid)
The floggings will continue until morale improves!
-
Stanley
- Global Moderator
- Posts: 90679
- Joined: 23 Jan 2012, 12:01
- Location: Barnoldswick. Nearer to Heaven than Gloria.
Re: SHED MATTERS 2
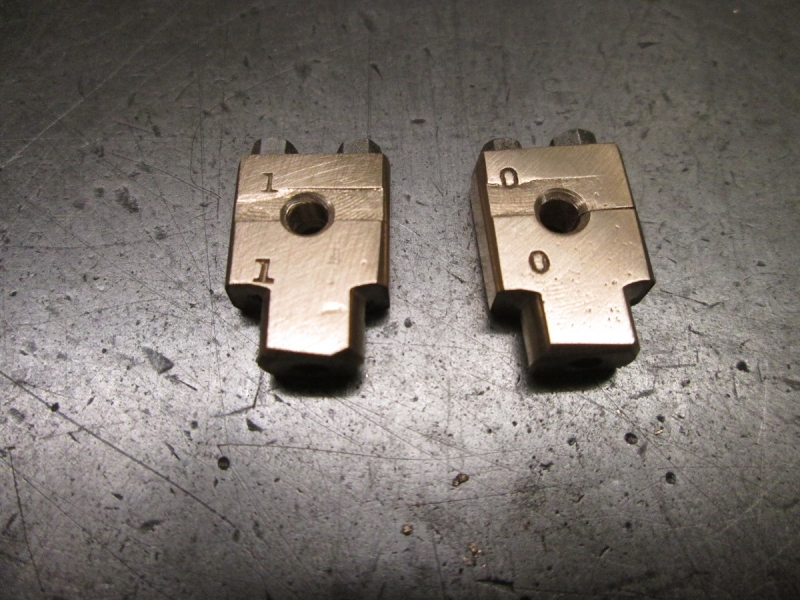
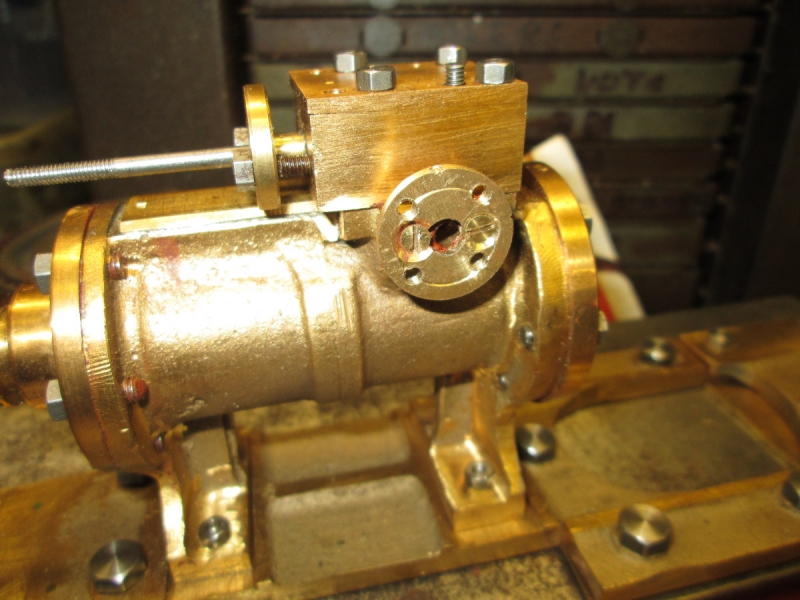
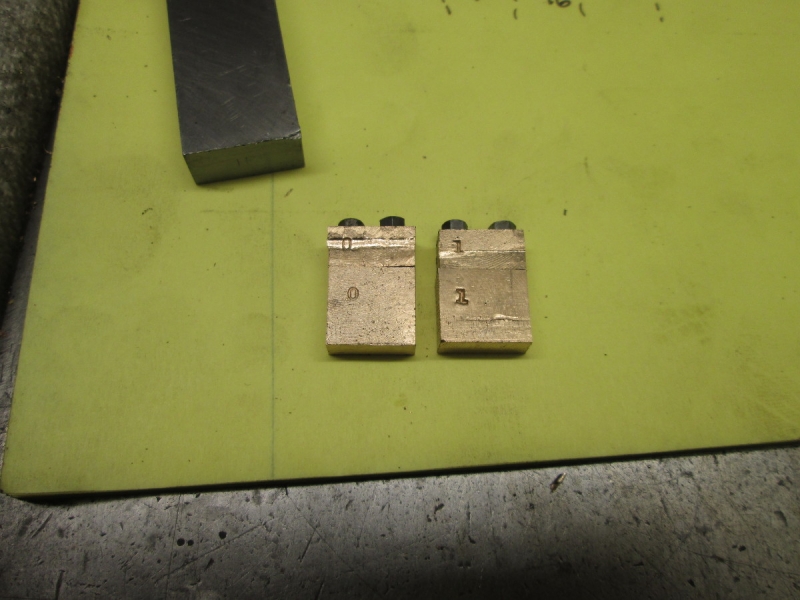
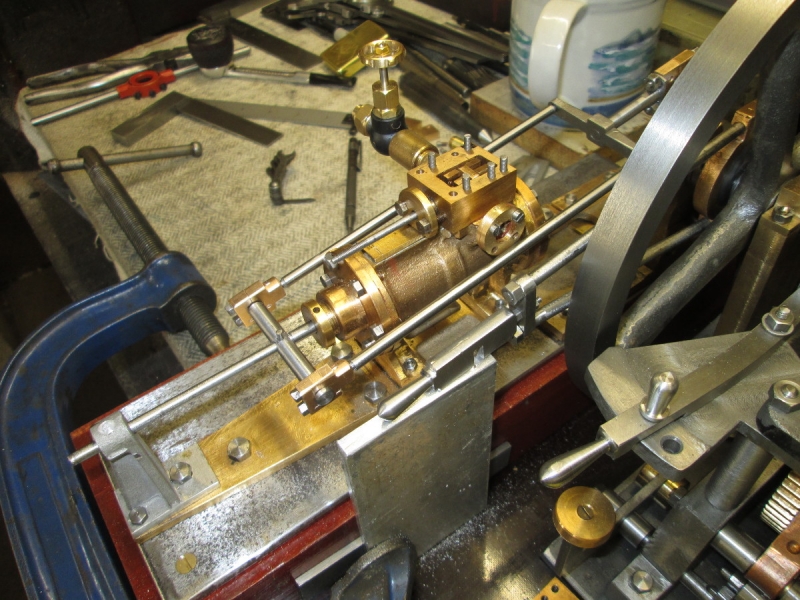
First job was a bit of prettyfication.
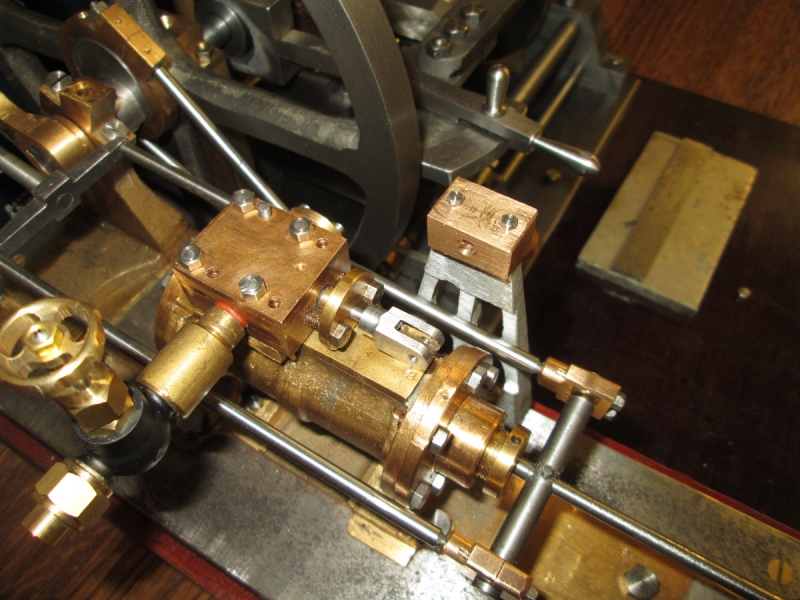
Then a trial fit on the engine. They are OK. Notice that I have taken off the casting supplied in the kit for the support of the valve gear. I've never liked it and the way my mind is working there is a better way of doing the job. But that's for later....
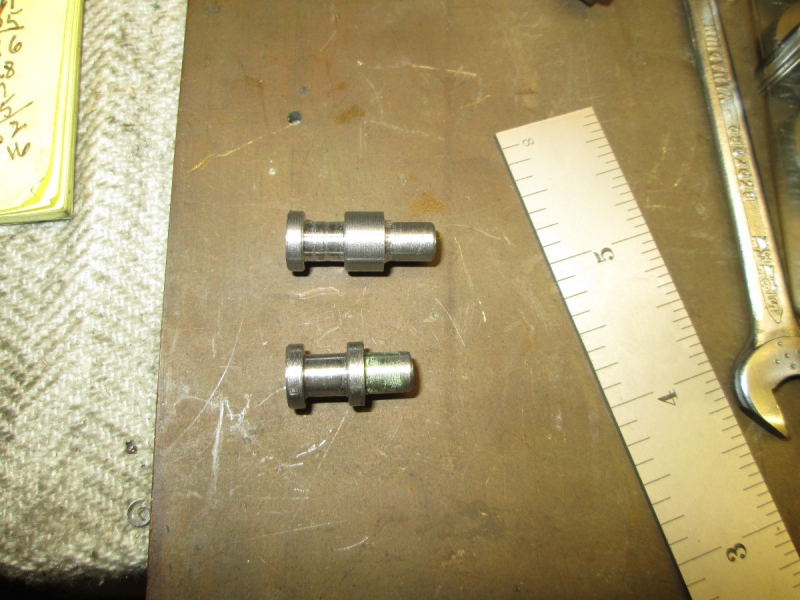
When I got the bearings on I did a last check measurement and then set to to make the side rods.
Only one way to find out if they are the right length!
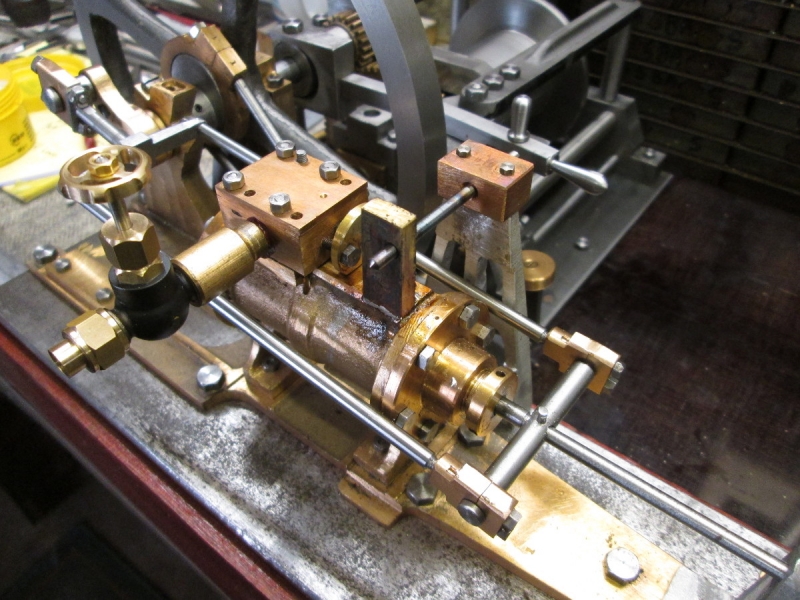
And this is it. The length is fine, just right in fact, but I have some problems to address!

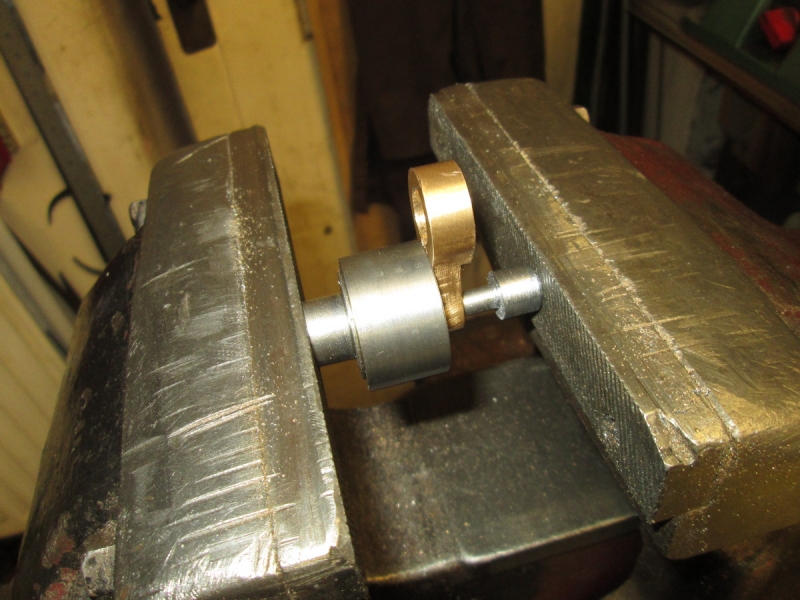
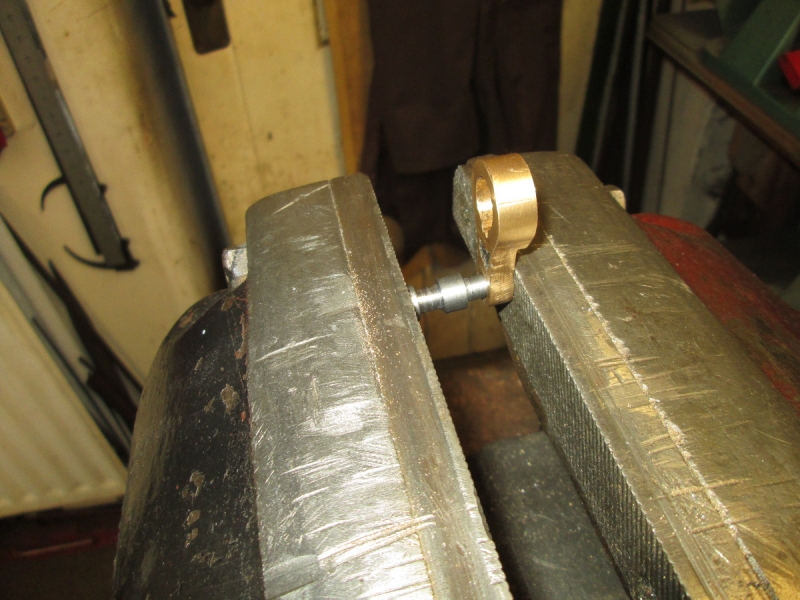
Nothing I wasn't expecting, the fitting of these is incredibly tight! Here's the list: The crank pin is loose. The exhaust side rod fouls the exhaust. Finally, the crank crosshead fouls the standard for the flywheel bearing. Simple one first, I took the crank pin out and my first thought was that I should make a new one but then I had a thought.....

I didn't really think I could get away with it but had a go at knurling the pin. To my surprise at worked!
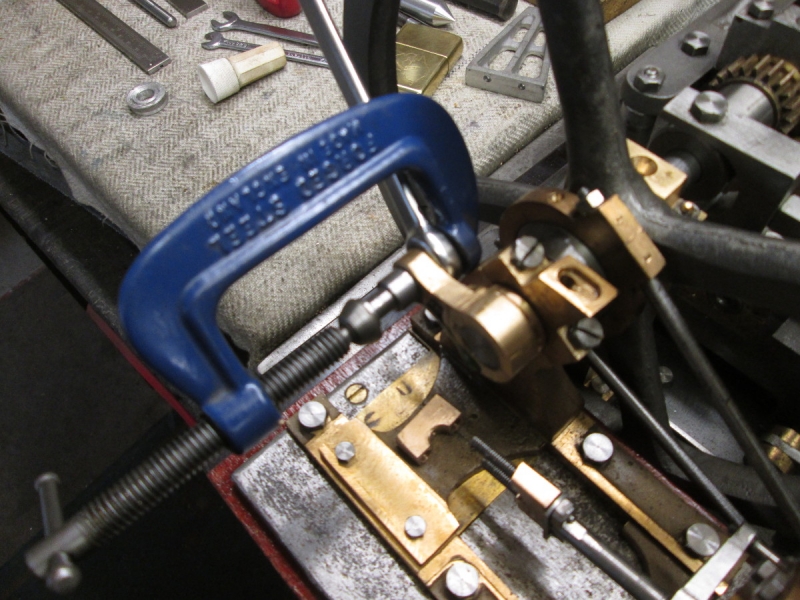
I pressed the pin in with a cramp, it was tight but worked fine. I have been using the same bottle of shaft lock for years and decided to have a treat and use a new bottle of a more modern grade. I think it could be better. This was knocking off time. I could have started straight into the other faults but I want to think about things before I go any further. There are so many different ways of killing this pig. I want to make sure I wnd up with the right one!
Stanley Challenger Graham
Stanley's View
scg1936 at talktalk.net
"Beware of certitude" (Jimmy Reid)
The floggings will continue until morale improves!
Stanley's View
scg1936 at talktalk.net
"Beware of certitude" (Jimmy Reid)
The floggings will continue until morale improves!
-
Stanley
- Global Moderator
- Posts: 90679
- Joined: 23 Jan 2012, 12:01
- Location: Barnoldswick. Nearer to Heaven than Gloria.
Re: SHED MATTERS 2
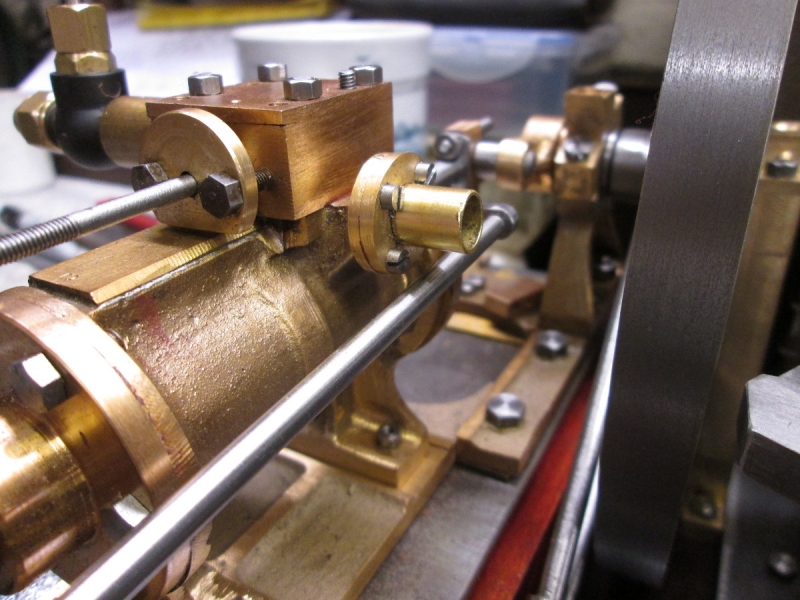
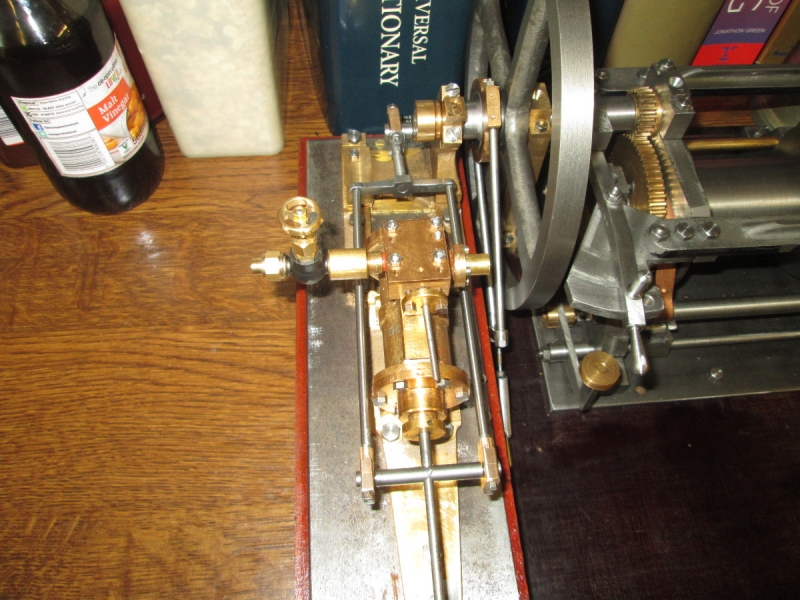
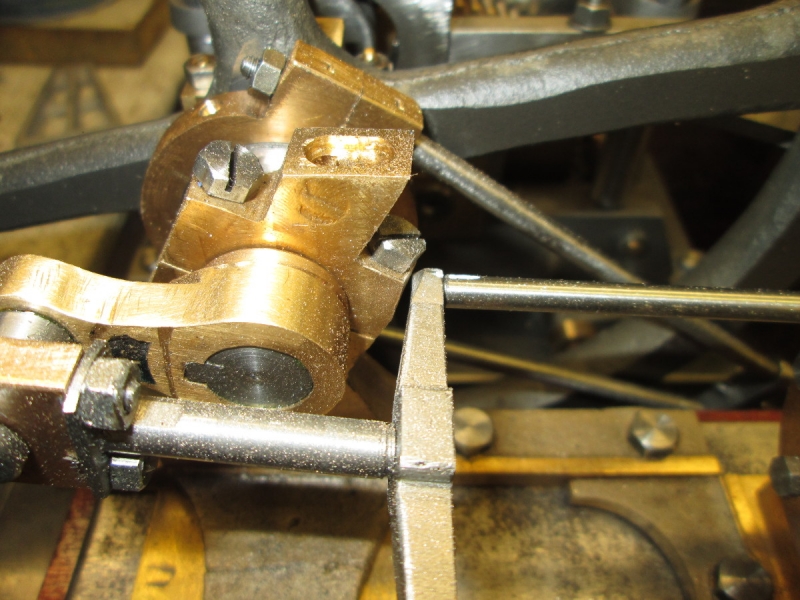
I'd cured one problem yesterday by re-fitting the crank pin and I'm satisfied with that now. Today I had a different set of problems. I decided to tackle them one at a time. The first is the fact that this side rod fouls the exhaust pipe and the screws holding the flange to the cylinder. I can't see a way round this one without making a bent rod and I rebel against that. So I decided to take the stub of pipe off and the two bottom screws out of the flange. This almost gave me the clearance I needed and allowed me to concentrate on the next problem which was bad alignment of the rods with the tail crosshead. I say bad but it was very small and in an inspired moment I took the whole assembly off, lengthened one leg slightly by screwing the bearing out half a turn and then re-fitting it upside down. It all fell into line and worked perfectly!
It just clears and runs true.
Having got that out of the way I decided to refit the taper pin that locks the tail-slide crosshead to the piston rod.
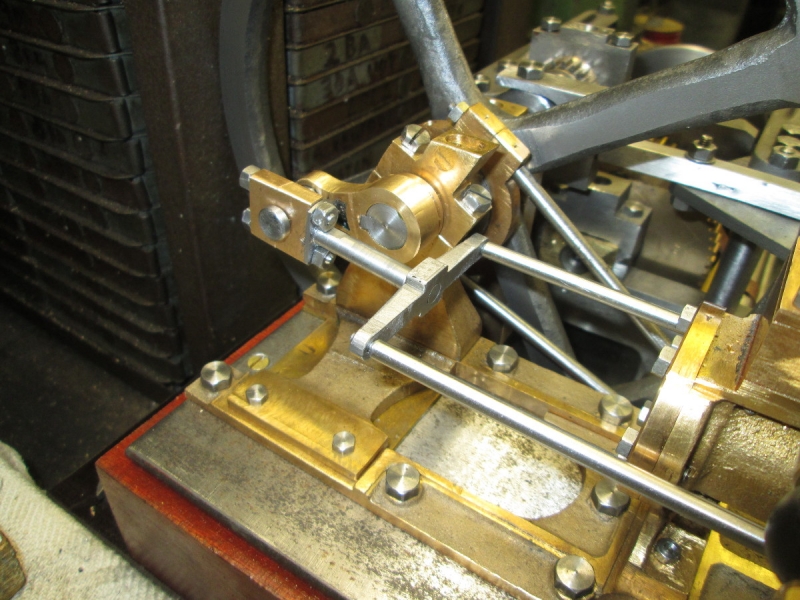
I moved on to the next problem. The crank end crosshead fouls the pedestal that supports the flywheel shaft. It isn't quite as bad as it looks here but is still serious.
Kev is going to love this..... When he came round to measure for the plinth we talked about this and he said it looked as though I would have to cut some metal out of the standard. He was right but first I ground off the excess thread at the back of the crosshead and rounded the end of that was fouling. Then I took a bit off the corner of the standard.
Here's the end result. You'll see that I didn't need to do much and it clears now by about a sixteenth. By the way the crosshead clears the nuts on the back cylinder cover by about 1/32nd. I told you it was tight!
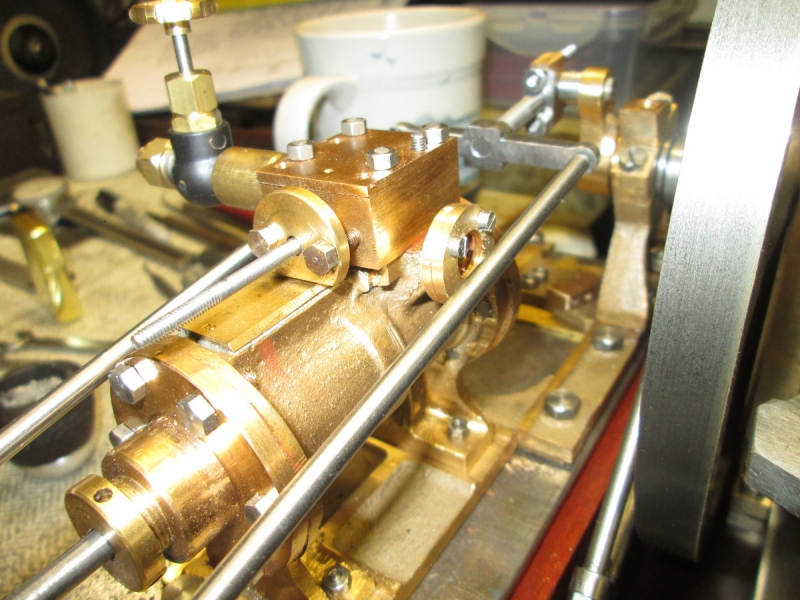
Knocking off time. All the bearings are fully tightened up and fit well. The engine turns over smoothly with no tight spots. I am ready now to address the connection between the eccentric rod and the valve rod which is going to be fun! The drawings give a replica of the original engine and I don't like the design. I am not after a replica, just something that will work! I shall give it a bit of thought and come up with a different solution.
Stanley Challenger Graham
Stanley's View
scg1936 at talktalk.net
"Beware of certitude" (Jimmy Reid)
The floggings will continue until morale improves!
Stanley's View
scg1936 at talktalk.net
"Beware of certitude" (Jimmy Reid)
The floggings will continue until morale improves!
Re: SHED MATTERS 2
Hi Stanley,
Sorry I have not posted for a while but I have been watching. Some real fiddly stuff been going on , you must be starting to get used to the little sizes now. I bet you will be wanting something bigger and less fiddly for the next project
I am very impressed with the progress and how you are overcoming the problems you hit. Stig the pup is full time job but doing really well.
Cheers Mick.
-
Stanley
- Global Moderator
- Posts: 90679
- Joined: 23 Jan 2012, 12:01
- Location: Barnoldswick. Nearer to Heaven than Gloria.
Re: SHED MATTERS 2
credit where it is due Kev. Mind you, it was only the tiniest fraction.
Mick, I've been watching Stig as well, handy looking pup! post a pic of him in Pet's Corner.....
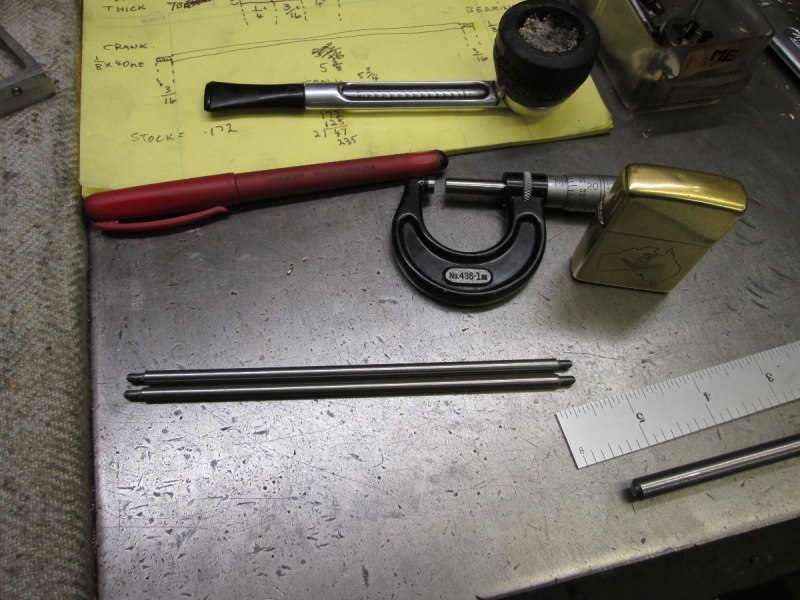
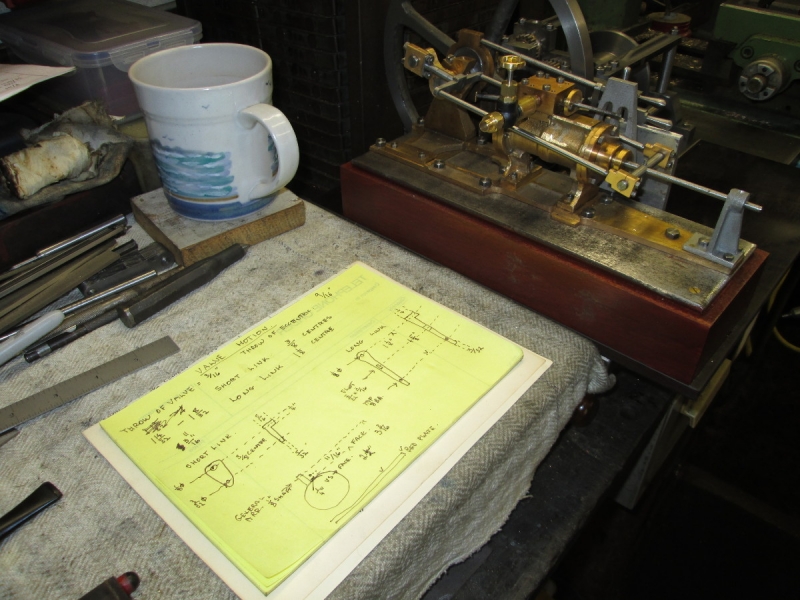
I've been thinking about the arrangement for the valve motion and I can't get it clear in my head. I think I shall have to start making it and then it might just grow in my hands.... Before I start making chips I have to do some careful measuring and dust my GCE geometry off. I have to determine some very accurate sizes. I could just take them off the drawing but there is so little room for error that small differences between my crank centres and eccentric throw might lead me astray. I shall make sure of that before I start!
You're right about something bigger, my limiting factor is my right eye, the distortion in the retina makes fine scales a bugger. I have the cylinder castings John made for me but my mind keeps wandering towards a Stuart Launch engine...... When we have got probate out of the way and my finances are back to somewhere near normal I shall be doing something!
Mick, I've been watching Stig as well, handy looking pup! post a pic of him in Pet's Corner.....
I've been thinking about the arrangement for the valve motion and I can't get it clear in my head. I think I shall have to start making it and then it might just grow in my hands.... Before I start making chips I have to do some careful measuring and dust my GCE geometry off. I have to determine some very accurate sizes. I could just take them off the drawing but there is so little room for error that small differences between my crank centres and eccentric throw might lead me astray. I shall make sure of that before I start!
You're right about something bigger, my limiting factor is my right eye, the distortion in the retina makes fine scales a bugger. I have the cylinder castings John made for me but my mind keeps wandering towards a Stuart Launch engine...... When we have got probate out of the way and my finances are back to somewhere near normal I shall be doing something!
Stanley Challenger Graham
Stanley's View
scg1936 at talktalk.net
"Beware of certitude" (Jimmy Reid)
The floggings will continue until morale improves!
Stanley's View
scg1936 at talktalk.net
"Beware of certitude" (Jimmy Reid)
The floggings will continue until morale improves!
-
Stanley
- Global Moderator
- Posts: 90679
- Joined: 23 Jan 2012, 12:01
- Location: Barnoldswick. Nearer to Heaven than Gloria.
Re: SHED MATTERS 2
No machining this morning! I started by opening up the valve chest and measuring the throw of the valve exactly. Then I set up a surface the gab end could slide on and measured the actual throw of the eccentric. Good job I did, it's supposed to be 1/2" and it's actually 9/16". This is no problem because the actual travel of the valve is going to be determined by the ratio between the lengths of the large and small levers in the linkage.
I had to adjust the length and the amount of thread on both the link between the gab end and the eccentric rod and the valve rod as well.
The next move was to mark what will be the centre line of the fulcrum on top of the cylinder. You can't see it in the pic but it's there, reinforced with a punch mark.
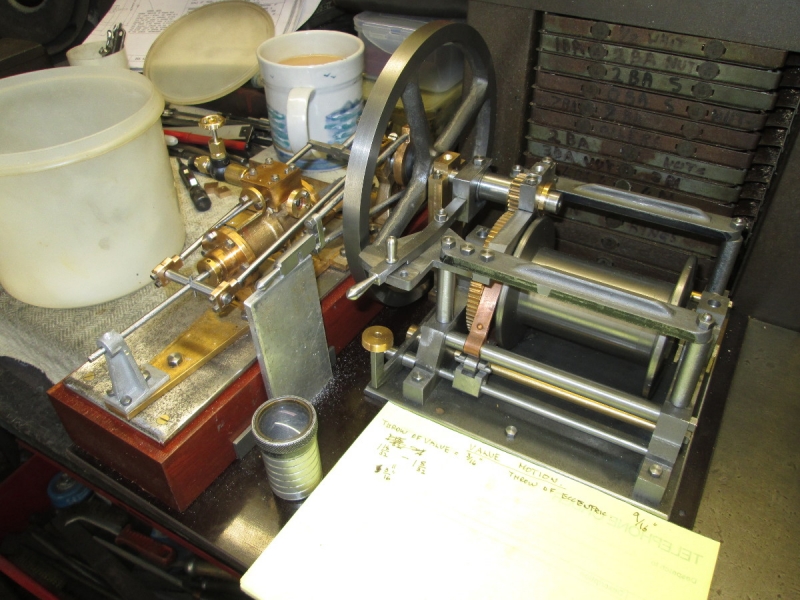
Here we are at closing time. Everything I have done this morning has been checked and re-checked, if we don't get this right it won't run! The last job was to pop the lid back on the valve chest and have a tidy up. The next job is to calculate the relationship between the two levers, Draw this out and this will give me the height of the fulcrum over the valve rod. In turn that will determine the design and height of whatever I decide on to support the whole motion and I haven't decided that yet. I'm hoping that as I get further in it will be obvious! Slow work this morning but I am satisfied.....
Stanley Challenger Graham
Stanley's View
scg1936 at talktalk.net
"Beware of certitude" (Jimmy Reid)
The floggings will continue until morale improves!
Stanley's View
scg1936 at talktalk.net
"Beware of certitude" (Jimmy Reid)
The floggings will continue until morale improves!
-
Stanley
- Global Moderator
- Posts: 90679
- Joined: 23 Jan 2012, 12:01
- Location: Barnoldswick. Nearer to Heaven than Gloria.
Re: SHED MATTERS 2
A short stint in the shed this morning, someone has to do the housework! But what I have done is solid I think. I didn't start by looking at the drawing, I did my 'O' level geometry, worked out what I thought I needed and then compared it with the drawing. Allowing for the fact I have an extra 1/16th of an inch on the throw the figures compared well. So I have put my version down on paper. Once I had the length of the levers sorted I looked at the height of the gear above the cylinder. My thoughts coincide with the drawings and the surprising thing is that when I looked at the overall height above the bed, the aluminium bracket I dislike so much is actually exactly the right height when you allow for the bearing on top. It will need a bit of relieving on the inside to give the side rod clearance, that's a small problem. It's not all plain sailing yet, The link between the short lever and the valve rod has to be hinged to accommodate the arc of the lever and the linear motion of the valve rod. I'm not going into a decline about that, I shall cross that bridge when I come to it. So, I'm ready for some more watchmaking! (No housework tomorrow!)
Stanley Challenger Graham
Stanley's View
scg1936 at talktalk.net
"Beware of certitude" (Jimmy Reid)
The floggings will continue until morale improves!
Stanley's View
scg1936 at talktalk.net
"Beware of certitude" (Jimmy Reid)
The floggings will continue until morale improves!
-
Stanley
- Global Moderator
- Posts: 90679
- Joined: 23 Jan 2012, 12:01
- Location: Barnoldswick. Nearer to Heaven than Gloria.
Re: SHED MATTERS 2
The Design Committee have made a suggestion about that hinged link. They propose ignoring the arced connection to the linear motion of the valve rod as the variation is so small it will be absorbed by natural wear and the ability of the valve rod to vary slightly without affecting the seating of the valve on the cylinder face. On the original engine, the scale made the hinge necessary but at the sizes we are talking about it is negligible. (The purists won't like this but I am going for it!)
Stanley Challenger Graham
Stanley's View
scg1936 at talktalk.net
"Beware of certitude" (Jimmy Reid)
The floggings will continue until morale improves!
Stanley's View
scg1936 at talktalk.net
"Beware of certitude" (Jimmy Reid)
The floggings will continue until morale improves!
-
Stanley
- Global Moderator
- Posts: 90679
- Joined: 23 Jan 2012, 12:01
- Location: Barnoldswick. Nearer to Heaven than Gloria.
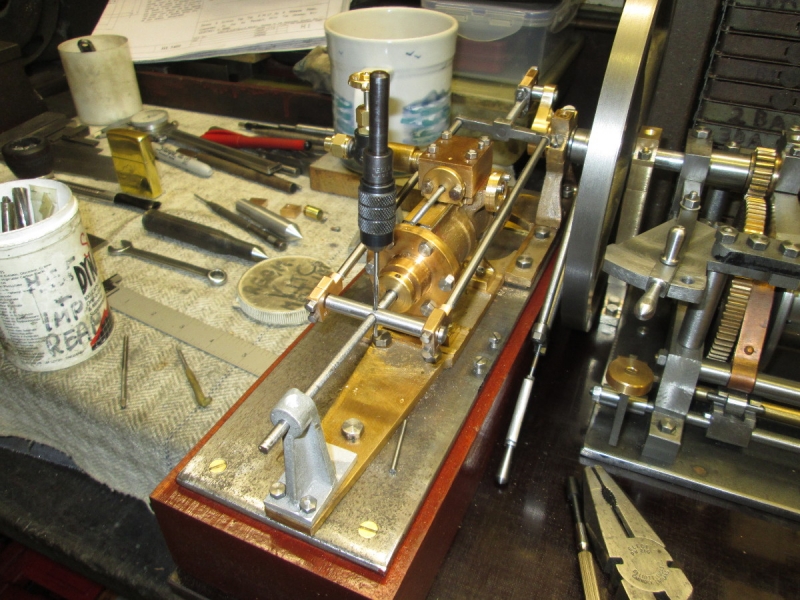
Re: SHED MATTERS 2
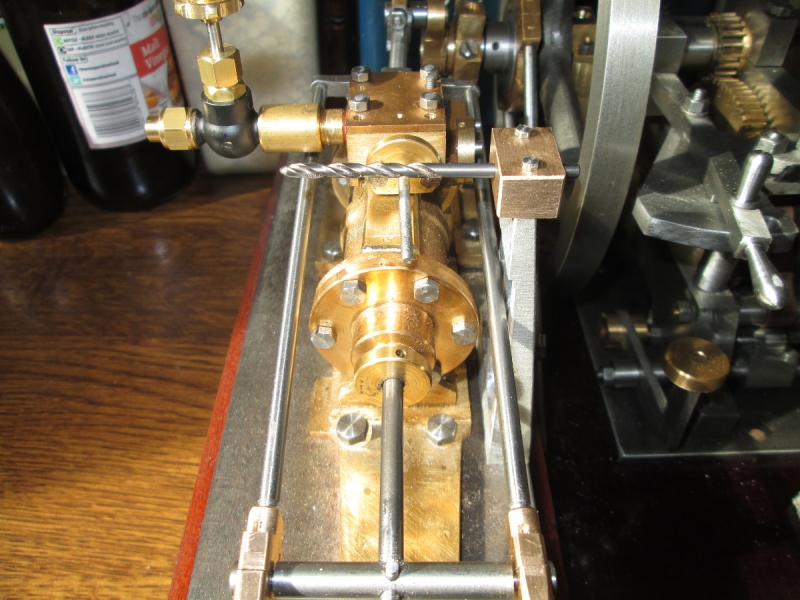
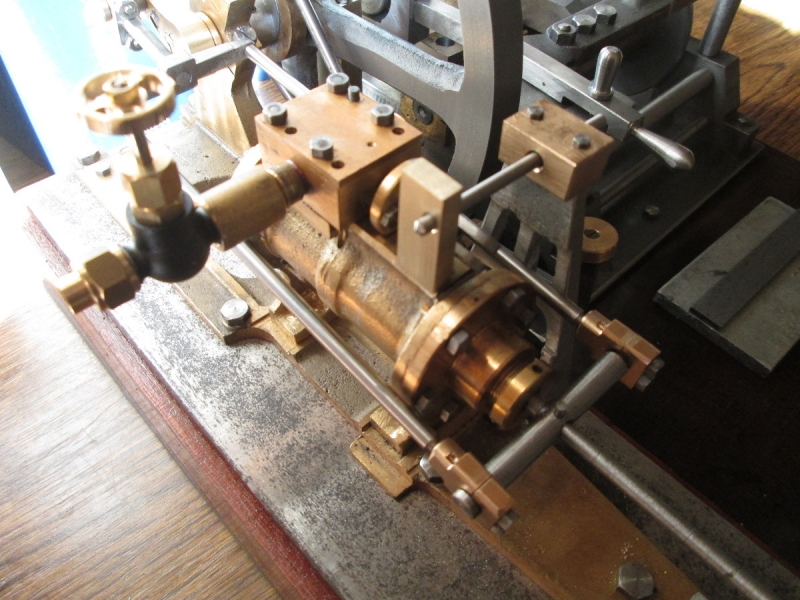
The first thing I had to do was relieve the inside of the standard to give the side rods clearance. The nice thing I noticed is that as you turn the flywheel is that the rods are running parallel and in the same plane as the surface of the standard.
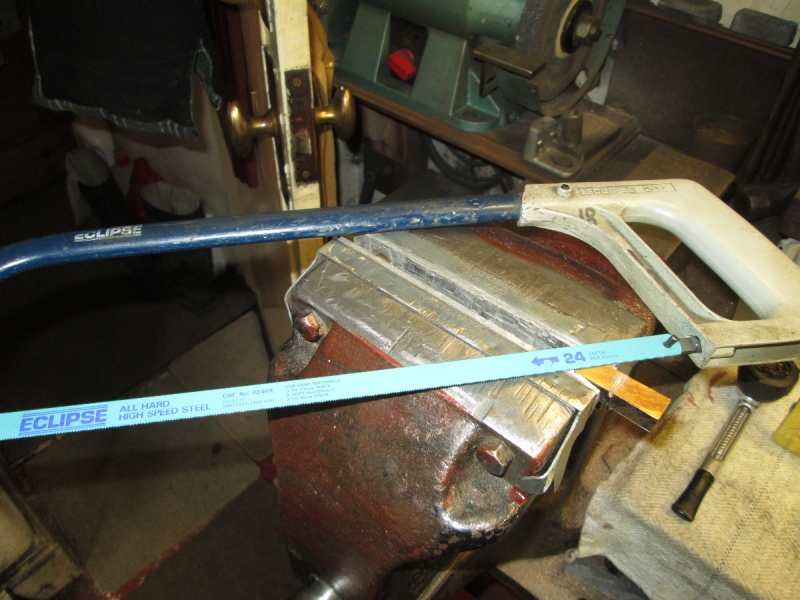
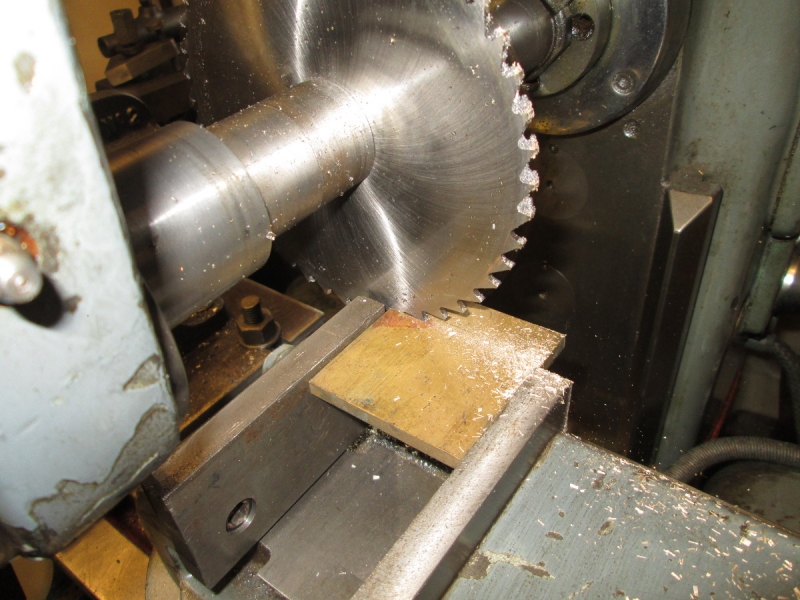
I was lucky in that one of my bronze ends in the treasure chest was correct in two dimensions, all it needed was cutting to length. Note that I am not going to live forever so I put a brand new 24tpi blade in the saw! Then I milled it square and exactly 3/4".
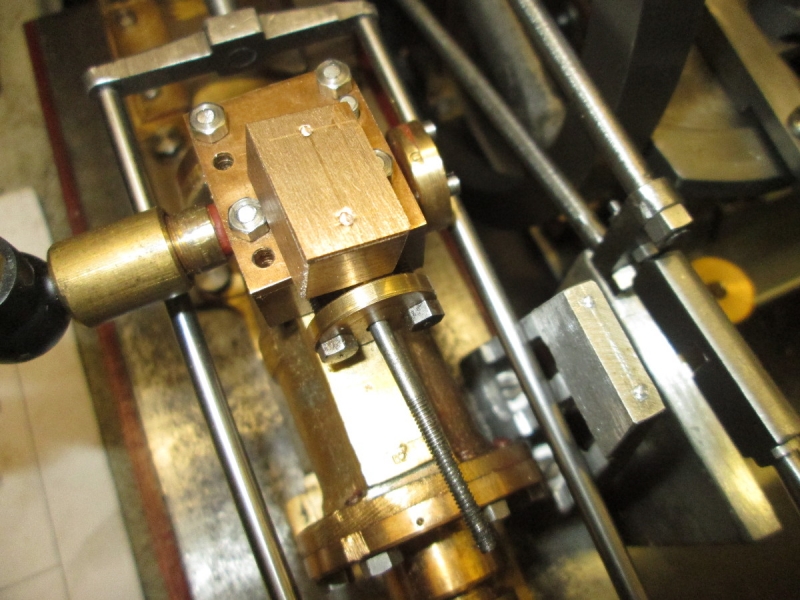
The block for the bearing on the standard is marked for both the holding down bolts and the 1/8" cross rod. The standard is marked for the 8BA threaded holes.
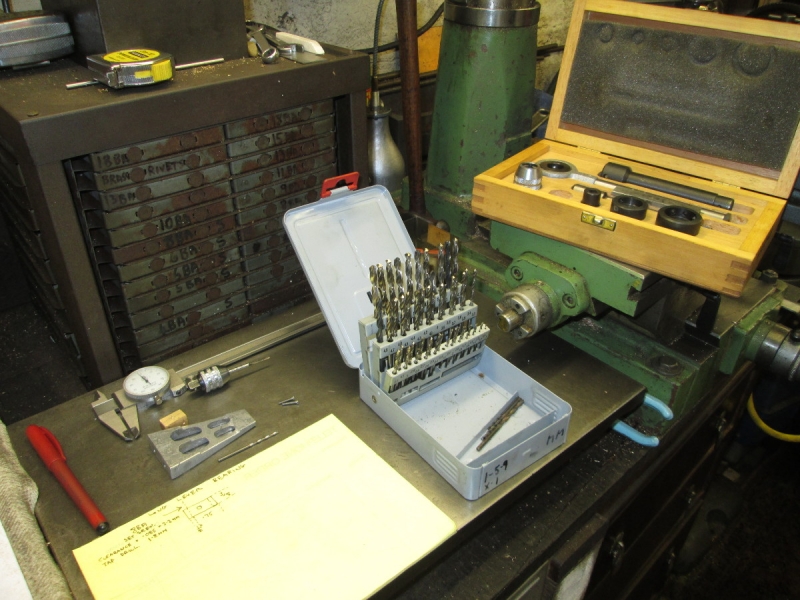
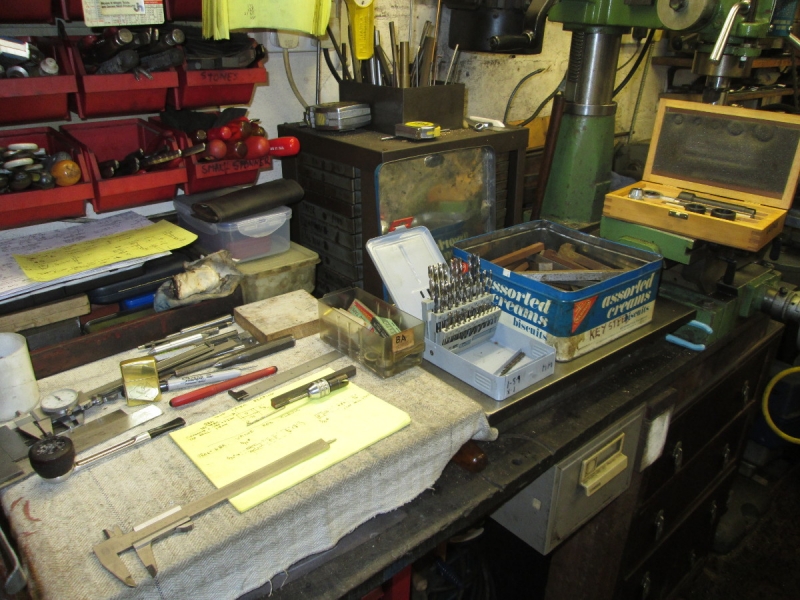
Then I got my ducks in a row, found my set screws, the right tap and both the clearance and tapping drills. It's so easy if you have the right tackle to choose from and I can well remember in the early days how much time was wasted because I hadn't got the range of drills, taps and bolts. I'm always aware that many who are watching me haven't had as much time as me and have a lot of collecting to do. Keep working at it, you'll get there in the end!
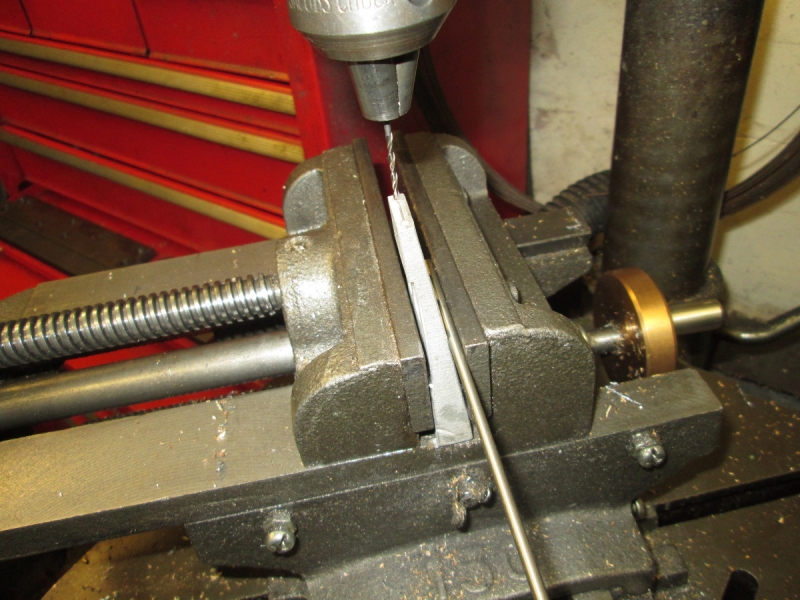
Drilling the 1.8mm tapping holes. Note the rod to make sure the standard is upright as the back slopes.
At closing time this is where we were. The block is fitted and drilled for the cross rod. I popped the drill in to check that the drilling was level, as you can see it's fine. I'll tackle the outrigger bearing on the opposite end of the cross rod tomorrow. A nice morning, quietly away and everything has gone well!
Stanley Challenger Graham
Stanley's View
scg1936 at talktalk.net
"Beware of certitude" (Jimmy Reid)
The floggings will continue until morale improves!
Stanley's View
scg1936 at talktalk.net
"Beware of certitude" (Jimmy Reid)
The floggings will continue until morale improves!
-
Stanley
- Global Moderator
- Posts: 90679
- Joined: 23 Jan 2012, 12:01
- Location: Barnoldswick. Nearer to Heaven than Gloria.
Re: SHED MATTERS 2
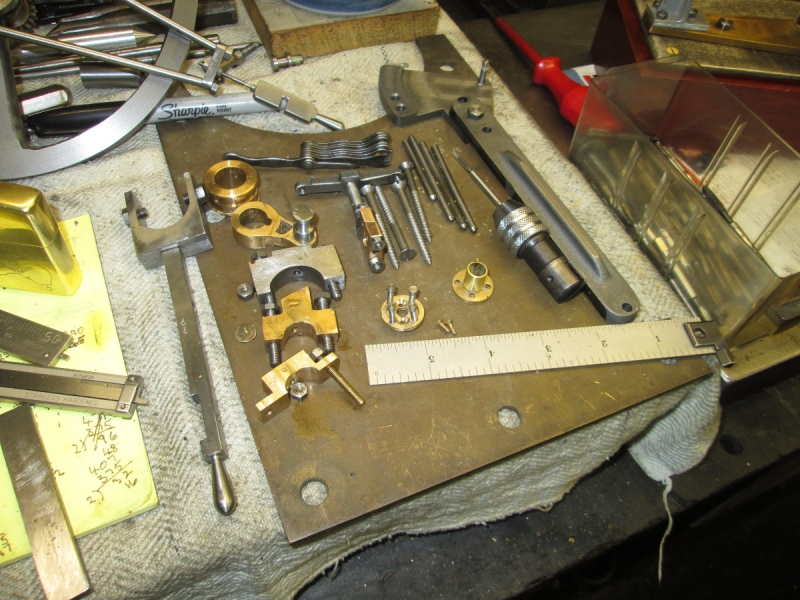
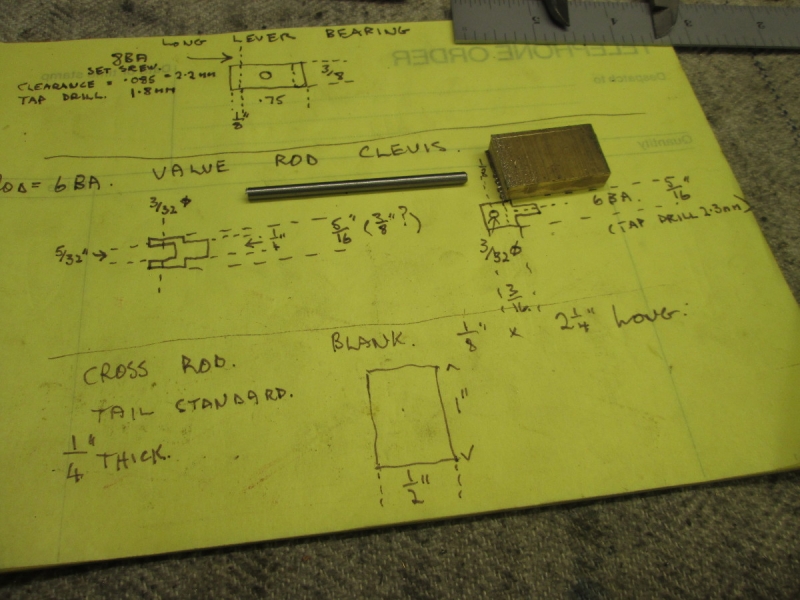
Looking at the rabbit this morning I saw that there was an advantage in making the clevis for the valve rod first so I knew exactly how much room I had for the outrigger bearing. As usual I got my ducks in a row and got everything ready. More tackle than you can poke a stick at!
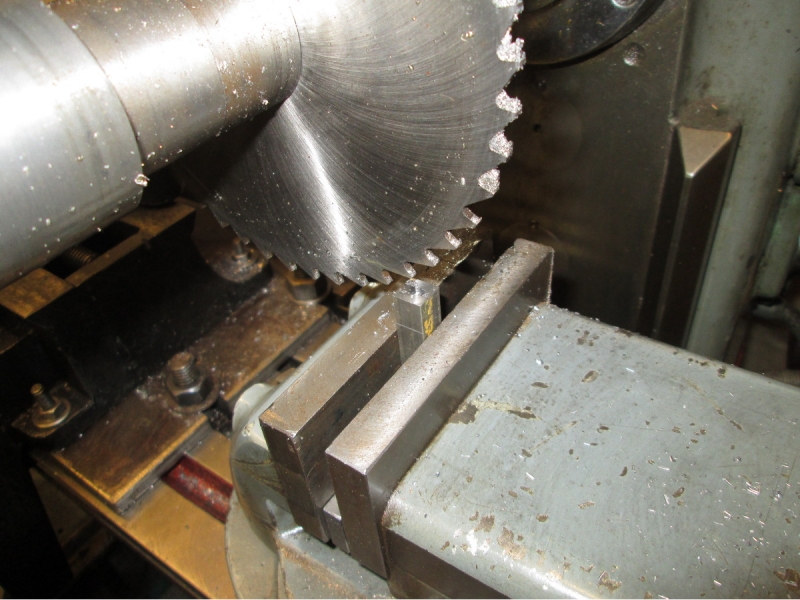
First thing was to cut off a chunk of 3/8" square key steel, square the ends in the lathe and pop a centre in to guide this cut for the slot which looks like overkill but is the best and most accurate way of getting the slot in.
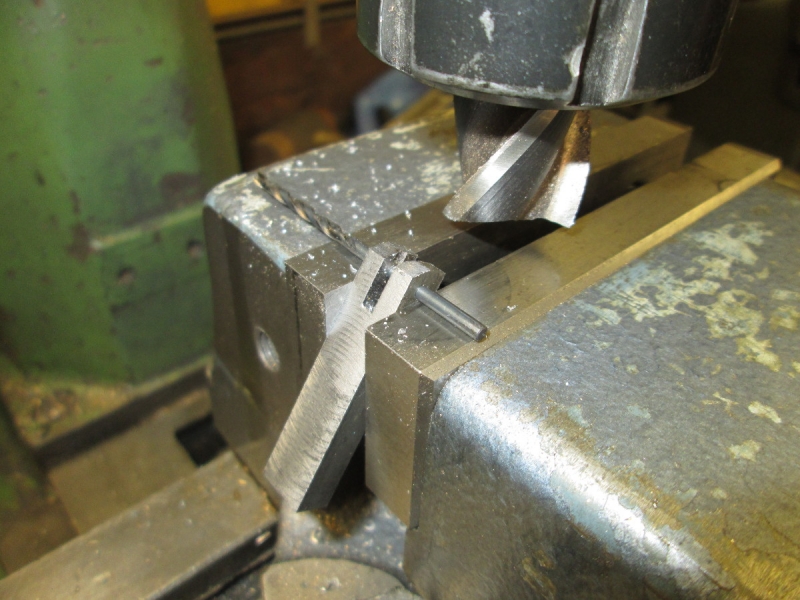
Lots of reducing down to 1/4" square and drilling the 3/32" clevis pin hole. Then using this lovely milling trick to get an accurate rounded end.
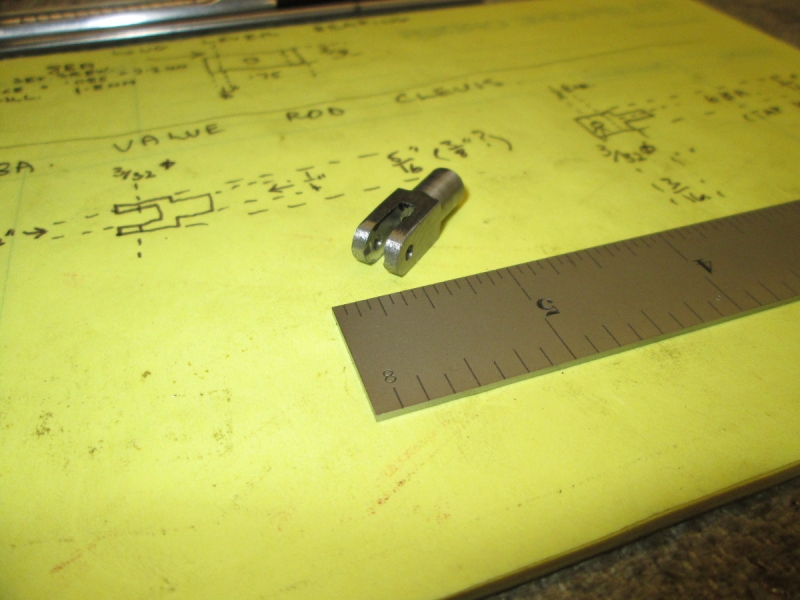
After two and a half hours I had got here. Quite pleased, it's nice and tidy. I was thinking of making the pin for it but decided I had done enough.
Here it is screwed onto the rod. I think I have the proportions about right. The valve rod is far too long at the moment, that will get attention in the final fitting. Tomorrow is definitely going to the outrigger bearing and the cross rod.
Stanley Challenger Graham
Stanley's View
scg1936 at talktalk.net
"Beware of certitude" (Jimmy Reid)
The floggings will continue until morale improves!
Stanley's View
scg1936 at talktalk.net
"Beware of certitude" (Jimmy Reid)
The floggings will continue until morale improves!
-
Stanley
- Global Moderator
- Posts: 90679
- Joined: 23 Jan 2012, 12:01
- Location: Barnoldswick. Nearer to Heaven than Gloria.
Re: SHED MATTERS 2
The design committee have pointed out that it would be better to adjust the length of the valve rod now so as to be perfectly sure of the clearance to the outrigger bearing not only for the clevis but the short lever..... Good plan so I will do that.
Stanley Challenger Graham
Stanley's View
scg1936 at talktalk.net
"Beware of certitude" (Jimmy Reid)
The floggings will continue until morale improves!
Stanley's View
scg1936 at talktalk.net
"Beware of certitude" (Jimmy Reid)
The floggings will continue until morale improves!
-
Stanley
- Global Moderator
- Posts: 90679
- Joined: 23 Jan 2012, 12:01
- Location: Barnoldswick. Nearer to Heaven than Gloria.
Re: SHED MATTERS 2
I started by following the design committee's advice. I Shortened the valve rod and the clevis so that I could position it on the centre line of the cross rod when the valve is at mid point in its travel.
I had a furtle in the treasure chest and came up with a sensible piece of bronze. Here we are with my hacksaw.... cuts much straighter than I can.
I found a piece of 1/8" silver steel. I have the materials, now I need to get in the mill and reduce the blank to the size I need. I did remember to leave room behind it for the gland screws!
Here we are ready for the fixing. I can only see one way of doing it, soldering the standard to the cylinder. This is bad news as I am the worst man in the world at soldering small parts like this that need accurate positioning!
Here we are at knocking off time after several attempts, dropping the standard on the floor, you name it! But I think it's solid, I shall do some cleaning up tomorrow. My worst nightmare is that it breaks off..... We shall see!
Stanley Challenger Graham
Stanley's View
scg1936 at talktalk.net
"Beware of certitude" (Jimmy Reid)
The floggings will continue until morale improves!
Stanley's View
scg1936 at talktalk.net
"Beware of certitude" (Jimmy Reid)
The floggings will continue until morale improves!
-
Stanley
- Global Moderator
- Posts: 90679
- Joined: 23 Jan 2012, 12:01
- Location: Barnoldswick. Nearer to Heaven than Gloria.
Re: SHED MATTERS 2
PS. When I measured things up as a check I found that instead of 3/8" between the centre of the cross rod and the hole in the clevis I found that it was 1/2". Not sure how that happened but it's no problem, I shall increase the distance of the centres on the long lever, it's the proportion that counts.
Stanley Challenger Graham
Stanley's View
scg1936 at talktalk.net
"Beware of certitude" (Jimmy Reid)
The floggings will continue until morale improves!
Stanley's View
scg1936 at talktalk.net
"Beware of certitude" (Jimmy Reid)
The floggings will continue until morale improves!