SHED MATTERS 2

Locked
User avatar
Stanley
Global Moderator
Global Moderator
Posts: 90439
Joined: 23 Jan 2012, 12:01
Location: Barnoldswick. Nearer to Heaven than Gloria.

Re: SHED MATTERS 2

Post by Stanley »

Image

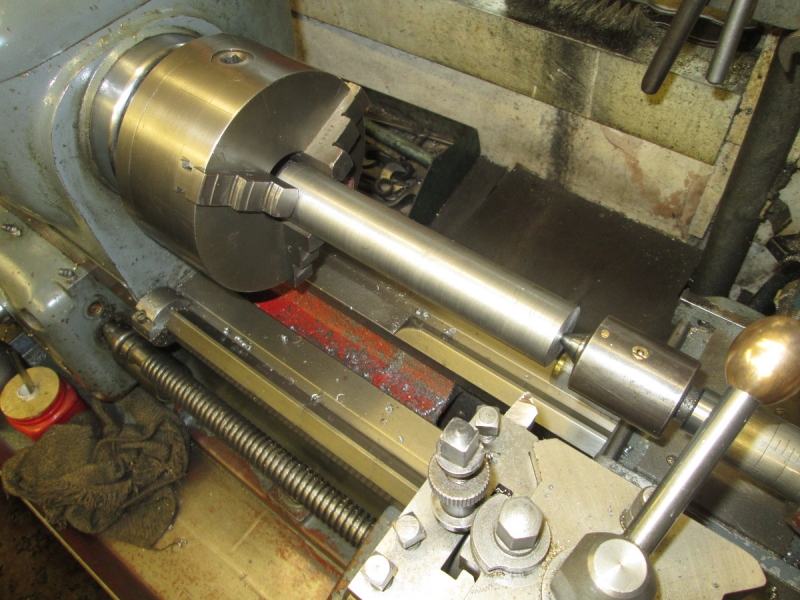
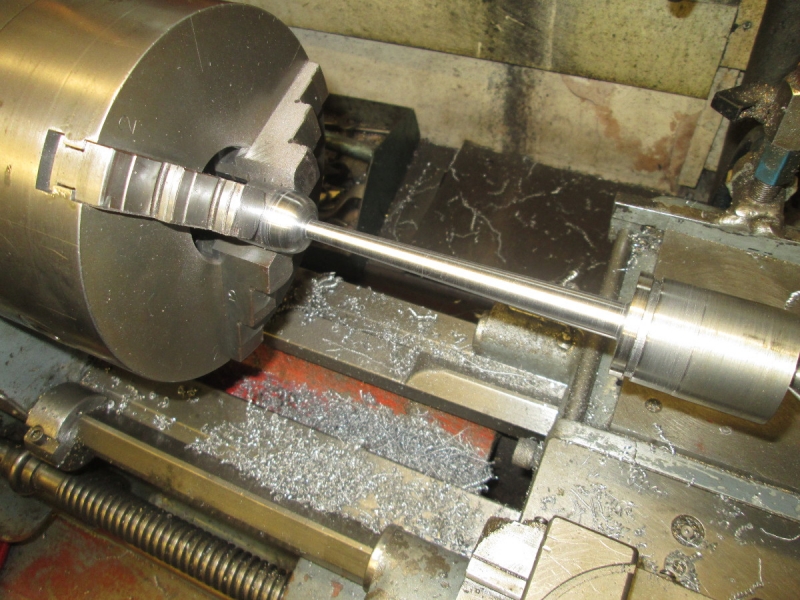
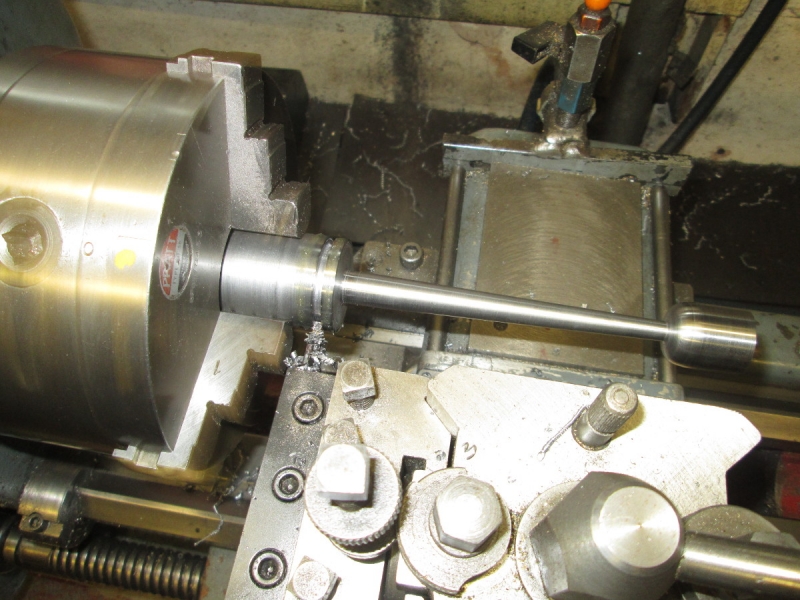
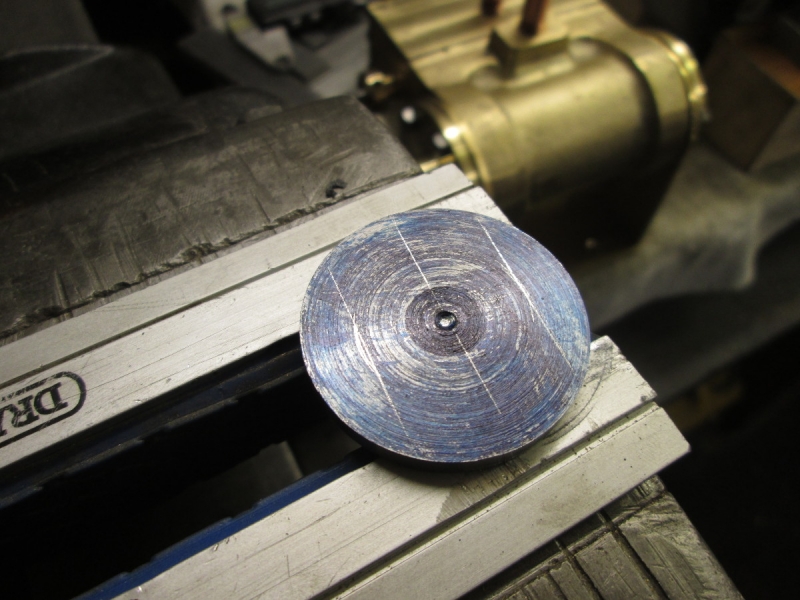
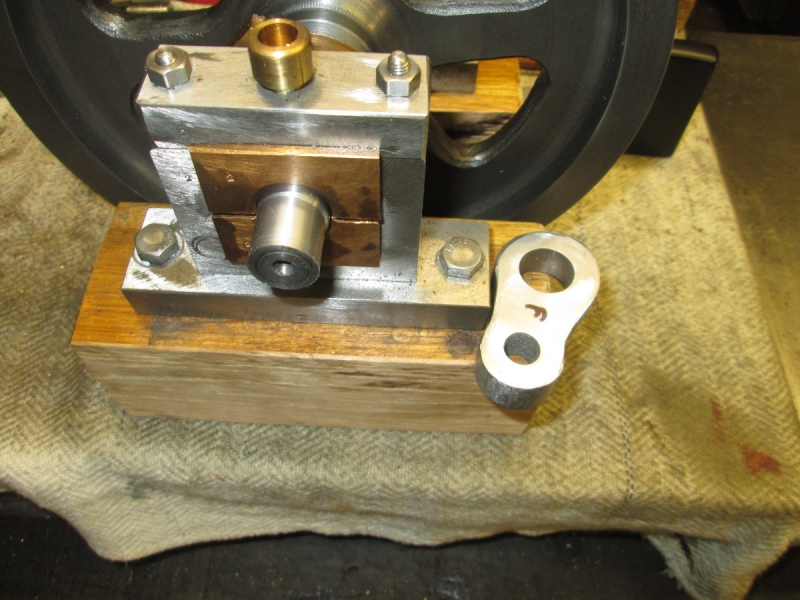
I managed just over an hour in the shed and started by putting about 30 minutes into improving the finish of the crank. Eventually I realised I had gone far enough!

Image

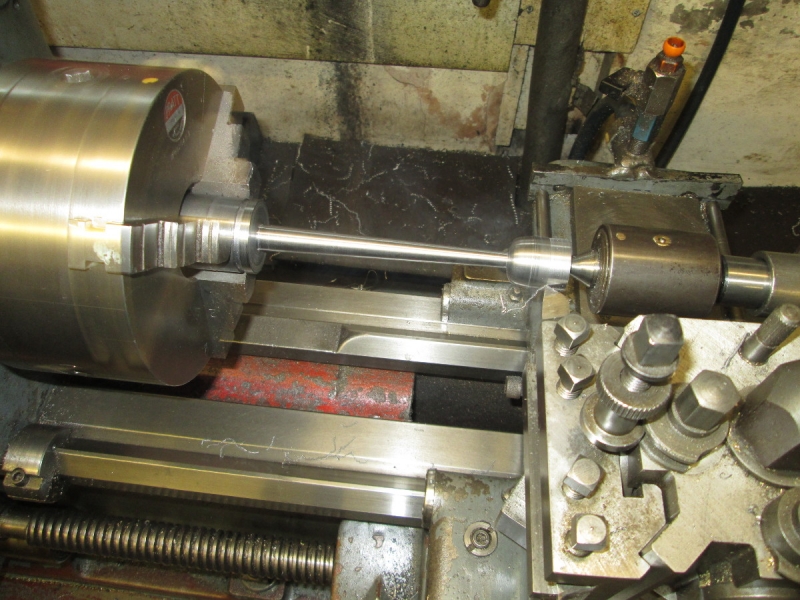
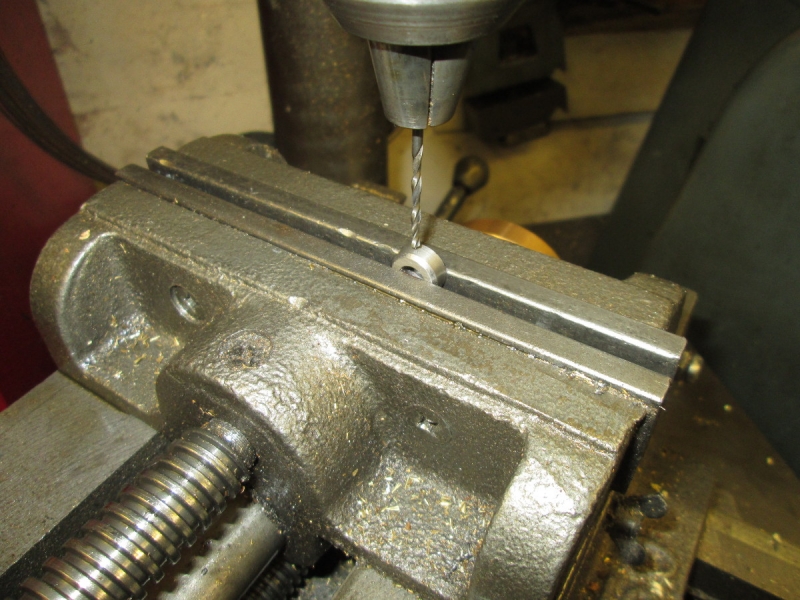
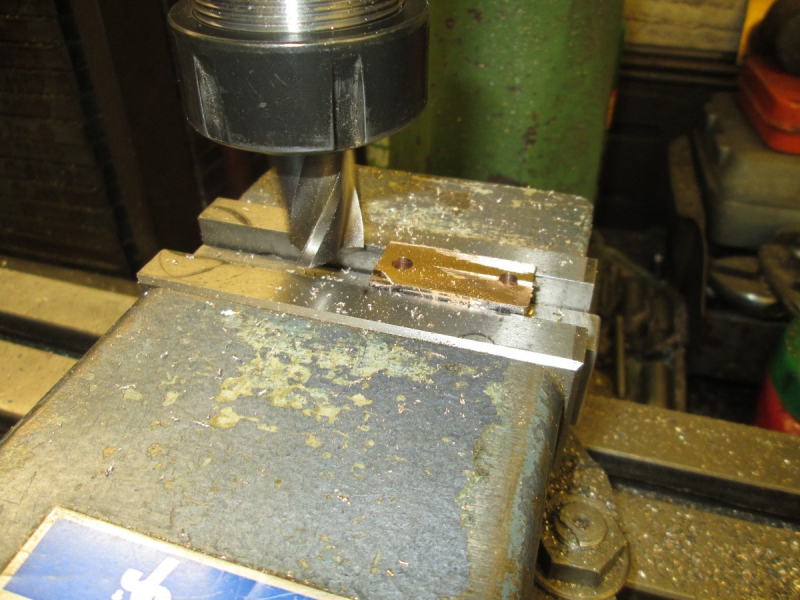
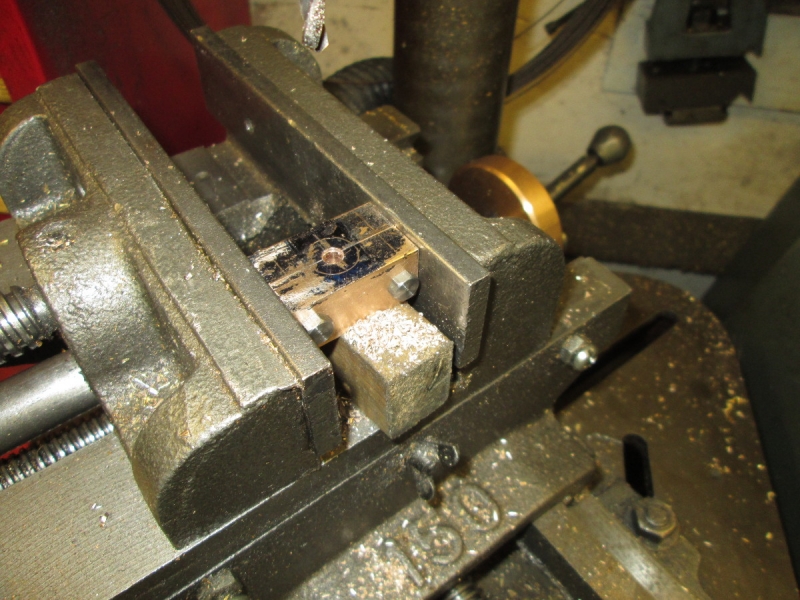
In my head the next job was to make a new crank pin but I realised that in the process of finishing the crank I had reduced the thickness and it was possible to rework the crank pin and make it fit properly.

Image

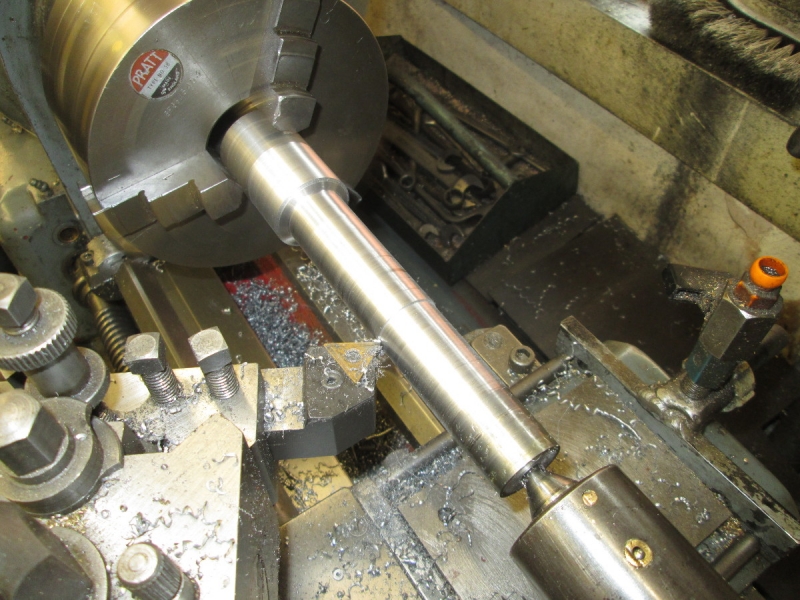
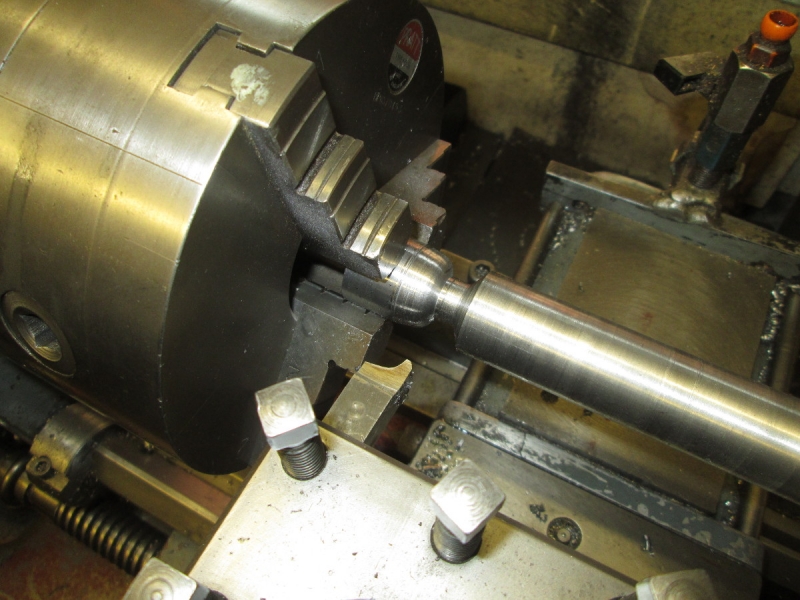
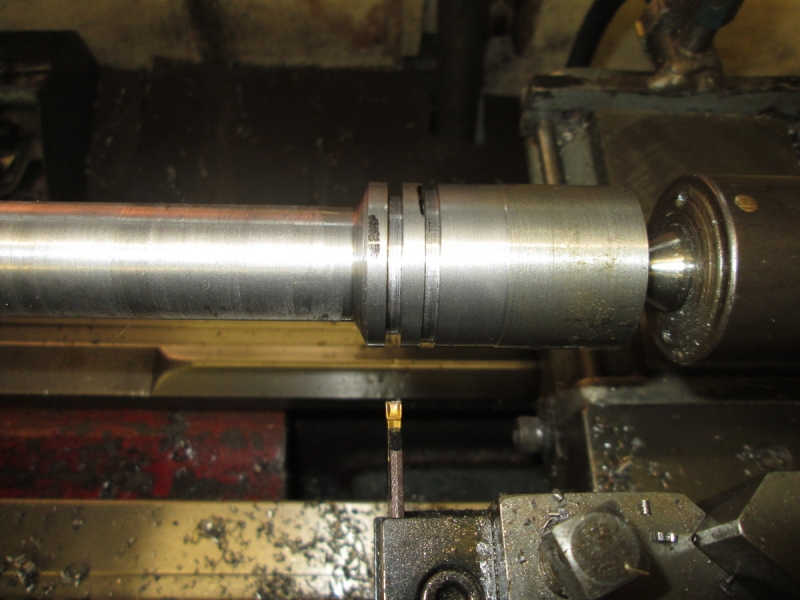
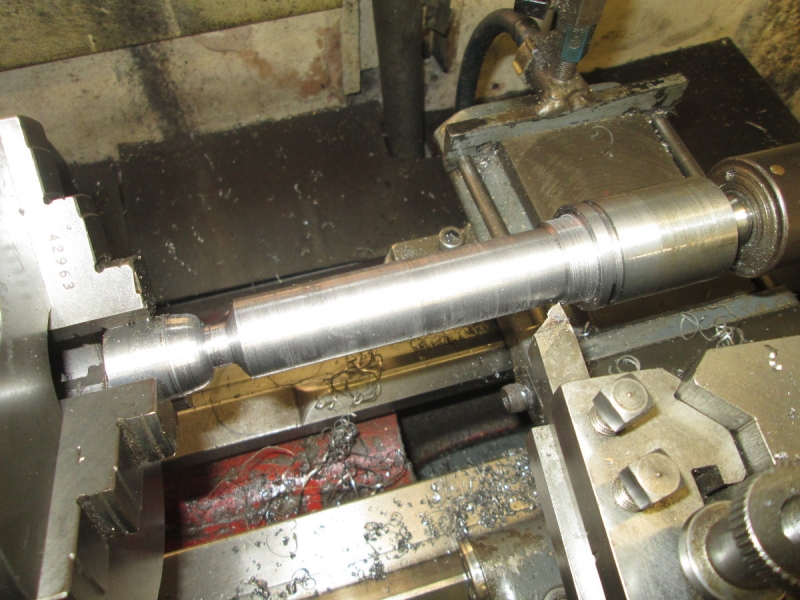
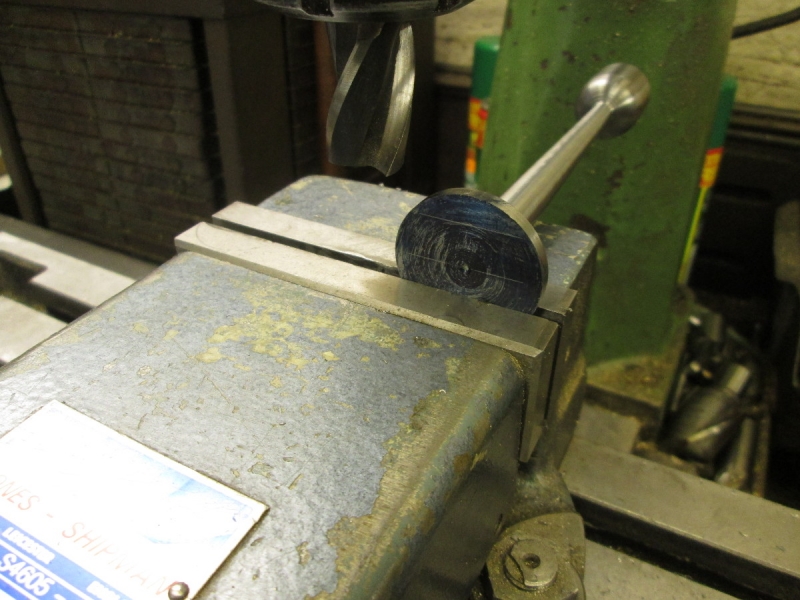
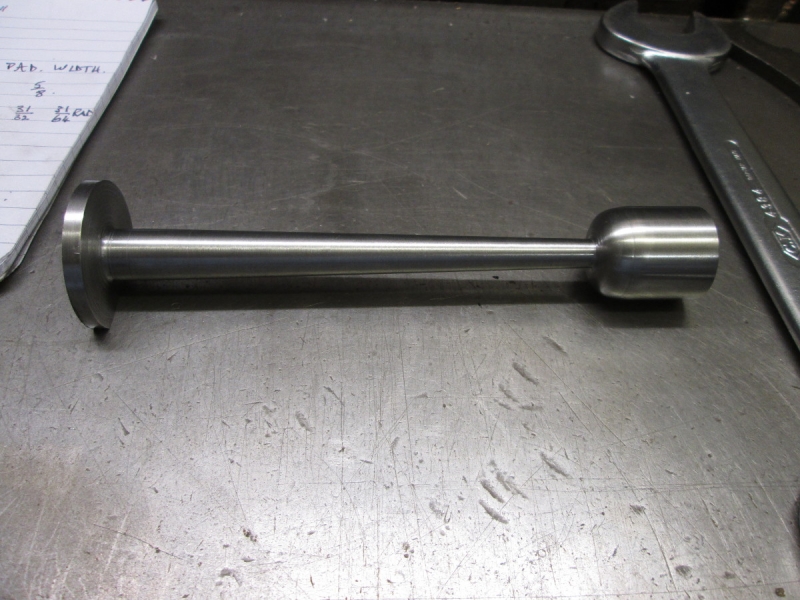
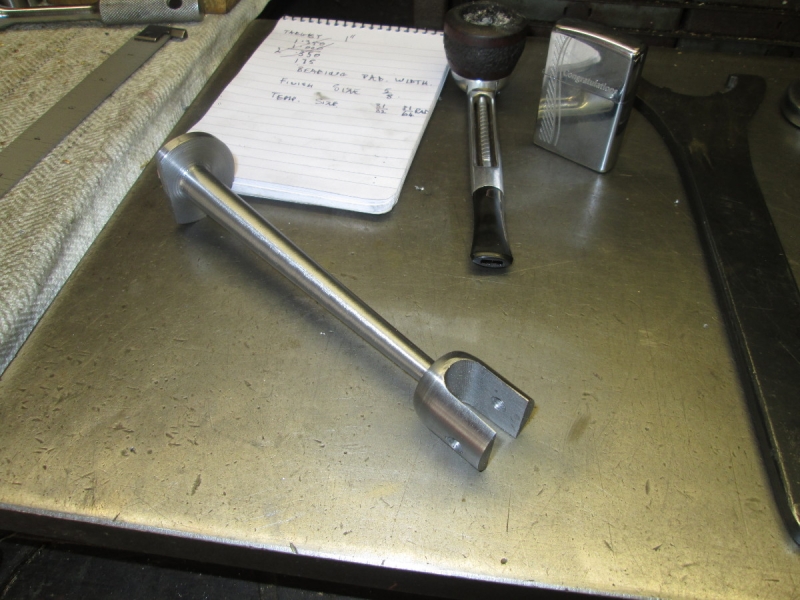
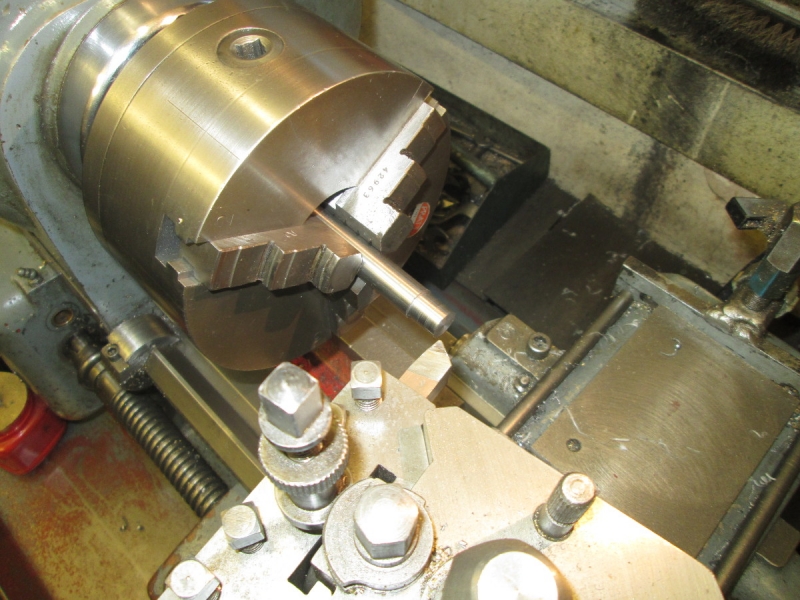
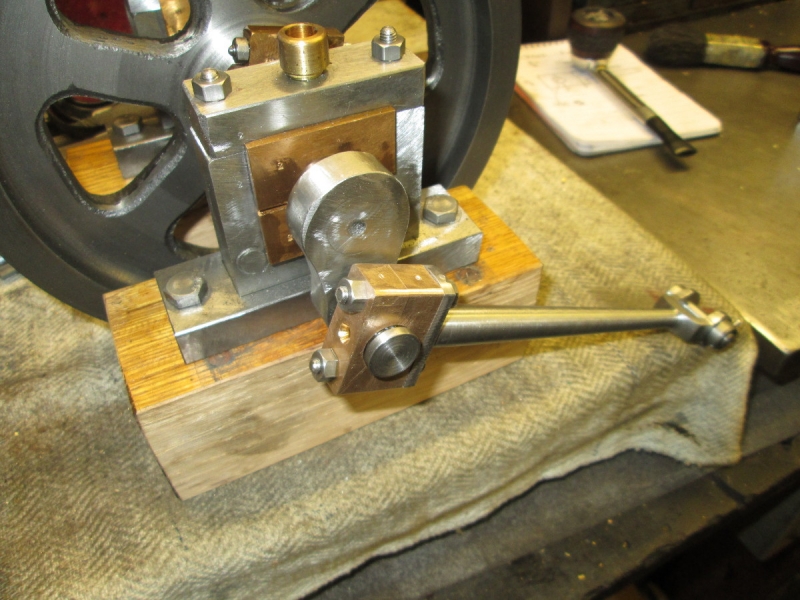
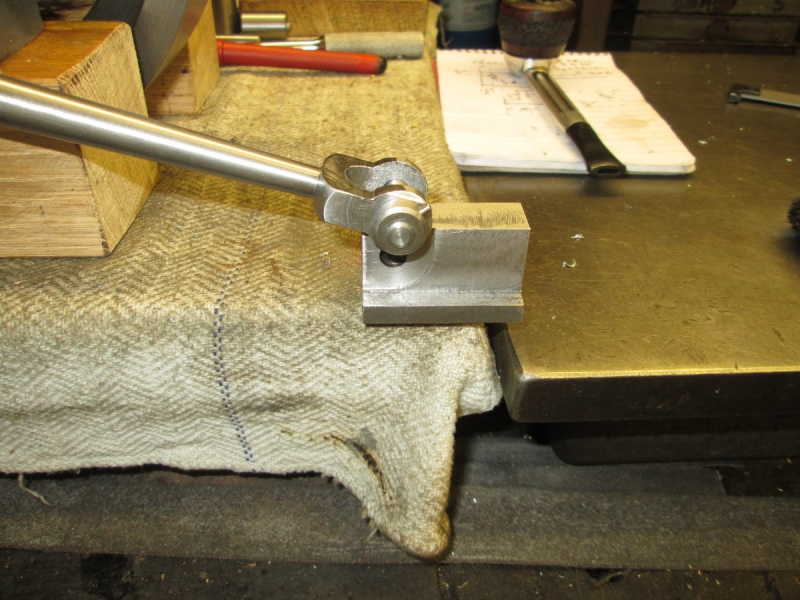
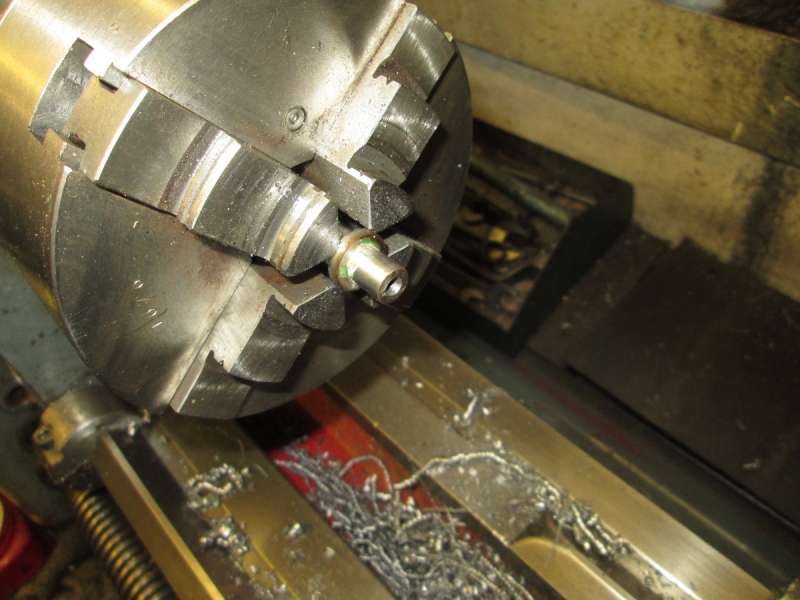
It worked and I was satisfied so I pressed it in and it was a good fit.

Image

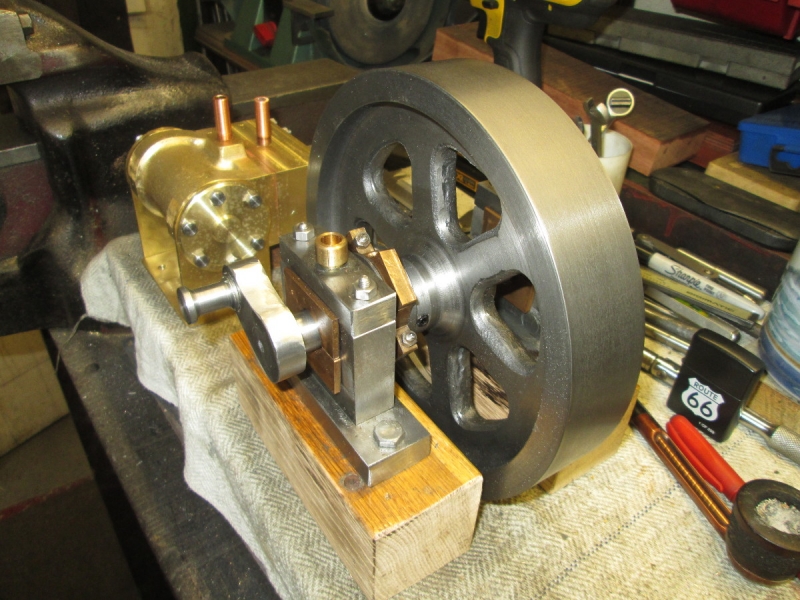
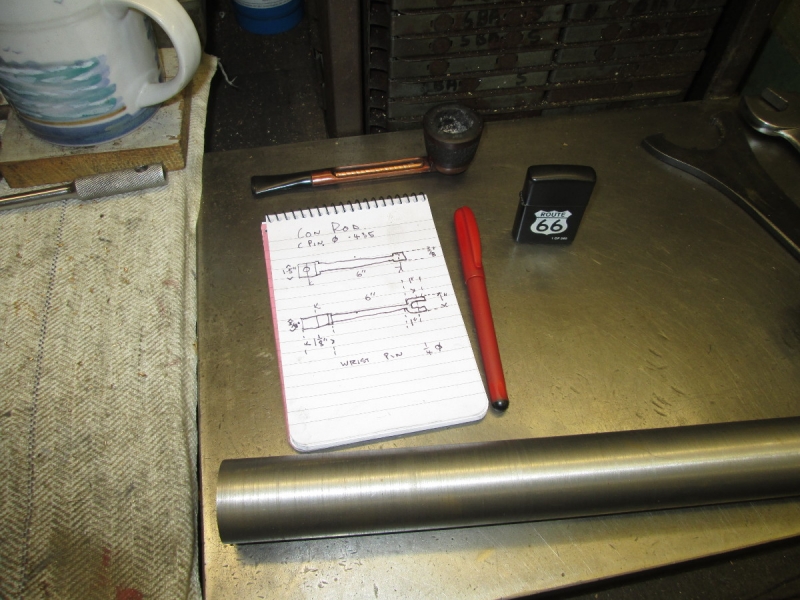
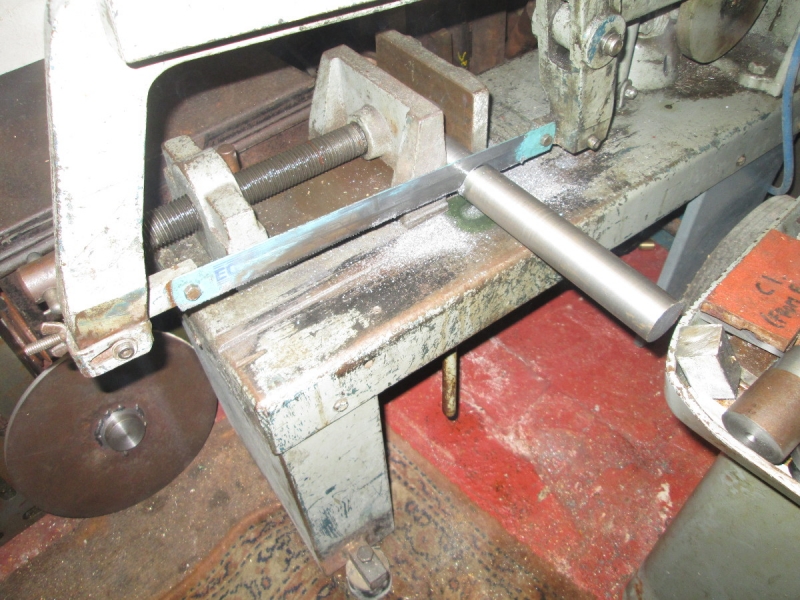
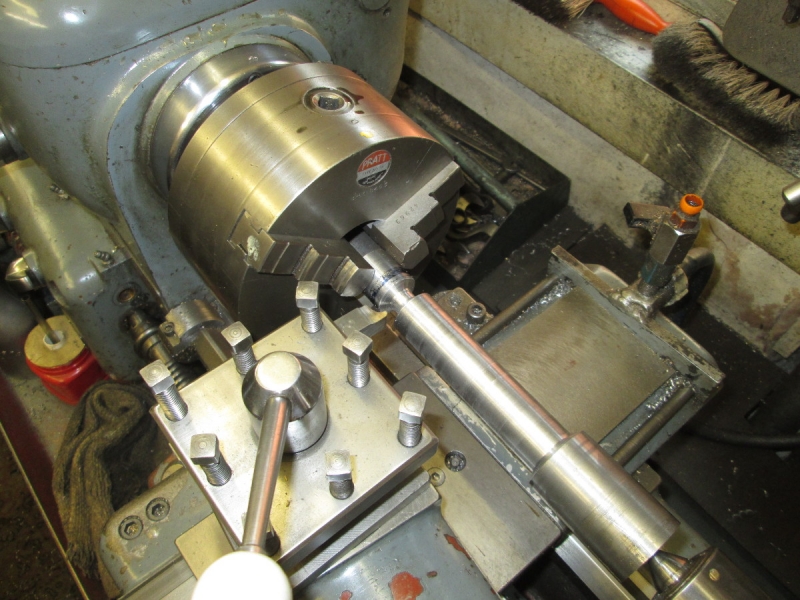
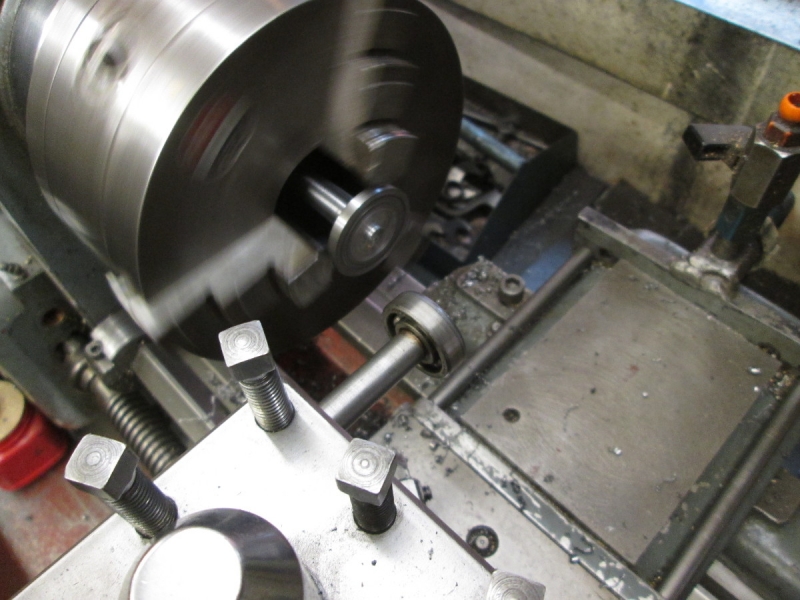
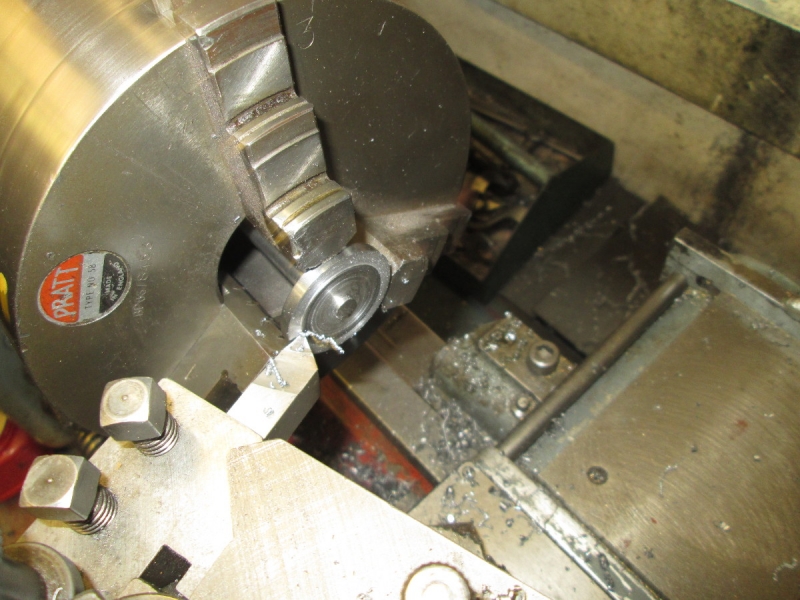
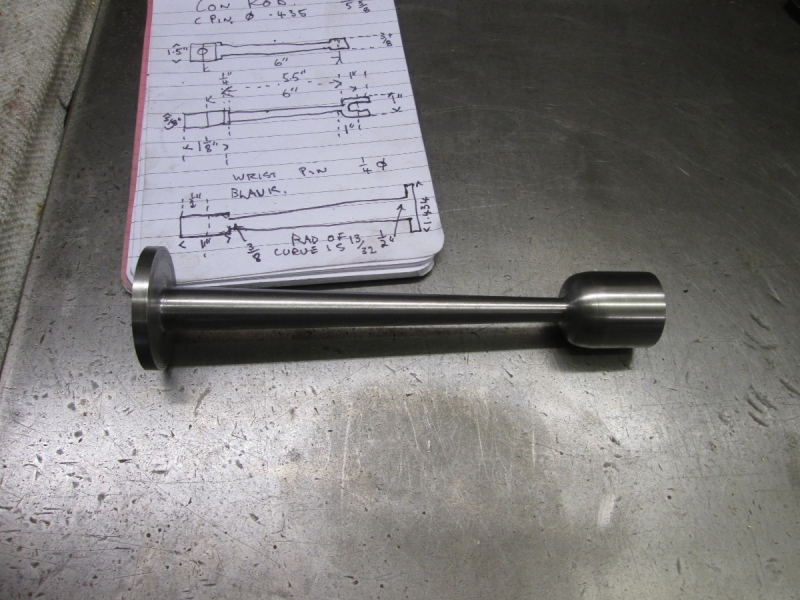
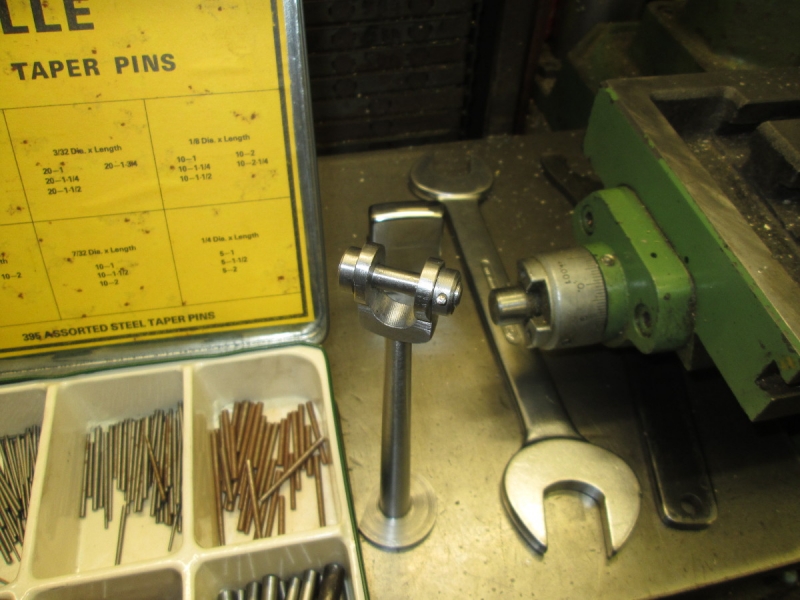
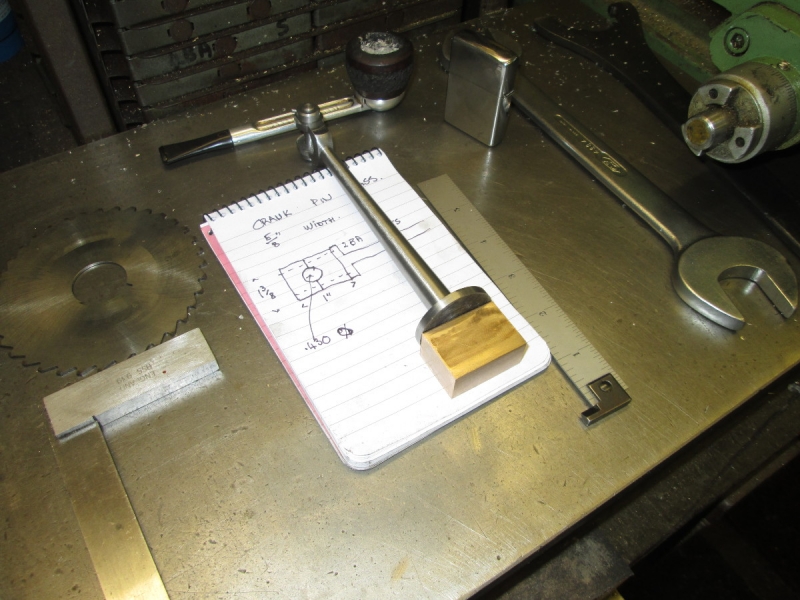
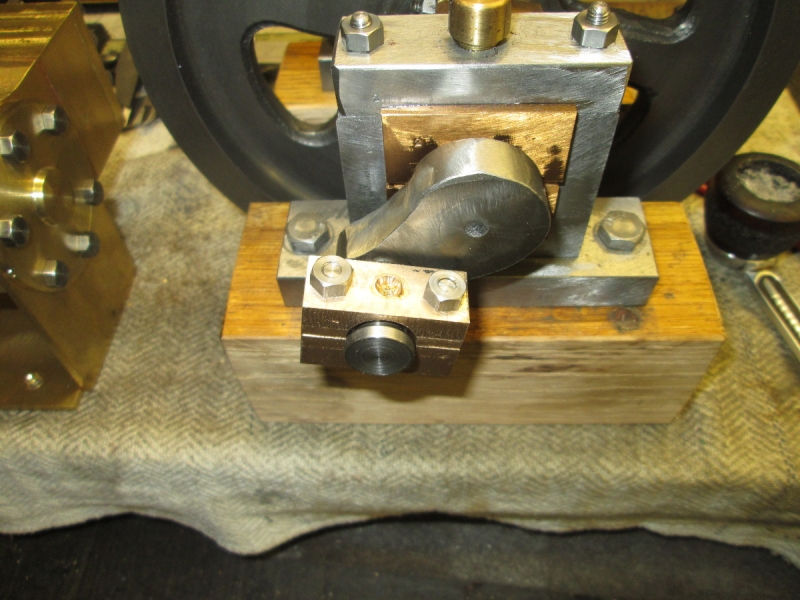
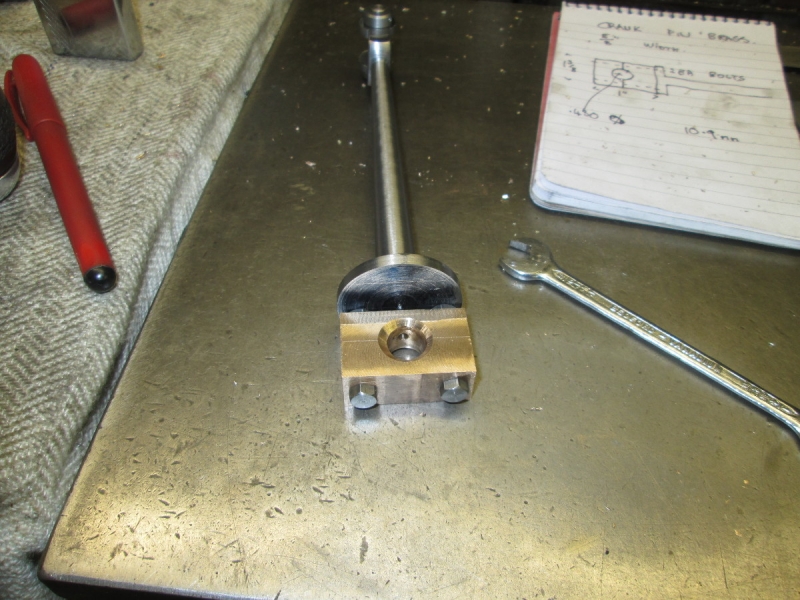
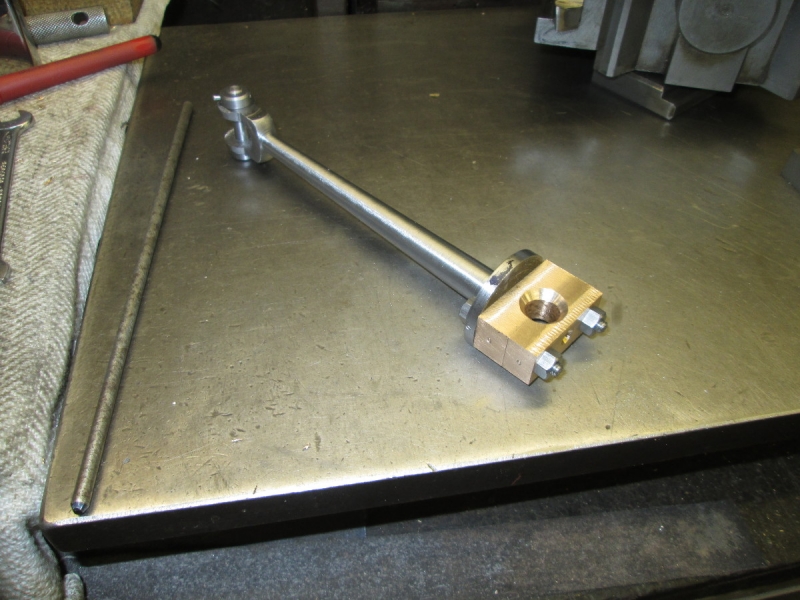
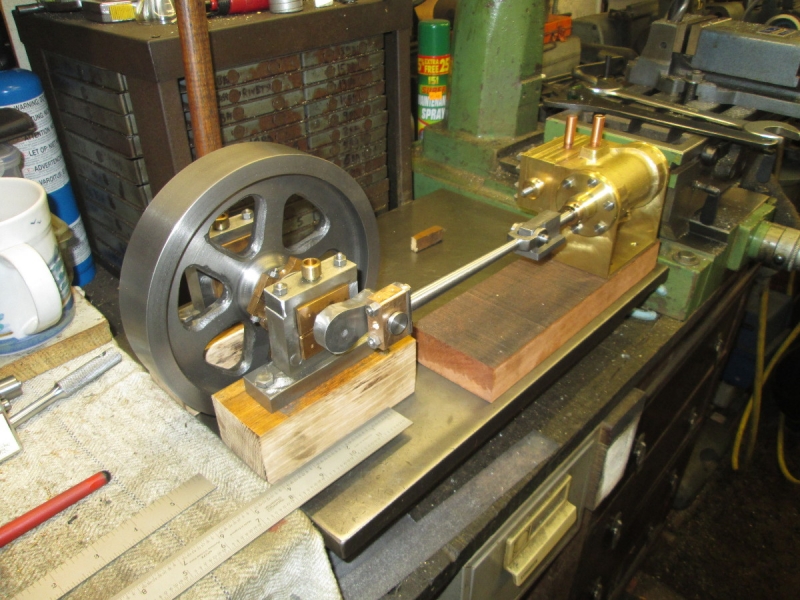
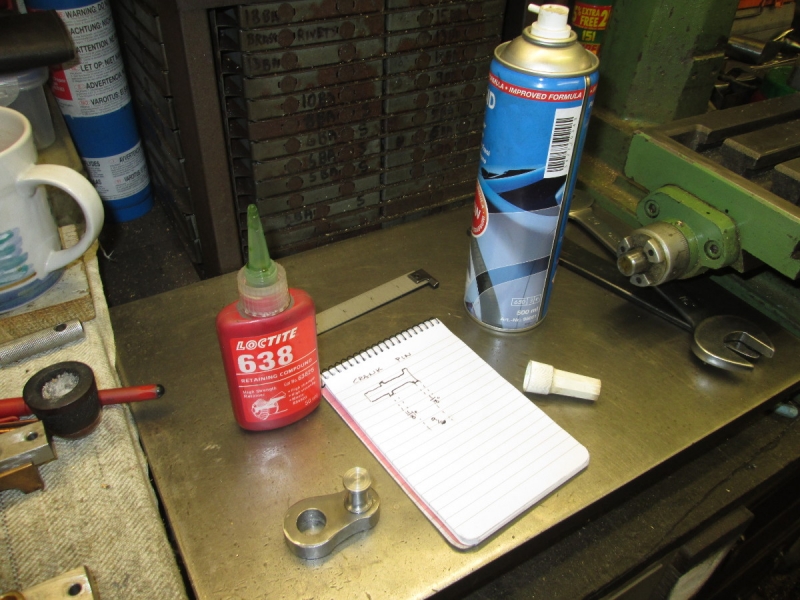
Pressing the crank on to the shaft was a brutal affair! The shaft is too long to fit in the vice and it was a heavier interference than I had anticipated. It finished up with a block of scrap brass for a dolly and a 4lb hammer. Not your classic careful controlled fitting but every now and then you have to break the rules! At closing time the shaft was installed and the end of the shaft dressed to make the fit look pretty. I can guarantee it will never move! Tomorrow I can go back to looking at the con rod and the bed.....
Stanley Challenger Graham
Stanley's View
scg1936 at talktalk.net

"Beware of certitude" (Jimmy Reid)
The floggings will continue until morale improves!
User avatar
Stanley
Global Moderator
Global Moderator
Posts: 90439
Joined: 23 Jan 2012, 12:01
Location: Barnoldswick. Nearer to Heaven than Gloria.

Re: SHED MATTERS 2

Post by Stanley »

Image

Enough high risk modifications.... For one moment this morning I thought of making the pedestal bearings a better fit than they are now but then decided I'd do something simple from scratch. We need a con rod! I did some check measurements and then did a fag packet drawing of what I wanted. I'm not going to skimp it by trying to make it easy, I'm going to give it a substantial clevis for the wrist pin and a good size bearing with plenty of room for the bolts. You can get into terrible trouble if you skimp on dimensions and then try to fit the nuts. Too often I have had to mill a flat on the side of the rod to make room for the nuts. None of that here! It's surprising how much metal you have to chop away if you make one like this, I needed a lump of 1.5" diameter stock and in some places this will be reduced to 3/8". The stock pile didn't let me down....

Image

You know what I'm going to say here! Mrs McMaster makes the sweetest sound in the world as you fill your pipe and light it! Thanks lads!

Image

I changed the chuck, I wanted the old three jaw on as it has a big enough clearance to put the stock right in for facing and centring. I cleaned Mrs Harrison and got set up with a sharp HSS tool.

Image

Then I decided that as I was playing out and had a lot of metal to chop out I'd use my tipped tools and get some practice in, I am still learning about speeds and feeds. What I have to remember is that good as Mrs Harrison is, she is an old lady and wasn't built to take heavy cuts. I had an interesting half hour and here we are at knocking off time. We have the first cut done and the clevis end reduced to one inch diameter. Ready for tomorrow.....
Stanley Challenger Graham
Stanley's View
scg1936 at talktalk.net

"Beware of certitude" (Jimmy Reid)
The floggings will continue until morale improves!
User avatar
Stanley
Global Moderator
Global Moderator
Posts: 90439
Joined: 23 Jan 2012, 12:01
Location: Barnoldswick. Nearer to Heaven than Gloria.

Re: SHED MATTERS 2

Post by Stanley »

Image

Today is a bad day for the shed of course, lots of preparation for cooking, washing and housework ready for a start at 9AM. (Someone has to do it!)
Here we have a pic of some little lads that don't come out too often. They are Moore and Wright internal and external radius gauges. I want a form tool to shape the beginnings of the clevis on the end of the con road and despite a search amongst my HSS tools I haven't got one.

Image

Some careful grinding and honing and we have a tool.

Image

Here we are set up ready for forming the shape. I've reduced the diameter quite a bit to give me room to get in. I've got the cutter set and I'm ready to do it but it's time to attend to domestic duties! No rush and I want it to be a nice shape.
Just on a matter of method, I could have left this until I had done more work but decided to do it now while I have a lot of meat in the workpiece and do my adjustments for length at the other end when I have this end properly formed.
Stanley Challenger Graham
Stanley's View
scg1936 at talktalk.net

"Beware of certitude" (Jimmy Reid)
The floggings will continue until morale improves!
User avatar
Stanley
Global Moderator
Global Moderator
Posts: 90439
Joined: 23 Jan 2012, 12:01
Location: Barnoldswick. Nearer to Heaven than Gloria.

Re: SHED MATTERS 2

Post by Stanley »

Image

Preparation helps, it took 2 minutes to put the shape into the clevis end of the con rod.

Image

Now I have the curve in place I can make an accurate measurement of the length and mark it properly with the parting tool.

Image

The next job was to start muck shifting to get the whole length down at .5". I started with a left hand HSS cutter.....

Image

but soon swapped to a tipped tool for a bit more practice using different feeds and cuts. It went well and was a good play out. Very instructive!

Image

By closing time I had the main of the rod cut back to .5", ready for putting a taper in it tomorrow but first I have to dig into my reference books to find the correct angle for reduction from half and inch to 3/8" in five inches......

Stop Press!

Image

Remember me saying I needed a new 1/2" X 26tpi die? I got a care parcel just as I was posting this. A care parcel from the NE Mafia. on the left, a small BSF die and a very small metric one. In the centre a good selection of 26tpi brass thread dies including the one I wanted. On the right some assorted Model Engineer's thread dies and a surprise, a lovely little half thou indicator! Thanks lads, I know where my friends are!
Stanley Challenger Graham
Stanley's View
scg1936 at talktalk.net

"Beware of certitude" (Jimmy Reid)
The floggings will continue until morale improves!
User avatar
Stanley
Global Moderator
Global Moderator
Posts: 90439
Joined: 23 Jan 2012, 12:01
Location: Barnoldswick. Nearer to Heaven than Gloria.

Re: SHED MATTERS 2

Post by Stanley »

Image

Sorry lads, no shed today as I had other fish to fry. Went to Skipton and arranged my funeral. As you can see I decided on a B17 theme in memory of my mate Bob who was a 35 mission tail gunner.... Normal service will be resumed after a fun day out!
Stanley Challenger Graham
Stanley's View
scg1936 at talktalk.net

"Beware of certitude" (Jimmy Reid)
The floggings will continue until morale improves!
User avatar
Stanley
Global Moderator
Global Moderator
Posts: 90439
Joined: 23 Jan 2012, 12:01
Location: Barnoldswick. Nearer to Heaven than Gloria.

Re: SHED MATTERS 2

Post by Stanley »

I have to do some cooking before I actually get into the shed but while my veggies cook and I chop things I have gone on the web and found a calculator for tapers. Dead easy, the taper from .5" to .375" over 4.75" is 1.5%. I shall report back later, lots going on here! Someone has to do it!
08:45. In the shed and the first thing was to put my loot away. I noticed that amongst it was a 1/4" X 32tpi die. Not one I recognised so I looked it up. It's National Extra Fine (NEF) something I have never come across. Evidently it's used on model engine steam pipe threads and some glow plugs. You live and learn! Definitely the most rare die in my collection.
10:20. I had another look on the web and the only hard information I found was on a website in the US. They class it as Unified Extra Fine Thread. It's certainly rare! I got my cooking done and an hour in the shed.....

Image

My first little job was to put Monday's loot away....

Image

Next job was to get set up for turning the taper.... Hone the tool and set up for cutting the left hand end first because the top slide hasn't enough travel for the full 4.75". You wouldn't believe how long it took me to make absolutely certain I had 1.5 degrees set on the protractor! My eyes make me check over and over but I got there. I cut the first section on the left and then swapped to the other end with a left hand tool....

Image

By closing time I had cut the taper and polished the rod. Looks OK I think and I'm ready for more work on it tomorrow. Nice to have a normal day!
Stanley Challenger Graham
Stanley's View
scg1936 at talktalk.net

"Beware of certitude" (Jimmy Reid)
The floggings will continue until morale improves!
User avatar
Stanley
Global Moderator
Global Moderator
Posts: 90439
Joined: 23 Jan 2012, 12:01
Location: Barnoldswick. Nearer to Heaven than Gloria.

Re: SHED MATTERS 2

Post by Stanley »

Image

I started the day by putting the final finish on the blank at the clevis end.

Image

Then I reversed it and parted the rod off from the stock.

Image

Then I reversed it again and used John's ball bearing trick to get it straight, I only have about 1/8" grip on it so carefully away!

Image

Next I faced the end at a slow speed, that's why the finish isn't too good but this is no matter, in fact it could give a better grip on the bearing brasses when they are fitted. Last thing was to make a little dimple in the centre for measuring purposes.

Image

Here's where we finished up, a nice looking blank. Lots to do yet and it's a good idea to review what you have to do because this can have a big bearing on what you do next. The classic mistake I made once when I was building two marine compounds was to mill the shape of the clevis in the same plane as the foot which was of course 90 degrees out! I made four at once. I retrieved that one by getting away with using the same blanks for the eccentric rods..... So have a think.....

Image

Soft jaws in the vice and using the dimple, mark out the next cuts on the foot. Here's a tip, mark the flats out so that the width is the same as the diameter of the clevis end. You'll see why in a minute!

Image

I have some milling to do next and the last time I sharpened this cutter I was a bit lax and it's not cutting as well as it should. So I moved over the the T&C, dressed the wheel and sharpened three end mills that needed attention.

Image

I cut one of the flats. Good cut, so the time spent in the mill was worth it.

Image

Here's where I am at closing time. Notice that because I cut the flat on the same plane as the clevis the rod lies flat on the surface plate. If I had vise jaws wide enough this would make it simple to hold the rod while I mill the gap out in the clevis. As it is I may have to go a different way.... I shall think of it tomorrow...
Stanley Challenger Graham
Stanley's View
scg1936 at talktalk.net

"Beware of certitude" (Jimmy Reid)
The floggings will continue until morale improves!
User avatar
Stanley
Global Moderator
Global Moderator
Posts: 90439
Joined: 23 Jan 2012, 12:01
Location: Barnoldswick. Nearer to Heaven than Gloria.

Re: SHED MATTERS 2

Post by Stanley »

I'll be late in the shed this morning lads. I have to write a polemic article defending Bancroft Engine.....
Later....

Image

I got an hour in the shed and did some high risk milling and drilling. I'll leave it to you to imagine how precarious my grip on it was but all went well and we now have a jaw in the clevis end and a 1/4" hole for the wrist pin. More shape chasing tomorrow!
Stanley Challenger Graham
Stanley's View
scg1936 at talktalk.net

"Beware of certitude" (Jimmy Reid)
The floggings will continue until morale improves!
User avatar
chinatyke
Donor
Posts: 3831
Joined: 21 Apr 2012, 13:14
Location: Pingguo, Guangxi, China

Re: SHED MATTERS 2

Post by chinatyke »

Stanley wrote: 22 Aug 2017, 15:55 Image

Sorry lads, no shed today as I had other fish to fry. Went to Skipton and arranged my funeral. As you can see I decided on a B17 theme in memory of my mate Bob who was a 35 mission tail gunner.... Normal service will be resumed after a fun day out!
You're looking well Stanley. Looks like the funeral will be a good way off!
User avatar
Stanley
Global Moderator
Global Moderator
Posts: 90439
Joined: 23 Jan 2012, 12:01
Location: Barnoldswick. Nearer to Heaven than Gloria.

Re: SHED MATTERS 2

Post by Stanley »

Thanks China! About 20 years I reckon.....
Stanley Challenger Graham
Stanley's View
scg1936 at talktalk.net

"Beware of certitude" (Jimmy Reid)
The floggings will continue until morale improves!
User avatar
Stanley
Global Moderator
Global Moderator
Posts: 90439
Joined: 23 Jan 2012, 12:01
Location: Barnoldswick. Nearer to Heaven than Gloria.

Re: SHED MATTERS 2

Post by Stanley »

I spent half an hour this morning looking for a reel of very light wire rope that I once had. I thought it would be just the thing for Ian but I can't find it so I must have given it away. I eventually got going.

Image

I want to start putting some shape in the clevis end of the con rod but it's too long to do my usual trick. I just used it to get some meat off the corners.

Image

Then some very careful cutting because I have very little grip on the rod!

Image

Another light cut on the sides.

Image

I took some more metal off by filing, note the lead wrapped round the rod to help grip it. In case you're wondering, it's a lot easier to file accurately with a big file!

Image

I'm almost there. It would function well as it is but for aesthetic reasons I want to do two more cuts.... I hope I don't regret it! Oh, and I have broken all the edges with a diamond hone.
Stanley Challenger Graham
Stanley's View
scg1936 at talktalk.net

"Beware of certitude" (Jimmy Reid)
The floggings will continue until morale improves!
User avatar
Stanley
Global Moderator
Global Moderator
Posts: 90439
Joined: 23 Jan 2012, 12:01
Location: Barnoldswick. Nearer to Heaven than Gloria.

Re: SHED MATTERS 2

Post by Stanley »

Image

One last job on the clevis! I might regret this but my cutter is reflecting the care I took when I had my recent sharpening session, it's cutting nicely. Light cuts.....

Image

The first cut done, looks like butchery doesn't it. I always say all we do is take chunks of metal and knock hell out of them.....

Image

Here's the result. Now I have to make it look beautiful again.

Image

Here's the route. I fitted a 1/4Whitworth nut and bolt with a washer under each end and this washer is my guide. Note that I have my favourite big file! No point piddling about. When I'm doing this I always think about Henry Maudslay. When he died one of his men said "It was a pleasure to watch Mr Maudslay use a hand tool of any description but he was particularly fine with an 18" flat file." That's the target....

Image

9AM and time to knock off and get on with cooking washing and housework. Here's where I finished. I think it looks better now and the next job is to make a wrist pin to fit it.....
Stanley Challenger Graham
Stanley's View
scg1936 at talktalk.net

"Beware of certitude" (Jimmy Reid)
The floggings will continue until morale improves!
User avatar
Stanley
Global Moderator
Global Moderator
Posts: 90439
Joined: 23 Jan 2012, 12:01
Location: Barnoldswick. Nearer to Heaven than Gloria.

Re: SHED MATTERS 2

Post by Stanley »

Image

Wrist pin..... First a fag packet drawing and find some silver steel.....

Image

Image

Image

Tough stuff silver steel but the right choice. Some careful work and we have a con-rod ready for the next stage which is the bearing brasses....

Image

Again, measure up, make a fag packet drawing and dive into the brass bits. I found a piece that is almost the exact size and got it into the mill to get it to size.

Image

Knocking off time. I have a block the right size and all my ducks in a row......
Stanley Challenger Graham
Stanley's View
scg1936 at talktalk.net

"Beware of certitude" (Jimmy Reid)
The floggings will continue until morale improves!
User avatar
Stanley
Global Moderator
Global Moderator
Posts: 90439
Joined: 23 Jan 2012, 12:01
Location: Barnoldswick. Nearer to Heaven than Gloria.

Re: SHED MATTERS 2

Post by Stanley »

Image

We're making the crank pin brass today and the better the job, the better the engine will run! I started by marking the blank up and boring the holes for the studs. 2BA clearance. At the same time I found a centre and marked the 9mm hole for the bearing to see how it looked. That also gave me the centre line for splitting the blank.

Image

I got set up in the HM with a 1/16" thick slitting saw and made a block to even the pressure up in the vise jaws. Dead easy, let's split it....

Image

It didn't go well. The cut went off piste as soon as I started so I went on to plan 'B'. Set it again in the centre of the jaws, make a good cut and go on from there.

Image

Finishing off in the vice with the hacksaw. Even that went wrong because the cut wasn't even. The bottom line is that the saw wasn't sharp. Ah well.....

Image

I finished up with this mess! Only one thing to do, look for an accurate face in the mill.

Image

I got a face on the first half and took it out. Then I cut the second. The difference in thickness doesn't matter.

Image

Here's the result. I found my centre again and scribed a 9mm circle just to see how much meat we have. It's going to be OK! Notice the witness marks to keep me on track.

Image

Next under the pillar drill. bore the 9mm hole out, put a good countersink in each and and have a try out on the crank pin. The blocks needed thinning down so back into the mill, Then under the pillar drill, countersink again and put an oil hole in the end of the brass.

Image

Final try out. Lovely fit! Free turning but no play.

Image

Here's where I finished at knocking off time. Now I need to get the brasses fitted on the con-rod..... But that's for tomorrow. [By the way, before you mention it. I have the brass the wrong way round, the oil hole needs to be on this end.]
Stanley Challenger Graham
Stanley's View
scg1936 at talktalk.net

"Beware of certitude" (Jimmy Reid)
The floggings will continue until morale improves!
User avatar
Stanley
Global Moderator
Global Moderator
Posts: 90439
Joined: 23 Jan 2012, 12:01
Location: Barnoldswick. Nearer to Heaven than Gloria.

Re: SHED MATTERS 2

Post by Stanley »

Image

Today I want to finish the con rod. I started by getting serious and got the Matrix slips out. I want to get this right so first I checked my first cut on the foot and as you can see, that was a good move! It's not quite at right angles to the wrist pin. No problem, I can soon put that right and get a proper mark for installing the brasses.

Image

I used the slips again to get an accurate fix on my level. Then I marked the holes by transfer punch and drilled them freehand with the DeWalt.

Image

Next job was to get some measurements and make two studs. Taking the trouble to use the tailstock die holder looks like overkill but that way I ensure good straight threads.

Image

Lovely! Now for my favourite bit making con-rods. So easy and such a transformation.

Image

This cut sets itself up with a bit of care. The cutter was working well and once again my El Cheapo mill does its job. I deride my mill but on the quiet it's amazing how well it does the job if you take care. It's quite remarkable how accurate it is and how repeatable the cuts are. Quietly away with no heavy cuts, no rush.

Image

The last job was to take the edges off the sharp corners to match the foot. Then I made it pretty using a diamond hone and finishing with a very fine emery board.

Image

The last job was to fit it to the crank. It's so easy to distort the brasses when you're working on them. All went well, the studs are tightened dead tight, there is virtually no play in the bearing and it spins beautifully. I am pleased with this morning's work. Care has paid off and this will do fine. Next thing looks like a crosshead and slide...... We'll see!
Stanley Challenger Graham
Stanley's View
scg1936 at talktalk.net

"Beware of certitude" (Jimmy Reid)
The floggings will continue until morale improves!
User avatar
Stanley
Global Moderator
Global Moderator
Posts: 90439
Joined: 23 Jan 2012, 12:01
Location: Barnoldswick. Nearer to Heaven than Gloria.

Re: SHED MATTERS 2

Post by Stanley »

No shed yesterday as I was enjoying a day on the canal with old friends. This morning, apart from my usual Friday tasks, I have had to give time to domestic matters to get back on track. I shall get in the shed for a short spell of plotting and thinking. The next job is to measure up and make the crosshead and slide. Once that is done it gives me the level of the wooden bed I am going to make so that will follow on. The Valve rod will be the last job and then we will have yet another engine!
Stanley Challenger Graham
Stanley's View
scg1936 at talktalk.net

"Beware of certitude" (Jimmy Reid)
The floggings will continue until morale improves!
User avatar
Stanley
Global Moderator
Global Moderator
Posts: 90439
Joined: 23 Jan 2012, 12:01
Location: Barnoldswick. Nearer to Heaven than Gloria.

Re: SHED MATTERS 2

Post by Stanley »

Image

I did some measuring and decided on a crosshead made out of a 1" cube of steel. However I found this piece of 1" black bar 1 1/2" long which already had a hole in one end and decided there was nothing wrong in having a longer crosshead So I opened the Hole in the end up to 8.4mm and tapped it 3/8" X 26tpi. Marked the other end and drilled a 1/4" hole for the wrist pin.

Image

Then some marking out and into the mill to get some shape into it. The cutter is working beautifully, just shows what you can do if you take a bit more care....

Image

I milled all the faces to my marks and finally squared the ends off in the vice. It all went nicely, my El Cheapo mill, as usual, doing a lovely job considering!

Image

When I had all the faces milled I broke all the edges. It looks a bit better doesn't it......

Image

Last move was to offer it up to the piston rod, that was OK, the tapping is deep enough. Then I tried the clevis and found that my web on the crosshead was a bit on the large side so I popped it back into the VM and took a sliver off each side at the clevis end. It fits nicely now. I knocked off, tomorrow I'll make the crosshead slide.....
Stanley Challenger Graham
Stanley's View
scg1936 at talktalk.net

"Beware of certitude" (Jimmy Reid)
The floggings will continue until morale improves!
User avatar
Stanley
Global Moderator
Global Moderator
Posts: 90439
Joined: 23 Jan 2012, 12:01
Location: Barnoldswick. Nearer to Heaven than Gloria.

Re: SHED MATTERS 2

Post by Stanley »

Image

This morning is of course free leccy and housework and cooking. The washing machine is going (fingers crossed!) the oven is on and my compressor is blown up full. But I did get in the shed.... It was time to have a big think and measure up, first to get a size for the crosshead slide but also to make some decisions about the wooden bed I need. Not as easy as it looks and to be quite honest, I am not absolutely certain that the solution I have come up with is the right one but I need a plan and this is the best one I have!

Image

The treasure chest came up trumps as usual! (One of these days I will run out of stock.) I need a blank approximately 4" X 2" X 1 1/2" and I can just get that length out of this. Not a lot to get hold of but with an outrigger support I managed it and set Mrs McMaster to work. (Free leccy!) Once again I thanked my mates in the NE, 4" X 2" cut is a bit much for an old bloke with a hacksaw!

Image

It took 20 minutes to make a perfect cut so I am ready for some serious milling tomorrow. I'm going to make this one slightly different, Normally I cut a tee-slot to fit the crosshead block but this time I am going to follow the full size engine practice, a simple slot and top plates bolted on to retain any upward lift. This means I can have a play on the HM to mill out a simple 1" X 1/4" deep slot in the top face once I have it milled to overall size. But that's for tomorrow, I need to get on with housework!
Stanley Challenger Graham
Stanley's View
scg1936 at talktalk.net

"Beware of certitude" (Jimmy Reid)
The floggings will continue until morale improves!
User avatar
Stanley
Global Moderator
Global Moderator
Posts: 90439
Joined: 23 Jan 2012, 12:01
Location: Barnoldswick. Nearer to Heaven than Gloria.

Re: SHED MATTERS 2

Post by Stanley »

Image

Today's job is to turn a lump of rusty scrap into a perfectly square block. I'm not bothered about the actual sizes, I'll attend to that after I have a lump of good stock. By the way, I didn't get in the shed until 8AM because I decided to shift the old washing machine out of the house to lighten the load on the fitter on Wednesday. See 'Today I will be mainly' and prepare to be impressed!
By the way, notice the pattern the cutter is leaving, a light cross hatch from the trailing edge. This is a good sign that the quill is exactly perpendicular to the table. My El Cheapo mill does well as usual with light cuts and a reasonably sharp cutter.

Image

The first cut. I won't bore you with the whole process.

Image

When I'd done all my roughing cuts I touched the cutter up. Never a waste of time!

Image

When I had all the faces right I swapped cutters and squared the ends.

Image

By closing time after just over an hour and a half this is where I was at. Nicely squared within a couple of thou and all the edges broken. I've had a good morning and been very productive (for an old bloke!). Have a look at 'Today I shall be mainly'!
Stanley Challenger Graham
Stanley's View
scg1936 at talktalk.net

"Beware of certitude" (Jimmy Reid)
The floggings will continue until morale improves!
User avatar
Stanley
Global Moderator
Global Moderator
Posts: 90439
Joined: 23 Jan 2012, 12:01
Location: Barnoldswick. Nearer to Heaven than Gloria.

Re: SHED MATTERS 2

Post by Stanley »

Image

First thing to do was compare the size of my squared blank with what the target is. The length is a few thou shy but I couldn't do anything about that, the material dictated it. All the other dimensions fit into the block and it's so little oversize that there's no point reducing it. The only critical element is the seat that the crosshead slides in so I blued up and made a couple of marks. Then swap the cutter for a newly sharpened one and into the VM.

Image

Usual drill, sensible cuts and careful work. No problems of any kind.

Image

Here's the result, a nice fit laterally, just a few thou play. The sharper eyed amongst you might have realised that I haven't quite milled the slide deep enough for the shoe on the block. There's a reason for this. When I drilled the crosshead for the wrist pin I didn't quite get it high enough which means I am short of room between the guides I am going to install to restrain any upward tendency, not that there will be any because the engine will be running 'over' and won't have reversing gear. So I'm going to reduce the thickness of the shoe a bit from the top to give me a bit more clearance between the con rod clevis. So a bit of blue and a touch of light milling.

Image

Here we are, I milled a bit off both on the same setting and then broke the edges.

Image

Here's the result. Much better and a nice bit of clearance.

Image

Then a bit of cleaning up and prettifying! My favourite flat file was a start but then I finished with a coarse hone. I did both the slide and the crosshead.

Image

Knocking off time, now I have to attend to the top strips but that's a different skill set and I have to get ready to go and see the diabetes nurse...... Nice morning on all fronts....
Stanley Challenger Graham
Stanley's View
scg1936 at talktalk.net

"Beware of certitude" (Jimmy Reid)
The floggings will continue until morale improves!
User avatar
chinatyke
Donor
Posts: 3831
Joined: 21 Apr 2012, 13:14
Location: Pingguo, Guangxi, China

Re: SHED MATTERS 2

Post by chinatyke »

What is the reason roller bearings weren't used instead of the crosshead block just having metal to metal contact with the crosshead slide? Wouldn't roller bearings have made for less wear and friction losses?
User avatar
Stanley
Global Moderator
Global Moderator
Posts: 90439
Joined: 23 Jan 2012, 12:01
Location: Barnoldswick. Nearer to Heaven than Gloria.

Re: SHED MATTERS 2

Post by Stanley »

That's a good question China and like many of these 'simple' questions, has a complicated answer!
When a new technology is perfected, in this case ball and roller bearings, the natural tendency is to assume that they are better and so they are applied everywhere possible in the name of progress. Unfortunately, there are circumstances where they are in fact worse or at best, no improvement and more expensive. Newton tells me that the fashion of fitting roller and ball bearings in lineshafting soon died out as they found they did not withstand the vibration in the shafts generated by the gearing. It is a little known fact that vibration generates a form of electrolytic corrosion and breakdown of the bearing surfaces. Brook motors used to recommend that idle electric motors with these bearings should be stored in a vibration free environment as they could degenerate even if resting.
However the answer in your question is the second circumstance. A plain bearing for rotation or sliding motion, if properly sized and fitted is perfectly adequate and at times even better, certainly cheaper. Steel on bronze or the older technology of steel on cast iron for low linear speeds, if properly sized and lubricated, is almost wear free. This is the case with crosshead slides which in full size practice could be steel on CI or steel on steel. If properly lubricated with full separation of surfaces with oil the life of these bearings is virtually unlimited, particularly in the case of crosshead slides where any wear doesn't affect the performance of the bearing if the clearance is adjusted and in the case of reversing engines, wear taken up.
So the short answer to your question is that the old technology was cheaper and perfectly adequate, no need for expensive changes!
Stanley Challenger Graham
Stanley's View
scg1936 at talktalk.net

"Beware of certitude" (Jimmy Reid)
The floggings will continue until morale improves!
User avatar
Stanley
Global Moderator
Global Moderator
Posts: 90439
Joined: 23 Jan 2012, 12:01
Location: Barnoldswick. Nearer to Heaven than Gloria.

Re: SHED MATTERS 2

Post by Stanley »

Later.... Apologies Lads, there will be no shed today. I had a bit more preparatory work to complete ready for my fitters to come and install the new kitchen equipment so I did that and by then, as I was expecting them first thing, it didn't seem worth starting anything in the shed. It turned out that it was like waiting for a courier to deliver, in the end I cracked and rang them, it will be 11:00 before they are here.... hopefully! So I shall just get on with other things. I am aiming to be back in there tomorrow.....
Stanley Challenger Graham
Stanley's View
scg1936 at talktalk.net

"Beware of certitude" (Jimmy Reid)
The floggings will continue until morale improves!
User avatar
Stanley
Global Moderator
Global Moderator
Posts: 90439
Joined: 23 Jan 2012, 12:01
Location: Barnoldswick. Nearer to Heaven than Gloria.

Re: SHED MATTERS 2

Post by Stanley »

Image

Today is fitting the top slides to the crosshead. The first job was to run the cutter across the edge that will butt up against the crosshead itself so I had one straight edge.....

Image

Then I clamped the plates in place with the good edges in contact with the crosshead. This means that any excess can easily be removed from the outside edge.

Image

I'm intending to fasten the plates down with countersunk head screws and mill or sand them off after fitting. So I went for a dig in the treasure chest on the bench and found two sets that looked like candidates. On reflection I decided that the 2BA ones were too chunky and went for the 8BA set. I've got eight out but don't think I shall use more than six....

Image

It's all right taking what it says on the drawer for granted but if you are sensible you'll check by screwing all of them into an 8BA nut to clean the threads and identify any bum ones. Looks like a lot of trouble but saves time in the long run!

Image

Next job is to find an 8BA tap. I have just one and it's marked 8BA but again, if you are sensible, try it out in an 8BA nut. There is so little difference between this and a 7BA that you can easily slip up. Then get a pin vise out, you've got to be able to hold it.

Image

I threw this pic in to show any of you who don't know how small they can get! Actually there are smaller ones than these but I don't have them, I'm not watchmaking! That reminds me of the watchmaker's apprentice who, when he saw a 1/4" drill expressed surprise. He said "I didn't know they made drills that big!" It's all comparative.... Here I let you down, I mounted the clamped crosshead in the vice and big does and little does I drilled the outside two holes tapping size through the slides on both sides. I marked the slides so I don't lose track of which way they fit. I got so engrossed in this that I didn't take any pics. It was awkward because I had to move the clamps for two of the holes, the chuck was fouling the adjusting screws.

Image

You can call me chicken, I don't mind but at 09:30 I was ready for tapping but remember I only have one tap! So I decided to come to that job fresh in the morning. You can't be too careful!
Here's a laugh for you. I went back into the kitchen to wash my hands and face and realised I had done all this with the wrong glasses on! Not fit to let out.....
Stanley Challenger Graham
Stanley's View
scg1936 at talktalk.net

"Beware of certitude" (Jimmy Reid)
The floggings will continue until morale improves!
User avatar
chinatyke
Donor
Posts: 3831
Joined: 21 Apr 2012, 13:14
Location: Pingguo, Guangxi, China

Re: SHED MATTERS 2

Post by chinatyke »

Stanley wrote: 06 Sep 2017, 04:36 ...
So the short answer to your question is that the old technology was cheaper and perfectly adequate, no need for expensive changes!
Thanks for the explanation. I thought the wear would be excessive but it turns out it isn't.
Locked

Return to “Crafts”