SHED MATTERS 2

Locked
User avatar
Stanley
Global Moderator
Global Moderator
Posts: 90761
Joined: 23 Jan 2012, 12:01
Location: Barnoldswick. Nearer to Heaven than Gloria.

Re: SHED MATTERS 2

Post by Stanley »

Image

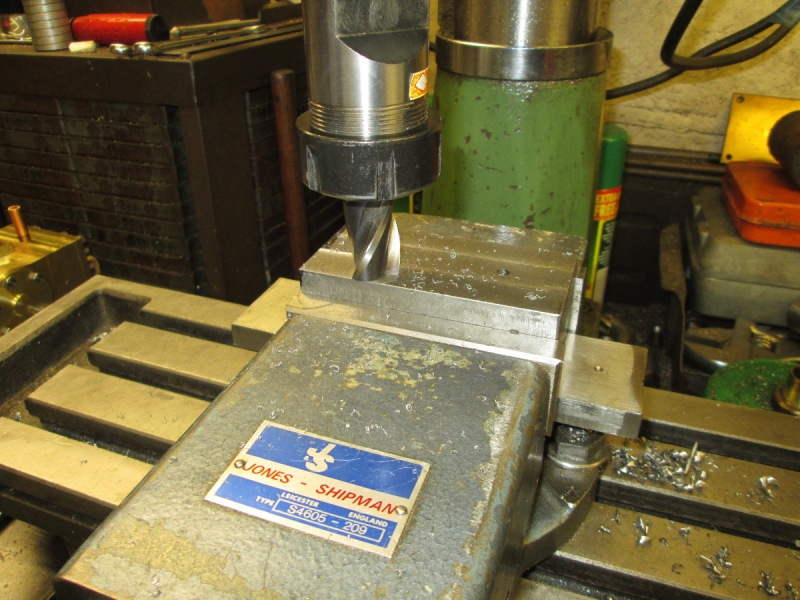
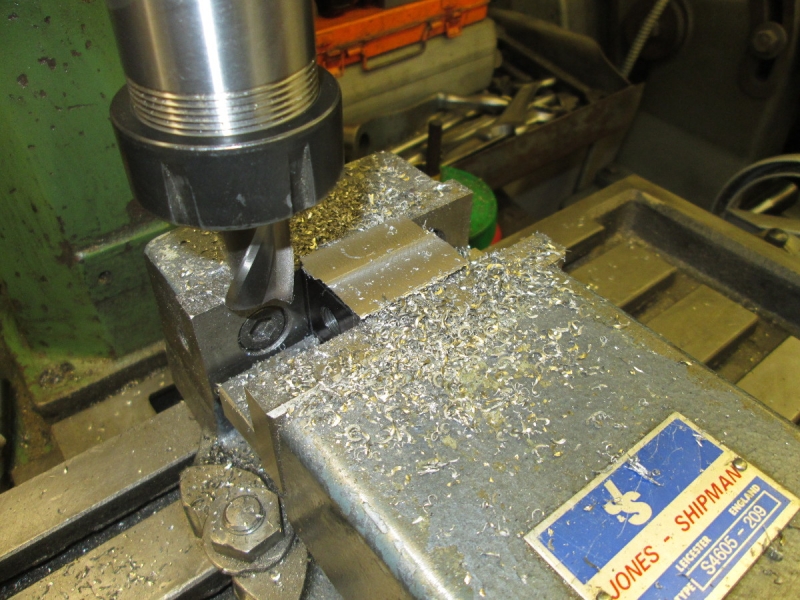
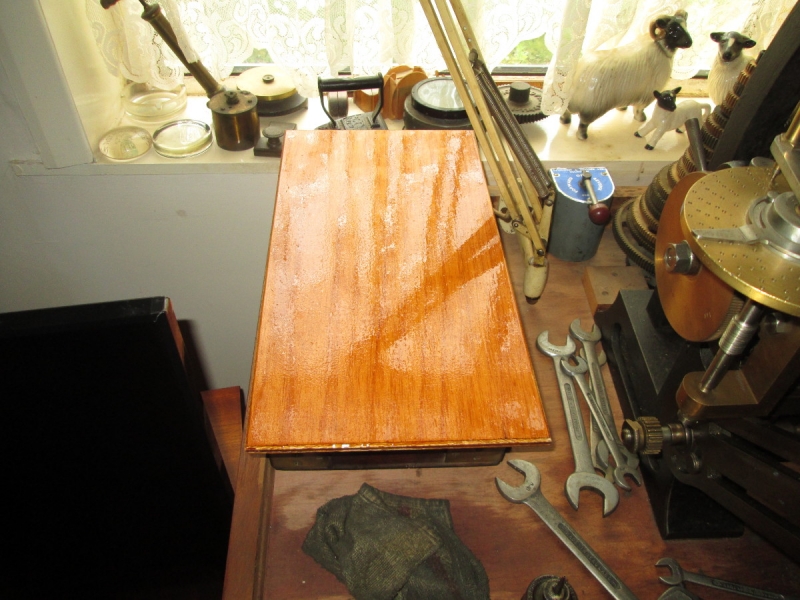
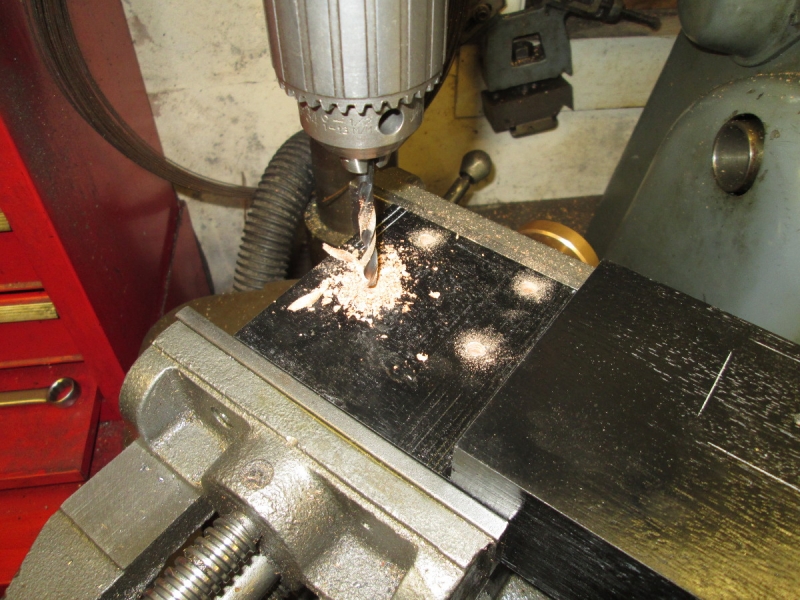
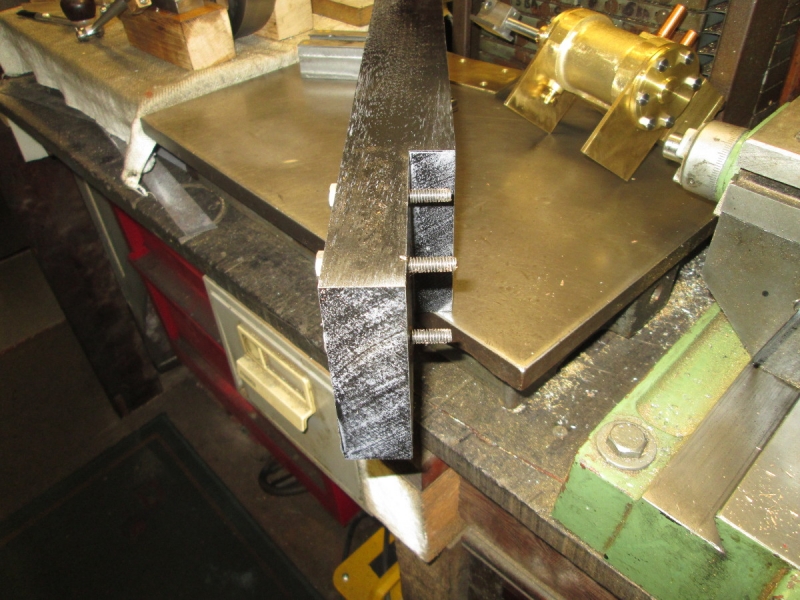
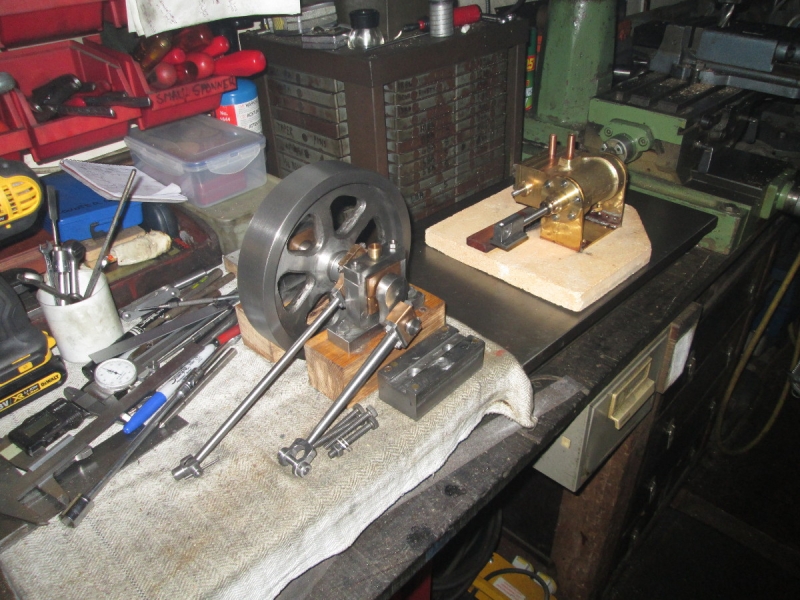
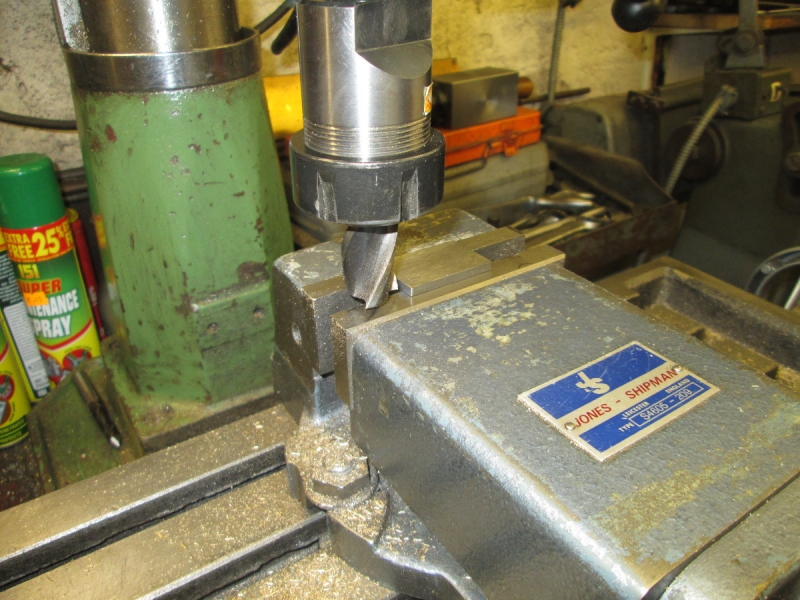
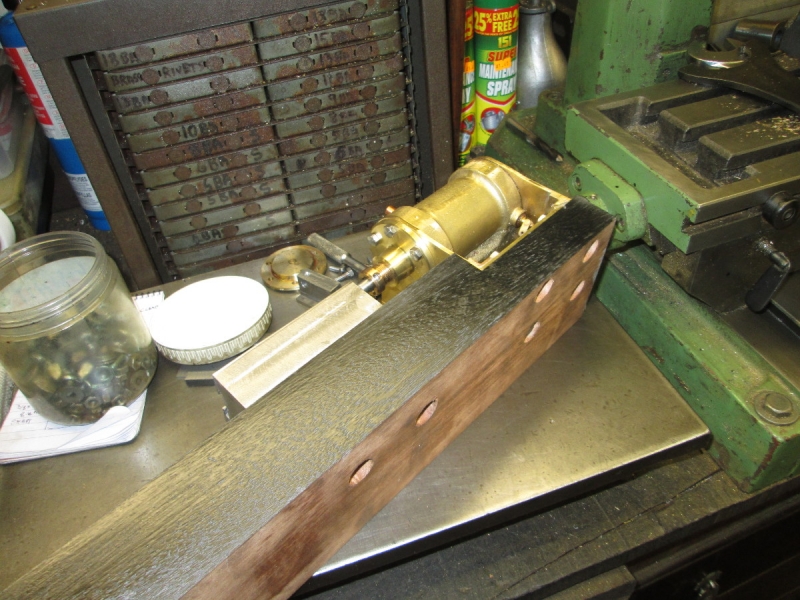
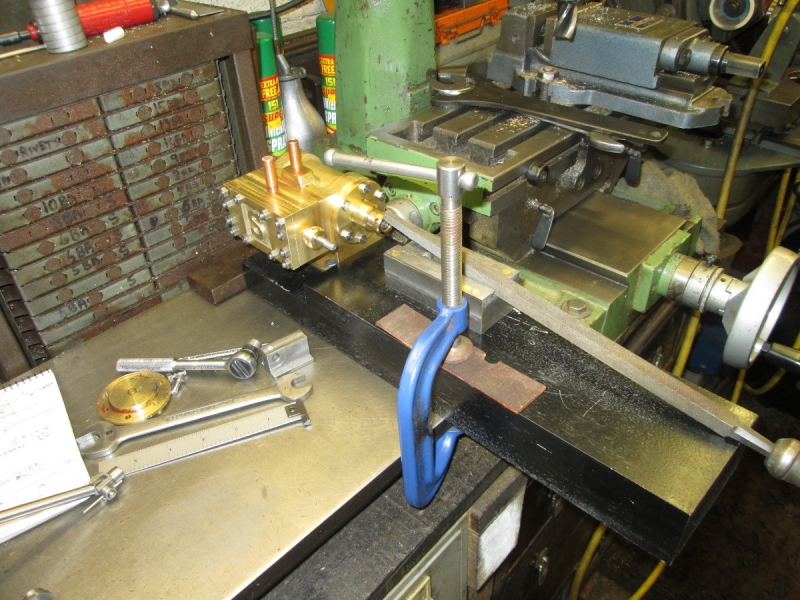
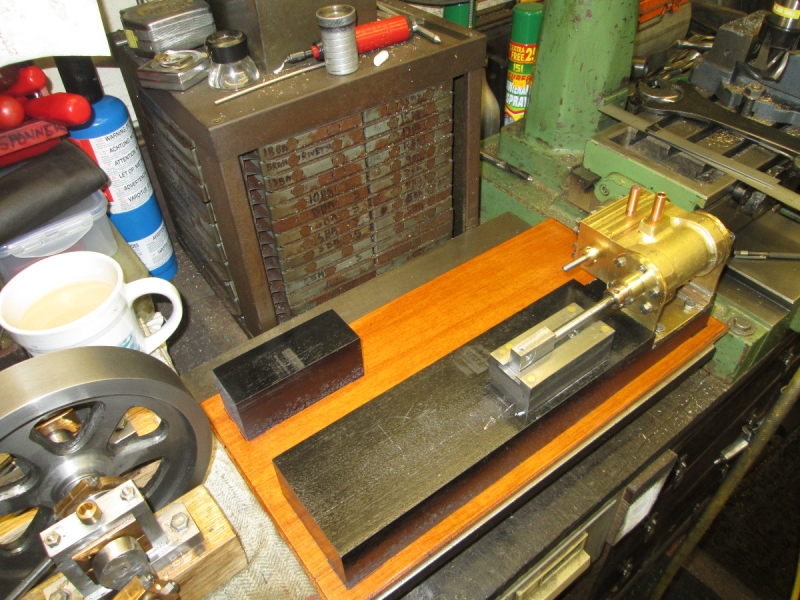
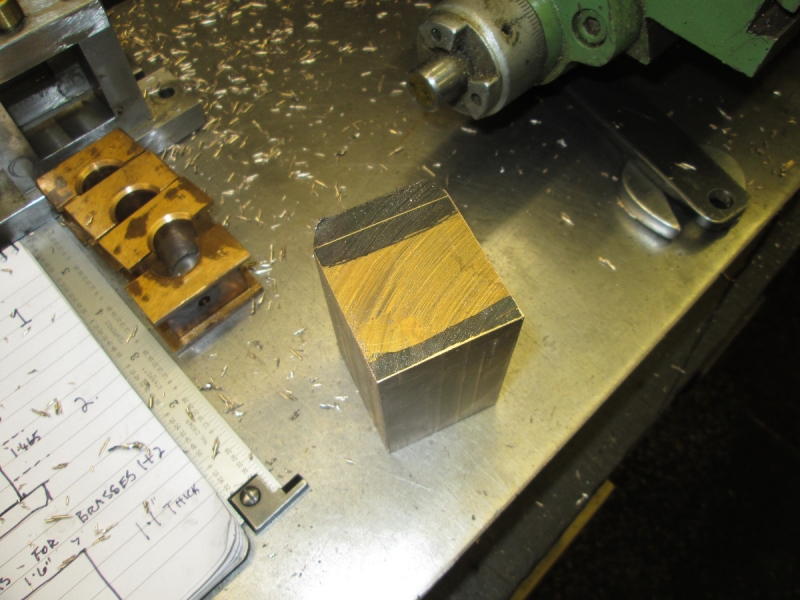
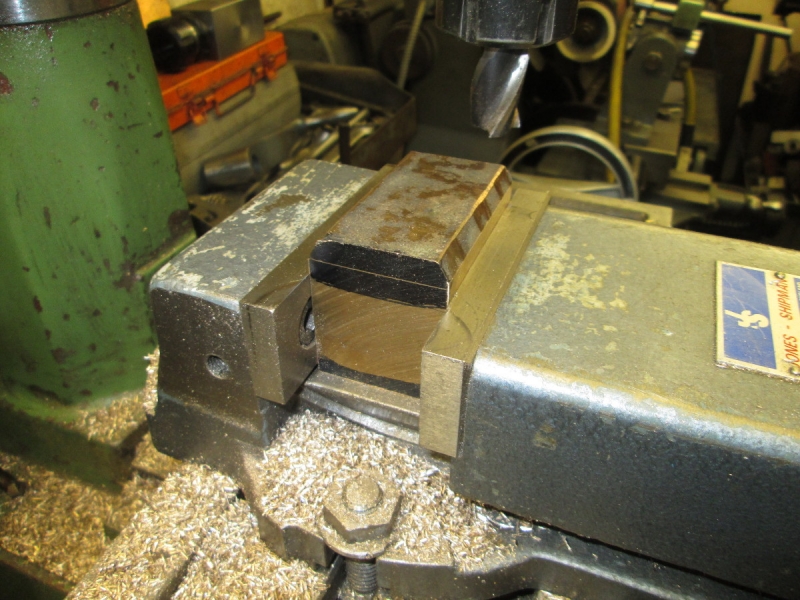
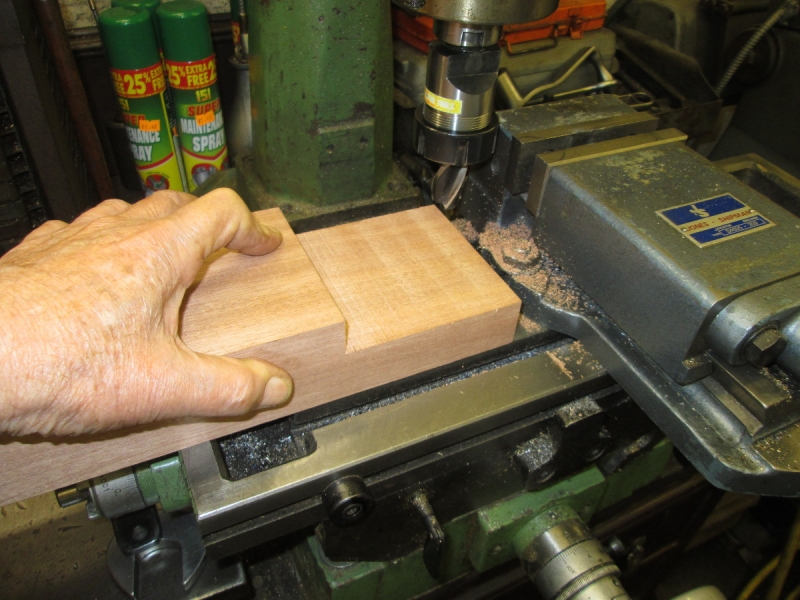
Have you ever noticed how good your eye can be at picking up discrepancies? When I first picked the wood for the bed up from B&D, to my eye, the rebate for the cylinder didn't look quite right. I measured it this morning and it slopes up to the end by .025". I mulled over how to correct it and then it struck me, I had the ideal tool! I set the cutter to the low shop and milled the rest of it off. Perfect solution but then I had to vacuum up the wood dust, I hate it on my machines, quick way to corrosion!

Image

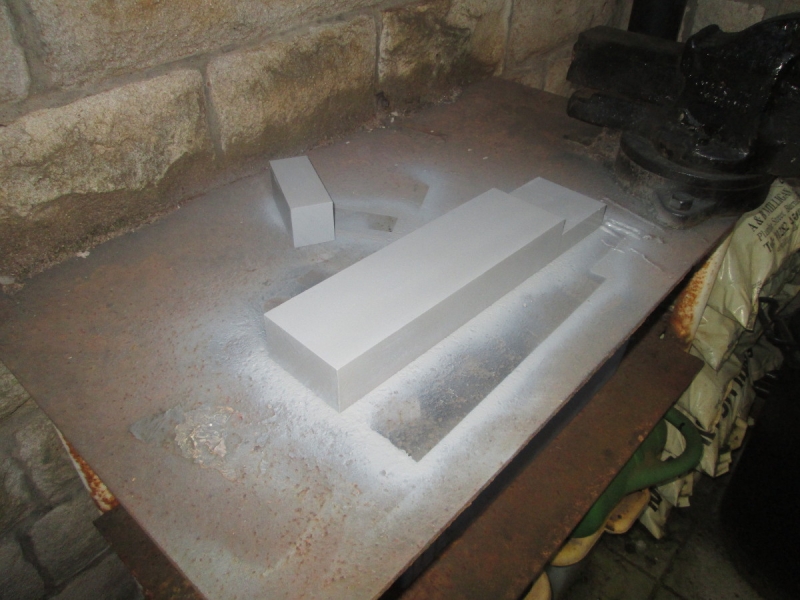
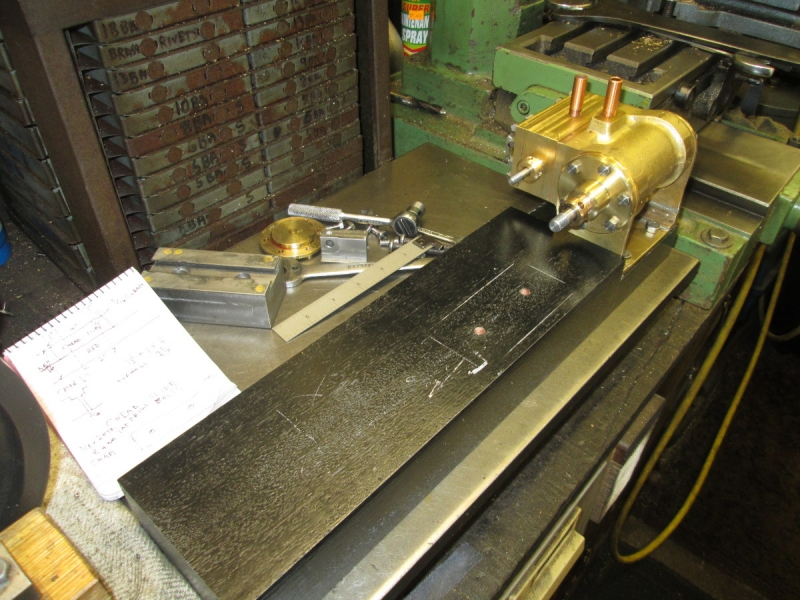
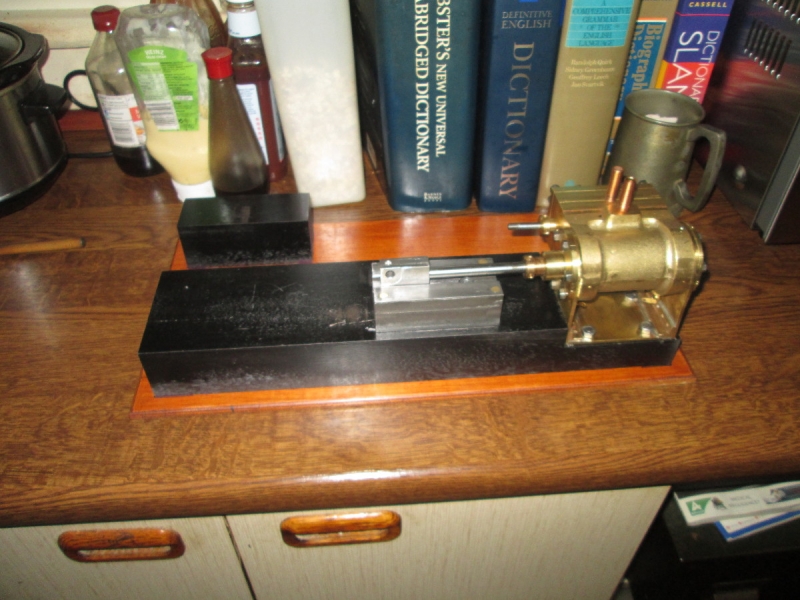
Then it struck me that the promised rain hadn't arrived so I grabbed the chance to get outside onto the welding bench and give both the beds a coat of primer. (I've decided they will be black and the base clear varnish over the natural grain.)

Image

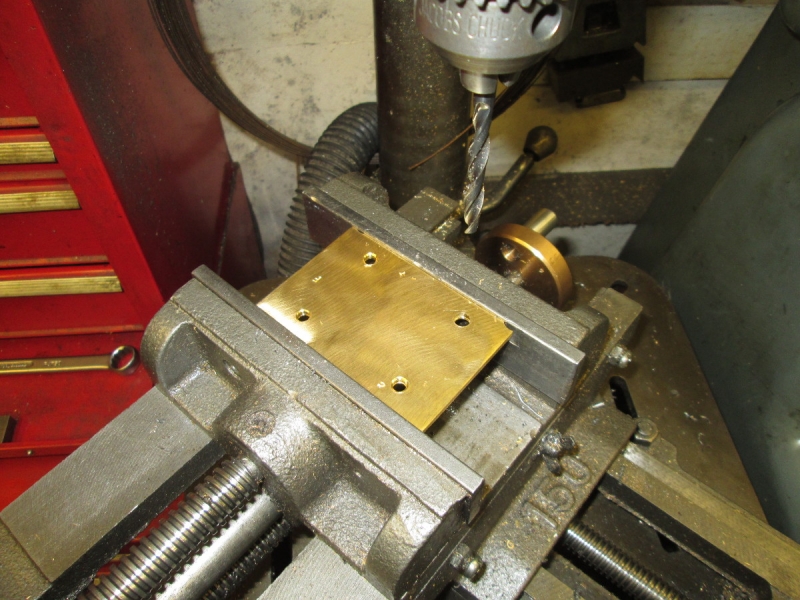
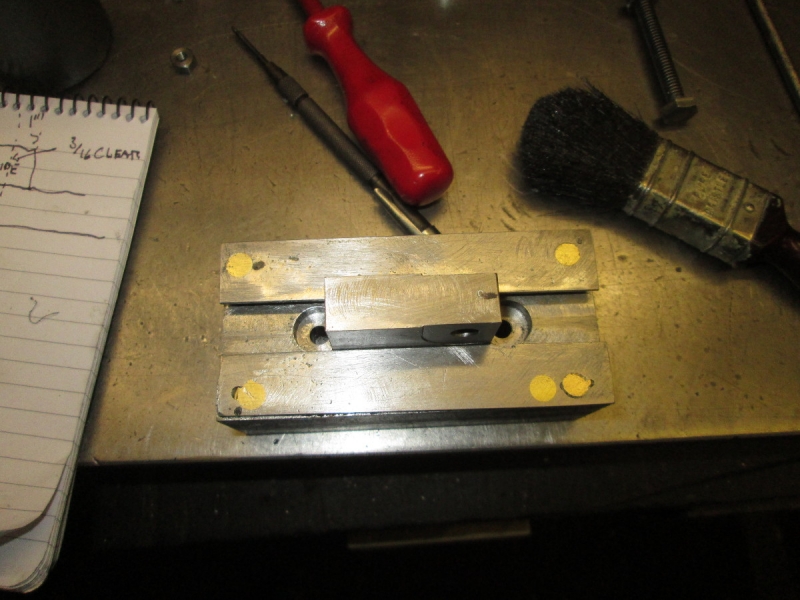
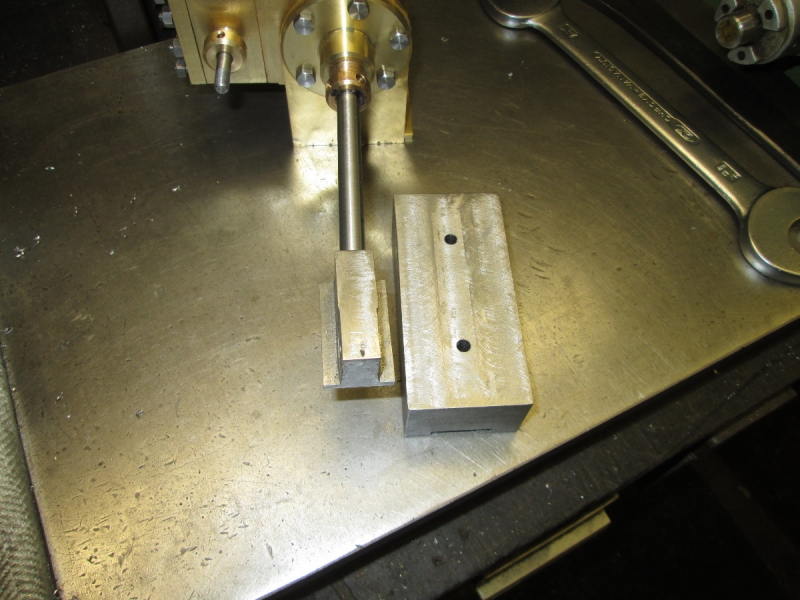
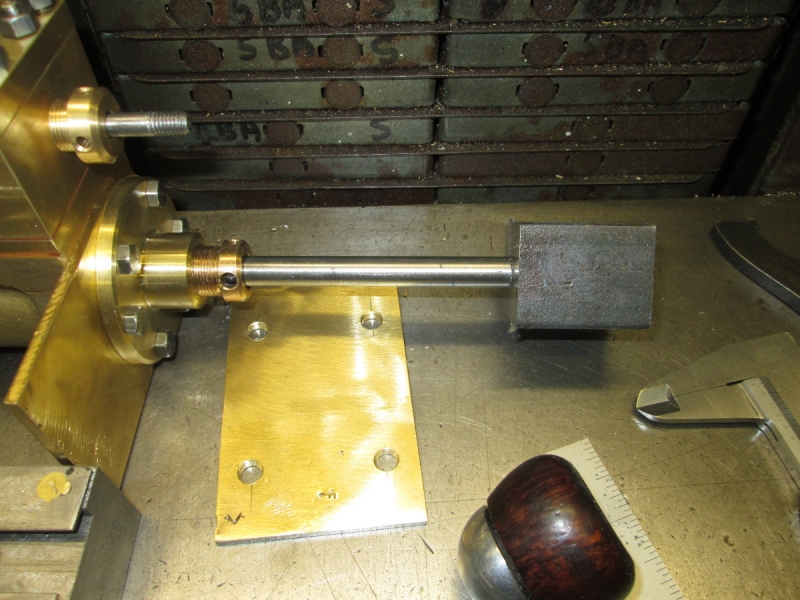
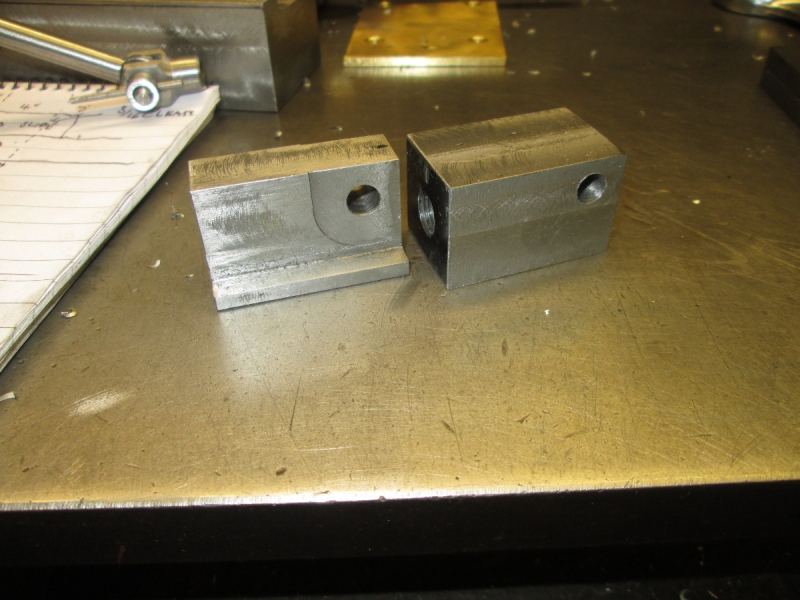
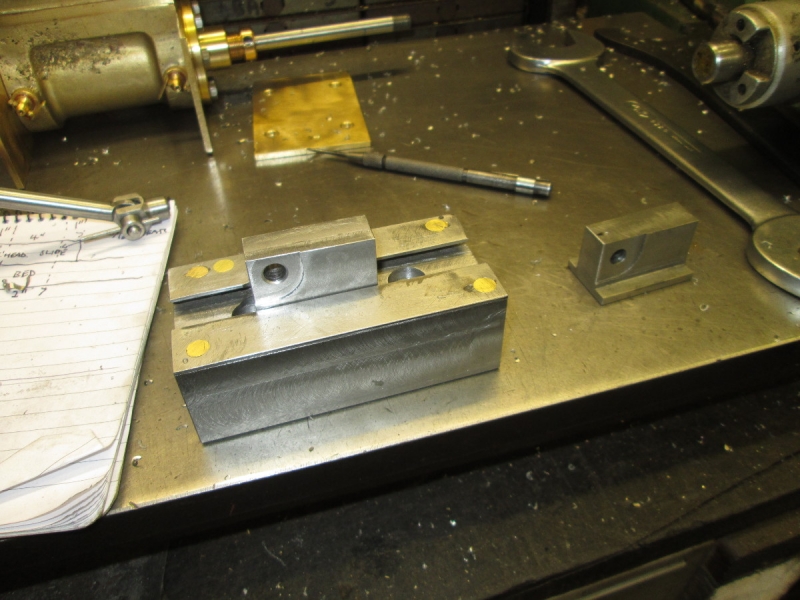
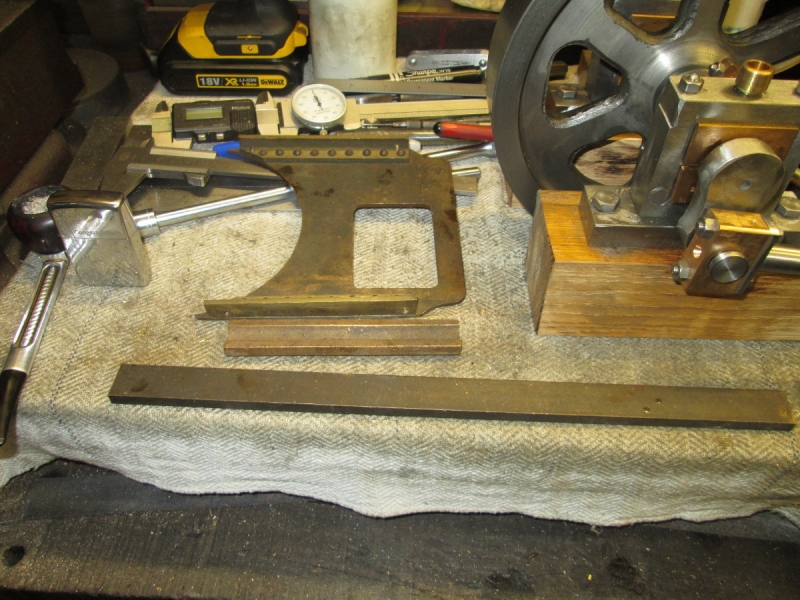
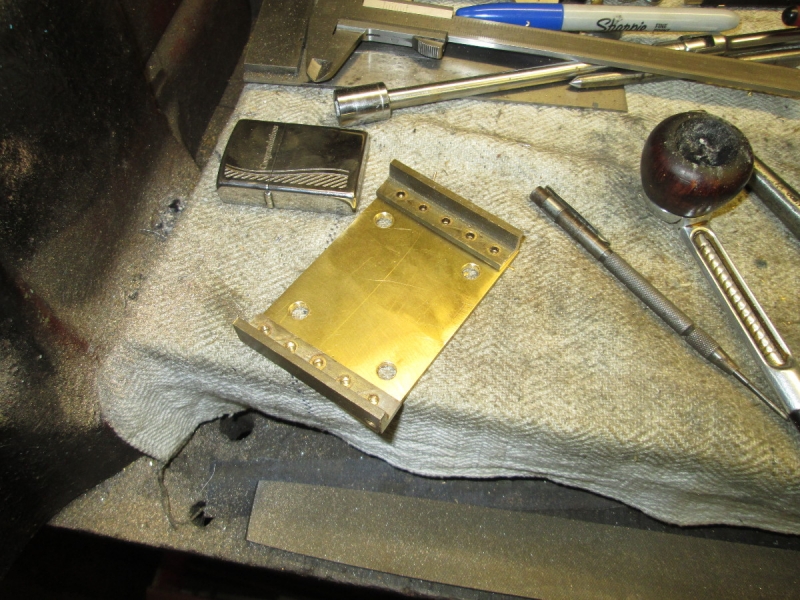
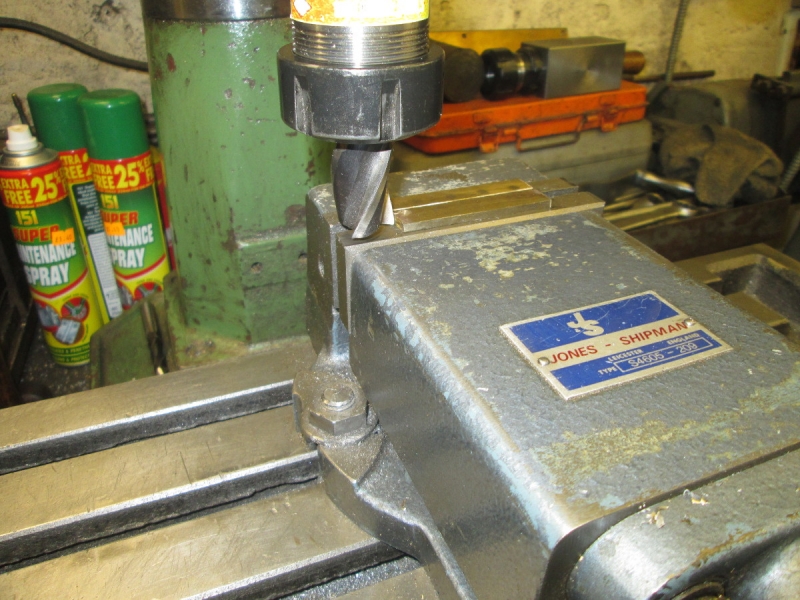
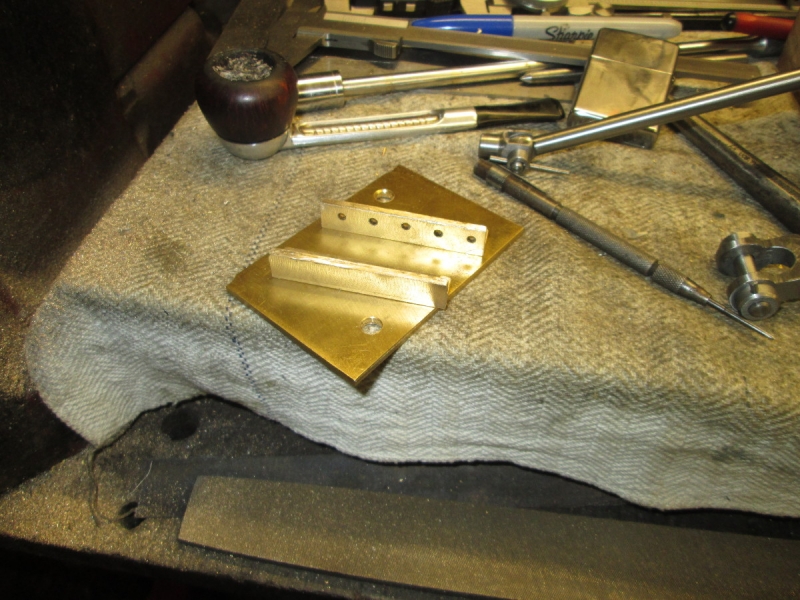
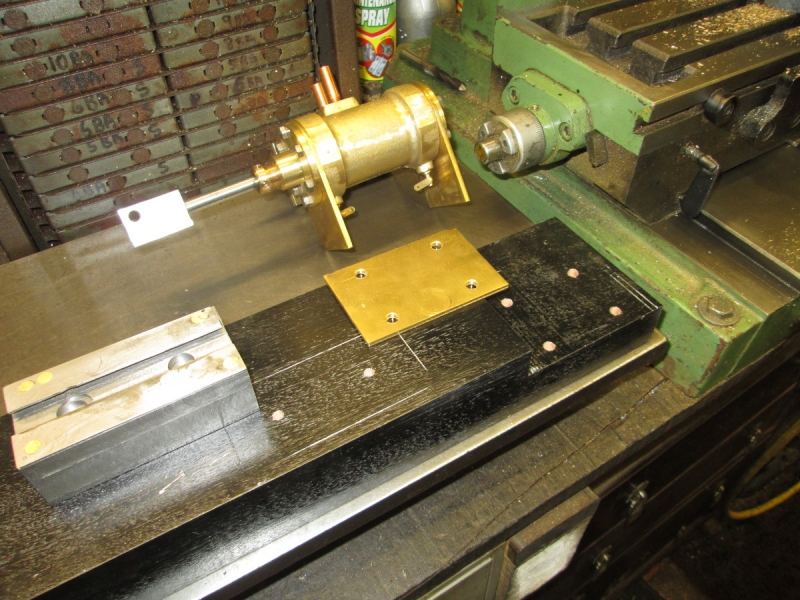
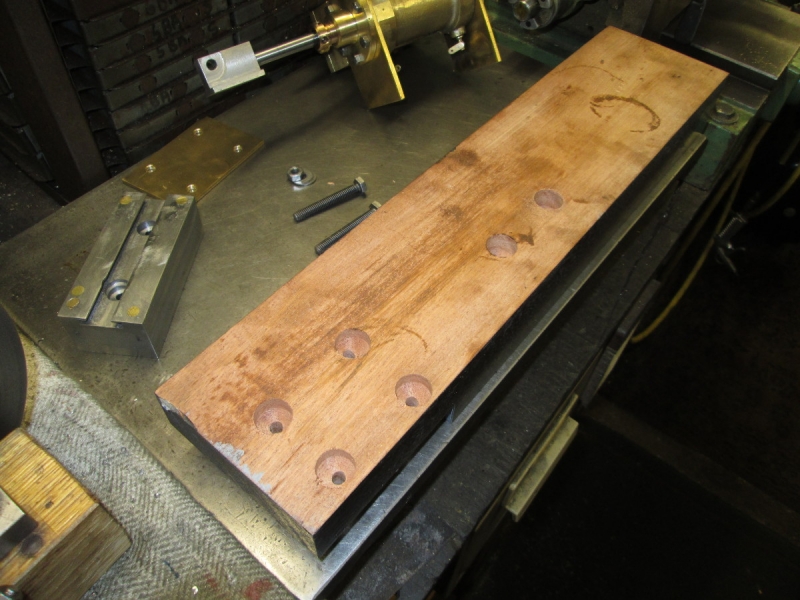
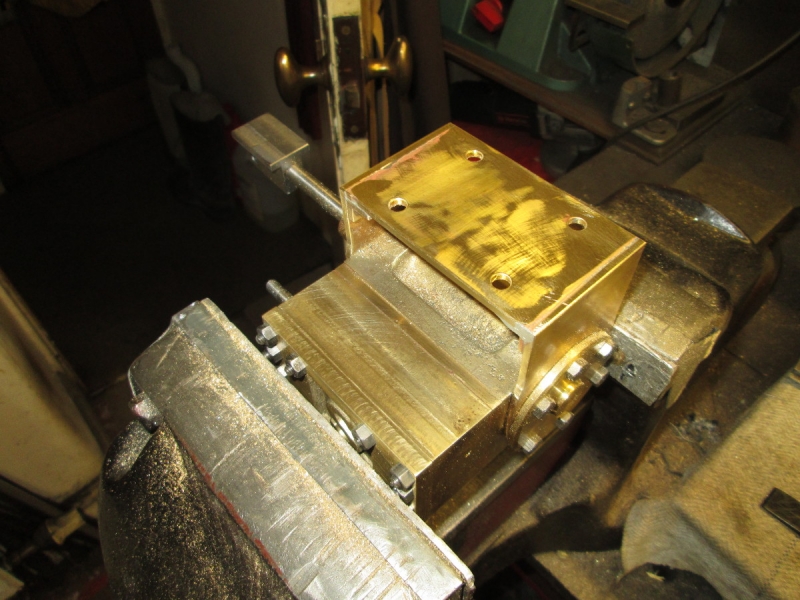
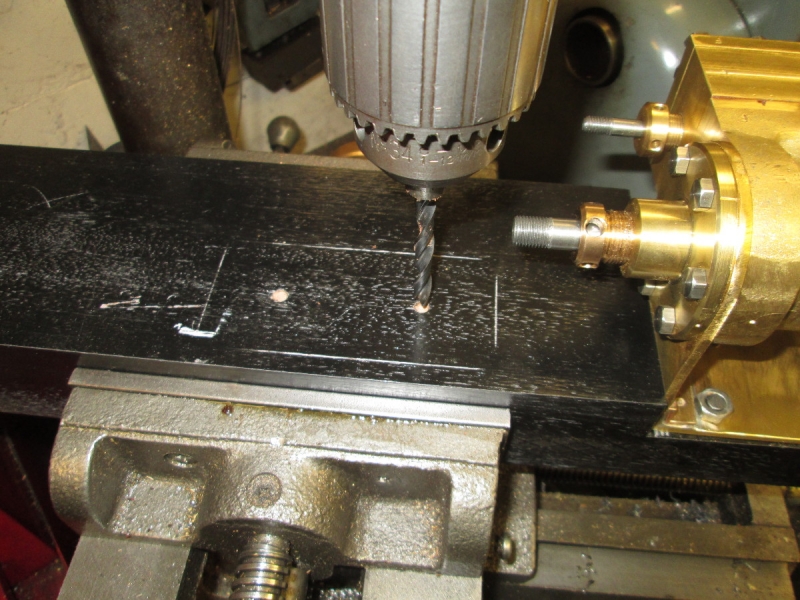
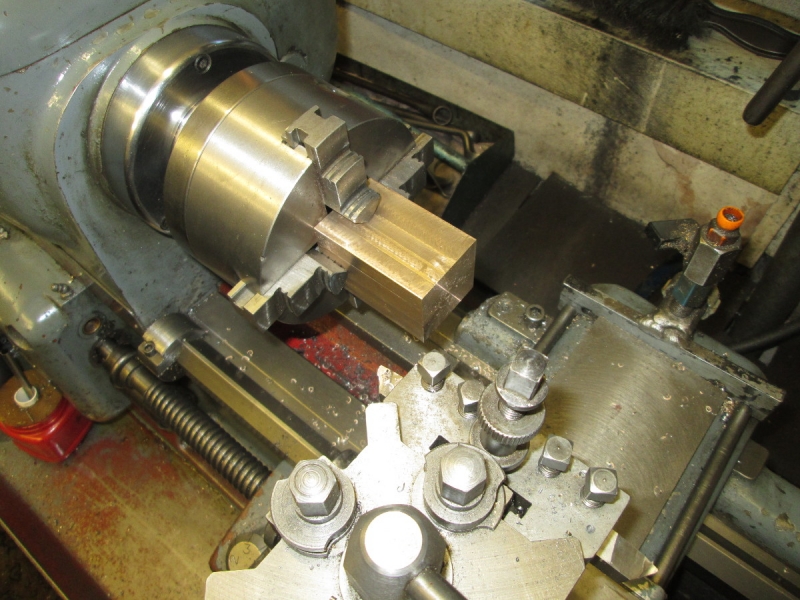
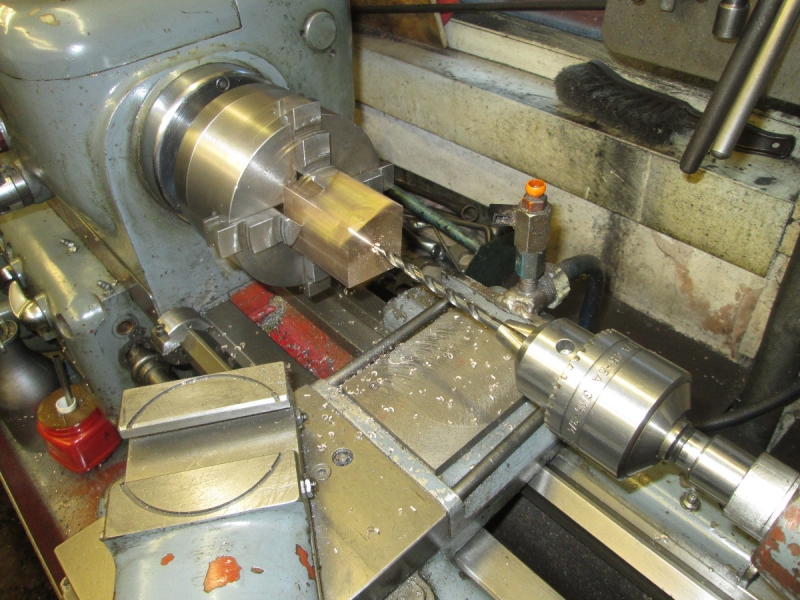
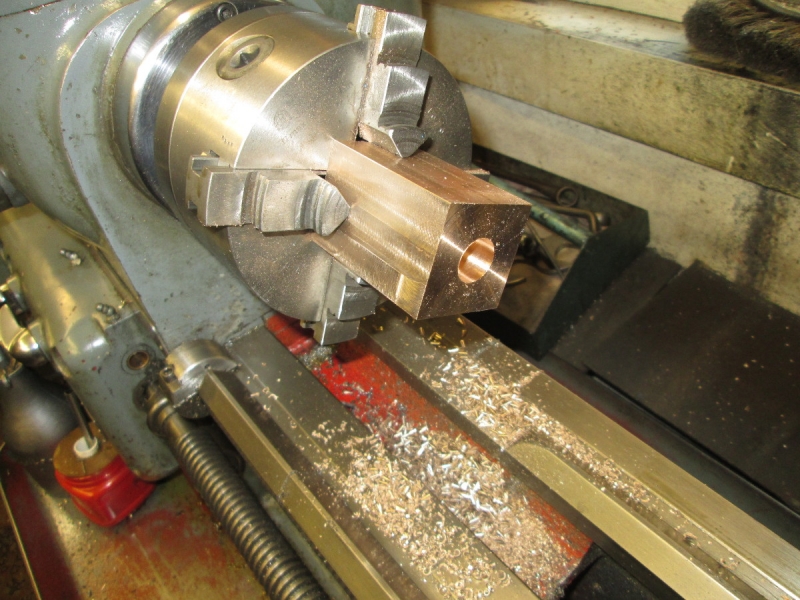
Next little adjustment was to open the holes out in the cylinder bedplate to 1/4", I've decided that the holding down bolts are going to be 1/4"Whit.

Image

Image

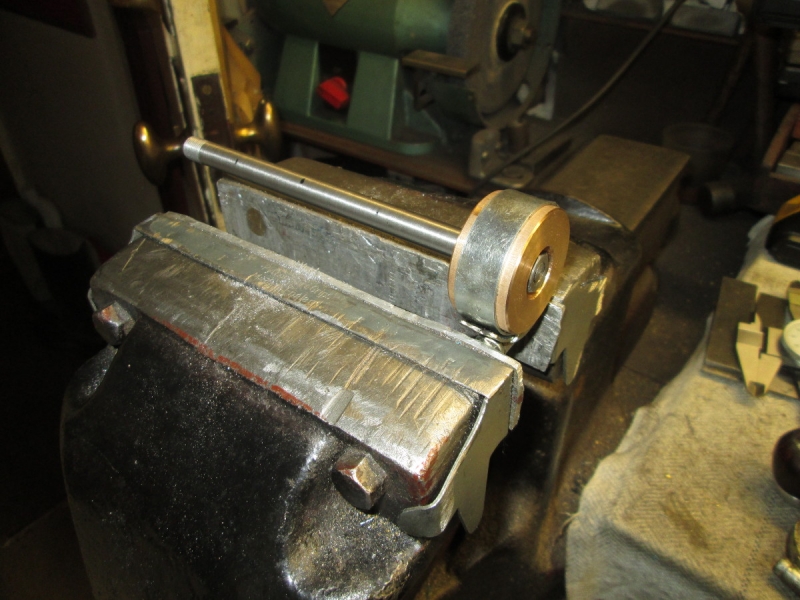
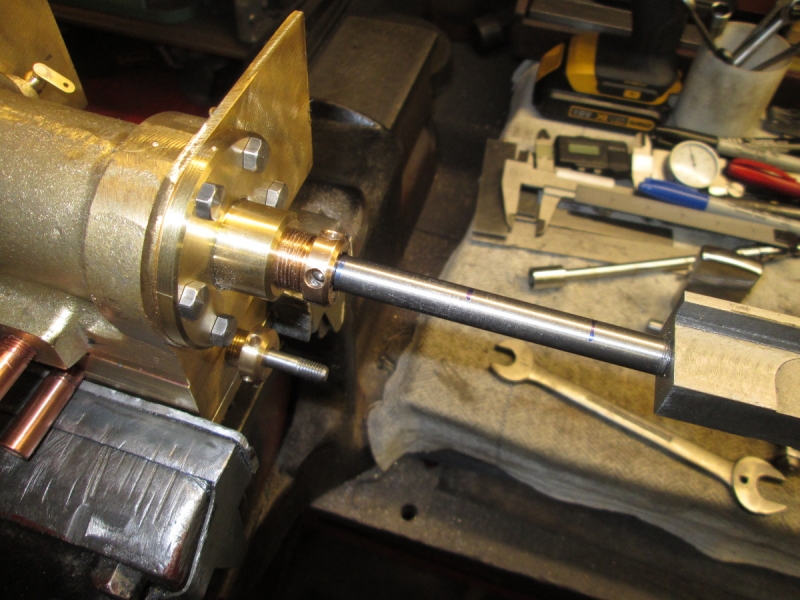
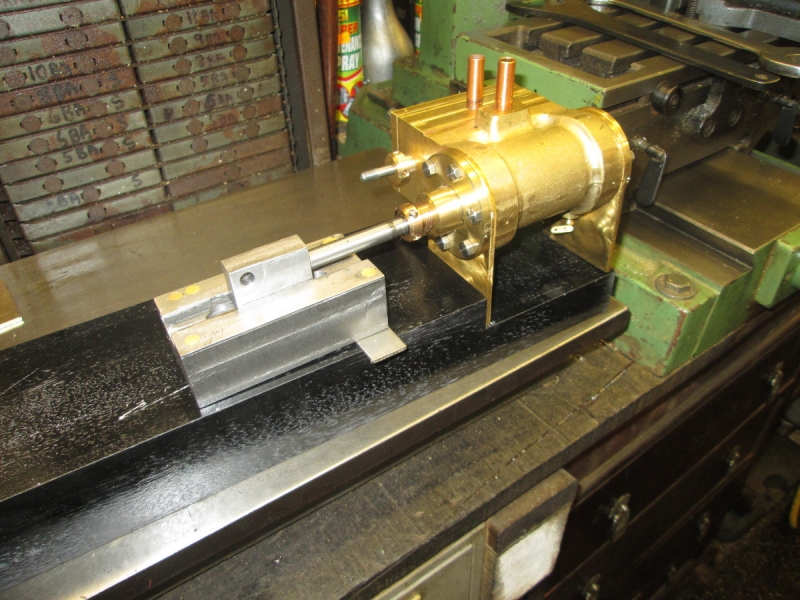
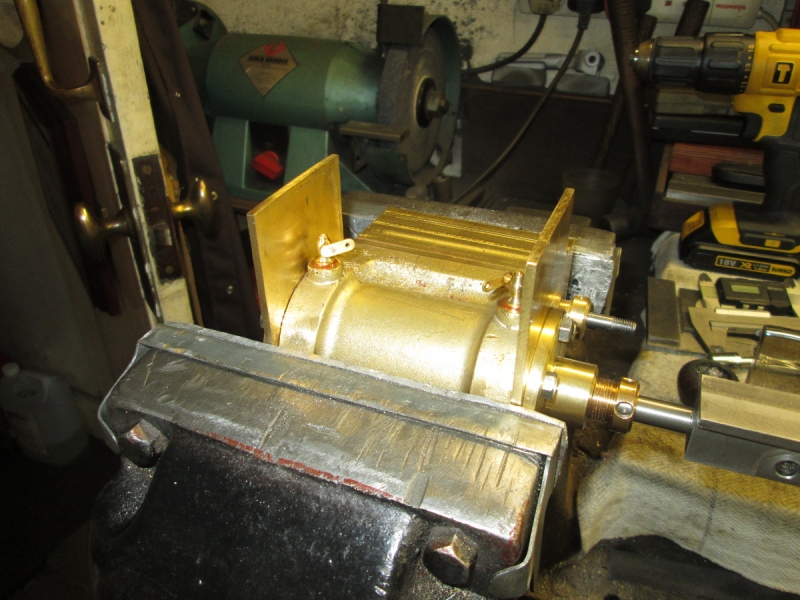
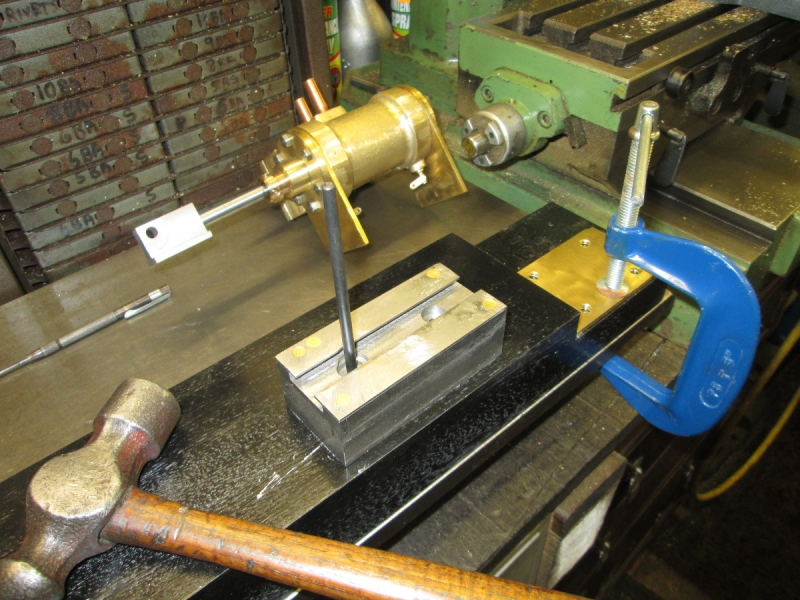
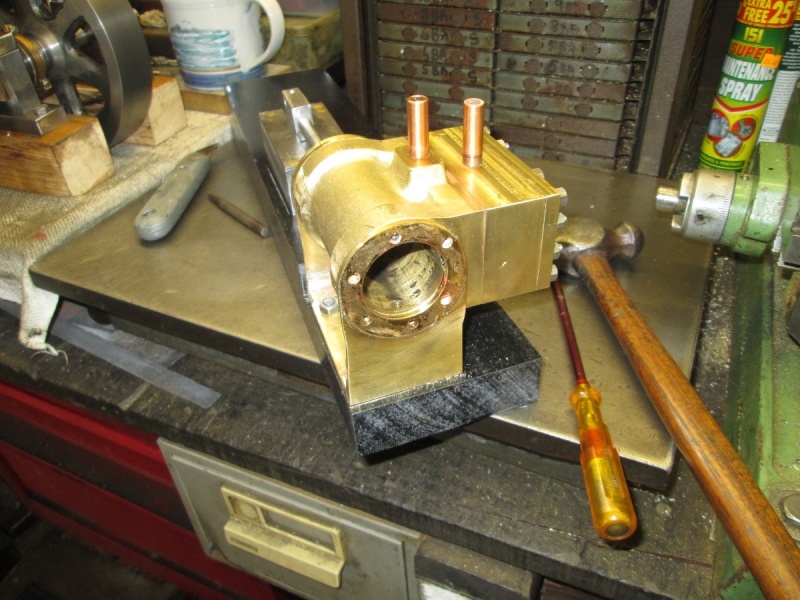
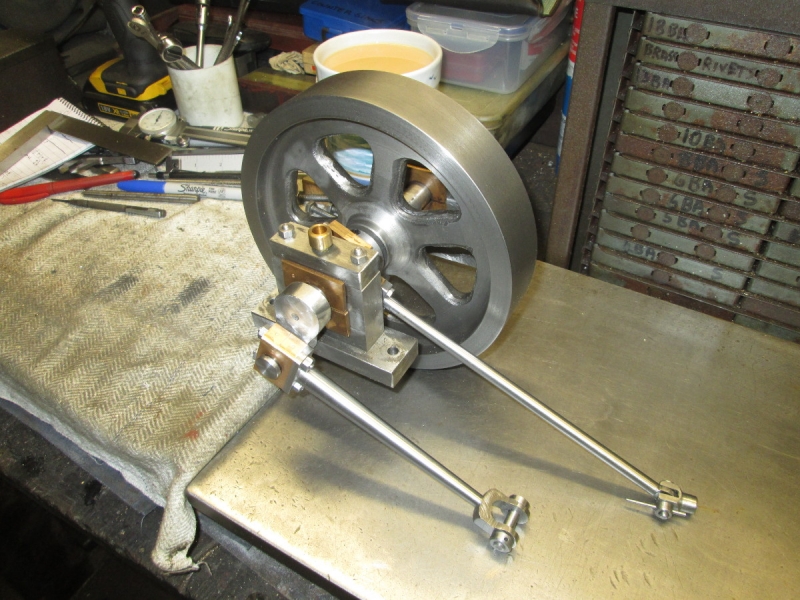
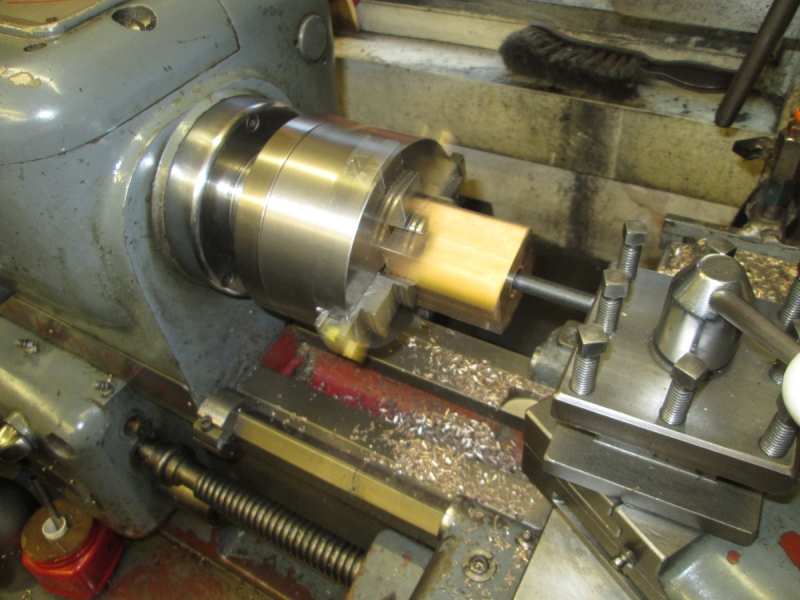
The next little job was to pack the piston with graphited asbestos yarn, my favourite seal for brass cylinders and pistons. Quite amazing how durable it is. Wrap the packing round the groove until is is slightly proud and then compress it with a Jubilee clip. Put plenty of oil in the bore. Leave enough of the piston protruding to engage with the bore, slacken the clip a bit and drive the piston in with a lump of wood. Don't be afraid of clouting it, it's going to be too tight anyway but will soon ease up when you start to move it.

Image

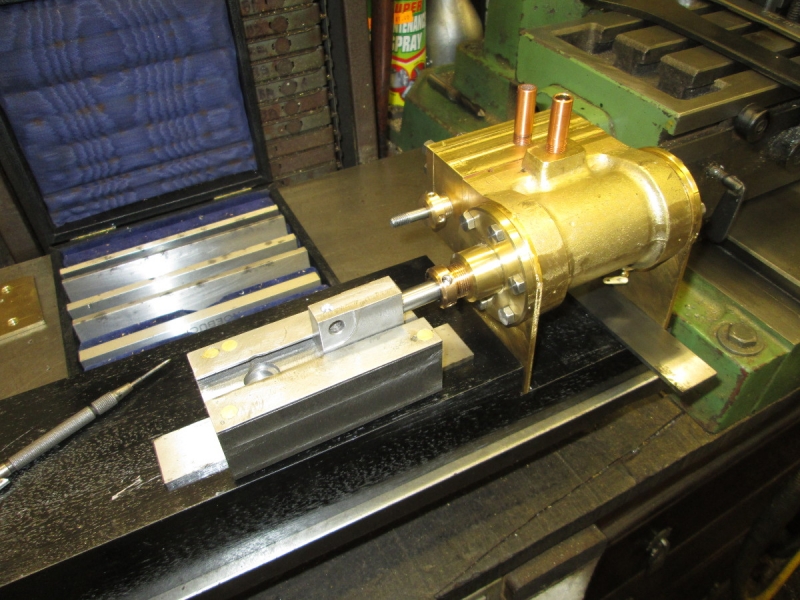
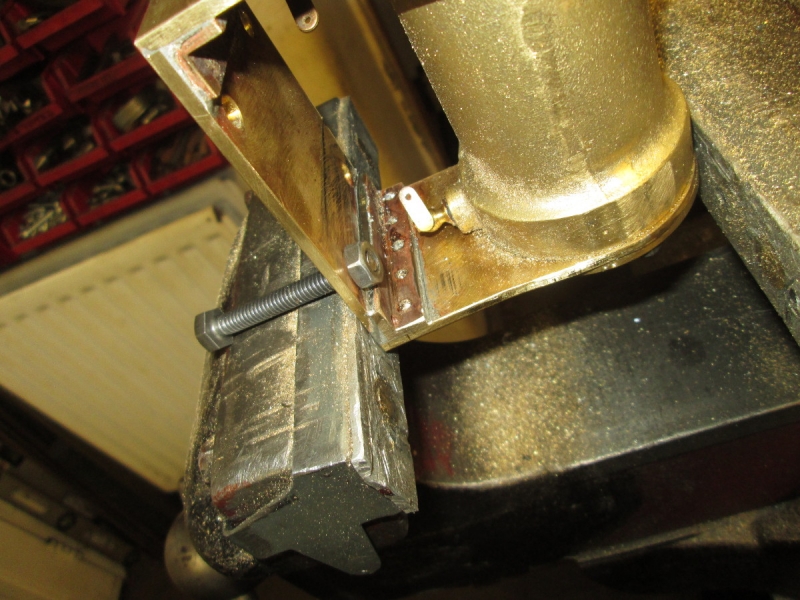
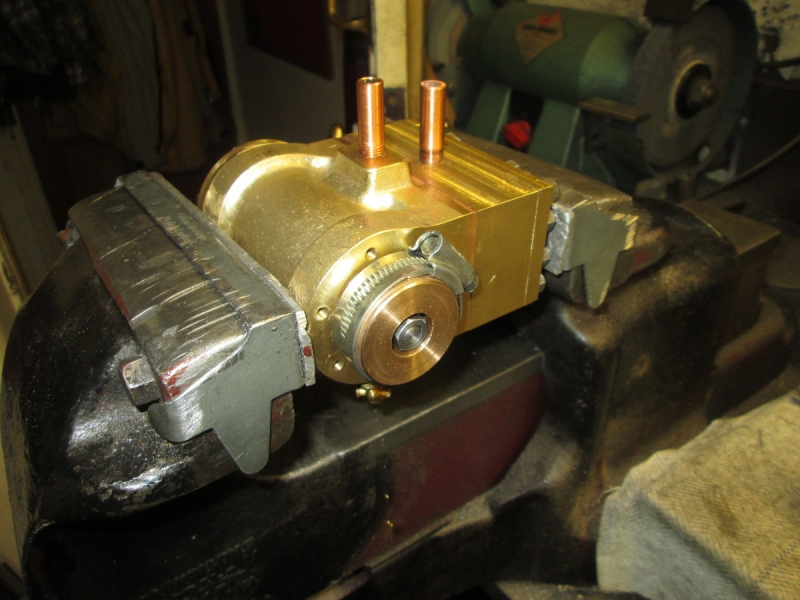
More packing, this time the glands.

Image

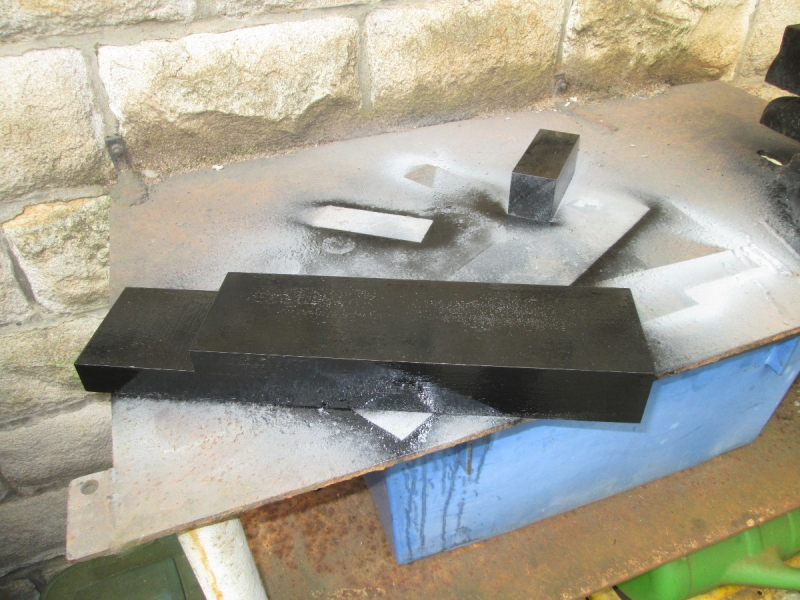
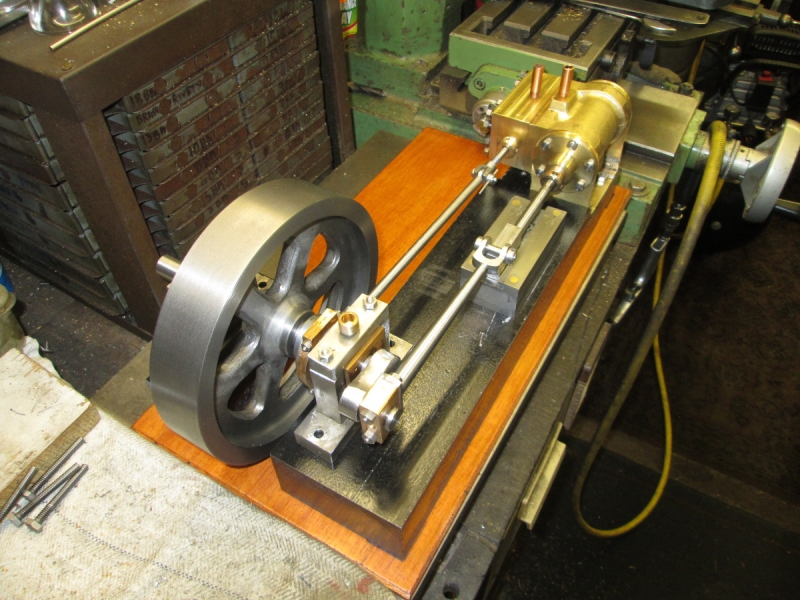
While I was doing that it struck me it was still dry and the primer had been drying for over an hour.... So out into the yard and a coat of black paint. Strike while the iron is hot.

Image

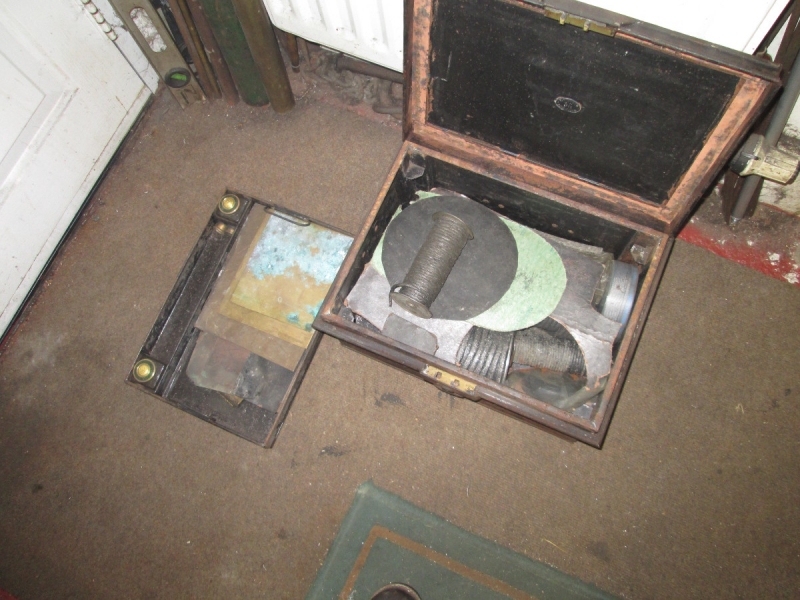
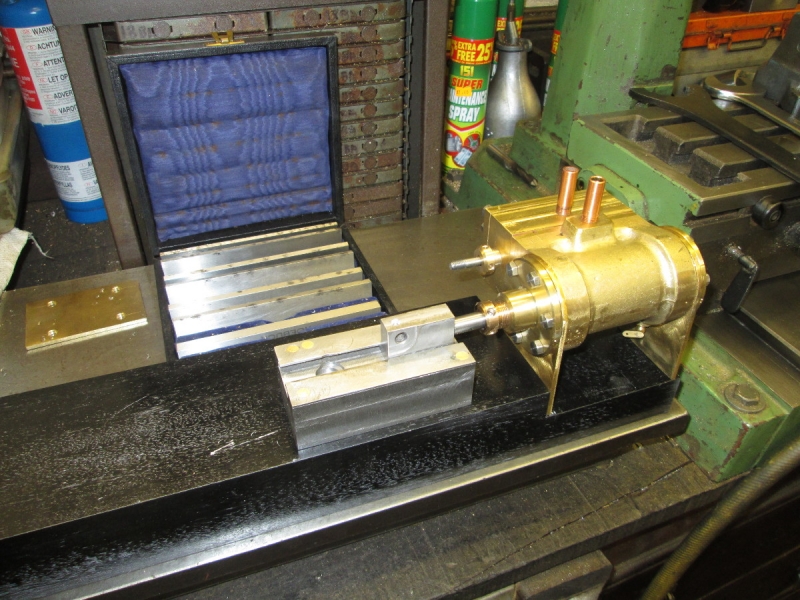
I had to dig another treasure chest out from under Johnny's lathe. I needed more packing yarn.

Image

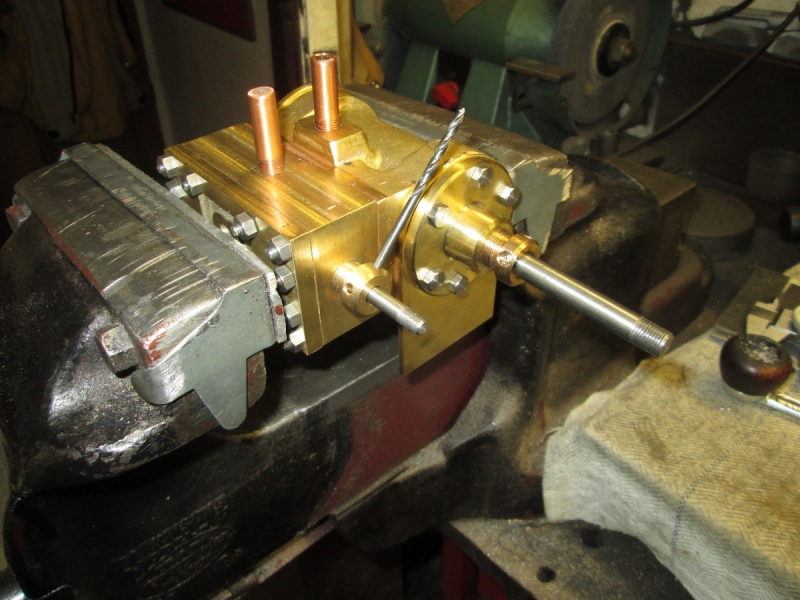
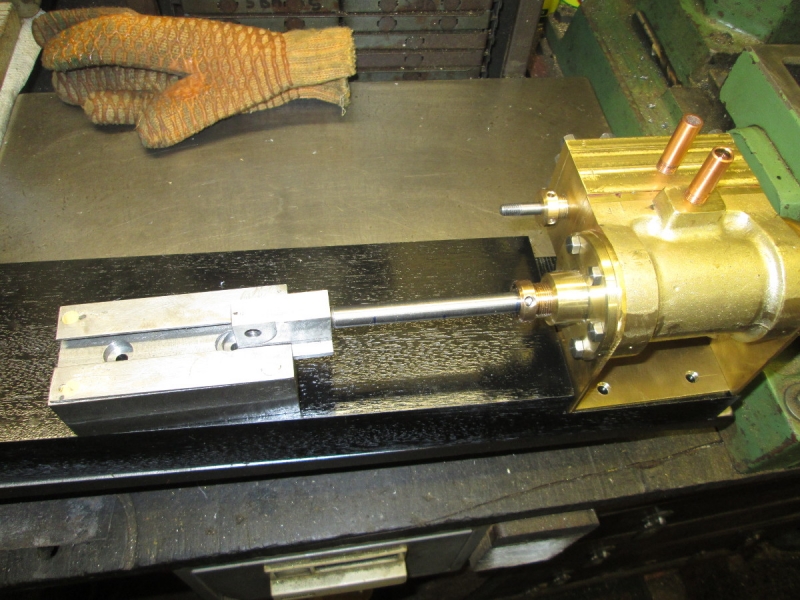
Then another packing session on the glands.

Image

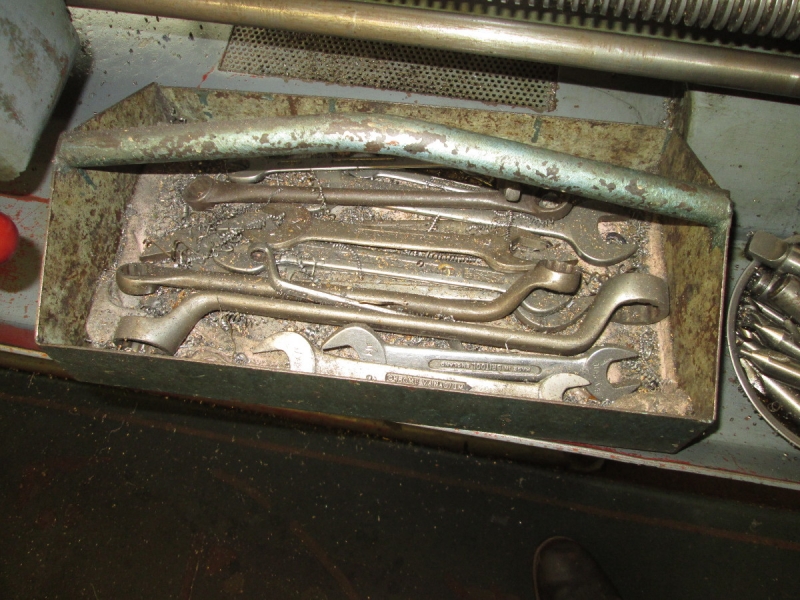
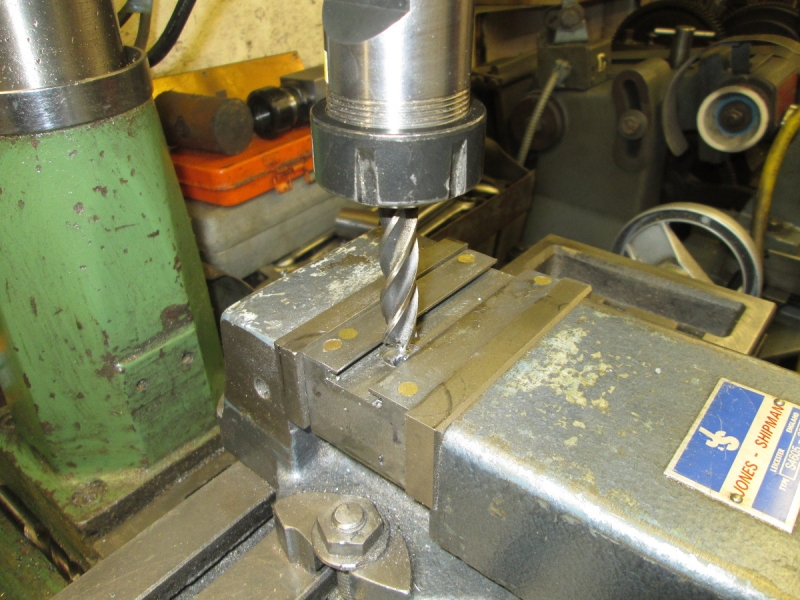
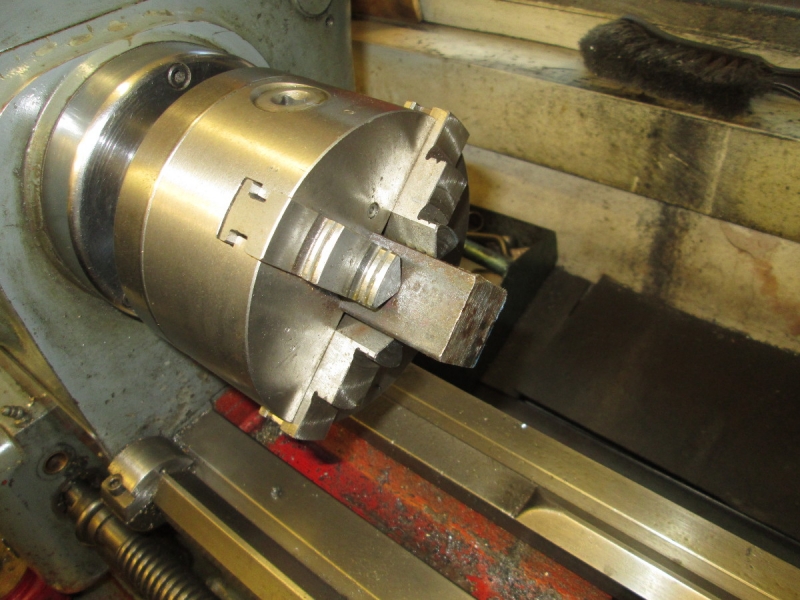
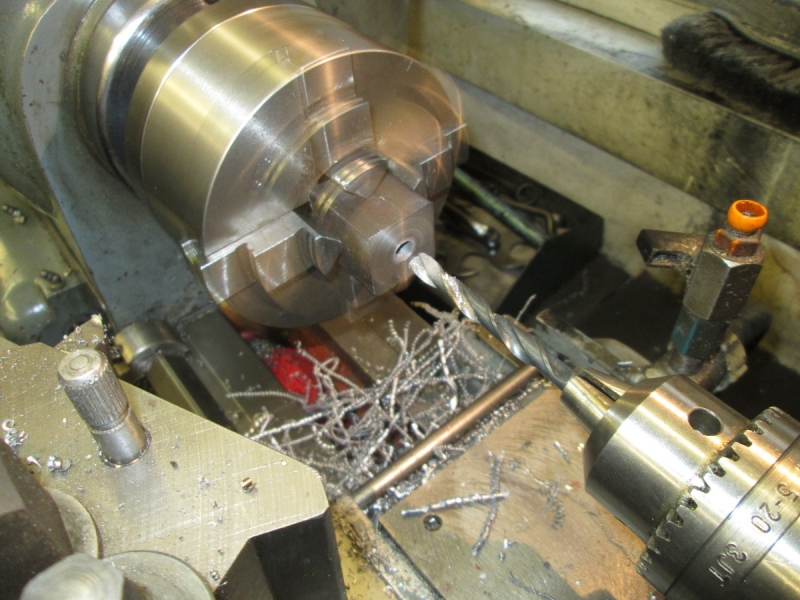
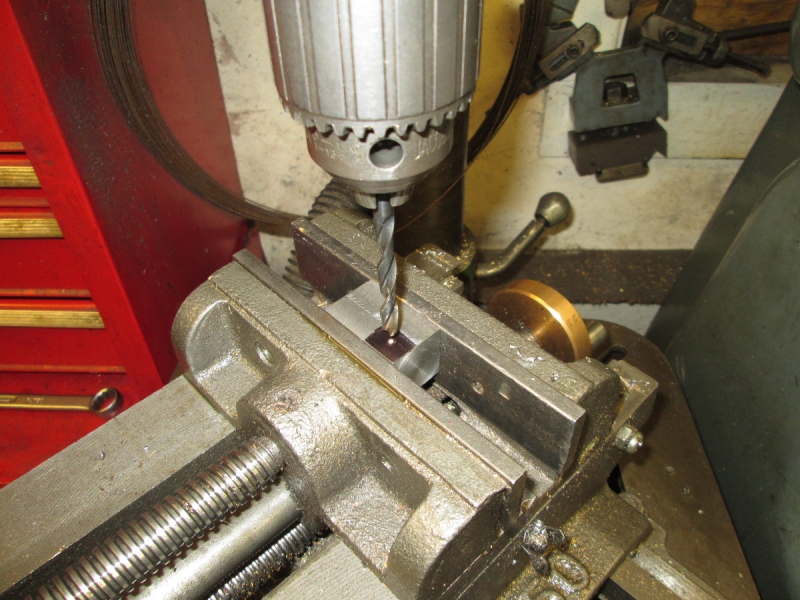
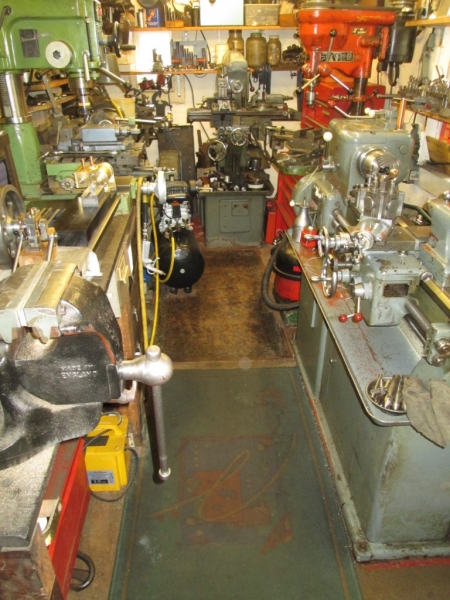
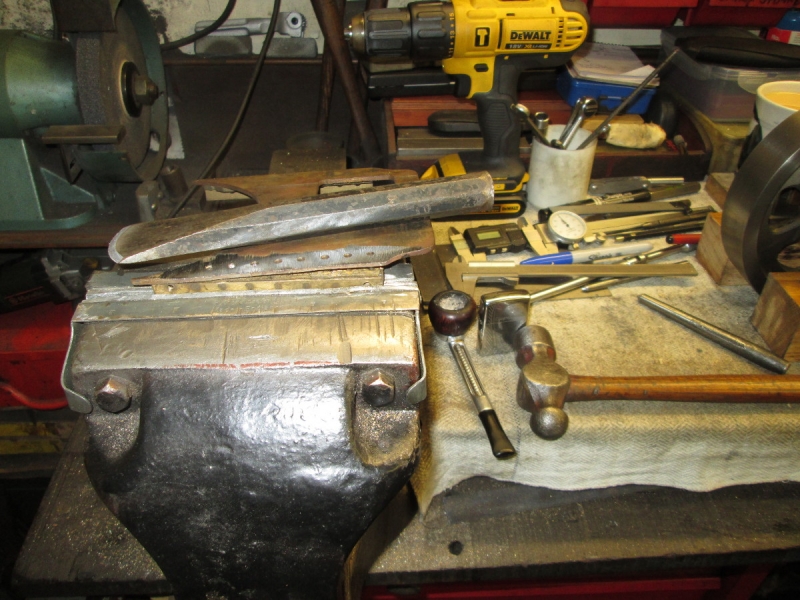
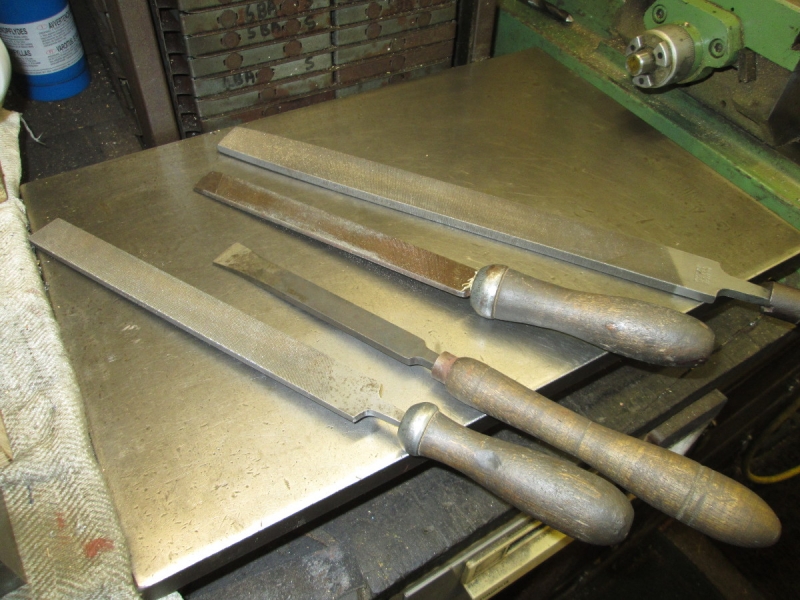
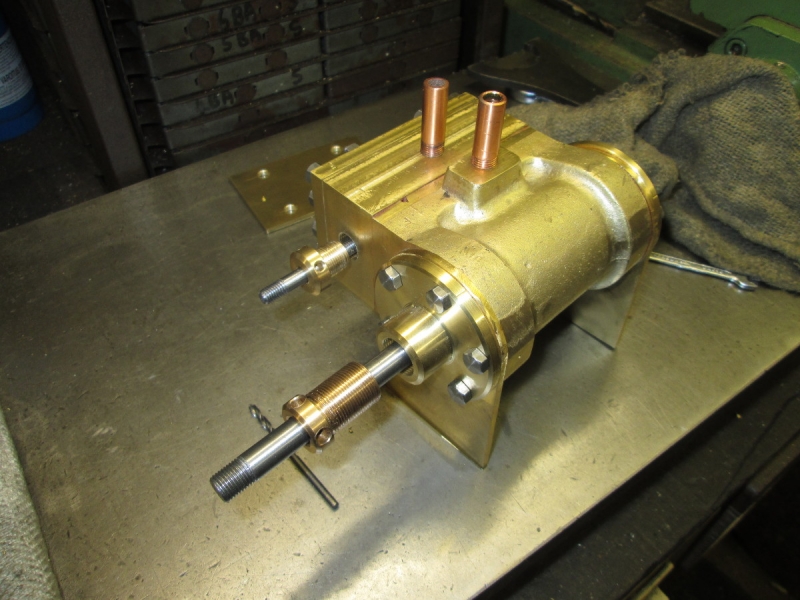
While I was getting a drill to use as a tommy bar for the valve rod gland I dropped a drill into this mess which sits behind the headstock. So I had to retrieve it and decided that after god knows how long sitting on the bed and collecting chips, my remaining time in the shed this morning would be well spent cleaning the spanners up and ditching the chips. These are all spanners which occasionally come in handy and it's good to have them to hand. I did that and for an encore swept Mrs Harrison as well and called it knocking off time. Two and a half hours on my feet is enough!
Stanley Challenger Graham
Stanley's View
scg1936 at talktalk.net

"Beware of certitude" (Jimmy Reid)
The floggings will continue until morale improves!
User avatar
Stanley
Global Moderator
Global Moderator
Posts: 90761
Joined: 23 Jan 2012, 12:01
Location: Barnoldswick. Nearer to Heaven than Gloria.

Re: SHED MATTERS 2

Post by Stanley »

Image

I'm at the stage where I have a bunch of finished parts that need knitting together to make an engine. In order to do that we need to start thinking about fastening them down to the bed and in the matter of the crosshead slide, this means drilling it clearance for a 2BA stud and counter-boring the hole at the top not only to recess the nut below the surface but to accommodate the socket to tighten it up. I was idle and decided I could drill it under the pillar drill and counterbore it with an end mill at the same setting. Wrong!! The vise isn't stable enough and the counterbore was off centre. Time for a rethink!

Image

I did what I should have done in the first place and got into the VM. No problem at all of course....

Image

It took longer than it should have done but we got there in the end! (Is this slide jinxed?)

Image

The piston is of course effectively jammed in the bore until the packing is eased and as I wanted it to slide so I can find the centre so I can locate the slide on the bed for marking the holding down bolts I got the cylinder in the vise and worked on it until I had the piston sliding reasonably well in the bore. I marked the rod with a Sharpie.

Image

Then I had a trial fit..... Two things are obvious. The first is that the slide needs 1/8" skimming off the base to get it aligned with the rod. The second, and a bit of a shock, is that the crosshead is crooked on the rod! I couldn't immediately see what had gone wrong so got on with adjusting the slide base.

Image

I got set up, took the 1/8" off, cleaned the chips up and broke all the edges.

Image

Here it is ready for fitting and next to my little problem. While I was milling the slide I thought about the crosshead and realised why it was crooked. You may not remember, but when I looked for the stock to make it I found a piece that was perfect, almost the right size, dead square and even had a hole drilled near tapping size for the piston rod centred in the end. That was when I made the assumption that, like the stock, the hole was square. It obviously wasn't but I never noticed when I drilled and tapped it. I could cheat and make it fit but decided this was a bridge too far. I shall make a new crosshead with an accurate drilling.

Image

I had a look in the offcuts in the tray on the HM and found this. There is a crosshead inside there and it's very close to the right size. So that's the job tomorrow first thing, have a fresh start! The moral of the story is don't make lazy assumptions!
Stanley Challenger Graham
Stanley's View
scg1936 at talktalk.net

"Beware of certitude" (Jimmy Reid)
The floggings will continue until morale improves!
User avatar
Stanley
Global Moderator
Global Moderator
Posts: 90761
Joined: 23 Jan 2012, 12:01
Location: Barnoldswick. Nearer to Heaven than Gloria.

Re: SHED MATTERS 2

Post by Stanley »

Image

Friday is a busy morning and it was after 8AM when I got to the bench but that's OK, there's no rush. We're looking for a better crosshead this morning and I have a good feeling about it. Just for once I've made a good decision! The stock is nominal 1" black bar and so is just over 1" which is a good thing because the slipper of the crosshead is exactly 1". As it's square, dead easy to turn both ends square in the 4 jaw and at the same time adjust the length.

Image

The other advantage is that being square, it's dead easy to get an accurately centred drilling for tapping it 3/8" X 26tpi and know that it is dead parallel with the material! This is a good thing! I tapped it full depth.

Image

No harm in checking! It's dead straight on the end of the piston rod.

Image

Then into the mill and get the height right. As soon as I started cutting I realised I needed a bit of attention to my cutter. I have been a bit lazy and neglected backing off and gulleting so I had a good go at the 3/4" end mill and had another go. Far better, a nice clean cut and I soon had the top and bottom milled with a very nice finish. I didn't fully realise when I got the T&C grinder how essential it is to good work if your mill has weak points. I've never bought a cutter yet and at last I think I'm getting the hang of sharpening them. I've set up for milling the sides down to the 1" width and am ready to go straight into it tomorrow. I like this morning.... this is going to be a far better crosshead than the first.
Stanley Challenger Graham
Stanley's View
scg1936 at talktalk.net

"Beware of certitude" (Jimmy Reid)
The floggings will continue until morale improves!
User avatar
Bodger
Senior Member
Posts: 1285
Joined: 23 Jan 2012, 12:30
Location: Ireland

Re: SHED MATTERS 2

Post by Bodger »

User avatar
Stanley
Global Moderator
Global Moderator
Posts: 90761
Joined: 23 Jan 2012, 12:01
Location: Barnoldswick. Nearer to Heaven than Gloria.

Re: SHED MATTERS 2

Post by Stanley »

Too big for me Bodge! I know my limits.....

Image

On with the crosshead. I used my head and drilled the wrist pin hole while it was still square and easy to hold. I took the opportunity to lift it up a touch which will be better. This one is going to be better than the last!

Image

Here we are, all the edges broken and ready for marking up and cutting the top to size.

Image

After a bit of careful work, here we are. It fits better than the other, is better finished and just about as good as I can make it.

Image

I got the bed out and offered it up. As you can see the 1/8" I took off the bottom of the crosshead is getting me in trouble now but it's no big deal. I have the choice between dropping the cylinder a bit or making the cylinder fit the bed as it is. I choose the latter because that way I can get the cylinder slightly lower and not damage my paint job! That's for tomorrow, a bit of hand work I think!
Stanley Challenger Graham
Stanley's View
scg1936 at talktalk.net

"Beware of certitude" (Jimmy Reid)
The floggings will continue until morale improves!
User avatar
Stanley
Global Moderator
Global Moderator
Posts: 90761
Joined: 23 Jan 2012, 12:01
Location: Barnoldswick. Nearer to Heaven than Gloria.

Re: SHED MATTERS 2

Post by Stanley »

Image

The design committee came up with a plan.... I've put a parallel under the slide and used it's mate to mark the feet of the cylinder. This not only gives me the height of the feet but ensures that when I've reduced them they will be perfectly parallel.

Image

I had two choices, either strip the cylinder down and cut the feet under the mill or do it the old fashioned way and file them down. There is about 1/8" to take off.... I remembered an old fitter's trick that Newton taught me. If you want a really sharp cutting file for a job like this, find the biggest coarsest half round file in your box and use the rounded back for muck shifting. His rational was that the half round side hardly ever gets used. He was dead right, it took me half an hour to reduce them, finish them off with my favourite big smooth flat file, break the edges and clean the inside ready for soldering. It would have taken a lot longer than half an hour to strip it down, mill it and reassemble it.

Image

I can hear what you are saying.... I'll bet you're thinking I've got diverted. Not so, I am going to need the baseboard before long and I want to put a little chamfer on the edge and varnish it, it needs time to dry properly. Besides, it's dry this morning and may not be tomorrow and I hate woodworking in the shed!

Image

Here it is drying in the front room and my brush is cleaned and put away. I don't know how long I have had the Dulux varnish but it was an unopened tin and as good as new. The price on it is over £10, god knows what it would cost now.

Image

Despite all the housework I got here. I had a trial fit on the bed and it is exactly right. I'm ready for marking the foundation holes on the cylinder base and slide before soldering the base plate in. That's for tomorrow.

Image

My last blow this morning was to get the shed vacuum going and clean the floor. Free leccy is free leccy. It's been a broken morning but I've made some real progress. A good morning!
Stanley Challenger Graham
Stanley's View
scg1936 at talktalk.net

"Beware of certitude" (Jimmy Reid)
The floggings will continue until morale improves!
User avatar
Stanley
Global Moderator
Global Moderator
Posts: 90761
Joined: 23 Jan 2012, 12:01
Location: Barnoldswick. Nearer to Heaven than Gloria.

Re: SHED MATTERS 2

Post by Stanley »

Image

I want to put a fillet inside each side of the cylinder base to reinforce the bed plate. I had an idea I had a piece of extruded brass fillet somewhere in the treasure chests but didn't find it. In the end I decided the angles that Newton had riveted to the horn plates for his aborted traction engine would be just the thing.

Image

Newton was on form the day he riveted these on! I had to get my flange splitter out and use it to rip the plate off the angle after I had ground the backside to get rid of any countersink.

Image

It took a while but I ended up with these two pieces cut to size that will do nicely thank you.

Image

Then into the mill to make sure they were perfectly flat and the ends squared. It's also good preparation for sweating them into place.

Image

Then I broke all the corners and edges and made sure that every surface that counted was spotlessly clean.

Image

Before I sweat the base plate into place I wanted to mark the holes for the holding down bolts for both the cylinder and the crosshead slide. So I made sure I had them positioned correctly and marked the locations by transfer punch.

Image

It's a good thing that the vise jaws on the compound vise on the pillar drill open wide enough. That made it dead easy to accurately drill all six holes. This compound vise is one of the best purchases I ever made. It takes up a lot of height under the quill but is absolutely invaluable.

Image

Closing time, I'm ready for soldering the base plate in and mounting it and the slide on the base. Once they are on they set the position for the crank end bearing pedestal and in turn the outrigger block. We can start thinking about mounting both on the base board. What a good job I got it varnished.......
Stanley Challenger Graham
Stanley's View
scg1936 at talktalk.net

"Beware of certitude" (Jimmy Reid)
The floggings will continue until morale improves!
User avatar
Stanley
Global Moderator
Global Moderator
Posts: 90761
Joined: 23 Jan 2012, 12:01
Location: Barnoldswick. Nearer to Heaven than Gloria.

Re: SHED MATTERS 2

Post by Stanley »

Image

I started this morning by finishing preparations for my holding down bolts.

Image

Then I counter-bored the holes to give room not only for the nuts but the socket to tighten them as well.

Image

It's well known that I hate soldering..... I did all I could to prepare for the event! All my tackle sammed up, a firebrick to hold the heat, shields to avoid setting fire to the shed or melting any plastic and all the surfaces where I want the solder to flow to coated with flux. In short, everything I could think of. Then I did all my displacement activity which included brewing up and giving myself a good talking to. Then I fired the butane torch up.....

Image

Everything seemed to go well.... As soon as I got it to temperature and touched the solder to the joint it flashed through all the surfaces. It even bubbled up in the old rivet holes. It looks good!

Image

I cleared all my tackle up and then walked away from the shed because I am expecting visitors and anyway the cylinder is too hot to touch. I shall leave it to cool down overnight and issue a full report tomorrow!
Stanley Challenger Graham
Stanley's View
scg1936 at talktalk.net

"Beware of certitude" (Jimmy Reid)
The floggings will continue until morale improves!
User avatar
PanBiker
Site Administrator
Site Administrator
Posts: 16554
Joined: 23 Jan 2012, 13:07
Location: Barnoldswick - In the West Riding of Yorkshire, always was, always will be.

Re: SHED MATTERS 2

Post by PanBiker »

Looks good to me Stanley, It will look even better once you have cleaned all the flux off and given it a bit of titivating. :biggrin2:
Ian
User avatar
Stanley
Global Moderator
Global Moderator
Posts: 90761
Joined: 23 Jan 2012, 12:01
Location: Barnoldswick. Nearer to Heaven than Gloria.

Re: SHED MATTERS 2

Post by Stanley »

You're right Ian. Susan and Mick have been and gone and as it had cooled down I gave it a coat of looking over. The solder has penetrated all the joints and I think it's a perfect job. I say perfect, if there is a fault I used a bit too much solder but nothing I can't deal with in a good clean up.I'm sure actually that I'm getting the hang of it, the right solder and flux and plenty of cleaning first.
Stanley Challenger Graham
Stanley's View
scg1936 at talktalk.net

"Beware of certitude" (Jimmy Reid)
The floggings will continue until morale improves!
User avatar
PanBiker
Site Administrator
Site Administrator
Posts: 16554
Joined: 23 Jan 2012, 13:07
Location: Barnoldswick - In the West Riding of Yorkshire, always was, always will be.

Re: SHED MATTERS 2

Post by PanBiker »

Indeed Stanley, a clean joint and the right temperature for correct solder flow is the key. Over in electronics and PCB land, multi-core solder with the flux embedded within the solder is the way to go. Bare solder and painted on flux, a la plumber type operation is a different skill, that trade has it's own short cuts with copper connectors preloaded with solder and flux, only cleanliness and heat required for a perfect joint. A lot of folk who attempt soldering are frightened of overheating and consequently end up with dry joints. I always used to pride myself by leaving a job regardless of how much work I had done when reworking on PCB's as if I had never been there. It actually got me into bother once as a customer once had the back off a set that I had been working on and refused to pay as he could not see the work I had done, you can't win sometimes. :smile: :extrawink:
Ian
User avatar
Big Kev
Site Administrator
Site Administrator
Posts: 11055
Joined: 23 Jan 2012, 20:15
Location: Foulridge

Re: SHED MATTERS 2

Post by Big Kev »

Can't wait to see the finished job, I like the proportions especially that big chunky flywheel :-)
Kev

Stylish Fashion Icon.
🍹
User avatar
Stanley
Global Moderator
Global Moderator
Posts: 90761
Joined: 23 Jan 2012, 12:01
Location: Barnoldswick. Nearer to Heaven than Gloria.

Re: SHED MATTERS 2

Post by Stanley »

Thanks Kev. I think it came out of my head OK and I like the way it is shaping up as well. We're getting very close...... But there is no rush! This is where you slip up if you don't think twice or three times about everything!
Stanley Challenger Graham
Stanley's View
scg1936 at talktalk.net

"Beware of certitude" (Jimmy Reid)
The floggings will continue until morale improves!
User avatar
Stanley
Global Moderator
Global Moderator
Posts: 90761
Joined: 23 Jan 2012, 12:01
Location: Barnoldswick. Nearer to Heaven than Gloria.

Re: SHED MATTERS 2

Post by Stanley »

Image

I have a lot on my mind this morning because I have a list of documents I have to digitise for the solicitor, all vital to the big ongoing problem of finalising the probate of Janet's estate. I have my ducks in a row and will concentrate on that later. I haven't neglected the shed! I want to put the final finish on the cylinder before I mount it on the bed. Here are the main tools, various grades of file and probably the most important is the scraper made out of an old file.... I've made sure it has a good edge by lightly stoning it by hand and this will be the main tool for taking off the excess solder. By the way, the soldering job is good but the mistake was the beginner's error of using too much solder! I shall pay for that in elbow grease over the next hour and a half!

Image

Part of the process is making sure the base is flat and square. It's not bad.....

Image

An essential part of the process while I was removing the solder and making everything look pretty was to make certain that there is enough clearance from the angles I soldered in for strength for the 1/4" Whitworth nuts. They are all OK, didn't need any extra clearance.

Image

Here's where I was at 09:15. As always, the question is how long to you spend making 'improvements'? I reckon I've done enough, this looks tidy and I am not yet certain about the final finish. It could very well finish up being painted black! This is OK and a good place to stop. I shall fit it on the bed together with the crosshead slide tomorrow.
Stanley Challenger Graham
Stanley's View
scg1936 at talktalk.net

"Beware of certitude" (Jimmy Reid)
The floggings will continue until morale improves!
User avatar
Stanley
Global Moderator
Global Moderator
Posts: 90761
Joined: 23 Jan 2012, 12:01
Location: Barnoldswick. Nearer to Heaven than Gloria.

Re: SHED MATTERS 2

Post by Stanley »

Image

I'm lucky enough to have a stock of 1/4"Whit set screws and nuts so no problem about getting on with bolting the cylinder onto the bed. The excess had to be cut off and there's nothing subtle about my method, bolt down tight, cut the excess off and tidy the nuts and bolts up with a file. With a bit of luck this will not come off again!

Image

Bolting the cylinder down tight altered the relationship of the piston rod and the slide so the next bit of fitting was to skim a bit off the bottom of the crosshead to bring it into line.

Image

Fastening the cylinder down also slightly altered the line of the rod and if you look carefully you'll see that my slide has moved over slightly. I needed to mark the new position accurately and in order to do that while keeping the crosshead engaged in the slide to set the position I had to take the back cover off the cylinder so I could get the piston back far enough to let me get at the hole in the slide nearest to the cylinder. It turned out to be a good thing because a bit of Loctite plastic gasket had squeezed into the bore and tightened the movement of the piston. That was soon sorted and I put the bed under the pillar drill to adjust the position of the holes. The easiest way to do this was to open the hole out to 1/4" and doing that opened up another possibility.....

Image

I'd found a couple of pan headed screws which will be ideal for fitting the slide instead of 2BA studs. But they are a bit short so at the while I was opening the holes I deepened the counterbore to make the screws fit.

Image

Closing time. I've done a trial fit and the screws fit OK. I'm ready for fitting but as it was ten o'clock and I'd done a couple of hours I left it for tomorrow. No need for overtime!
Stanley Challenger Graham
Stanley's View
scg1936 at talktalk.net

"Beware of certitude" (Jimmy Reid)
The floggings will continue until morale improves!
User avatar
Stanley
Global Moderator
Global Moderator
Posts: 90761
Joined: 23 Jan 2012, 12:01
Location: Barnoldswick. Nearer to Heaven than Gloria.

Re: SHED MATTERS 2

Post by Stanley »

Image

Friday is a busy morning but I got in the shed for just over an hour. Carrying on with mounting the crosshead slide and making sure everything fits and functions. I cut the pan headed screws to the correct length and then bolted it down onto the bed.

Image

The next job was fitting it. I like fitting, the little adjustments that are needed to convert your vision into something that works reasonably freely. The slide was a bit out of alignment but that was easily solved by a smart clout with the hammer on the side. Never be afraid of a bit of carefully applied brute force! The heads of the threads were a bit proud so I cramped the assembly down tight and started by filing the ends down, final adjustments with a variety of files and at one point a small grinding wheel on the Dremel. I just kept carefully shifting metal until the crosshead slides easily. I took the opportunity to do a bit of polishing of the top of the slides. Once I was satisfied everything was as good a fit as I needed it I moved on.

Image

Once I had the slide correct I made sure everything around the back lid was right, applied a spot of Loctite plastic gasket. Tightened the crosshead onto the piston rod using the locknut on the piston so that made sure they were both tight and then replaced the lid and tightened it down. Then I tried the movement again in case I'd introduced any tight shops. No problem at all, the crosshead and piston rod slide freely but as usual, a bit on the tight side which is just how it should be. Everything will ease once you start to run the engine. The trick is to get the balance right and I think this is OK.
That brought me close to knocking off time and I stopped. Tomorrow I shall start to address the fitting of the flywheel assembly and perhaps even mounting everything on the base. We're getting close but there's a lot to do and there is no rush.....
Stanley Challenger Graham
Stanley's View
scg1936 at talktalk.net

"Beware of certitude" (Jimmy Reid)
The floggings will continue until morale improves!
User avatar
Stanley
Global Moderator
Global Moderator
Posts: 90761
Joined: 23 Jan 2012, 12:01
Location: Barnoldswick. Nearer to Heaven than Gloria.

Re: SHED MATTERS 2

Post by Stanley »

Image

The design committee has been busy overnight and looking at what has to happen now it will be an advantage if the bed and outrigger block are mounted on the base board for the fitting of the flywheel assembly. Main reason for doing it this way is that there are further modifications to be done to the assembly and I won't really be able to plan these until I have everything mounted up. I don't need to get to the underside of the bed to mount the pedestal bearings as they will be done by drilling and tapping the wood and using 1/4"Whit setscrews screwed directly into the bed and this is best done from the top. By doing it this way I also get perfect positioning of the fastenings. So the first thing I did this morning was to lightly sand the base board and give it a good polish using Dark Tan boot polish. This gives a good protective finish without looking too much like French Polish! Here we are ready for some serious measuring and positioning.

Image

A little used treasure chest came out of hiding.....

Image

I needed to sort out my screw size and this handy Makita accessory that drills the correct profile hole for a woodscrew including clearance for the shank and boring the countersink in one operation. The bit is in a socket on the back of the drill section and can be easily released and reversed using a quick lock feature.Next job was some serious measuring, thinking and marking. I think I have got it right!

Image

I clamped both the bed and the outrigger in the correct position and drilled the base and beds for the screws. Everything screwed up tight!

Image

Here we are at closing time. I'm ready to detach the flywheel assembly from its temporary mounting blocks and have a trial fit while I get the distances for the con rod and valve rod correct, rebore the bearings and fit the necessary modifications to the outrigger end to locate the assembly in its bearings. Lots to do yet!
The bad news is that there will be no shed tomorrow as I shall be watching the Last Malaysian Grand Prix live and the start is 08:00.
Stanley Challenger Graham
Stanley's View
scg1936 at talktalk.net

"Beware of certitude" (Jimmy Reid)
The floggings will continue until morale improves!
BillHowcroft
Donor
Posts: 102
Joined: 19 Aug 2017, 17:39
Location: Derby

Re: SHED MATTERS 2

Post by BillHowcroft »

Never tried boot polish on wood. Must give it a try.
User avatar
Stanley
Global Moderator
Global Moderator
Posts: 90761
Joined: 23 Jan 2012, 12:01
Location: Barnoldswick. Nearer to Heaven than Gloria.

Re: SHED MATTERS 2

Post by Stanley »

Two or three coats on dry untreated wood gives a lovely finish that needs very little maintenance and it can always be refreshed with another coat. Just like polishing boots, there's not much difference between leather and wood. It's a very natural finish as well...
Stanley Challenger Graham
Stanley's View
scg1936 at talktalk.net

"Beware of certitude" (Jimmy Reid)
The floggings will continue until morale improves!
User avatar
Stanley
Global Moderator
Global Moderator
Posts: 90761
Joined: 23 Jan 2012, 12:01
Location: Barnoldswick. Nearer to Heaven than Gloria.

Re: SHED MATTERS 2

Post by Stanley »

I've had a good morning. I watched Max Verstappen win the last Malaysian Grand Prix and at the same time did my washing and cooking. All has gone well and I have the best beef stew ever slowly arguing with itself in the slow cooker and a pan full of veggies cooked and ready to go with it. I walked Jack and then couldn't resist having one blow in the shed.... I took the flywheel assembly off its temporary blocks and offered it up to the cylinder and crosslide on the new bed. The good news is that I have got the measurements right and it fits nicely.... You can see what it's going to look like now!

Image
Stanley Challenger Graham
Stanley's View
scg1936 at talktalk.net

"Beware of certitude" (Jimmy Reid)
The floggings will continue until morale improves!
User avatar
Big Kev
Site Administrator
Site Administrator
Posts: 11055
Joined: 23 Jan 2012, 20:15
Location: Foulridge

Re: SHED MATTERS 2

Post by Big Kev »

Grand job, a great addition to someone's sideboard.
Kev

Stylish Fashion Icon.
🍹
User avatar
Stanley
Global Moderator
Global Moderator
Posts: 90761
Joined: 23 Jan 2012, 12:01
Location: Barnoldswick. Nearer to Heaven than Gloria.

Re: SHED MATTERS 2

Post by Stanley »

Thanks Kev but it's got a lot of work in it yet! I have realised I have articles to write so don't hold your breath for the next couple of days.
Later.... Sorry lads but as I have a straight edge in the shed I am going to spend the time today and perhaps even tomorrow getting articles on the stockpile at the paper. I can't concentrate properly on the engine with these hanging over me.....
Stanley Challenger Graham
Stanley's View
scg1936 at talktalk.net

"Beware of certitude" (Jimmy Reid)
The floggings will continue until morale improves!
User avatar
Stanley
Global Moderator
Global Moderator
Posts: 90761
Joined: 23 Jan 2012, 12:01
Location: Barnoldswick. Nearer to Heaven than Gloria.

Re: SHED MATTERS 2

Post by Stanley »

Good news lads! Four articles written and delivered so I shall be back on fitting duties this morning.
Stanley Challenger Graham
Stanley's View
scg1936 at talktalk.net

"Beware of certitude" (Jimmy Reid)
The floggings will continue until morale improves!
User avatar
Stanley
Global Moderator
Global Moderator
Posts: 90761
Joined: 23 Jan 2012, 12:01
Location: Barnoldswick. Nearer to Heaven than Gloria.

Re: SHED MATTERS 2

Post by Stanley »

Image

The task is to refit the flywheel assembly so that it fits the engine. First thing was to make some room on the bench so the base and bed with the cylinder and crosshead have flitted into the kitchen....

Image

That's better! A bit of room. My first modification is going to be on the pedestal bearings so I took them off and put the rest of the assembly into the kitchen once I had done my measurements. I needed to know the diameter of the shafts that the bearings fit on, I reduced the diameter when I started altering the shaft.

Image

There is no way the existing bearings can be modified, I have to make completely new ones. The first thing to do was measure the pedestals that contain the brasses.

Image

Then I had to measure the brasses and decide on the size of the blanks I needed. I am going to box clever and make the blanks square because this will make it a lot easier to make and fit the bearings. I needed a couple of good size blanks. They are roughly 1.6" square and an inch thick. I found a piece of cast brass in the treasure chest that will do the job. I have some big round bar but there is less waste using this piece. I cut a square out of card to give me a clear picture of what I had to take off.

Image

I have a lot of muck to shift. I won't bore you with all the stages....

Image

Once I had two parallel sides I measured them and marked the other two sides. They are slightly over 1.6" but that's OK.

Image

I cut the first side and measured to make sure my mark was accurate. It was....

Image

Closing time. I have one more side to cut. I know exactly where I am starting tomorrow. Once again my El Cheapo Taiwan mill has done a good job.....
Stanley Challenger Graham
Stanley's View
scg1936 at talktalk.net

"Beware of certitude" (Jimmy Reid)
The floggings will continue until morale improves!
User avatar
Stanley
Global Moderator
Global Moderator
Posts: 90761
Joined: 23 Jan 2012, 12:01
Location: Barnoldswick. Nearer to Heaven than Gloria.

Re: SHED MATTERS 2

Post by Stanley »

Image

Brass chips galore as I finish the last side of my blank for the two bearings.

Image

Here we are, perfectly square (well, within 3thou!) and ready to go into the lathe. I cleaned Mrs Harrison so I can harvest the chips for John....

Image

First job was to square both ends. The thing about doing it in the lathe is that I'm assured the ends will be perfectly square and a nice finish.

Image

Next job was to poke a hole through with a long series drill ready for drilling it 5/8". The target is .680" the journals are .675" and we want a little bit of play.

Image

I bored it out to size. Lots of measuring as I crept up on the finished size. My eyes have let me down too many times. One thing that struck me, despite my best efforts the 5/8" drill bored oversize, always worth checking! I was OK, still within the target.

Image

Closing time. I know I'm slow but it's dead on .680". That'll do me!
Stanley Challenger Graham
Stanley's View
scg1936 at talktalk.net

"Beware of certitude" (Jimmy Reid)
The floggings will continue until morale improves!
Locked

Return to “Crafts”