SHED MATTERS 2
-
Stanley

- Global Moderator

- Posts: 90335
- Joined: 23 Jan 2012, 12:01
- Location: Barnoldswick. Nearer to Heaven than Gloria.
Re: SHED MATTERS 2
Sorry kids, the word is I was a bit dickey this morning so I've had the morning off. Nowt serious, I'll be back tomorrow..... Old age isn't for cissies......
Stanley Challenger Graham
Stanley's View
scg1936 at talktalk.net
"Beware of certitude" (Jimmy Reid)
The floggings will continue until morale improves!
Stanley's View
scg1936 at talktalk.net
"Beware of certitude" (Jimmy Reid)
The floggings will continue until morale improves!
-
Stanley
- Global Moderator
- Posts: 90335
- Joined: 23 Jan 2012, 12:01
- Location: Barnoldswick. Nearer to Heaven than Gloria.
Re: SHED MATTERS 2
If you remember the last thing I said on Thursday was that I was a bit short of clearance at the back end of the stroke so first thing this morning was to get onto Johnny's 1927 lathe in the front room and reduced the register.
I went back in the shed and started to stick bits on the engine and here's where I finished up. Everything is together apart from fixing the flywheel and making and fitting the eccentric and valve gear. I had cooking to do and Susan's due any minute so I'll leave the serious valve work until tomorrow.....

Stanley Challenger Graham
Stanley's View
scg1936 at talktalk.net
"Beware of certitude" (Jimmy Reid)
The floggings will continue until morale improves!
Stanley's View
scg1936 at talktalk.net
"Beware of certitude" (Jimmy Reid)
The floggings will continue until morale improves!
-
Stanley
- Global Moderator
- Posts: 90335
- Joined: 23 Jan 2012, 12:01
- Location: Barnoldswick. Nearer to Heaven than Gloria.
Re: SHED MATTERS 2
I've been thinking about the misalignment in the crankshaft and the design committee have come up with a cunning plan. I shall try it after I have completed the valve gear but before I fix the flywheel to the shaft......
Stanley Challenger Graham
Stanley's View
scg1936 at talktalk.net
"Beware of certitude" (Jimmy Reid)
The floggings will continue until morale improves!
Stanley's View
scg1936 at talktalk.net
"Beware of certitude" (Jimmy Reid)
The floggings will continue until morale improves!
-
Stanley
- Global Moderator
- Posts: 90335
- Joined: 23 Jan 2012, 12:01
- Location: Barnoldswick. Nearer to Heaven than Gloria.
Re: SHED MATTERS 2
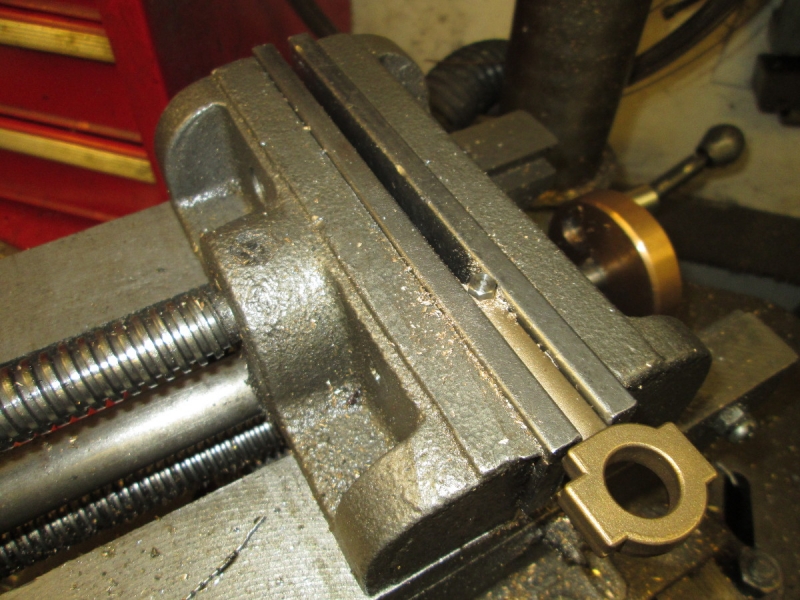
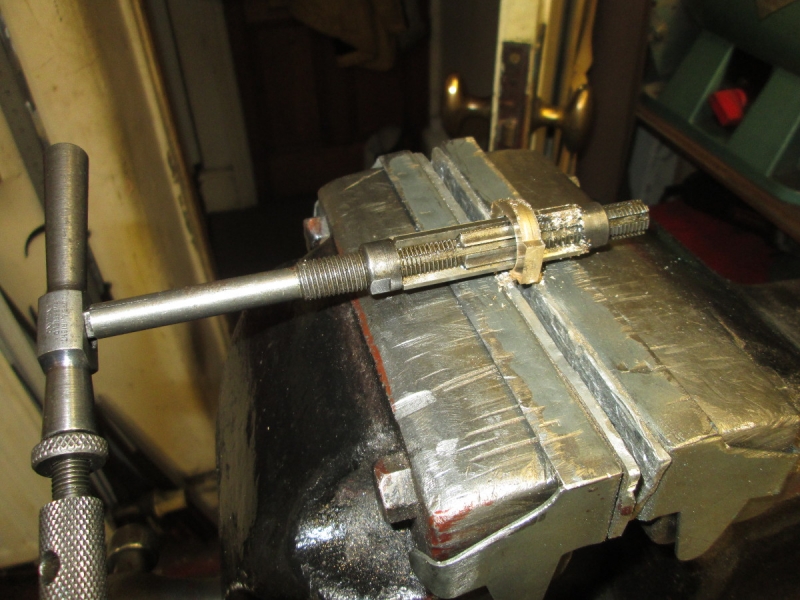
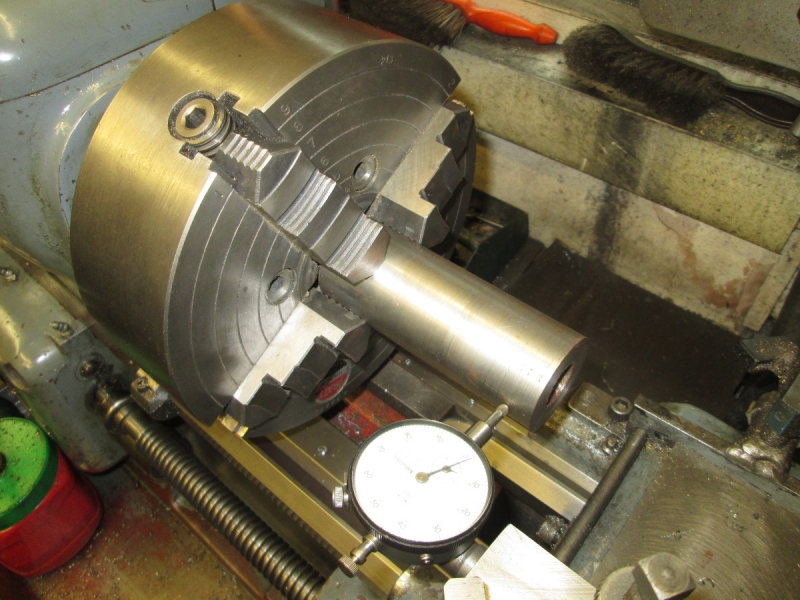
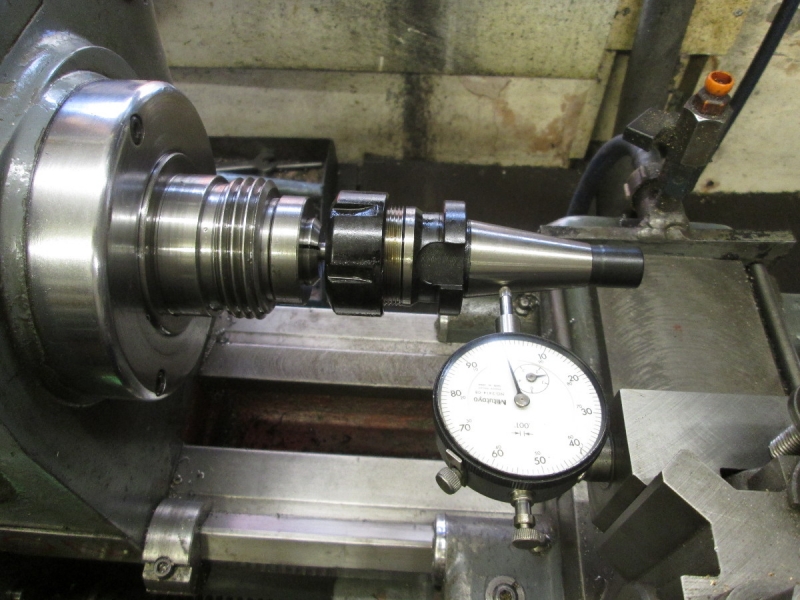
I'd forgotten that this morning is free leccy morning so I had to leave room for a frenzy of housework so I decided not to go for the valve gear but addressed the shaft. I took it out and put it in the lathe.
I got a surprise because I could see nowhere near the movement I saw in the engine so I reversed it and tried it the other way round, I saw a bit more but still hardly anything.
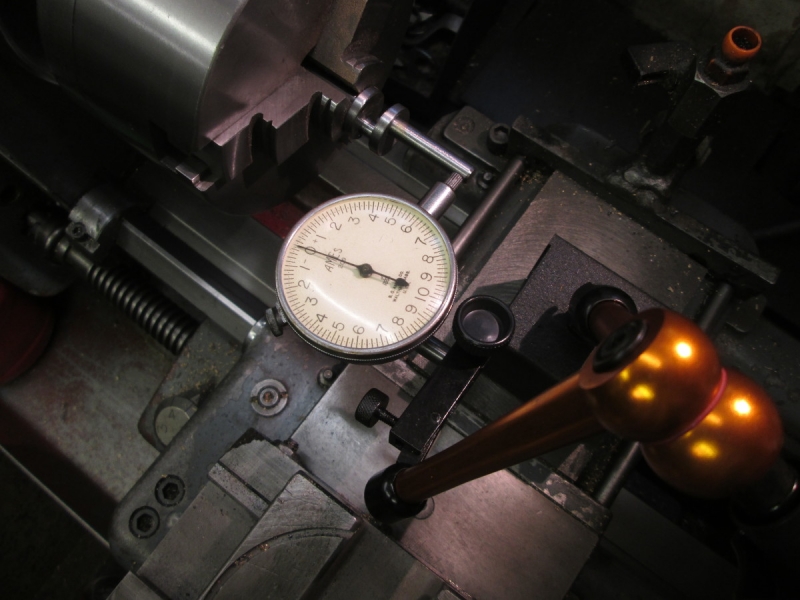
So I got serious and put a clock on it. I found .022 in it so started trying to make it better. I found I couldn't make any impression on it cold so I went to Plan 'B'. I got the blowlamp out.....

I don't know whether you can see my figures on the yellow pad but big does and little does I got it down to just over 2 thou but this isn't as good as it sounds because I suspect it's only the end I have squared up. Still, it's a lot nearer so I left it at that. The bottom line is that the only way to get a perfect one is to make another and as Johnny said "We aren't running 300 looms!" So I knocked off and got on with the housework.....
Stanley Challenger Graham
Stanley's View
scg1936 at talktalk.net
"Beware of certitude" (Jimmy Reid)
The floggings will continue until morale improves!
Stanley's View
scg1936 at talktalk.net
"Beware of certitude" (Jimmy Reid)
The floggings will continue until morale improves!


Re: SHED MATTERS 2
Kev
Stylish Fashion Icon.

Stylish Fashion Icon.

-
Stanley
- Global Moderator
- Posts: 90335
- Joined: 23 Jan 2012, 12:01
- Location: Barnoldswick. Nearer to Heaven than Gloria.
Re: SHED MATTERS 2
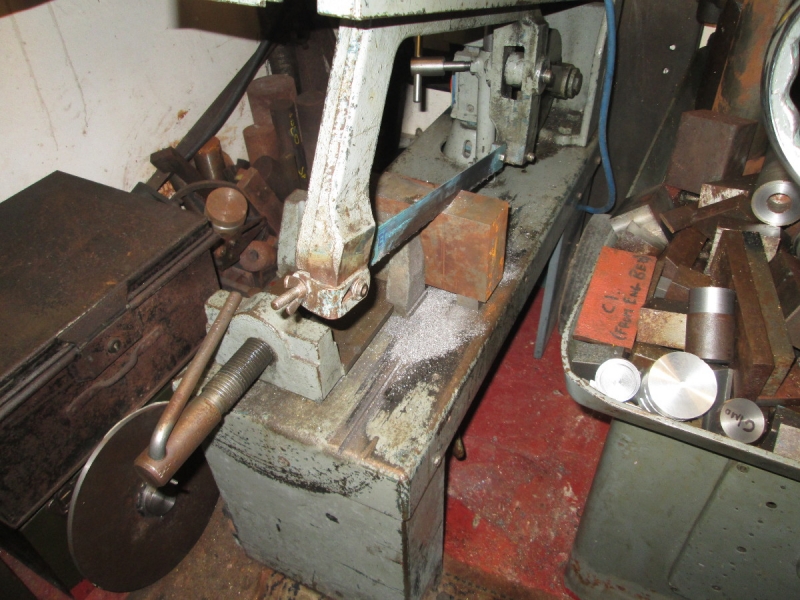
That's one I have seen Kev. It's a big lump and impressive watching those chips coming off. I once watched Newton truing the tyres on a driving wheel of a Black Five at Wellhouse in the big break lathe. About 6ft diameter and he was knocking blue swarf off with a steel tool. Serious metal coming off which could have damaged you badly of you got in the way. It's all relative but it's easy when you are working within the capacity of the lathe. Hardest thing is doing jobs that are really too big and that's what happens in the shed many a time.
Stanley Challenger Graham
Stanley's View
scg1936 at talktalk.net
"Beware of certitude" (Jimmy Reid)
The floggings will continue until morale improves!
Stanley's View
scg1936 at talktalk.net
"Beware of certitude" (Jimmy Reid)
The floggings will continue until morale improves!
-
Stanley
- Global Moderator
- Posts: 90335
- Joined: 23 Jan 2012, 12:01
- Location: Barnoldswick. Nearer to Heaven than Gloria.
Re: SHED MATTERS 2
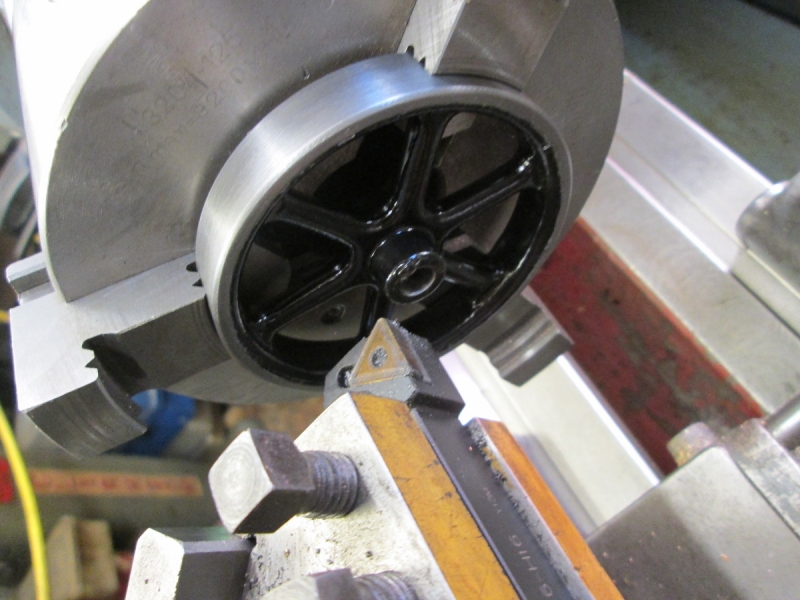
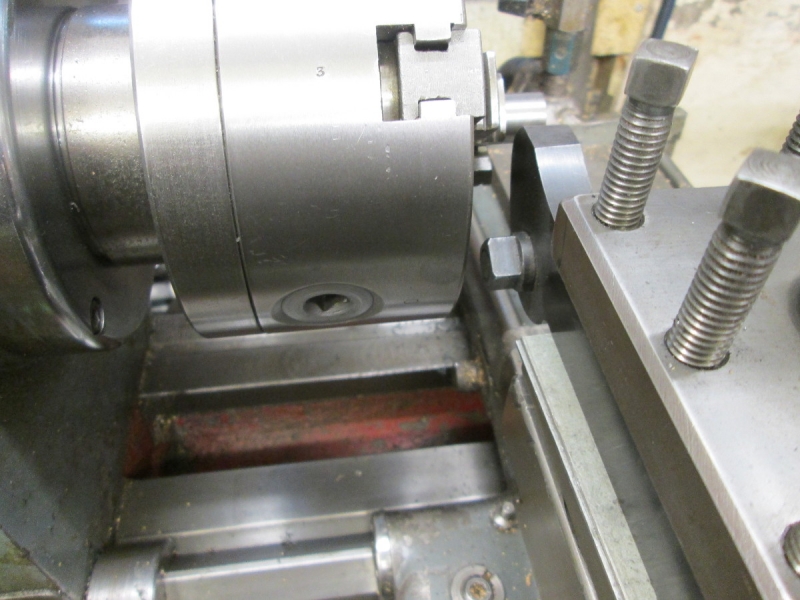
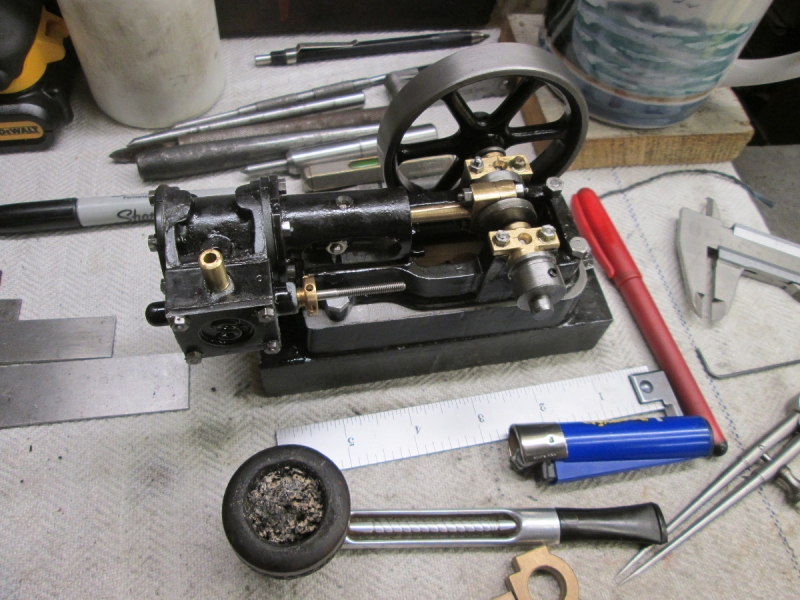
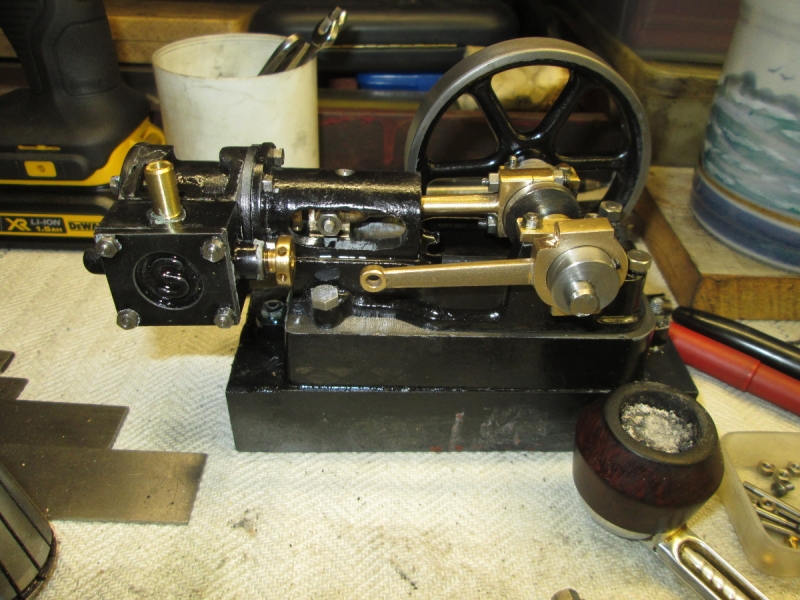
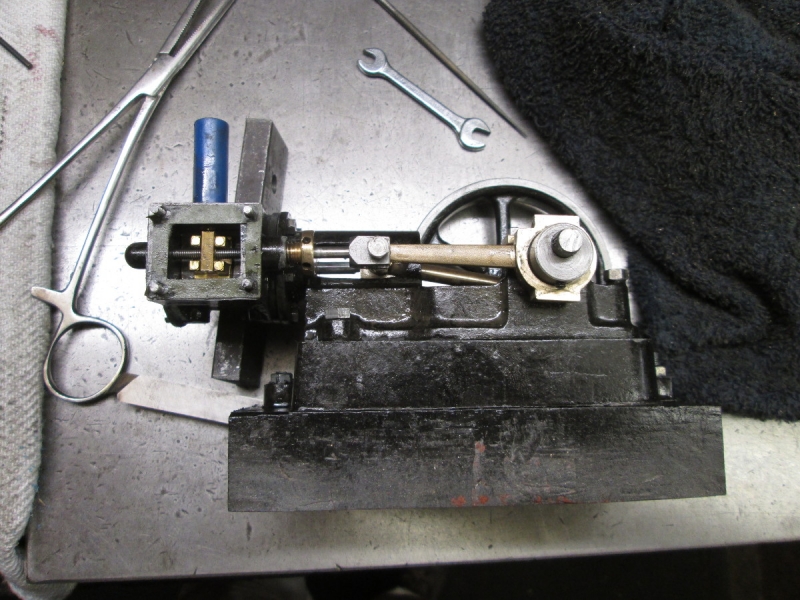
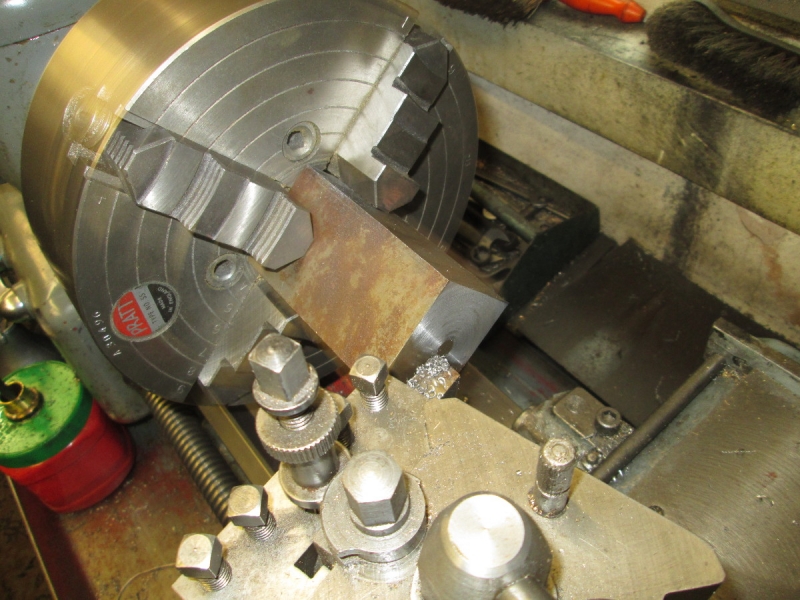
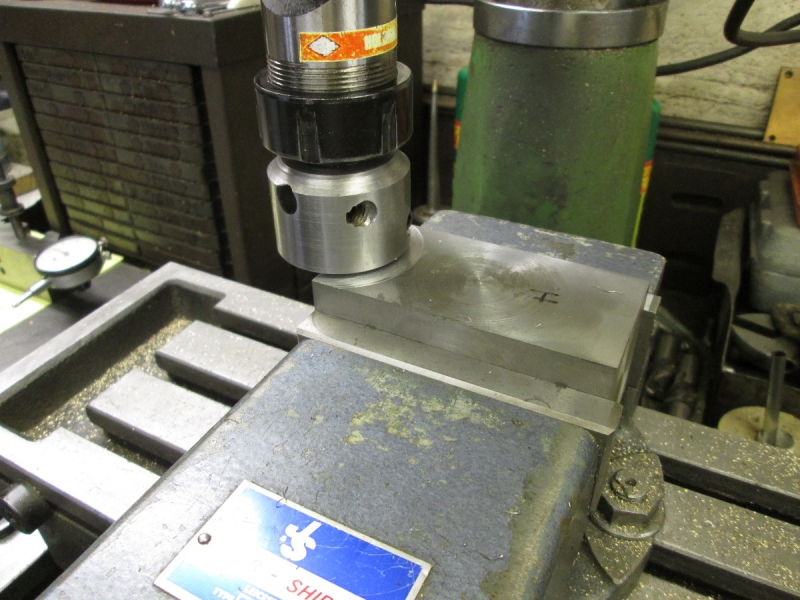
I made a decision that despite the fact I haven't cured the wobble in the shaft, life is too short and sometimes things are good enough. I don't think young Alex will complain. So change the jaws over in the chuck and clean up both sides of the boss and reduce one until it was level with the end of the shaft. Then change the jaws again.....
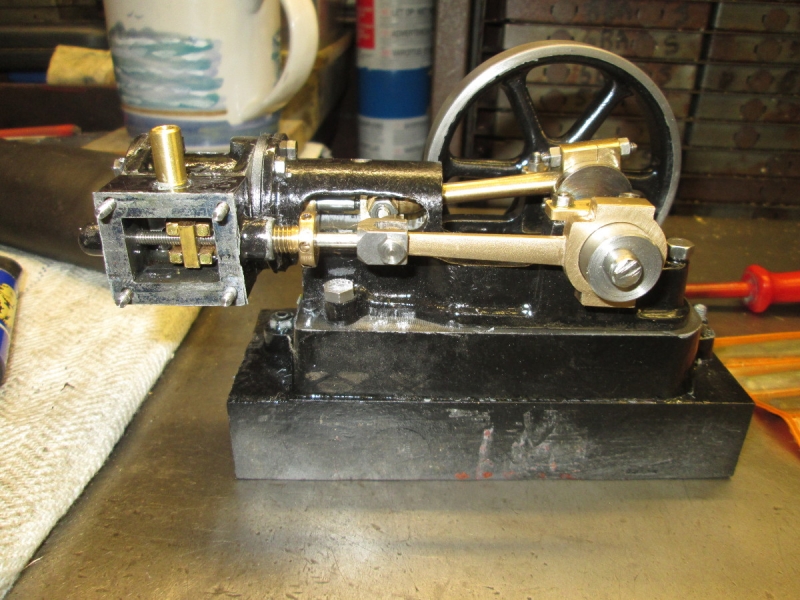
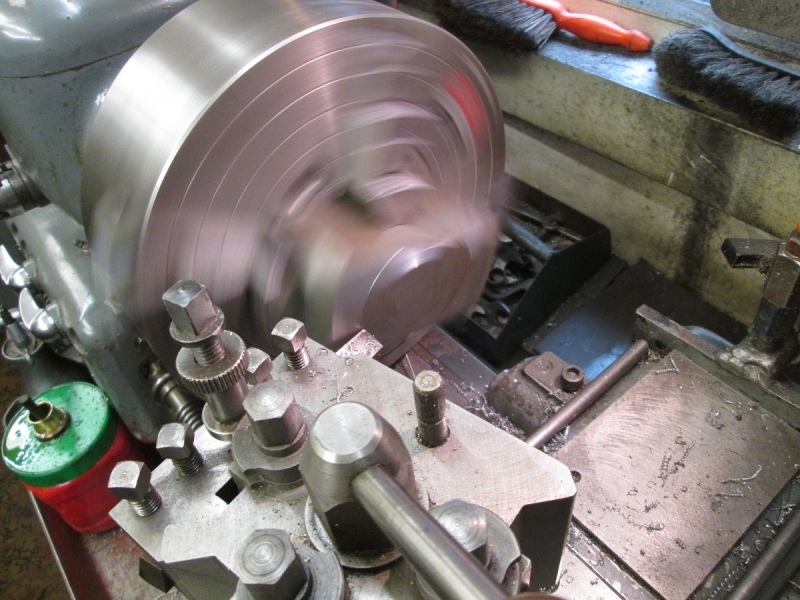
I re-assembled the crankshaft and motion, tightened everything up and checked that we were still running with the clearances OK. As I said before, it is snug but will soon ease off when it is run under compressed air. You don't want them too slack at this stage. I tried the flywheel as well, it looks better now it's cleaned up and the boss is the right width.
I decided to permanently fit the flywheel. The drawings call for a 5BA grub screw. I wasn't going to bother with it but rely solely on Loctite but then I decided belt and braces was perhaps the best way so I drilled the boss, tapped it and fitted the supplied grub screw.
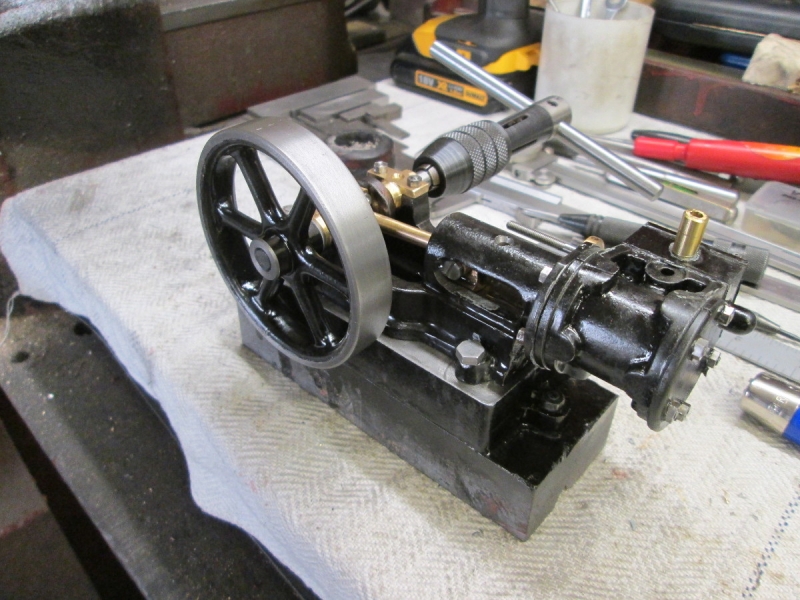
The flywheel is fitted and as you can see I have been busy so the next job was to put some tackle away and tidy up ready for the next stage.
Then a bit of close study of the drawings to make sure I have all the measurements firmly in my head. As usual I did my own fag packet drawing.... and then got the parts sammed up and made sure I had the method clear in my head. First job is to make the eccentric itself.
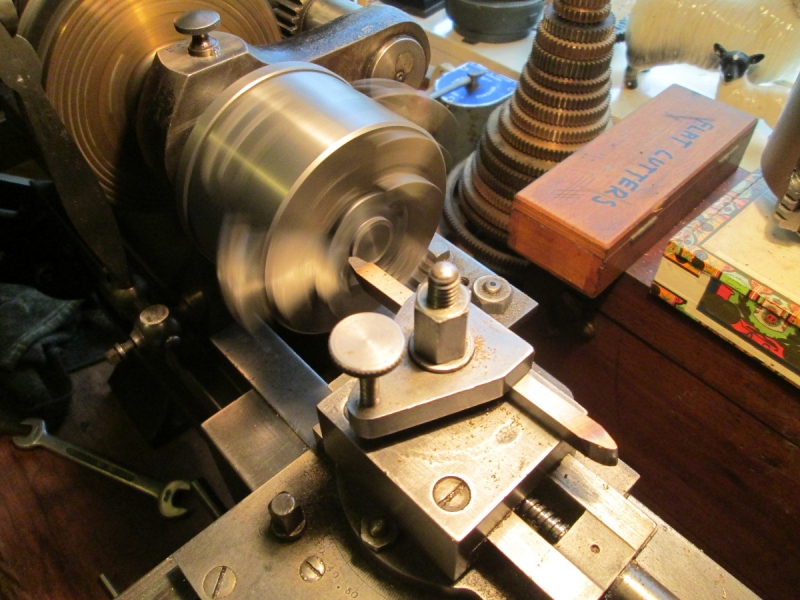
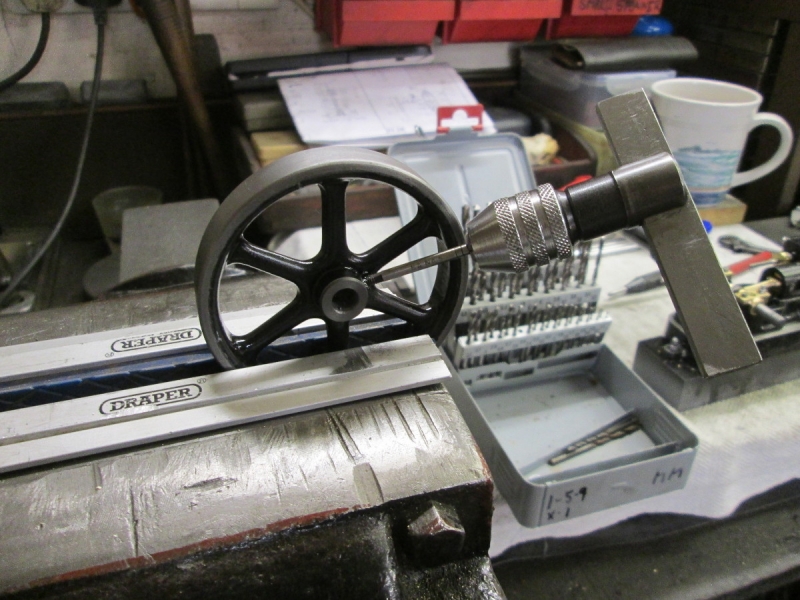
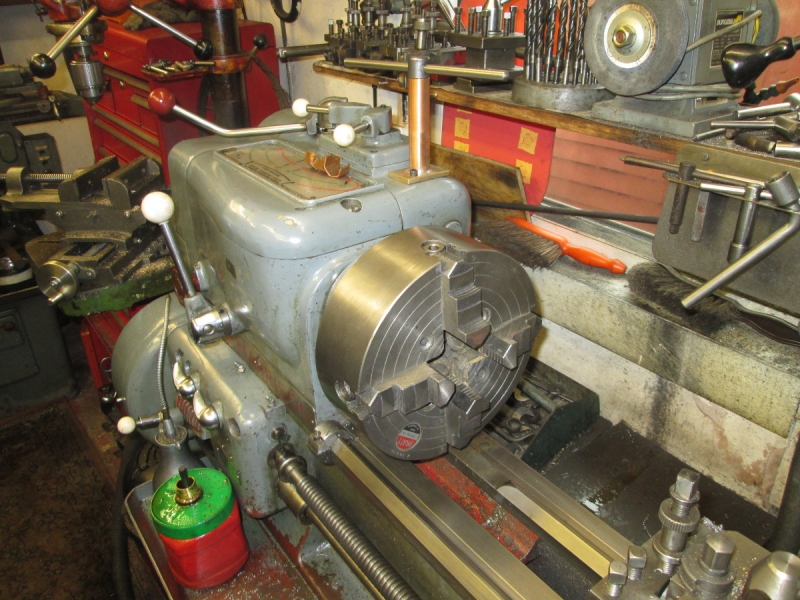
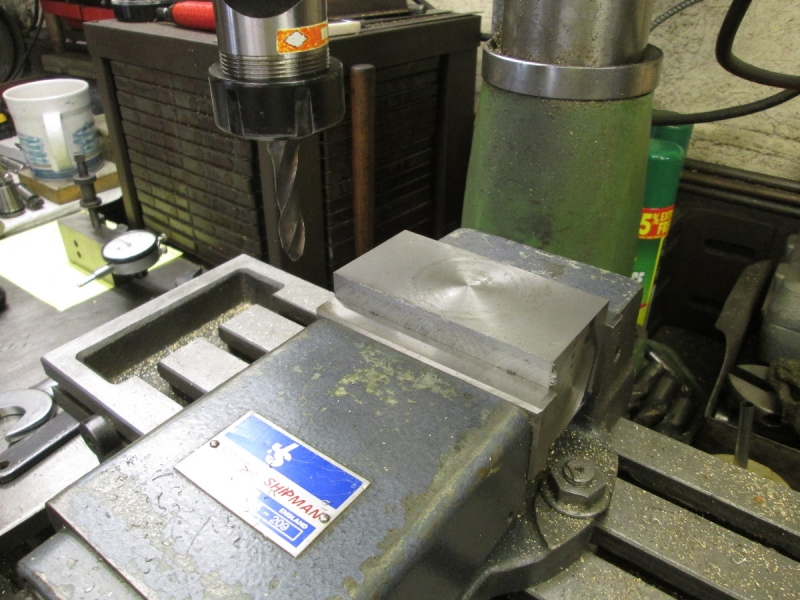
Touch the HS tool up, check the centre, get the stock chucked and face the end of it. I can do a lot of it in this chuck on Mrs Harrison but for the eccentric turning I need a smaller 4 jaw chuck so I shall be doing it on Johnny's 1927 lathe.
The eccentric calls for a 1/16" groove and I just happen to have an Eclipse tool holder with a cutter the right size. Problem is that I haven't used since I had bigger lathes and it needs to be reduced a bit to fit Mrs Harrison's toolpost. No rush so I decided to make it fit by reducing the thickness by about 1/16". It started cutting OK but the nearer I got to the business end of the holder the harder it got so I gave up to that and finished it off by grinding it down.
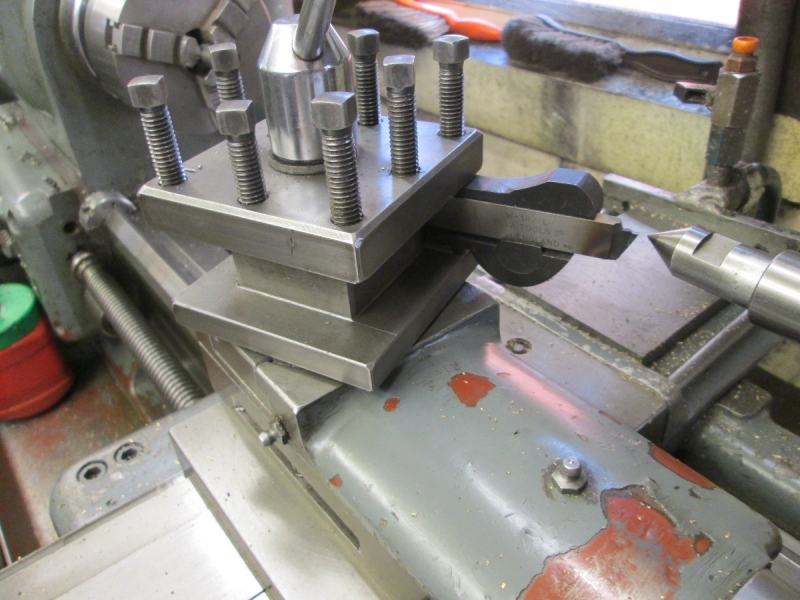
Big does and little does I got it to fit on centre height so I'm ready to cut the groove and part the stock off at the correct size. Then mark the centres and into Johnny's lathe to turn the eccentric but that's for tomorrow. Bit narked about the wobble in the flywheel but there you are. I can live with it!
Stanley Challenger Graham
Stanley's View
scg1936 at talktalk.net
"Beware of certitude" (Jimmy Reid)
The floggings will continue until morale improves!
Stanley's View
scg1936 at talktalk.net
"Beware of certitude" (Jimmy Reid)
The floggings will continue until morale improves!

-
Stanley
- Global Moderator
- Posts: 90335
- Joined: 23 Jan 2012, 12:01
- Location: Barnoldswick. Nearer to Heaven than Gloria.
Re: SHED MATTERS 2
Dead right China! I can assure you that whatever I do next will be larger. My eyes limit me these days, sad but it has to be admitted. Many a time I am working on guesses. Never mind, it will run!
Stanley Challenger Graham
Stanley's View
scg1936 at talktalk.net
"Beware of certitude" (Jimmy Reid)
The floggings will continue until morale improves!
Stanley's View
scg1936 at talktalk.net
"Beware of certitude" (Jimmy Reid)
The floggings will continue until morale improves!
-
Stanley
- Global Moderator
- Posts: 90335
- Joined: 23 Jan 2012, 12:01
- Location: Barnoldswick. Nearer to Heaven than Gloria.
Re: SHED MATTERS 2
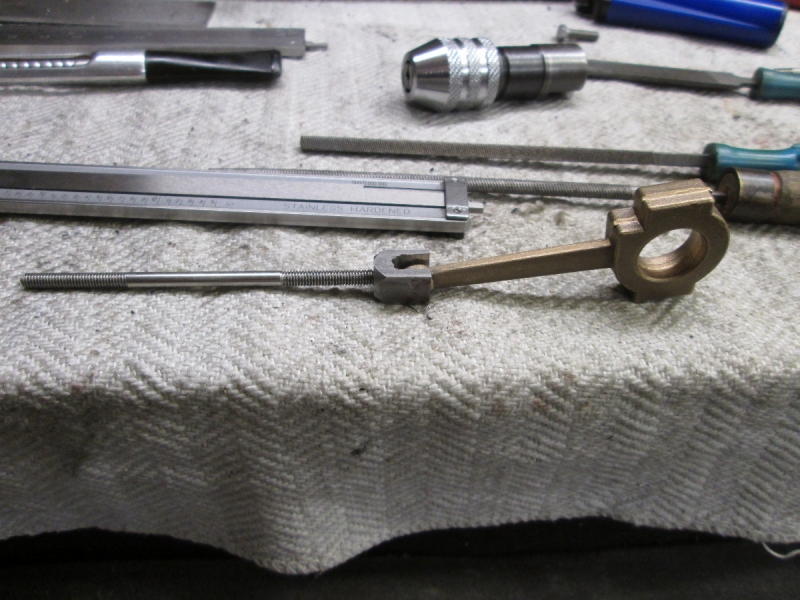
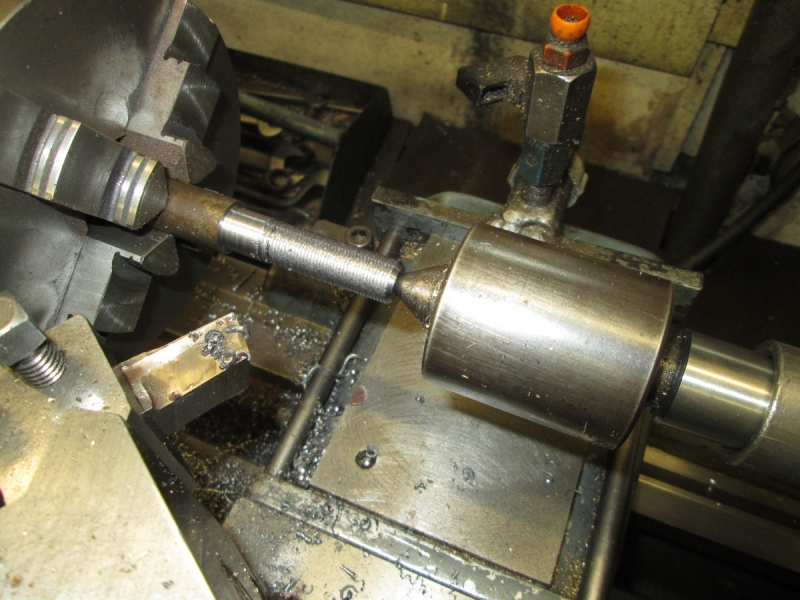
Cutting the groove for the eccentric strap wasn't without its drama. For a start off the stud that clamps the blade in the holder had a big lump of thread sticking out that fouled the chuck because this is such a short workpiece. I cut it off and ground the end and that cured it. It's still a numb holder though. The cutting itself was exciting and I had one small grab but got away with it. Funnily enough, the drawing that came with the castings has no mention of the depth of the groove or that part of the eccentric strap casting that engages with the groove. If you follow the drawing and bore it 5/8" you'll be in the shit! While I was puzzling over this it dawned on me that there was actually no need for any eccentric turning so I ditched the idea and did it my way! I hope I don't regret this.
I decided that this was a foolproof way of making sure that the bore for the shaft (3/32" off centre) was aligned and crashed on.
I tried the bore with the slightly undersize drill with the off-cut from the main shaft and it was a perfect fit. The drawing calls for a 7BA grub screw and the one that is provided is not good material so I decided to fit an Unbrako 1/8" Whitworth screw from stock. I shortened one, drilled and tapped the boss and fitted it. This was made a lot easier and better by not following the drawing.
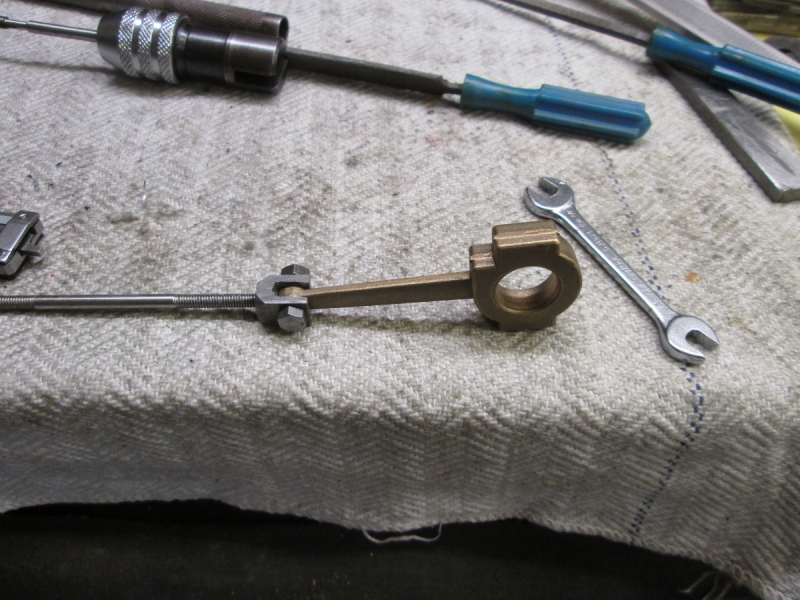
Here's where I was at knocking off time, now for the strap and the clevis. But that's for tomorrow.....
Stanley Challenger Graham
Stanley's View
scg1936 at talktalk.net
"Beware of certitude" (Jimmy Reid)
The floggings will continue until morale improves!
Stanley's View
scg1936 at talktalk.net
"Beware of certitude" (Jimmy Reid)
The floggings will continue until morale improves!
-
Stanley
- Global Moderator
- Posts: 90335
- Joined: 23 Jan 2012, 12:01
- Location: Barnoldswick. Nearer to Heaven than Gloria.
Re: SHED MATTERS 2
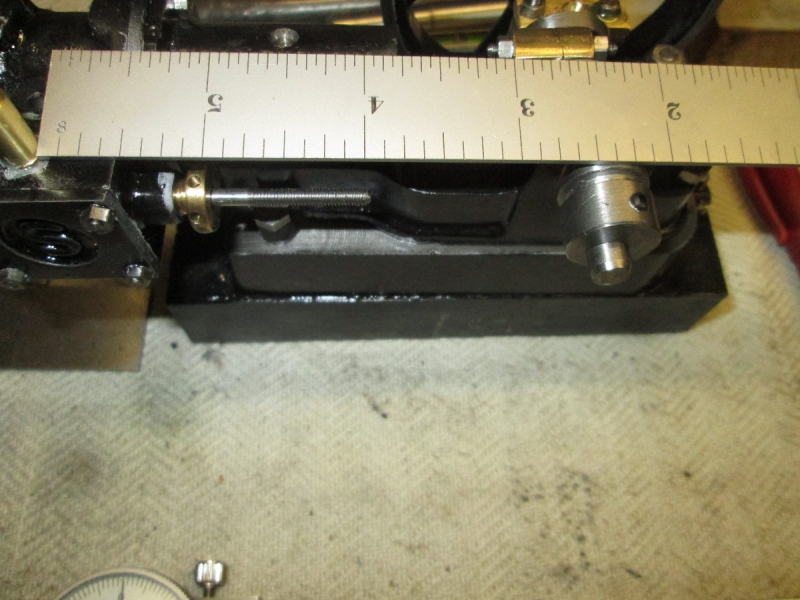
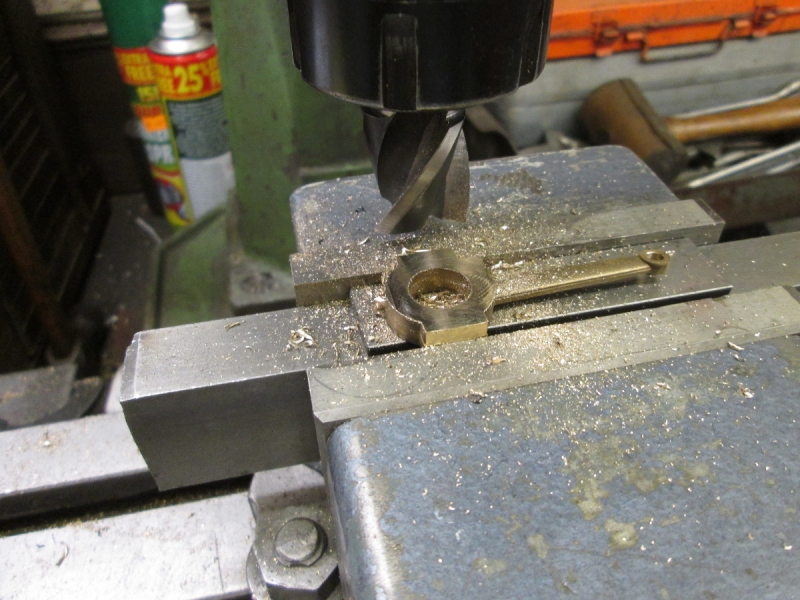
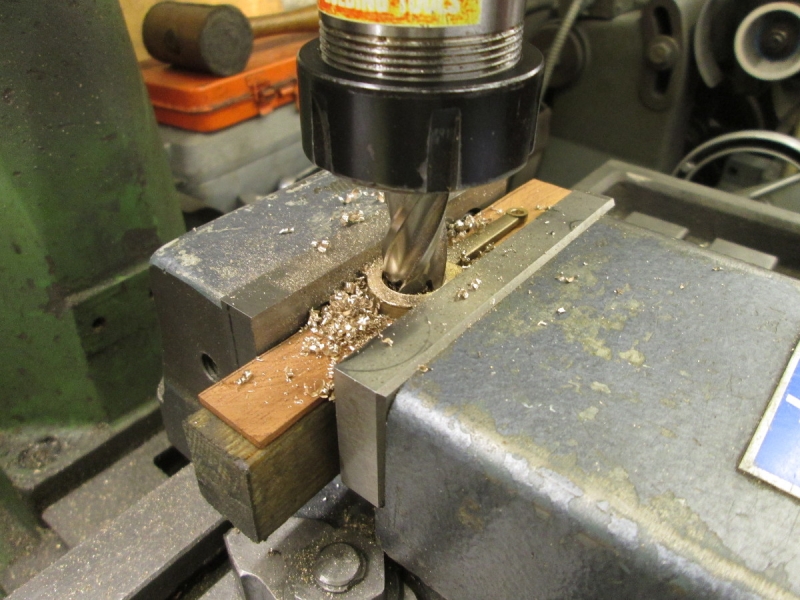
Thinking about the process of fitting the eccentric rod I decided it would be best if I made the clevis for the valve rod first. That got me to thinking because I have a slight self-induced problem. It's my fault because instead of cutting the shaft bearings so they are flush with the casting I gave them as much width as I could get away with as it makes a better bearing. I don't know whether you can see clearly but the consequence is that my groove for the strap is slightly offset to the line of the valve rod. This is no problem. Instead of using the 1/4" square bar Stuarts supplied I am using some 5/16" key steel and I shall offset the jaw of the clevis slightly to take up the misalignment. All this studying took time so I was a bit late before I actually started cutting.
Remember my aborted attempt to cut the parting tool holder? I sharpened the cutter, it was a bit dull.
I drilled a hole in the centre of the clevis to help my eyesight in cutting straight as I am doing it by hand. I had already drilled and tapped for the valve rod and that in itself was a challenge as key steel is is tough material, the last thing I want is a broken tap! So I did it very carefully. I was slow this morning but it doesn't worry me because there is no rush and I'm prepared to take the time to get it right. I have quite enjoyed this morning.....
In the course of thinking out the clevis I had a look at the eccentric rod again. It really is a mistake in the drawing because it could lead the unsuspecting astray. There is enough metal to make the the ridge that engages with the groove but only just.
Stanley Challenger Graham
Stanley's View
scg1936 at talktalk.net
"Beware of certitude" (Jimmy Reid)
The floggings will continue until morale improves!
Stanley's View
scg1936 at talktalk.net
"Beware of certitude" (Jimmy Reid)
The floggings will continue until morale improves!
-
Stanley
- Global Moderator
- Posts: 90335
- Joined: 23 Jan 2012, 12:01
- Location: Barnoldswick. Nearer to Heaven than Gloria.
Re: SHED MATTERS 2
I started the day by finishing the clevis. I cut the slot by hand and then drilled it on the other axis for the clevis pin which I upgraded to a 4BA bolt threaded into one side of the clevis. I got it in the centre, drilled and tapped.... Then I had another study of the rod and strap.
I had made sure I could get the clearance hole of the larger pin in the end and then after a lot of preparation I drilled it. You know how bad I am at this but managed to get the hole central. Big sigh of relief!
Here's where I am at. Now was the time to have another study of the strap, I still couldn't understand why there was no internal ridge. I did a fag packet drawing and in the course of doing that I realised what was going on. The reason why there is no mention of a ridge is because there isn't one. The strap is centralised on the eccentric by a set screw in the end of the strap! I quite like this idea so I'm going with it. The only thing I have changed is that instead of the BA stud they propose I think I have room for a 1/8" Unbrako grub screw suitably shortened and shaped.
Next job was to reduce the thickness of the strap to 7/32". Some careful milling and by knocking off time I had one side done. I'll complete it tomorrow. A slow but productive morning!
Stanley Challenger Graham
Stanley's View
scg1936 at talktalk.net
"Beware of certitude" (Jimmy Reid)
The floggings will continue until morale improves!
Stanley's View
scg1936 at talktalk.net
"Beware of certitude" (Jimmy Reid)
The floggings will continue until morale improves!
-
Stanley
- Global Moderator
- Posts: 90335
- Joined: 23 Jan 2012, 12:01
- Location: Barnoldswick. Nearer to Heaven than Gloria.
Re: SHED MATTERS 2
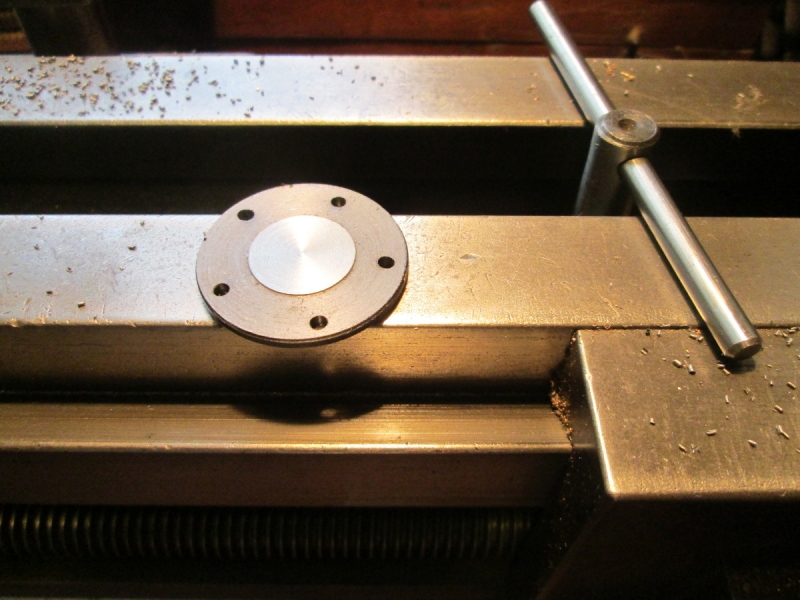
First job this morning was to reduce the thickness of the eccentric strap to 7/32". When I had done that I set up and bored to 5/8" with this end mill. I was confident in doing this as the target is 5/8" and I know this cutter bores slightly undersize.
Then I reamed it out to the exact size.... Once I had done this I spent a lot of time on it making it pretty, breaking all the edges, fitting the supplied 7BA set screw for locating the strap in the groove because it was a better size than an 1/8" Unbrako set screw in terms of wall thickness. Then I drilled an oil hole and generally put the finishing touches to it so I could fit it.
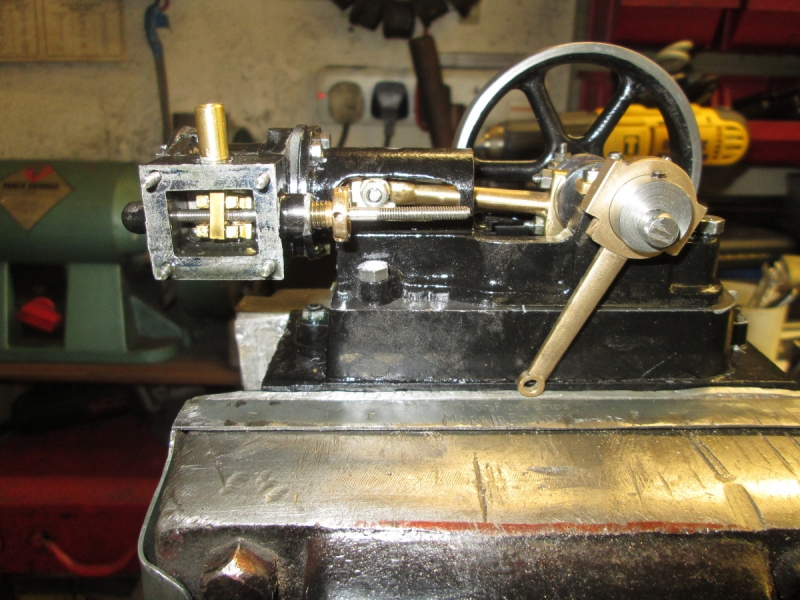
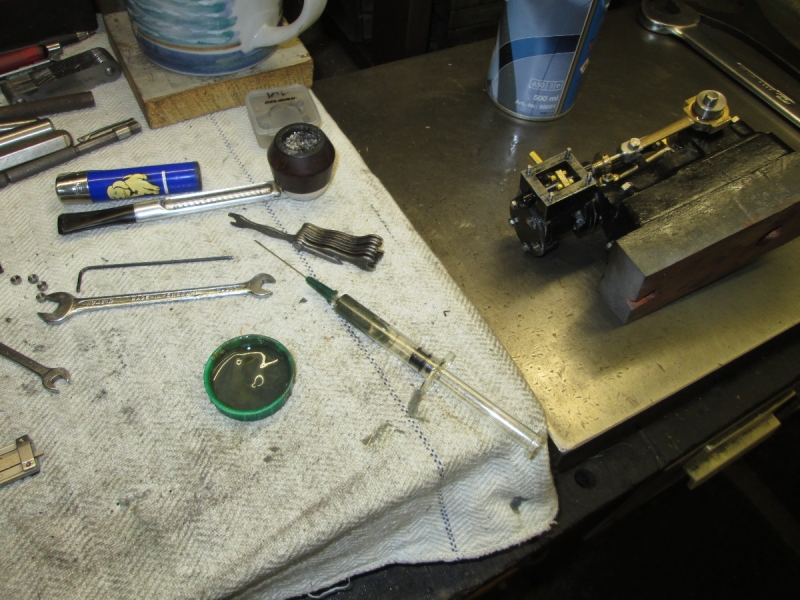
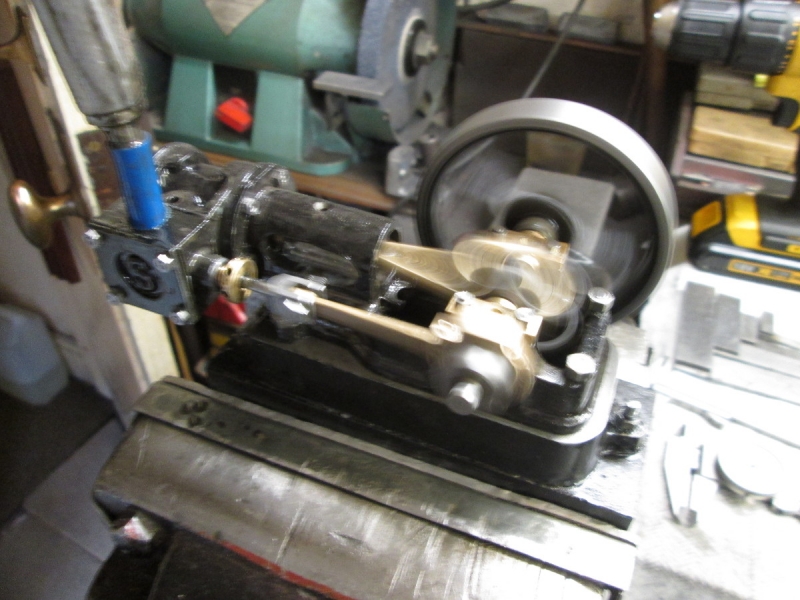
Once I had the eccentric rod mounted I could get a proper measurement for the valve rod. I purposely made it too long. When I had it to the right length I put the packing in the valve rod gland and laced it all up.
By almost knocking off time I had got to the point where everything is fitted and I'm ready for valve timing and steaming. It's still too tight, as always I fit too close! But this will ease off when it starts running and eventually leads to a better running engine. All exciting stuff but I want to take my time over it, this day doesn't come round too often and I want to enjoy it!
Stanley Challenger Graham
Stanley's View
scg1936 at talktalk.net
"Beware of certitude" (Jimmy Reid)
The floggings will continue until morale improves!
Stanley's View
scg1936 at talktalk.net
"Beware of certitude" (Jimmy Reid)
The floggings will continue until morale improves!
-
Stanley
- Global Moderator
- Posts: 90335
- Joined: 23 Jan 2012, 12:01
- Location: Barnoldswick. Nearer to Heaven than Gloria.
Re: SHED MATTERS 2
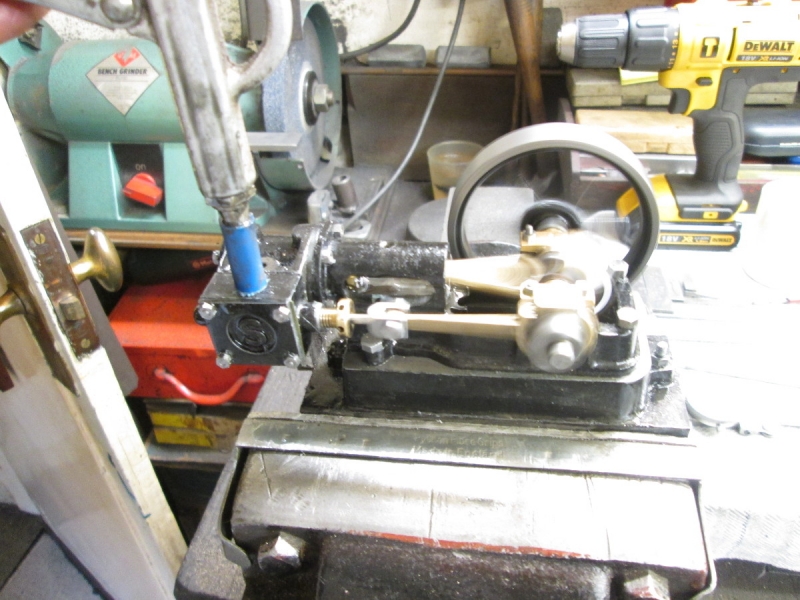
Don't go into a decline when you see this. I have not started on intravenous cylinder oil! The purists are going to hate this but bugger 'em, I do things my way. I mixed up some superfine lapping paste with spindle oil and used the syringe to lace the bore of the cylinder through the ports and all the bearings with it.
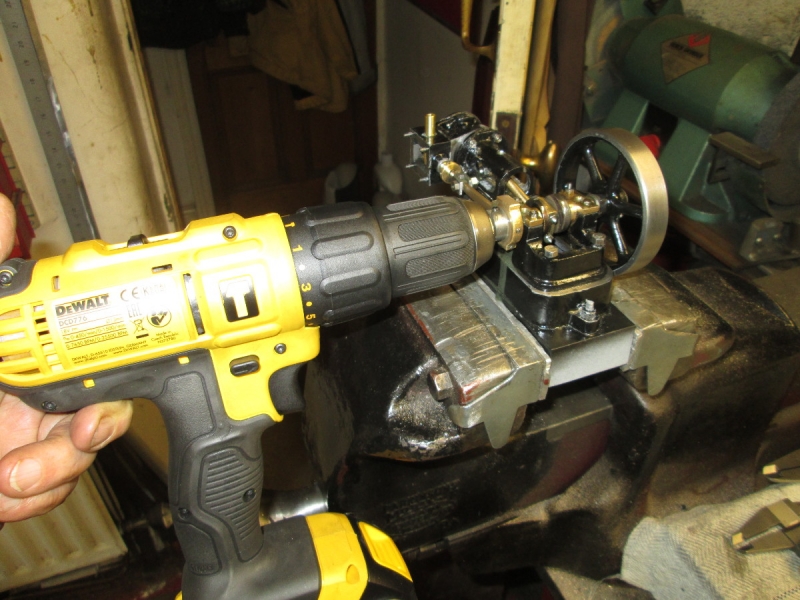
Then I ran the engine for a few minutes at 1500rpm using the DeWalt drill. That cured it, everything became free and I flushed everything through with John's brake cleaning aerosol and re-lubricated the engine.
Then I lifted the lid off the valve chest, set the valve travel so it was central and then gave it some advance for TDC. Then I put some air on it and it went like hell! It runs and restarts right down to 10psi so it will be OK on a bicycle tyre inflater. Next I did some tidying up of studs and little odds and sods and just for a check, I tried it on the compressed air again. Bit of a surprise because it refused to run!
Something was obviously wrong so back to the drawing board! I got it on the bench where the light enabled me to see the ports and went though everything. One thing I found was that I had to valve itself on the opposite way to what I had it when I originally fitted it so I took it out and reversed it. Then I went through setting the valve from the beginning, laced it up and tried again.... It still wouldn't run! There can only be one explanation, the valve, though loose and floating, isn't bedding on the valve face. So I went back to the beginning, popped the engine in the vice and ran it with the drill at 1500rpm.
That cured it! It's such a small valve and for some reason wasn't seating. I wasn't absolutely satisfied with the exhaust beat so I gave it a bit more lead and it's running well. On 100psi it's doing well over 1500rpm, nearer 2000 I reckon. That will do me for today. I had a clearing up and putting away session. My next move is to clean it thoroughly and make a polished wooden base for it. Interesting morning!
Stanley Challenger Graham
Stanley's View
scg1936 at talktalk.net
"Beware of certitude" (Jimmy Reid)
The floggings will continue until morale improves!
Stanley's View
scg1936 at talktalk.net
"Beware of certitude" (Jimmy Reid)
The floggings will continue until morale improves!
-
Stanley
- Global Moderator
- Posts: 90335
- Joined: 23 Jan 2012, 12:01
- Location: Barnoldswick. Nearer to Heaven than Gloria.
Re: SHED MATTERS 2
Not a lot to report this morning. I was pre-occupied by my grand daughter's visit and the weekly housework, washing and cooking. However, she has cancelled today and is coming tomorrow so I went into Mick's field of work! I cut a nice little piece of Keruing and made the edges look pretty. Not up to Mick's standard but it will be sufficient I think. Now it needs sanding and finishing.
Stanley Challenger Graham
Stanley's View
scg1936 at talktalk.net
"Beware of certitude" (Jimmy Reid)
The floggings will continue until morale improves!
Stanley's View
scg1936 at talktalk.net
"Beware of certitude" (Jimmy Reid)
The floggings will continue until morale improves!
-
Stanley
- Global Moderator
- Posts: 90335
- Joined: 23 Jan 2012, 12:01
- Location: Barnoldswick. Nearer to Heaven than Gloria.
Re: SHED MATTERS 2
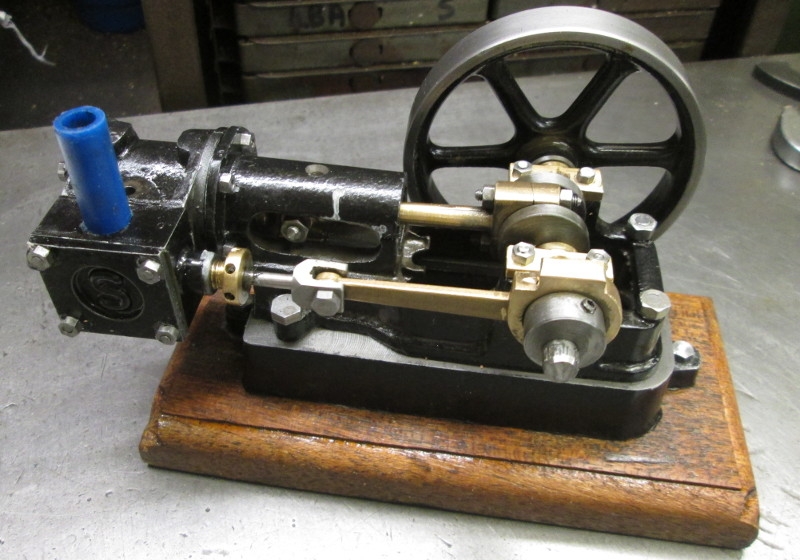
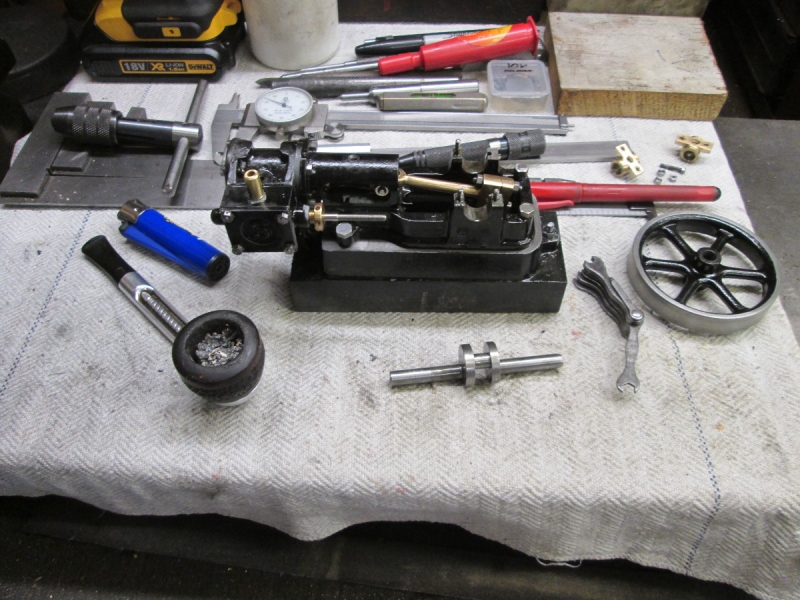
Here's the pic we have been after. Alex's engine is finished and ready to run for Yiota when she visits this morning. It runs really freely and I think will be OK on 15psi which should be well within the capacity of an El Cheapo bicycle tyre inflater. The blue plastic is covering the brass inlet pipe but is handy for sticking the nozzle of the air gun in to run it.
Stanley Challenger Graham
Stanley's View
scg1936 at talktalk.net
"Beware of certitude" (Jimmy Reid)
The floggings will continue until morale improves!
Stanley's View
scg1936 at talktalk.net
"Beware of certitude" (Jimmy Reid)
The floggings will continue until morale improves!

Re: SHED MATTERS 2
Love the wood base, a distressed look about it, very much in sympathy with an old fashioned machine. I didn't realise it was going to go that fast, super job, well done.
Just a thought, you can buy microwave turntable motors which are very slow, if you want to electrify it for display purposes.
Just a thought, you can buy microwave turntable motors which are very slow, if you want to electrify it for display purposes.
-
Stanley
- Global Moderator
- Posts: 90335
- Joined: 23 Jan 2012, 12:01
- Location: Barnoldswick. Nearer to Heaven than Gloria.
Re: SHED MATTERS 2
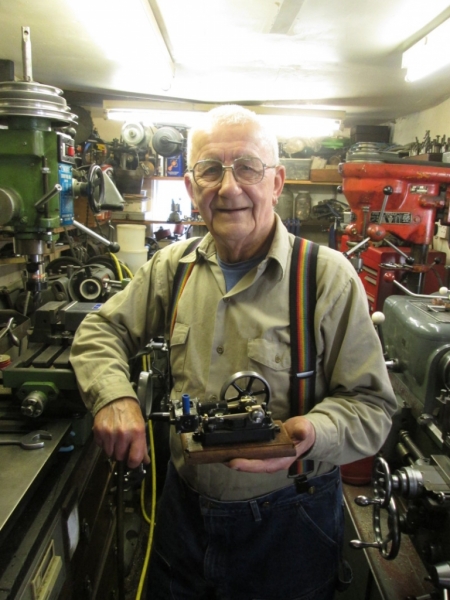
Yiota did this pic of me and the engine. All I did was sand the base down and rub a couple of coats of French Polish into it but no polishing, I agree with you China, doesn't want to look too perfect!
Now I have to get my brain in gear about what to do next.....
Stanley Challenger Graham
Stanley's View
scg1936 at talktalk.net
"Beware of certitude" (Jimmy Reid)
The floggings will continue until morale improves!
Stanley's View
scg1936 at talktalk.net
"Beware of certitude" (Jimmy Reid)
The floggings will continue until morale improves!
-
Stanley
- Global Moderator
- Posts: 90335
- Joined: 23 Jan 2012, 12:01
- Location: Barnoldswick. Nearer to Heaven than Gloria.
Re: SHED MATTERS 2
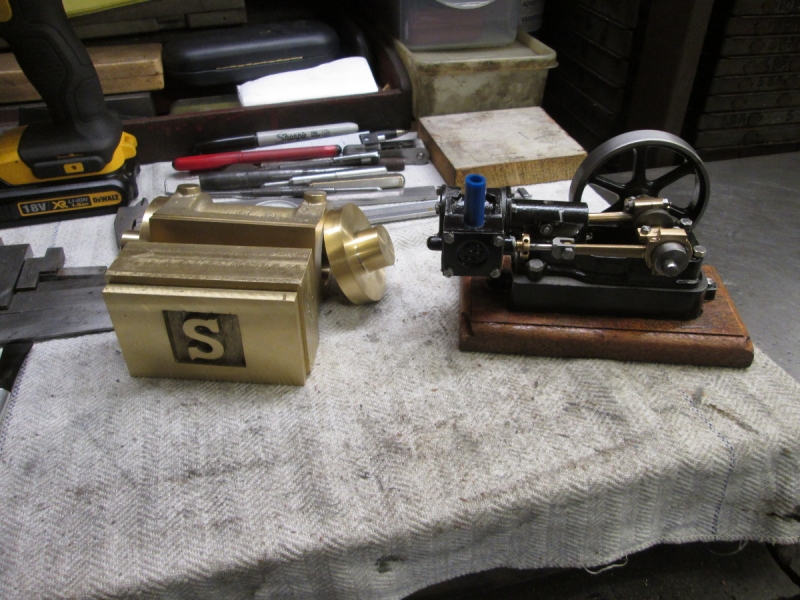
I'm thinking about these castings that John made for me which I started on while waiting for the Stuart castings. It's not a big casting but it looks bloody enormous when compared to Alex's engine!

I dare say you'll all recognise this one, you see something and think it is a good idea but very often don't get round to it. Chuck keys floating round on the top of the gearbox of the lathe are always a pain so I decided to do something about it! I raided the treasure chest, found a nice piece of heavy walled copper pipe (Heat exchanger pipes actually) and a handy piece of scrap brass near the right size, machined it up and drilled for two holes already drilled and tapped in the top of the gearbox where the built-in Harrison Low Voltage lamp used to live. I cleaned everything up, sammed up the soldering gear and co-opted a spare firebrick for the Morso Stove for a non conducting surface and went for it. Notice I am still not using my new super duper blowtorch, I have to empty the old one first and it is lasting forever!
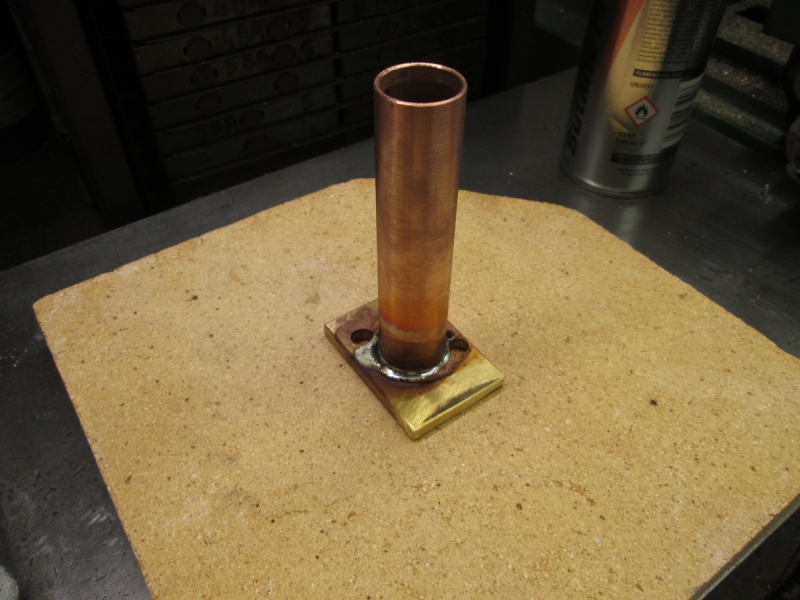
Plenty of cleanliness and some flux, a good preheat and I just touched the solder in the joint and it flashed round it. Probably the best soldering I have ever done!
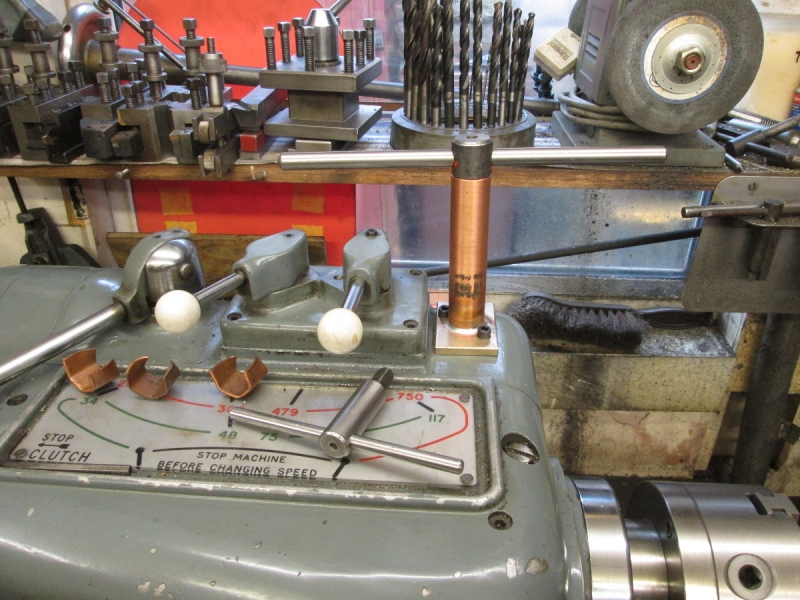
Here it is with my biggest chuck key in it. I'm quite pleased with it!
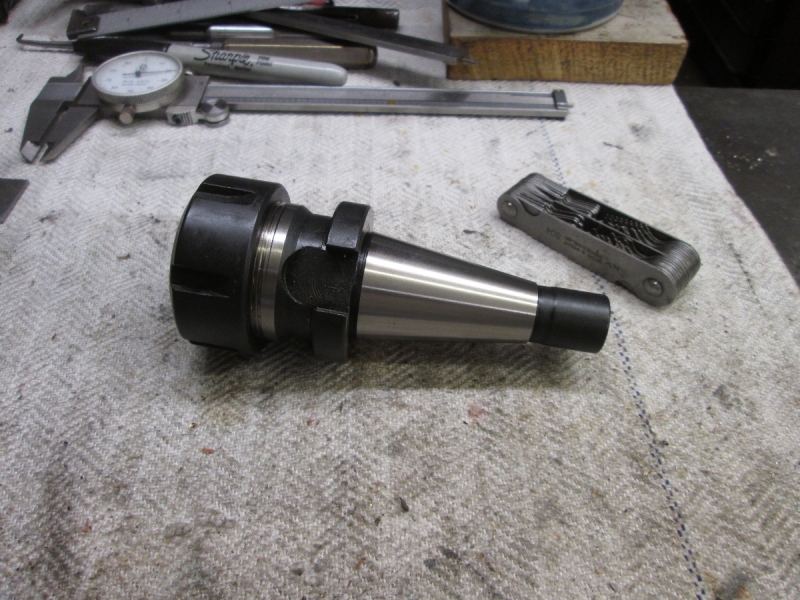
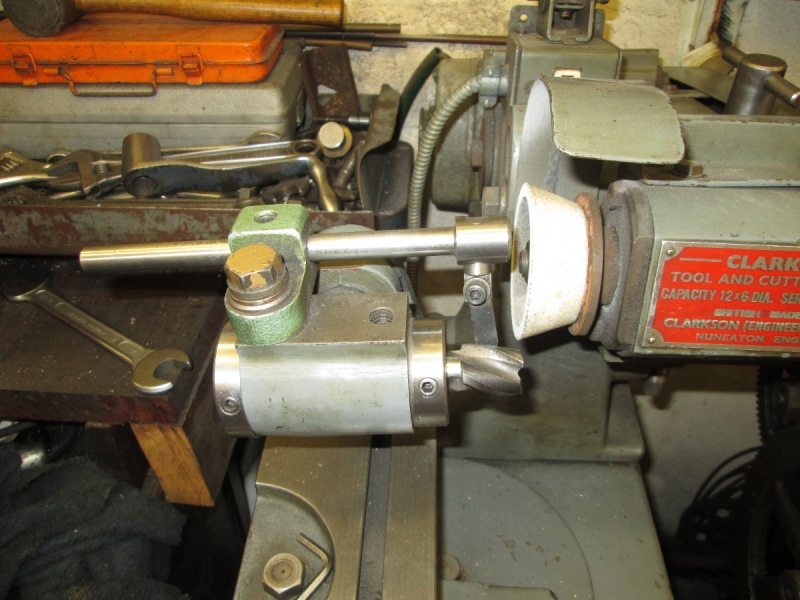
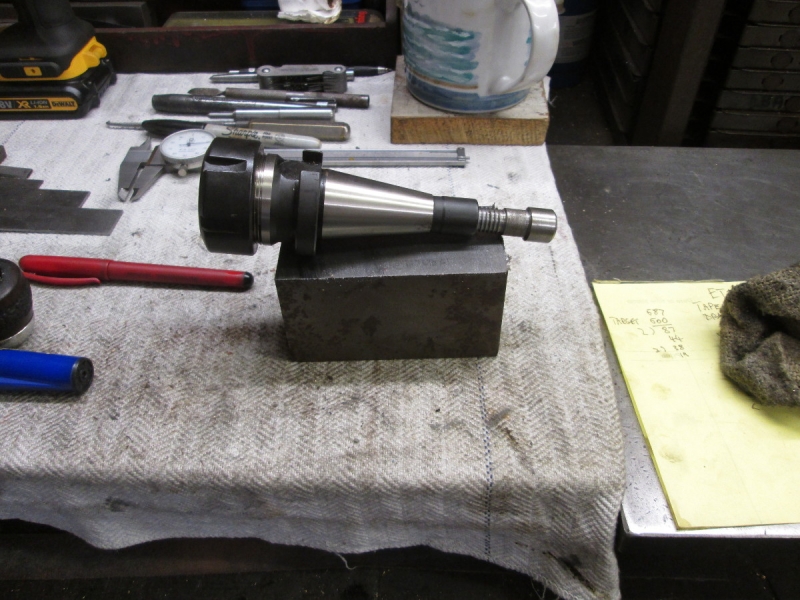
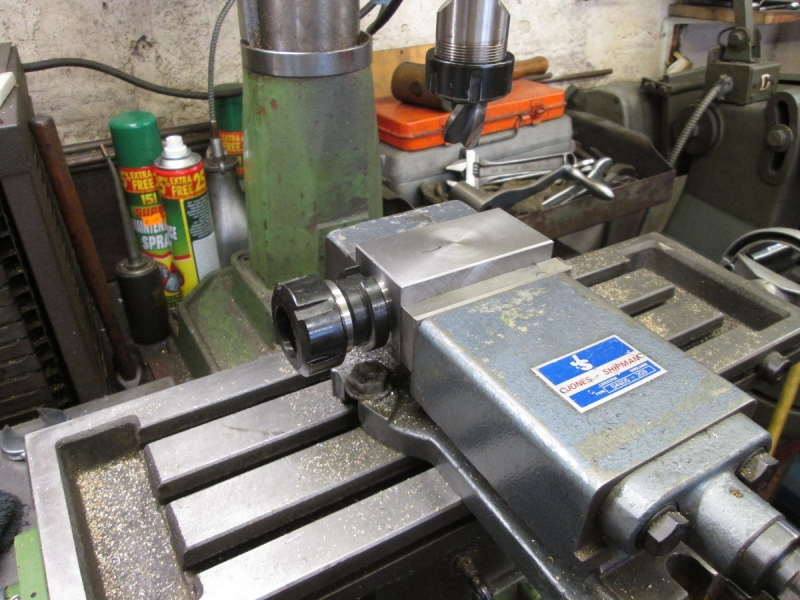
Then on to another long delayed improvement. I watch John using his collet holder in the milling machine vise, mounted in a square holder so it makes it easy to index round stock for milling. I have this collet chuck for the Harrison Horizontal mill but have never used it. It seemed like a good idea at the time. It takes my ETM collets of course which I use in the VM. Funnily enough the biggest problem I had was identifying the thread for the draw bar. It turned out to be 7/16" Whitworth. (I think! It is after all an Imperial Machine and old.....)
You won't be surprised to hear I just happened to have some threaded stock so I'm ready to address what I use for the mounting block but that's for tomorrow.
Stanley Challenger Graham
Stanley's View
scg1936 at talktalk.net
"Beware of certitude" (Jimmy Reid)
The floggings will continue until morale improves!
Stanley's View
scg1936 at talktalk.net
"Beware of certitude" (Jimmy Reid)
The floggings will continue until morale improves!
-
Stanley
- Global Moderator
- Posts: 90335
- Joined: 23 Jan 2012, 12:01
- Location: Barnoldswick. Nearer to Heaven than Gloria.
Re: SHED MATTERS 2
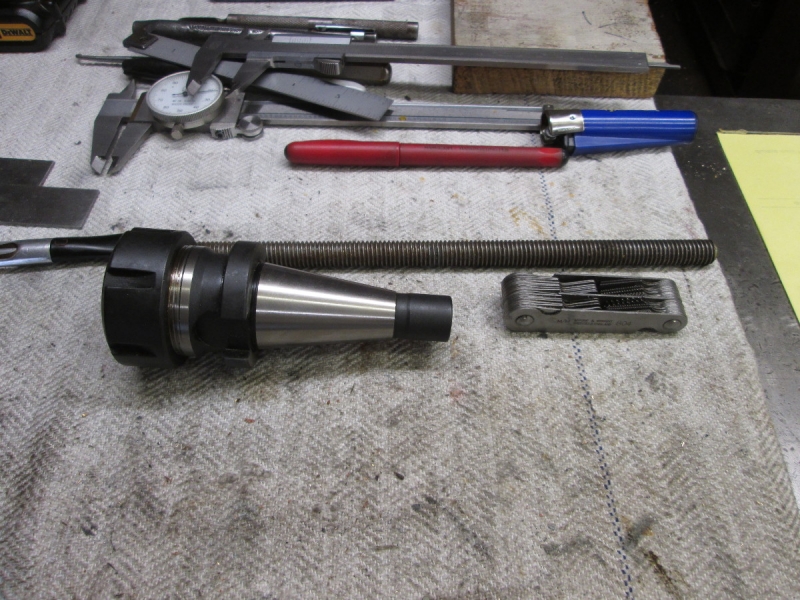
I got the square block on the left out of the treasure chest yesterday as a likely candidate but this morning I had another furtle and found another block which was nearer the size I wanted if I cut a slice off it.
You know what I am going to say now. Eternal gratitude to the NE Mafia for finding Mrs McMaster for me! Such a lovely sound chunking away in the corner while I got on with something else.
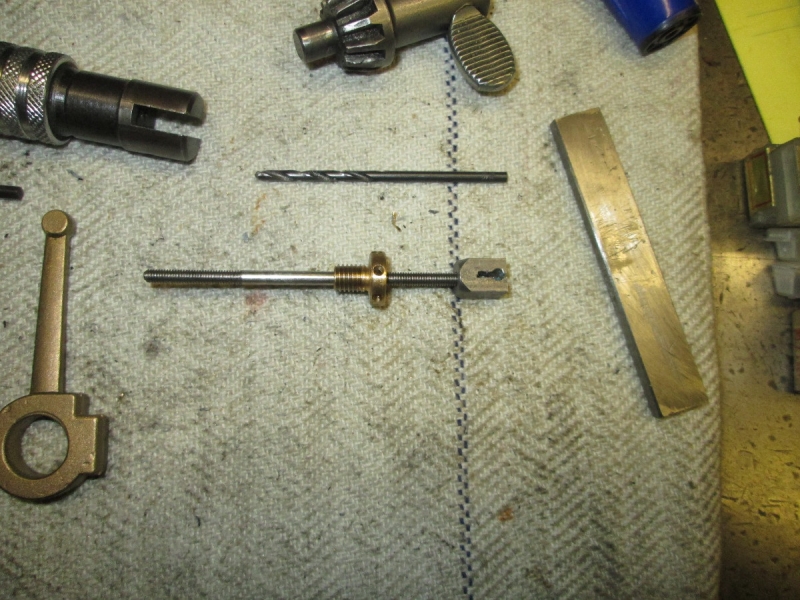
I had found some threaded rod that will do but I wasn't happy about it. I knew I hadn't got it right and there is so little information on the ETM holder. So I went for a furtle on the internet. This holder is obsolete today but luckily I found a specification for it. As I suspected, I was wrong the correct thread is 1/2" UNC 13tpi. So this started a search..... I hadn't any threaded rod so the next thing was a die. I went through my UNC box and found a tap but no die. So I went to the other treasure chests and searched them. No luck, I have everything but a 1/2" die! Only one thing for it, make a bolt.
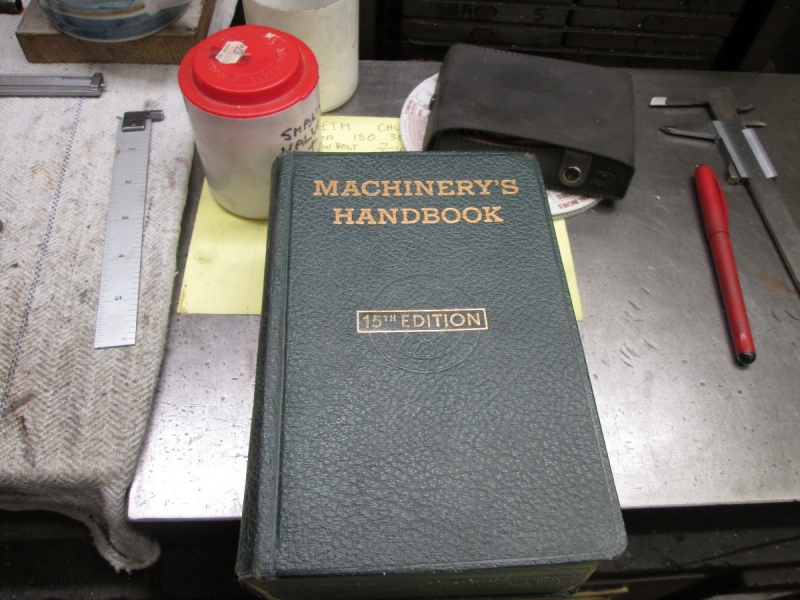
Here's an essential for any workshop that doesn't come out often but when it does it always gives the answer. This is the 1956 edition, a good year because it has all the old stuff in it. What I wanted was the thread form. I found it and sorted out a 60 degree HS cutter.
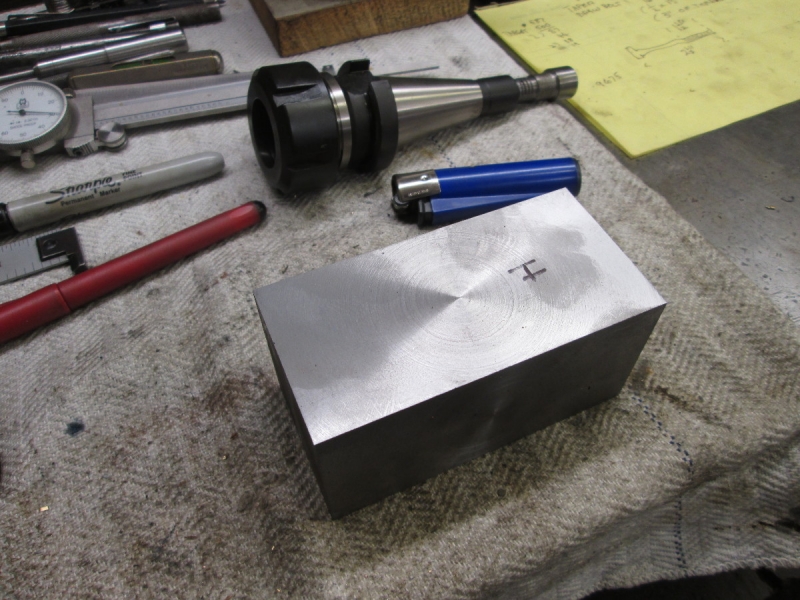
First thing to do was find some stock and make a blank.
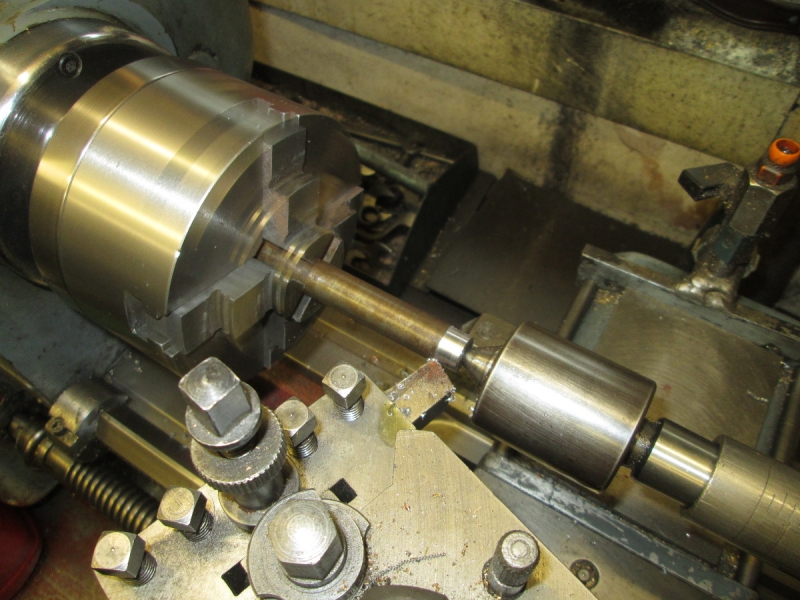
As you know I always admit to cock ups and this is a biggie! For a start off I forgot to put the right cutter in. That wouldn't have been to bad because luckily the grind was near enough to 60 degrees but I got mixed up and started on the wrong index mark on the indicator. If it had been and even number thread I would have got away with it but it wasn't so I ruined it. In my defence it's a long time since I did any screw-cutting in the lathe and I am getting old.....
I rest my brain, turned the radio off and started again. Not long after I had the bolt made and parted off. Only one small problem my eyes let me down and I took a cut too many so it's a relatively sloppy fit but it will do what I want. The forces trying to move the workpiece are nothing compared to if it was for milling cutters.
It was getting near knocking off time so I put the big 4 jaw on ready for squaring the block up tomorrow.
Stanley Challenger Graham
Stanley's View
scg1936 at talktalk.net
"Beware of certitude" (Jimmy Reid)
The floggings will continue until morale improves!
Stanley's View
scg1936 at talktalk.net
"Beware of certitude" (Jimmy Reid)
The floggings will continue until morale improves!
-
Stanley
- Global Moderator
- Posts: 90335
- Joined: 23 Jan 2012, 12:01
- Location: Barnoldswick. Nearer to Heaven than Gloria.
Re: SHED MATTERS 2
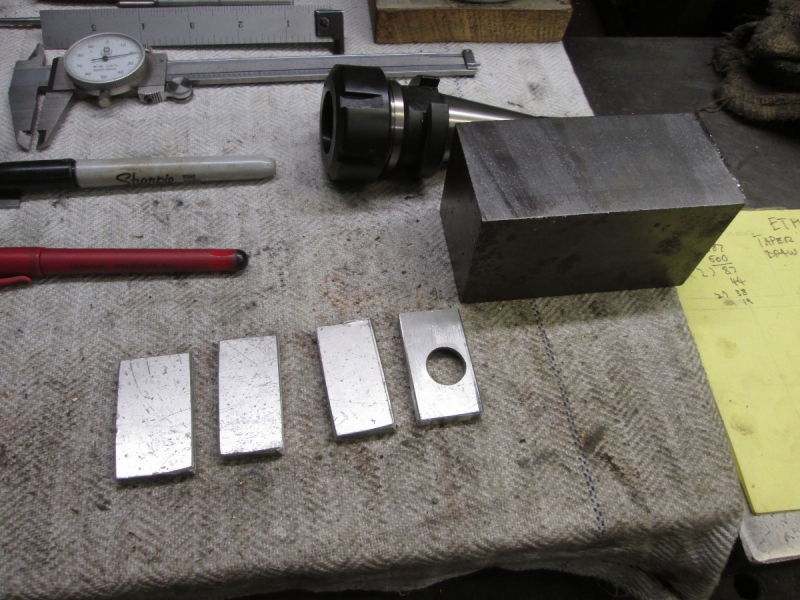
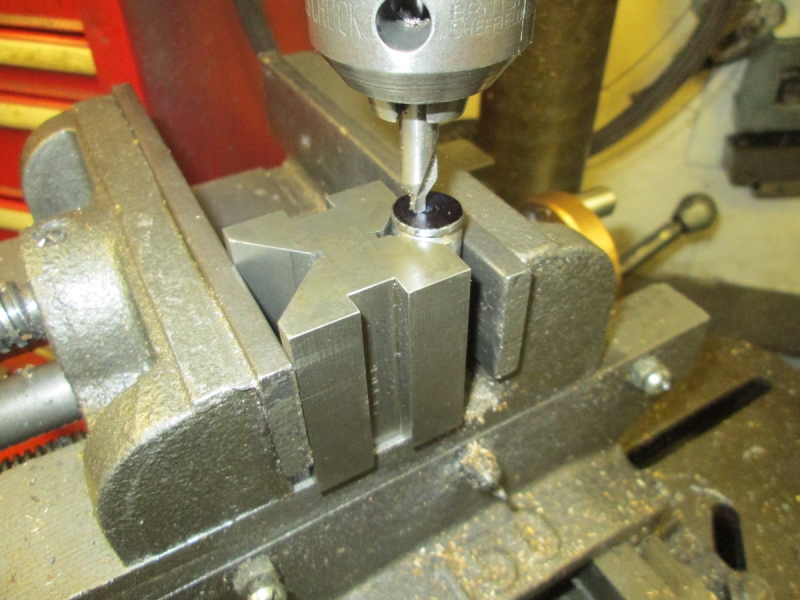
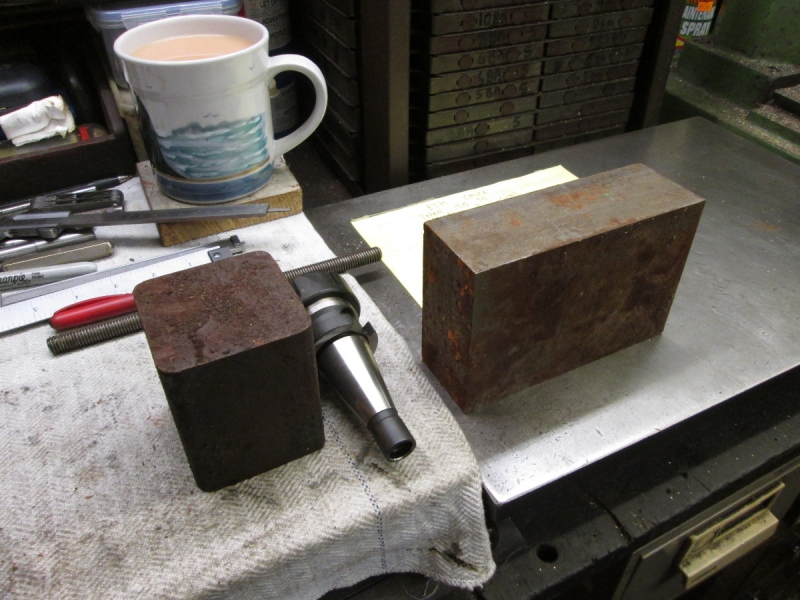
Today's job is to convert my lump of steel into a square, accurate block with all four sides lengthways the same size. Looking ahead, when I come to bore the taper for the chuck I need some proper protective slips to put between the jaws and my (hopefully) accurate finished block. So I cut four on the HM. No point having a dog and barking yourself!
This was the easiest way to get the chuck set for my block which is just over 2" square, put a piece of 2" round stock in and indicate it. Before we go any further let me tell you what my thinking is on getting a really accurate block, it's what I think of as sight disability machining! My eyes are not to be trusted most of the time so I am going to use the accuracy of the machines and methods that cut measuring down to a minimum. I don't have DRO and so have to box clever. I suspect a lot who read this will be in the same boat....
The first job was to use the accuracy of the chuck to get the ends square. I faced one end, reversed it, belted it up tight onto the face with a dead blow hammer, didn't overtighten the jaws and so finished up with the ends almost perfectly square to each other. Perhaps a couple of tenths of a thou out but no machine is perfectly accurate and this will do me!
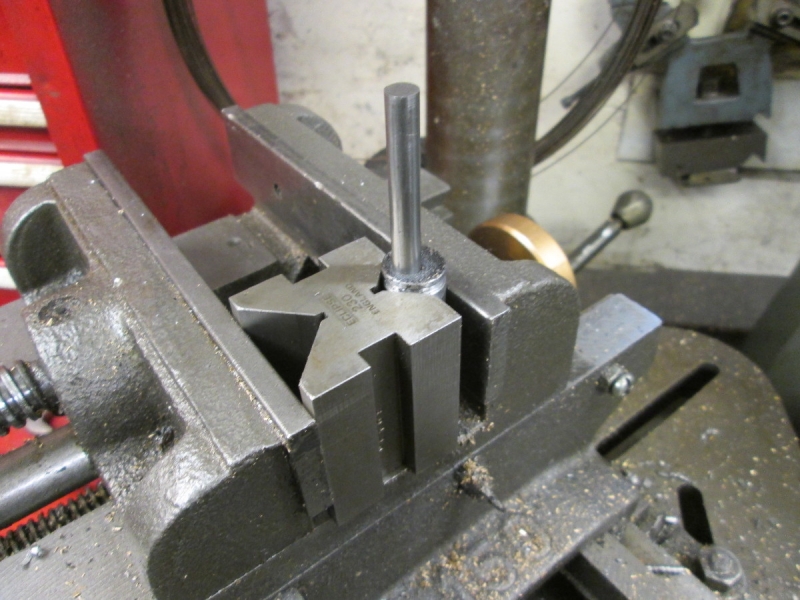
Once I had the ends square I used exactly the same technique on the sides, get one side clean and square and then reverse the stock, belting it down with the soft blow hammer.

I made sure that the last side was a bit proud and would take a cut. I took it out and measured with the micrometer and found I needed to take 20 thou off. I have the cross slide still set at 30 degrees from the threading so that was no good and anyway putting the magnetic back indicator on the bed is more accurate. Two ten thou cuts and a measure up.
Here's where I was at closing time.... I have measured it up and there is less than a thou in the sides. I have marked this 'H' and at the moment my plan is to do a light fly-cutter cut and then roll the block 90 degrees in the vise on the miller and cut it without altering the cutter. I reckon that way I shall be as accurate as possible with my tackle. It's overkill actually because it doesn't matter if there is a slight variation but I have decided to do it as accurately as I can just to be bloody minded!
Stanley Challenger Graham
Stanley's View
scg1936 at talktalk.net
"Beware of certitude" (Jimmy Reid)
The floggings will continue until morale improves!
Stanley's View
scg1936 at talktalk.net
"Beware of certitude" (Jimmy Reid)
The floggings will continue until morale improves!
-
Stanley
- Global Moderator
- Posts: 90335
- Joined: 23 Jan 2012, 12:01
- Location: Barnoldswick. Nearer to Heaven than Gloria.
Re: SHED MATTERS 2
I knew this side was about 2 thou proud so I sharpened the fly cutter, put about 5 thou of cut on it and did a pass before turning the block over to the adjacent side without altering the cutting depth and did a pass over that as well. I haven't got the cutter quite right, it could be a better finish but I ignored that and had a measure up. Not bad, the two measurements are within just over half a thou and I suspect that's the limit of the mill which isn't bad for an El Cheapo Taiwan import!

Then I put a 45 degree cutter in and put a small chamfer on all the edges before taking it out and smoothing all the edges with a coarse diamond hone. You always have the feeling you could do better but on the whole I am satisfied.
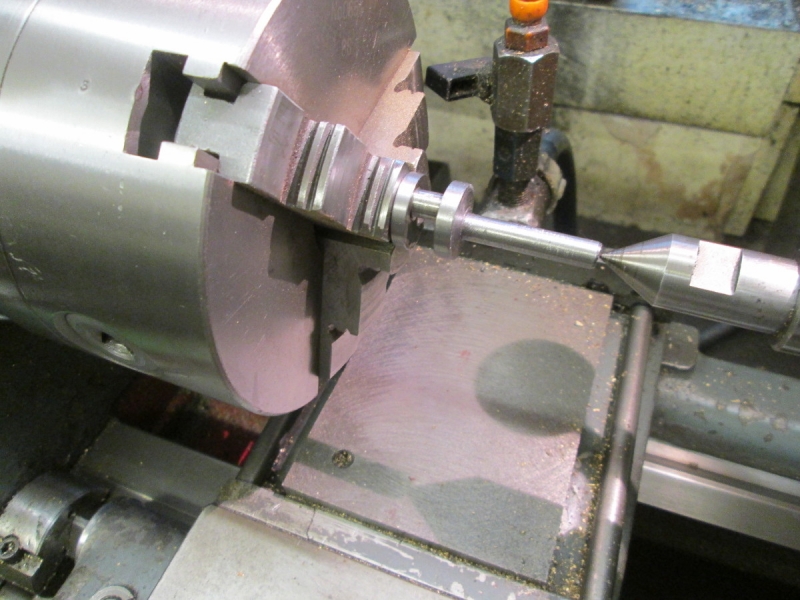
I gave Mrs Harrison a good clean. Next job is to get the compound slide to the correct angle for boring the taper. I decided that mounting the chuck on a piece of ground stock held in a collet would be good. Bit of a shock, the collet is fine but the run out on the taper is about 10 thou! I did all the usual things like cleaning everything, trying a different mandrel etc. but couldn't get a good result. I decided the discrepancy is in the collet in the chuck and tried a different approach.
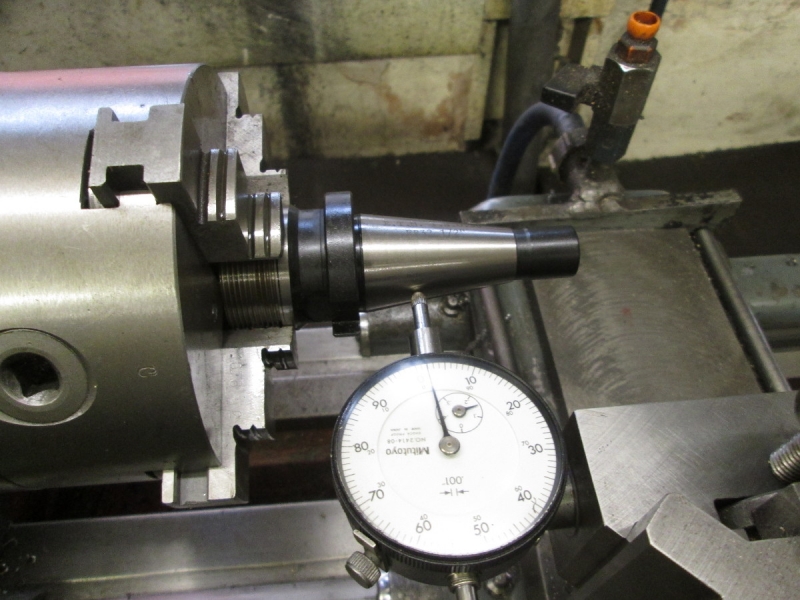
I put the 4 jaw SC chuck on and lightly gripped the chuck body. I didn't expect it to be accurate and it wasn't, 4 thou run out, so I accepted that, split the difference and left it at that.

I set up my most accurate dial indicator and adjusted the slide until I had it at the stage where I had only a tenth of a thou in 2". Again I suspect that this is the limit of the lathe's accuracy. So I locked the compound down, checked it once more and settled for that.

It was getting on for knocking off time so my last act was to put the big 4 jaw back on. I'm ready for another setting up session tomorrow.....
Stanley Challenger Graham
Stanley's View
scg1936 at talktalk.net
"Beware of certitude" (Jimmy Reid)
The floggings will continue until morale improves!
Stanley's View
scg1936 at talktalk.net
"Beware of certitude" (Jimmy Reid)
The floggings will continue until morale improves!
-
Stanley
- Global Moderator
- Posts: 90335
- Joined: 23 Jan 2012, 12:01
- Location: Barnoldswick. Nearer to Heaven than Gloria.
Re: SHED MATTERS 2
First job this morning was nothing to do with the collet chuck. A good quartz clock I have has been poorly recently, keeps stopping and I had pinned it down to bad contacts for the battery. So I took it into the shed and made absolutely certain that the contacts were clean.... It's running again and I hope that's cured it!
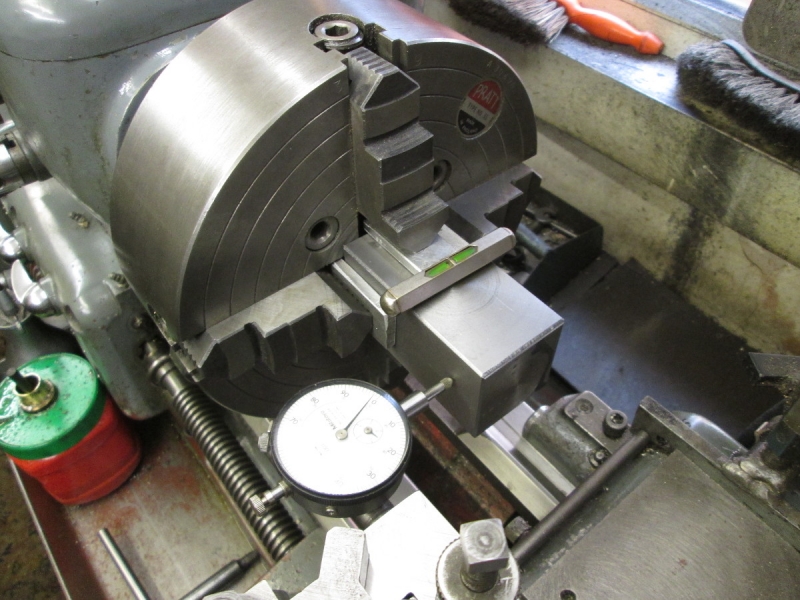
Then on to the main event, setting the block up in the lathe and starting boring it. Those of you who have tried it will know that indicating square stock up in the 4 jaw is not the easiest of jobs. I got set up with it somewhere near and then moved on to the indicator. The small spirit level is to make sure that I get the block upright and square each time. It took me forever but I have it within a couple of thou in all planes. Then I faced the end and centre drilled it.
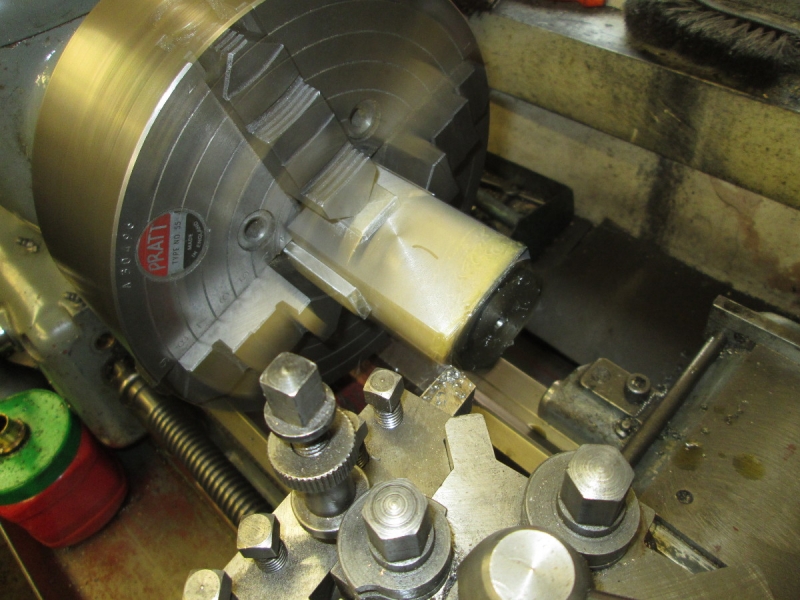
Then I drilled it a shade over 1/2" and now I'm ready for a fag packet drawing of the internal profile..... I know I'm slow but I am enjoying this even when it gets bloody frustrating!
Stanley Challenger Graham
Stanley's View
scg1936 at talktalk.net
"Beware of certitude" (Jimmy Reid)
The floggings will continue until morale improves!
Stanley's View
scg1936 at talktalk.net
"Beware of certitude" (Jimmy Reid)
The floggings will continue until morale improves!
-
Stanley
- Global Moderator
- Posts: 90335
- Joined: 23 Jan 2012, 12:01
- Location: Barnoldswick. Nearer to Heaven than Gloria.
Re: SHED MATTERS 2
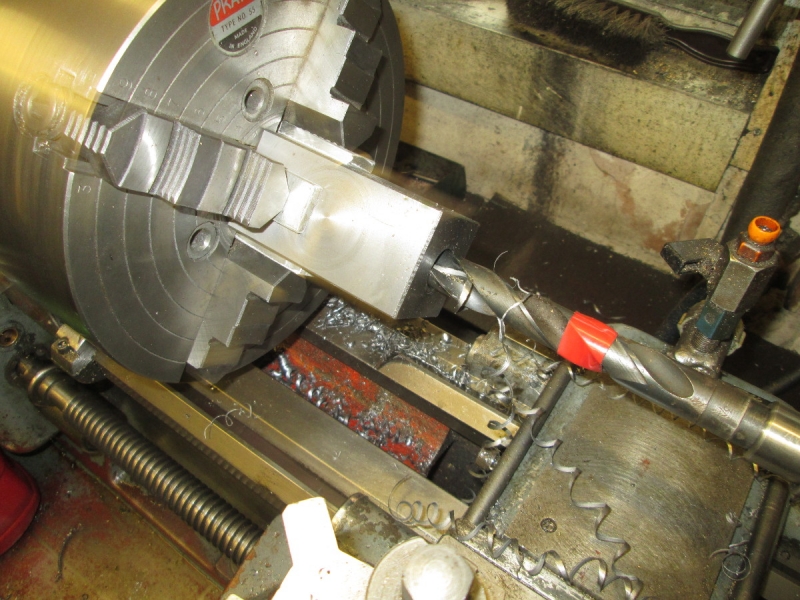
I did my drawing and decided we could bore to 3" deep with a 3/4" drill. We need clearance at the bottom of the taper. It doesn't need to be the full depth of the taper because all we are looking for here is a hold firm enough to be stable while the workpiece is being milled.
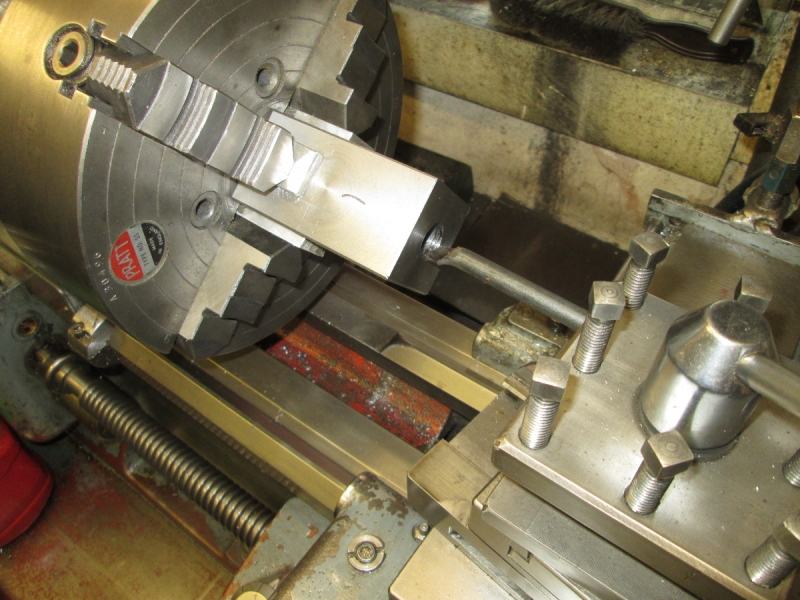
I re-sharpened this boring bar. It fits the bore and the only drawback is that it's a bit light. I did some test cuts and found that it bored without squealing at 216rpm as long as I keep to 10 thou cuts and take a spring cut on the return. It all worked out fine with plenty of cutting oil and I finished up with a good fit almost to the full depth of the taper. That's all I need.
Here's the end result. Time for me to stop and get on with my housework and cooking on the free leccy. Tomorrow I'll use the fixture to mill flats on the draw bolt.....
Stanley Challenger Graham
Stanley's View
scg1936 at talktalk.net
"Beware of certitude" (Jimmy Reid)
The floggings will continue until morale improves!
Stanley's View
scg1936 at talktalk.net
"Beware of certitude" (Jimmy Reid)
The floggings will continue until morale improves!