
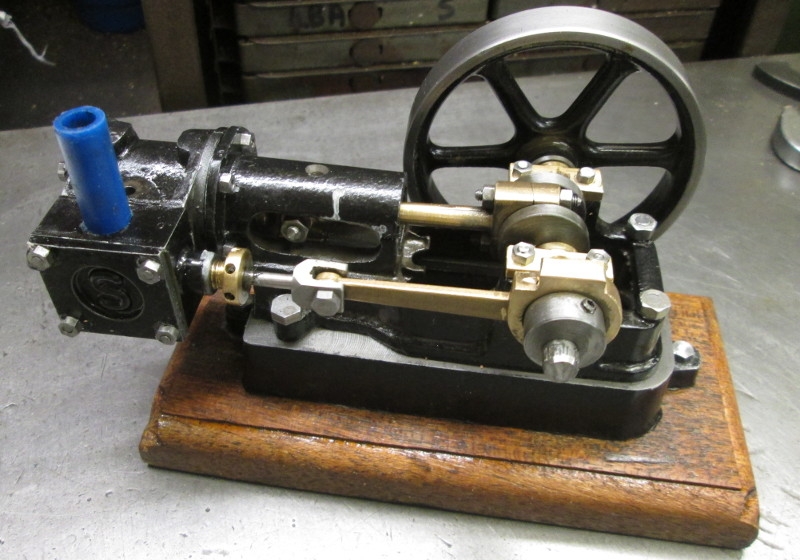
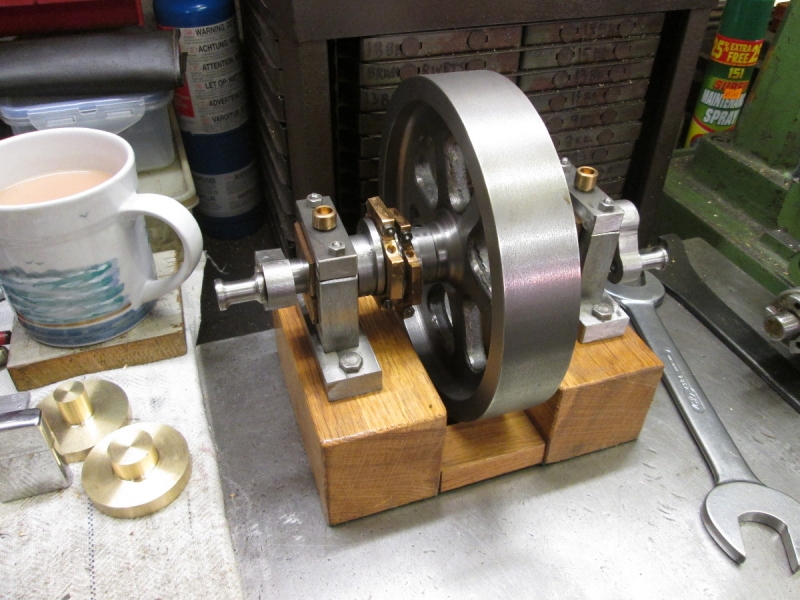
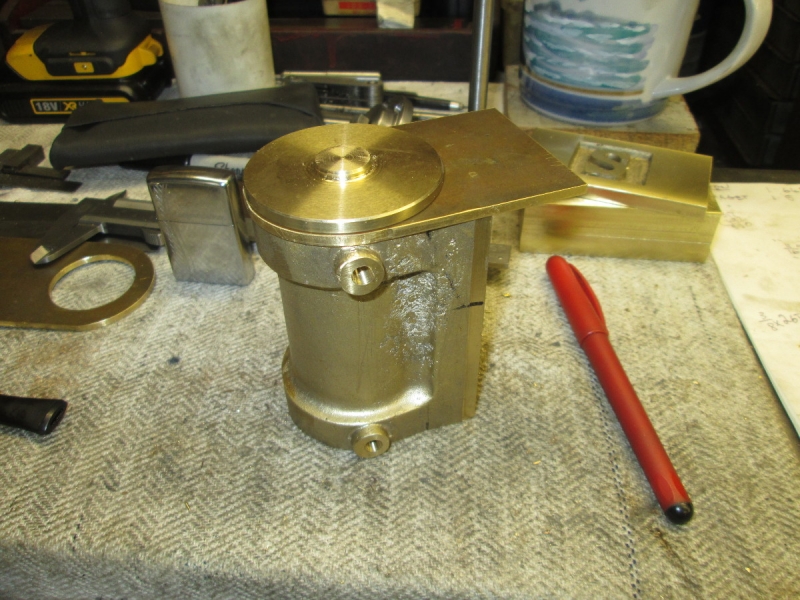
Something I've just noticed. Why is the strap (I think that's what you call it) notched at one side and rounded at the other? You can see it top left of the centre of the strap in the above picture. And does it cause imbalance and vibration when running at speed?
SHED MATTERS 2
-
Stanley

- Global Moderator

- Posts: 90743
- Joined: 23 Jan 2012, 12:01
- Location: Barnoldswick. Nearer to Heaven than Gloria.
Re: SHED MATTERS 2
China. The original design called for a saw cut in the middle of that flat and a bolt through so as to be able to pinch it to adjust the bore of the eccentric strap. So it needs a flat at each side for the adjusting bolt to bear on. I didn't bother with it. If it ever wears it can be altered but it will never need it. Theoretically there is some imbalance but in practice it is so small (Only 3/32" of throw on the eccentric) as to be negligible. I put the oil hole in there.
Stanley Challenger Graham
Stanley's View
scg1936 at talktalk.net
"Beware of certitude" (Jimmy Reid)
The floggings will continue until morale improves!
Stanley's View
scg1936 at talktalk.net
"Beware of certitude" (Jimmy Reid)
The floggings will continue until morale improves!
-
Stanley
- Global Moderator
- Posts: 90743
- Joined: 23 Jan 2012, 12:01
- Location: Barnoldswick. Nearer to Heaven than Gloria.
Re: SHED MATTERS 2
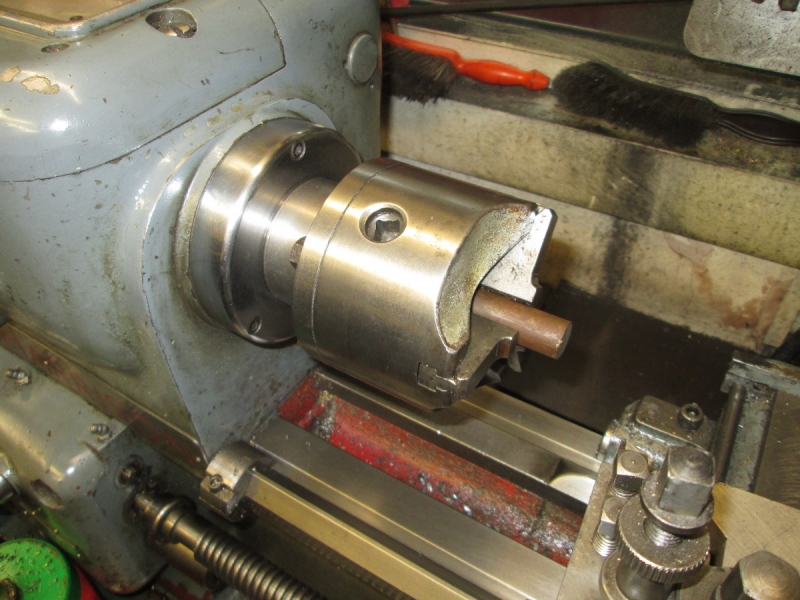
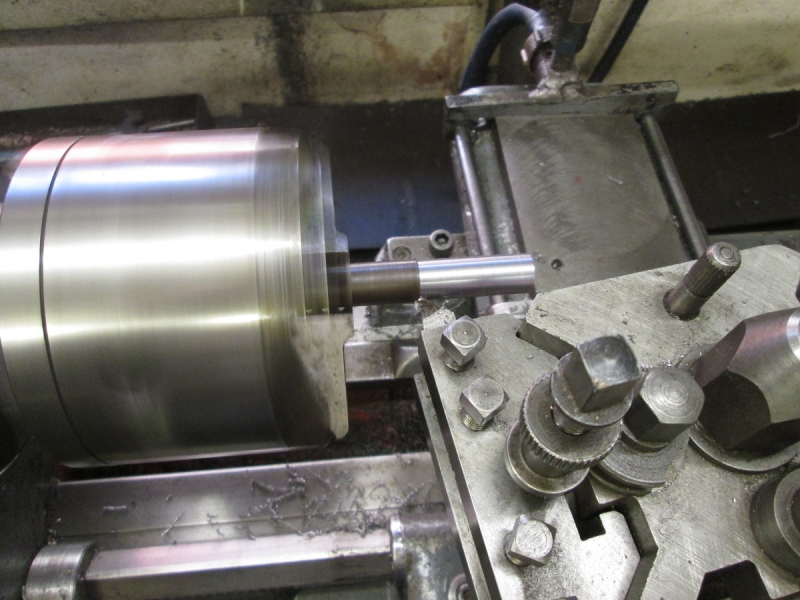
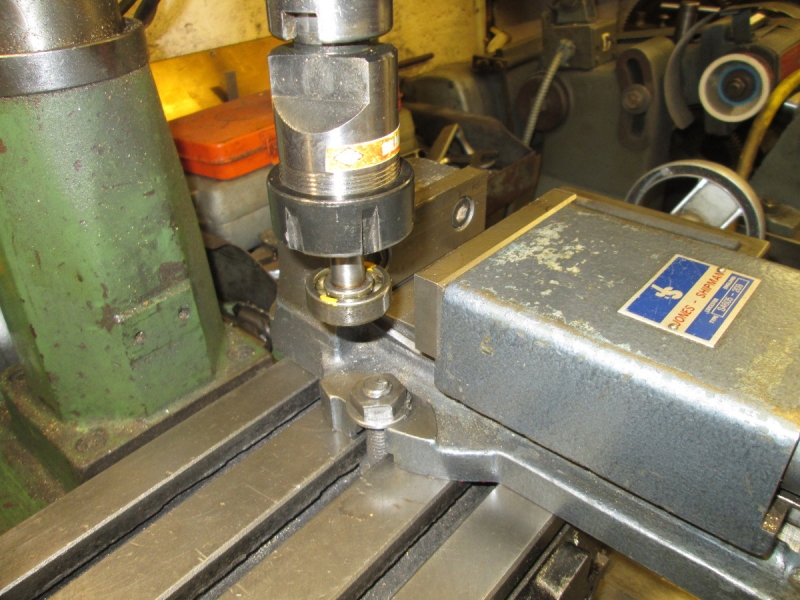
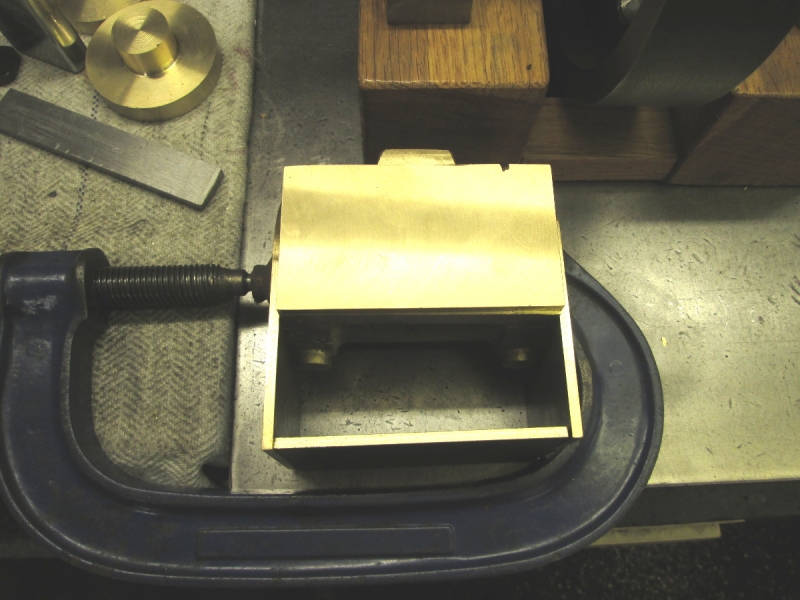
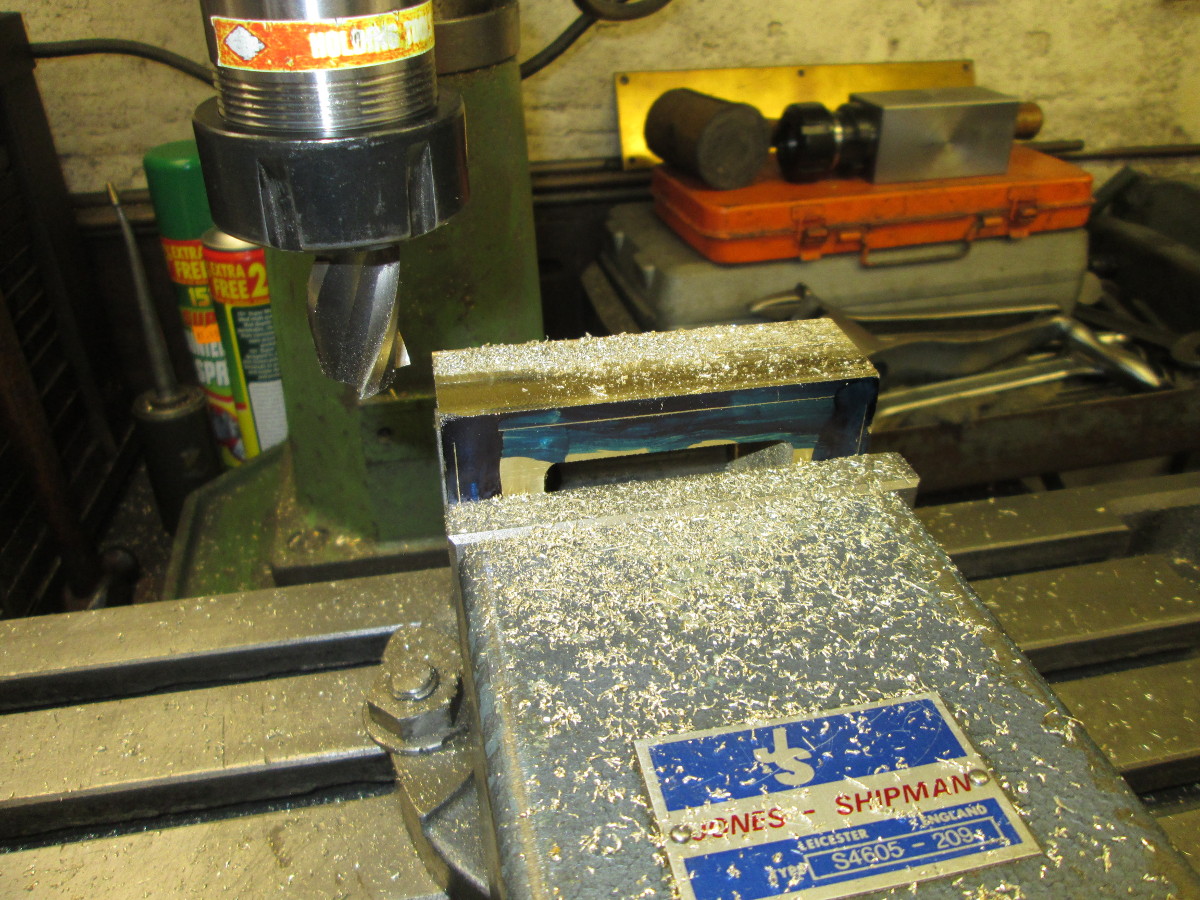
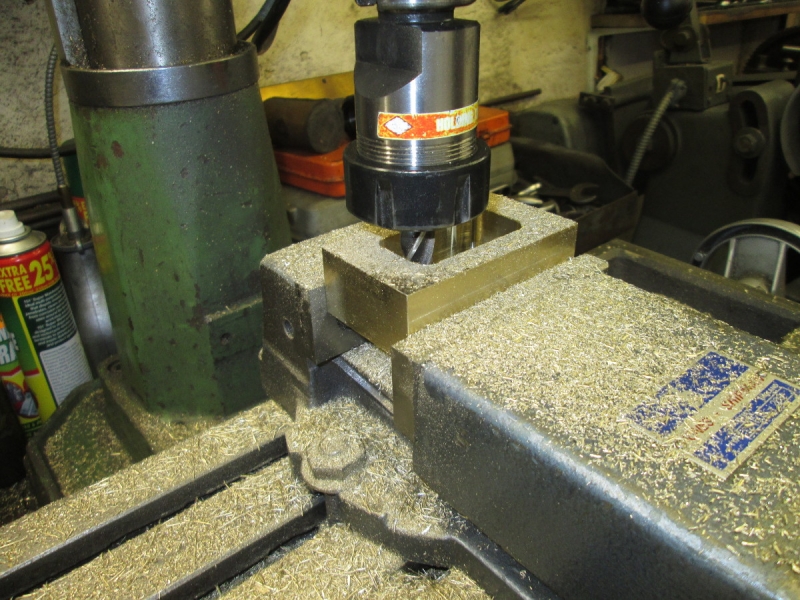
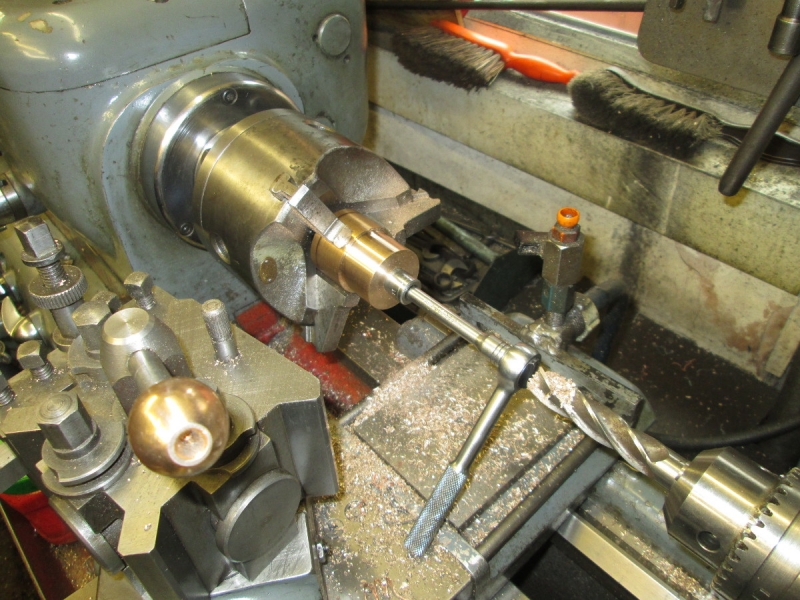
I decided that my draw-bolt was crap (it is!) so I would have a third go at it and get it right! Notice that I have given my Taylor chuck a trip out! I cleaned Mrs Harrison as well and re-sharpened all the tools. It's going to be right this time! Oh, and I switched the radio off as well, no distractions.

A bit later..... it's a perfect fit this time. I'd measured everything before I started and one little trap is that the 1/2" UNC bolt is actually 10 thou above size for the perfect fit. You can't trust the buggers!
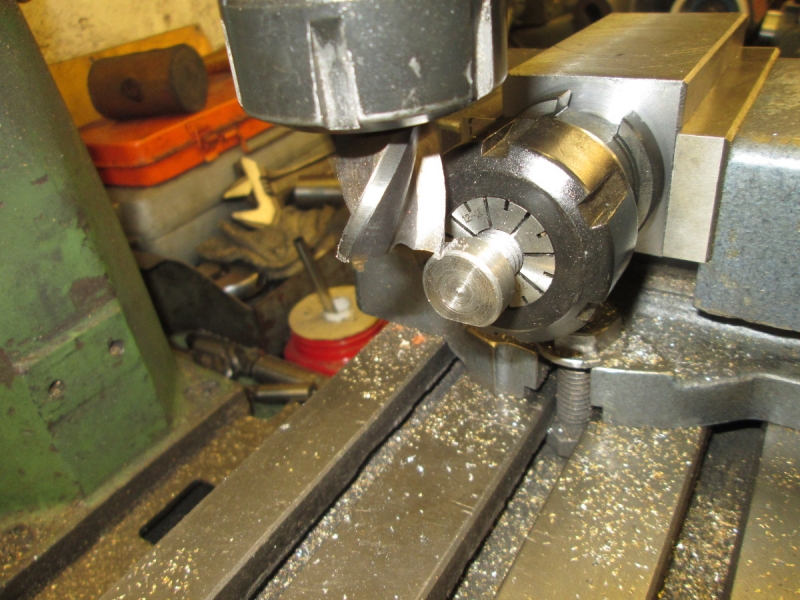
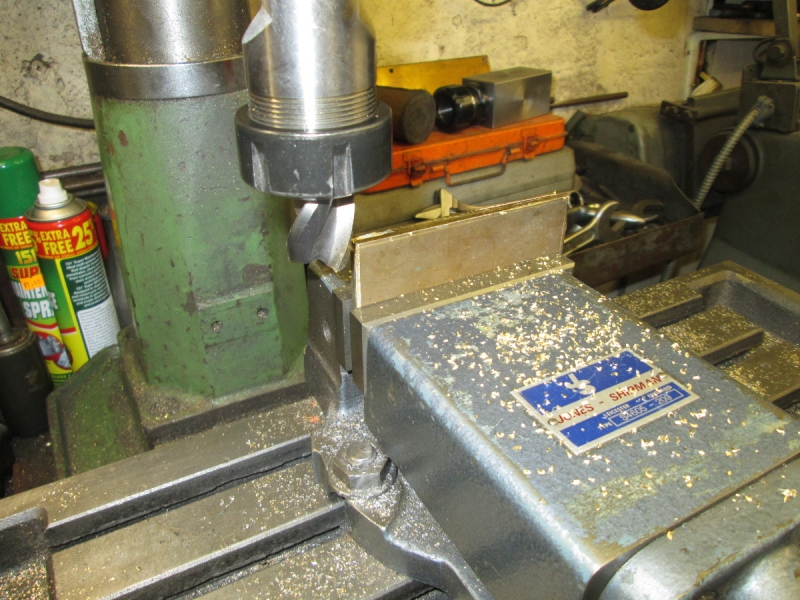
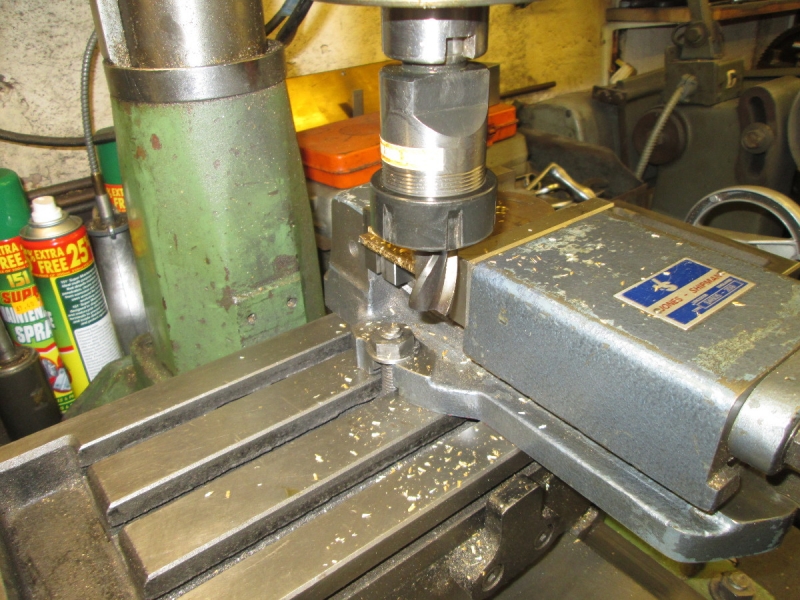
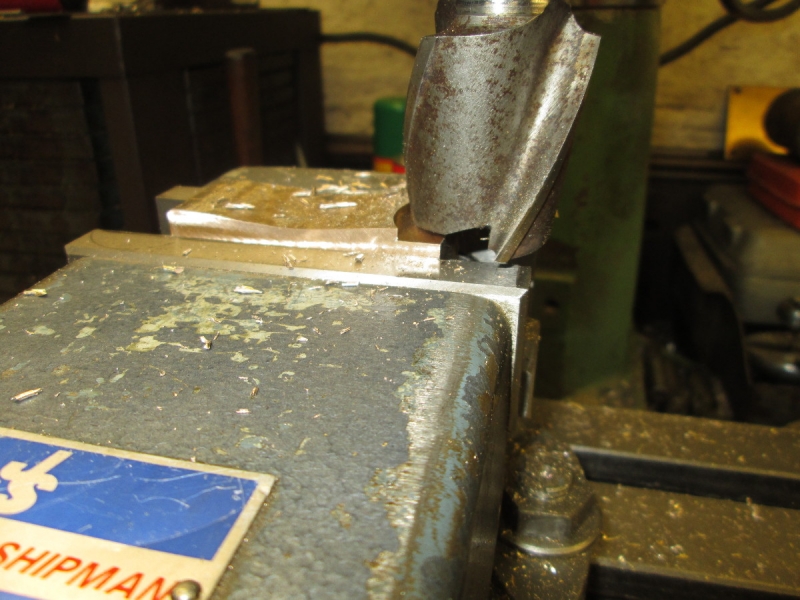
The collet block fulfilling its function, milling two flats on the draw-bolt.
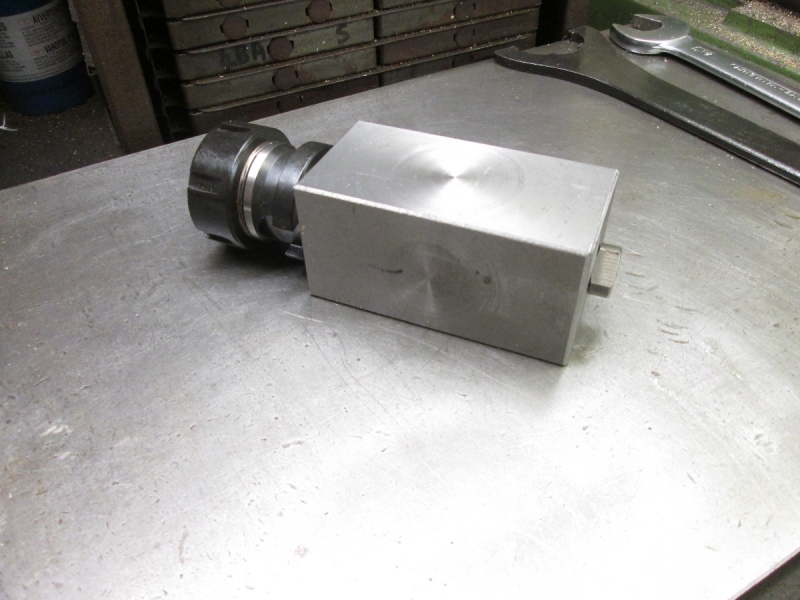
Here we are, a useful addition to the armoury! I'm glad I re-made the bolt...... Now then, what next?
Stanley Challenger Graham
Stanley's View
scg1936 at talktalk.net
"Beware of certitude" (Jimmy Reid)
The floggings will continue until morale improves!
Stanley's View
scg1936 at talktalk.net
"Beware of certitude" (Jimmy Reid)
The floggings will continue until morale improves!
-
Stanley
- Global Moderator
- Posts: 90743
- Joined: 23 Jan 2012, 12:01
- Location: Barnoldswick. Nearer to Heaven than Gloria.
Re: SHED MATTERS 2
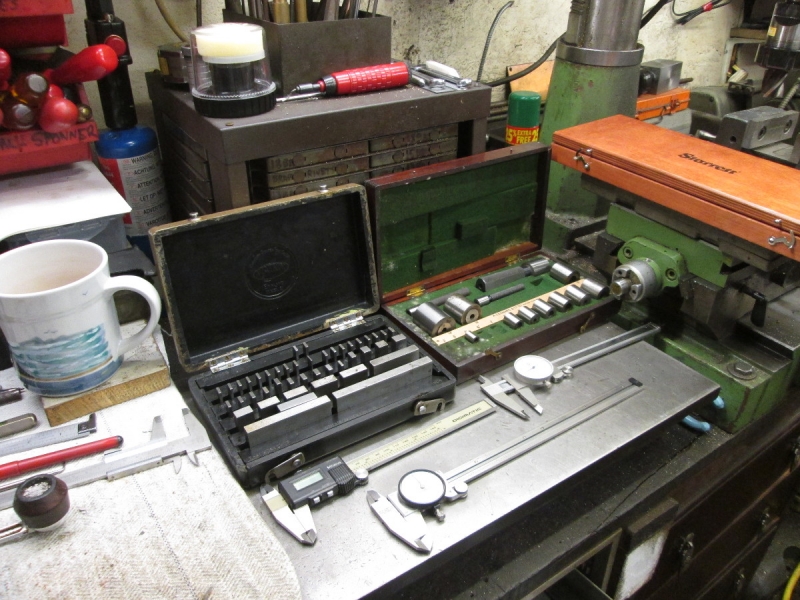
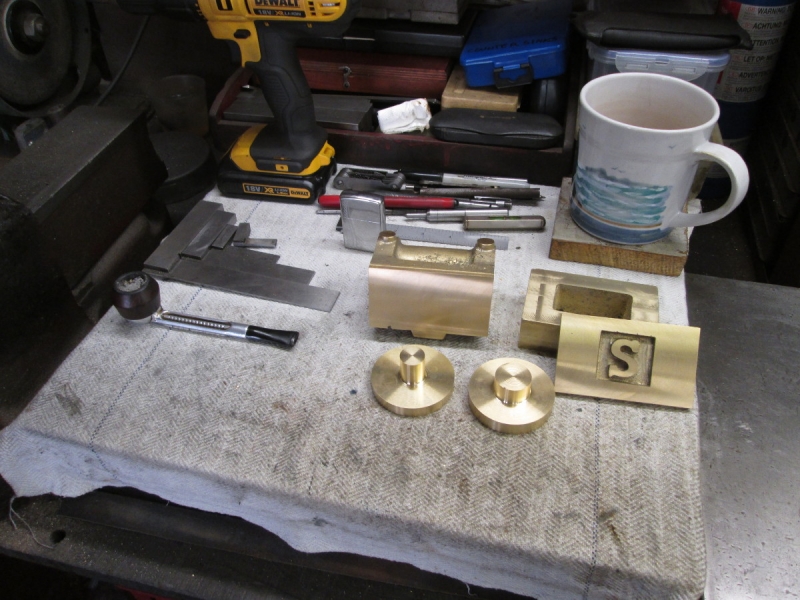
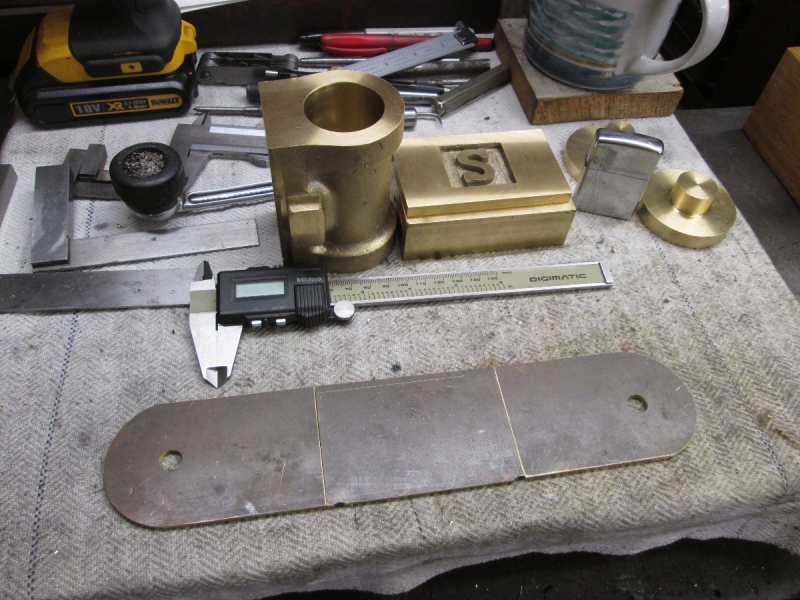
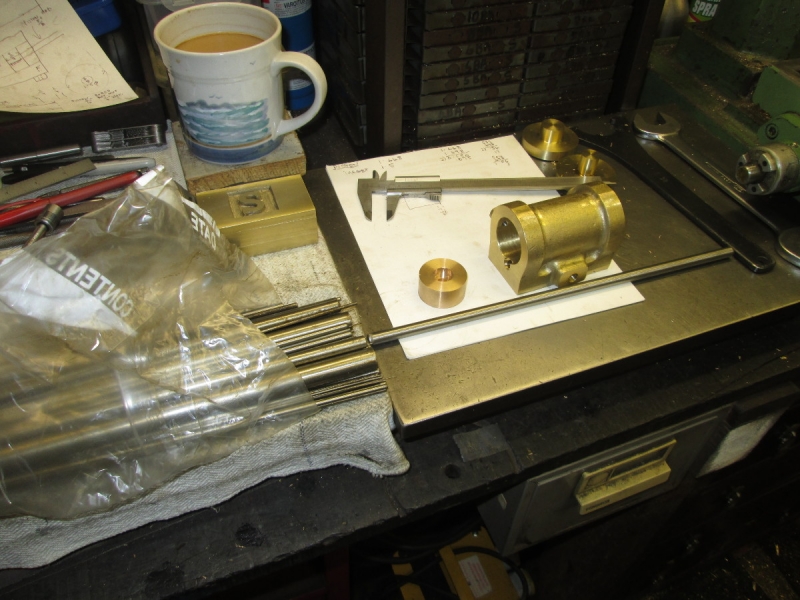
I surveyed my options for the shed and spurred on by a recent video by Adam Booth I decided to check my measuring tackle, particularly my old Mitutoyo Digimatic which I lost patience with a few weeks since. First job was to check callipers, vernier, dial and digital. I got the Matrix slips and my plug standards out so I had something to go by. Of course this implies that I believe they are both accurate. All I can say is that in terms of the best tool-room standards they will both be wanting because of wear due to age and a lot of use but it's a question of degree. I am confident they are both well with one tenth of a thou and that's good enough for me.
The first conclusion I came to was that I am not being careful enough about cleanliness, Grinding dust and minute machine chips are unavoidable in a shed as small as mine so I gave them all a good clean (and the micrometers as well later) and resolved that in future when not in use they will be in their cases!
The results were satisfactory, they are all accurate to less than half a thou, including the Digimatic. This is acceptable for the work I do. So what was the problem with the Digimatic? I did some different measurements with it and found that the problem was that whilst it gave an accurate reading, it seldom zeroes accurately when returned to zero. This being the case I have reinstated it on the team because of course it has a brilliant little function, if you zero it at the target measurement it can automatically give to what you need to take off to hit the target. As long as I remember to reset it each time I use it and do the final measurement with a micrometer I can live with it.
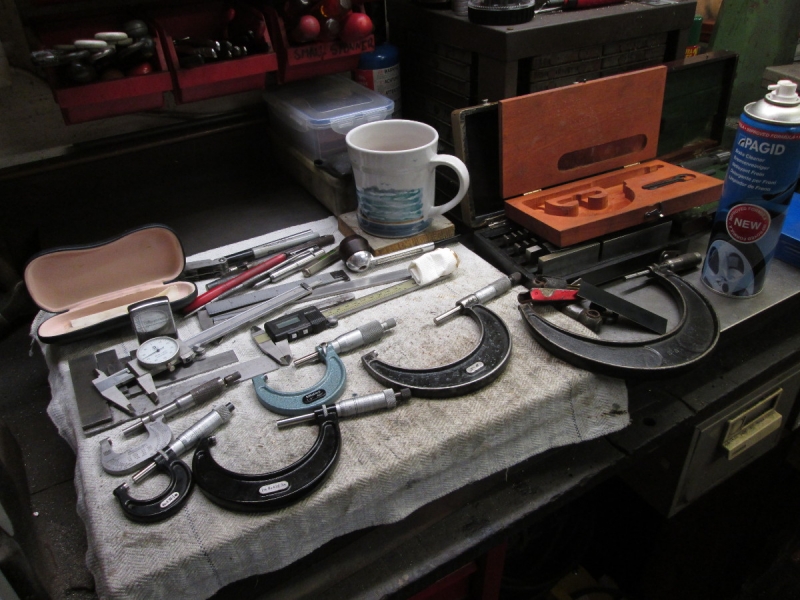
Next I got my micrometers out, from zero to one inch up to 5" to 6". Unlike many amateurs like me I only have one of each. I have seen blokes who have turned into collectors and it doesn't do anything for their accuracy. One of each used properly is better. They all checked out OK, slightly more accurate than the callipers which was no surprise. They are all within less than a tenth of a thou. Surprisingly this includes the very old Brown and Sharpe on the left. Living proof that the better the original quality the longer it will serve you!
Not a wasted morning. I was fairly confident of the results before I started. The best result was the finding that I have been unfair to the Digimatic, I shall use it more but remember the zero problem! I put them all away in their cases......
Stanley Challenger Graham
Stanley's View
scg1936 at talktalk.net
"Beware of certitude" (Jimmy Reid)
The floggings will continue until morale improves!
Stanley's View
scg1936 at talktalk.net
"Beware of certitude" (Jimmy Reid)
The floggings will continue until morale improves!
Re: SHED MATTERS 2
Thanks for the explanation about the strap.
-
Stanley
- Global Moderator
- Posts: 90743
- Joined: 23 Jan 2012, 12:01
- Location: Barnoldswick. Nearer to Heaven than Gloria.
Re: SHED MATTERS 2
Stanley Challenger Graham
Stanley's View
scg1936 at talktalk.net
"Beware of certitude" (Jimmy Reid)
The floggings will continue until morale improves!
Stanley's View
scg1936 at talktalk.net
"Beware of certitude" (Jimmy Reid)
The floggings will continue until morale improves!
-
Stanley
- Global Moderator
- Posts: 90743
- Joined: 23 Jan 2012, 12:01
- Location: Barnoldswick. Nearer to Heaven than Gloria.
Re: SHED MATTERS 2
The bad news is that I haven't been in the shed. The good news is that I have written three articles. You win some, you lose some!
Stanley Challenger Graham
Stanley's View
scg1936 at talktalk.net
"Beware of certitude" (Jimmy Reid)
The floggings will continue until morale improves!
Stanley's View
scg1936 at talktalk.net
"Beware of certitude" (Jimmy Reid)
The floggings will continue until morale improves!
-
Stanley
- Global Moderator
- Posts: 90743
- Joined: 23 Jan 2012, 12:01
- Location: Barnoldswick. Nearer to Heaven than Gloria.
Re: SHED MATTERS 2
I eventually wrote four articles so in that respect it was a good day.
I went in the shed this morning at 8AM with no clear objective in mind.
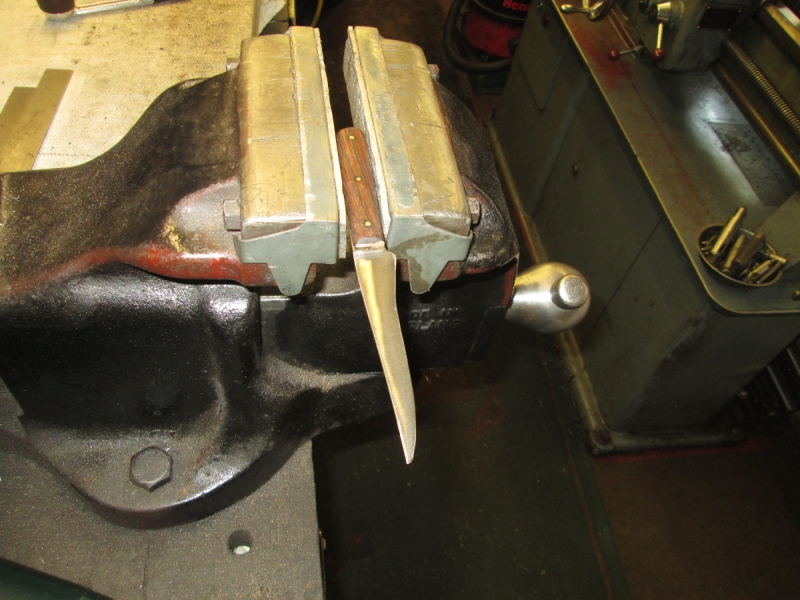
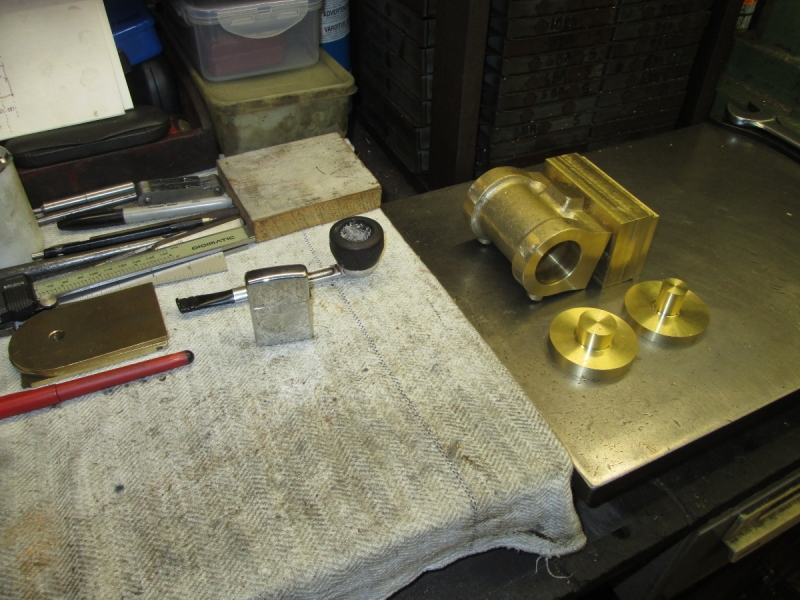
My first job was to improve two of my kitchen knives which I have neglected lately. I have favourite knives and like to keep them razor sharp. This is one, by Spong of London. It's good steel and very handy. The other was a very plain boning knife but it's excellent steel. I polished them both, re-sharpened them and honed the edges. You could shave with them now....
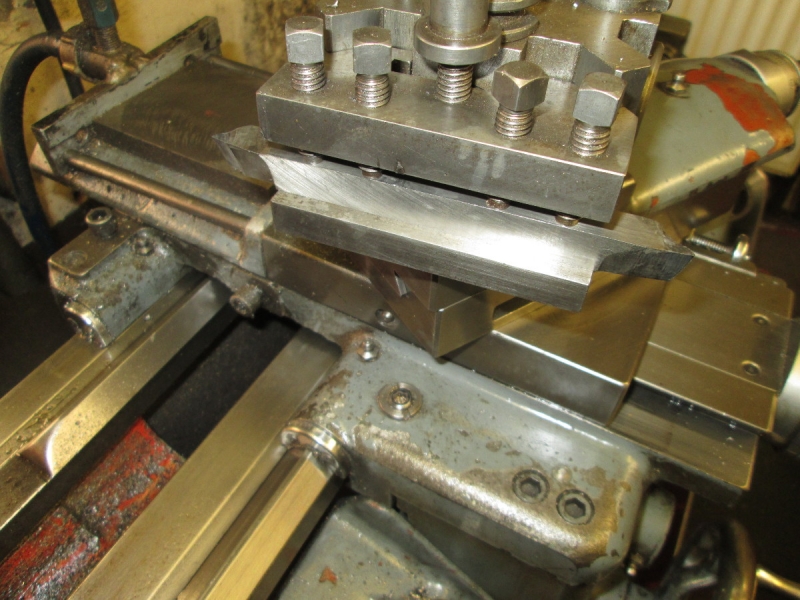
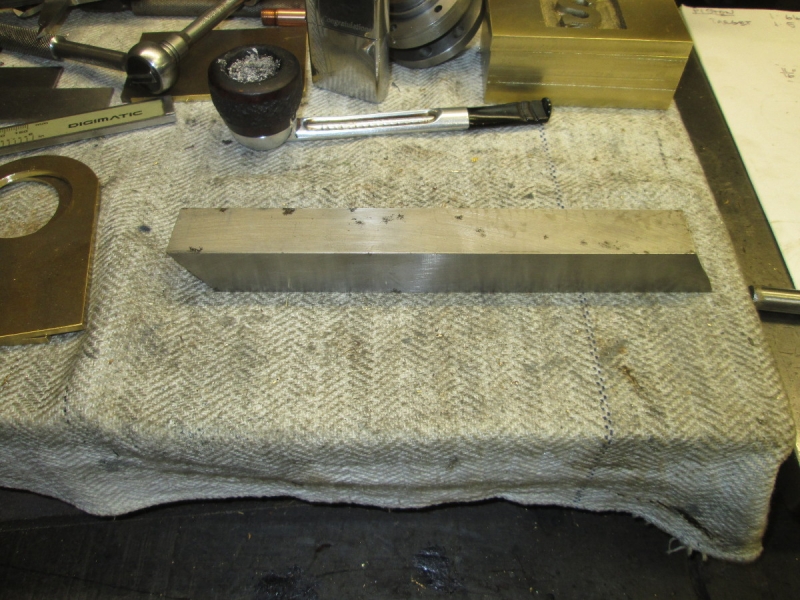
Next I addressed a matter that has been bugging me for a while. As you may have noticed I don't swap cutters a lot, I have favourites and have them set up in the quick change blocks and use them for everything. I've been using a 5/8" chip-breaker for a while that is a bit numb at the end. It fouls the centre too soon if you are turning small diameters so I started again with some 1/2" HS stock that was originally sharpened at the Nu-Swift factory as a grooving tool. (That's where all my HS steel came from) Another thing I looked at is my habit of sharpening cutters as though at some point they might be used for very heavy cuts. I suppose that goes back to when I had bigger lathes. 1/8" is a heavy cut in Mrs Harrison so I re-ground the bit using only the end 3/8" of the stock. One end is R hand cut and the other L hand and as near as possible I have ground them both the same centre height so it can easily be reversed in the holder.
I set the centre height and checked it and then did a couple of longitudinal cuts to test the finish. It was a bit raw and I had to hone it a couple of times before I was satisfied. Good job, this is a far better cutter in that it has enough back rake to clear the 30 degree angle of the centre.
I gave Mrs Harrison a good clean and then got these (enormous) castings out. Unless I get a better idea this is the fall back position, make a cylinder and see where it leads me. I have been thinking for a while that I want to make an engine where the cylinder sits on the bed instead of being mounted on a target end. I'm thinking about the possibilities.....
I went in the shed this morning at 8AM with no clear objective in mind.
My first job was to improve two of my kitchen knives which I have neglected lately. I have favourite knives and like to keep them razor sharp. This is one, by Spong of London. It's good steel and very handy. The other was a very plain boning knife but it's excellent steel. I polished them both, re-sharpened them and honed the edges. You could shave with them now....
Next I addressed a matter that has been bugging me for a while. As you may have noticed I don't swap cutters a lot, I have favourites and have them set up in the quick change blocks and use them for everything. I've been using a 5/8" chip-breaker for a while that is a bit numb at the end. It fouls the centre too soon if you are turning small diameters so I started again with some 1/2" HS stock that was originally sharpened at the Nu-Swift factory as a grooving tool. (That's where all my HS steel came from) Another thing I looked at is my habit of sharpening cutters as though at some point they might be used for very heavy cuts. I suppose that goes back to when I had bigger lathes. 1/8" is a heavy cut in Mrs Harrison so I re-ground the bit using only the end 3/8" of the stock. One end is R hand cut and the other L hand and as near as possible I have ground them both the same centre height so it can easily be reversed in the holder.
I set the centre height and checked it and then did a couple of longitudinal cuts to test the finish. It was a bit raw and I had to hone it a couple of times before I was satisfied. Good job, this is a far better cutter in that it has enough back rake to clear the 30 degree angle of the centre.
I gave Mrs Harrison a good clean and then got these (enormous) castings out. Unless I get a better idea this is the fall back position, make a cylinder and see where it leads me. I have been thinking for a while that I want to make an engine where the cylinder sits on the bed instead of being mounted on a target end. I'm thinking about the possibilities.....
Stanley Challenger Graham
Stanley's View
scg1936 at talktalk.net
"Beware of certitude" (Jimmy Reid)
The floggings will continue until morale improves!
Stanley's View
scg1936 at talktalk.net
"Beware of certitude" (Jimmy Reid)
The floggings will continue until morale improves!
-
Stanley
- Global Moderator
- Posts: 90743
- Joined: 23 Jan 2012, 12:01
- Location: Barnoldswick. Nearer to Heaven than Gloria.
Re: SHED MATTERS 2
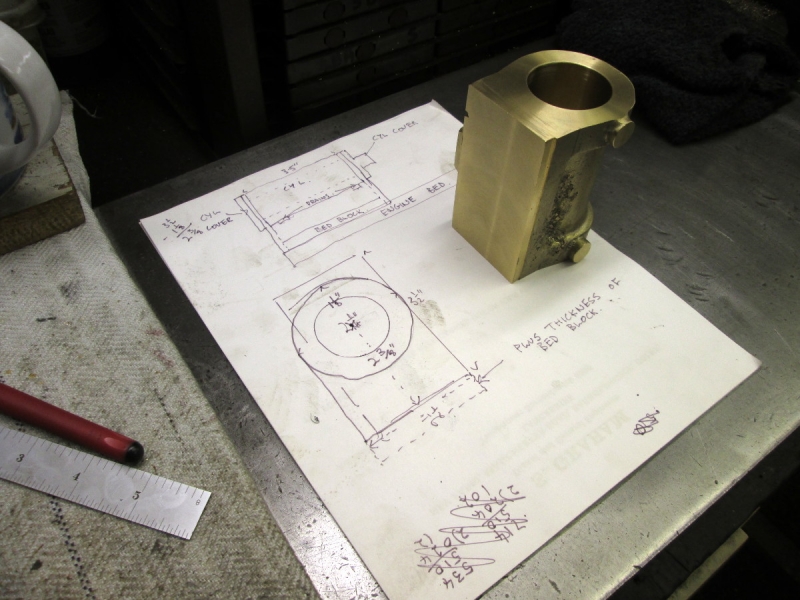
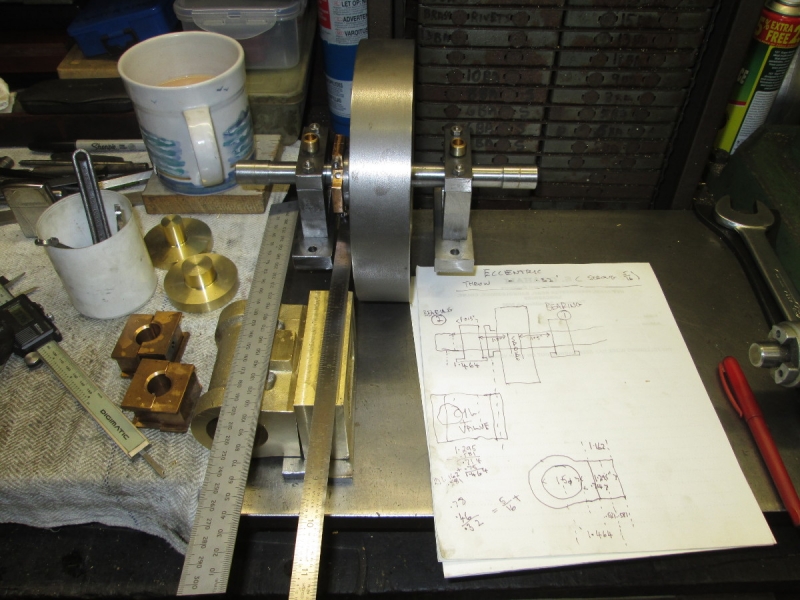
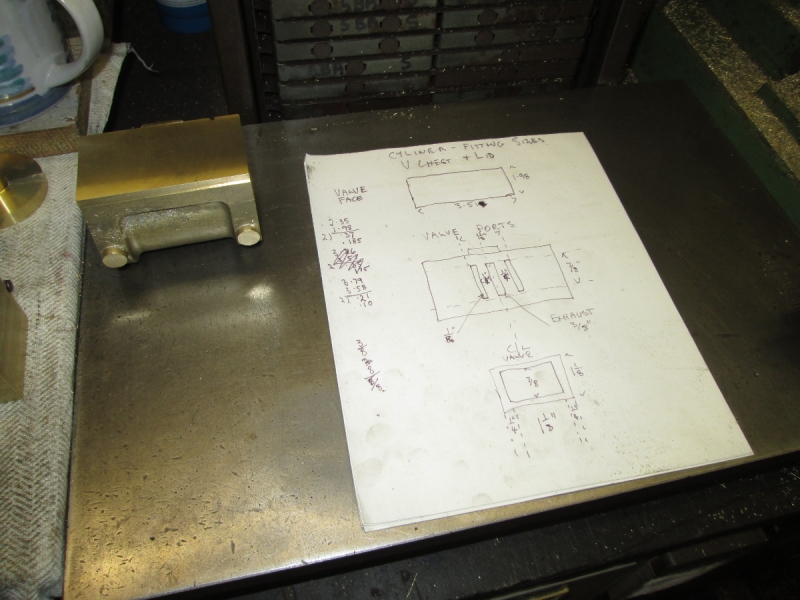
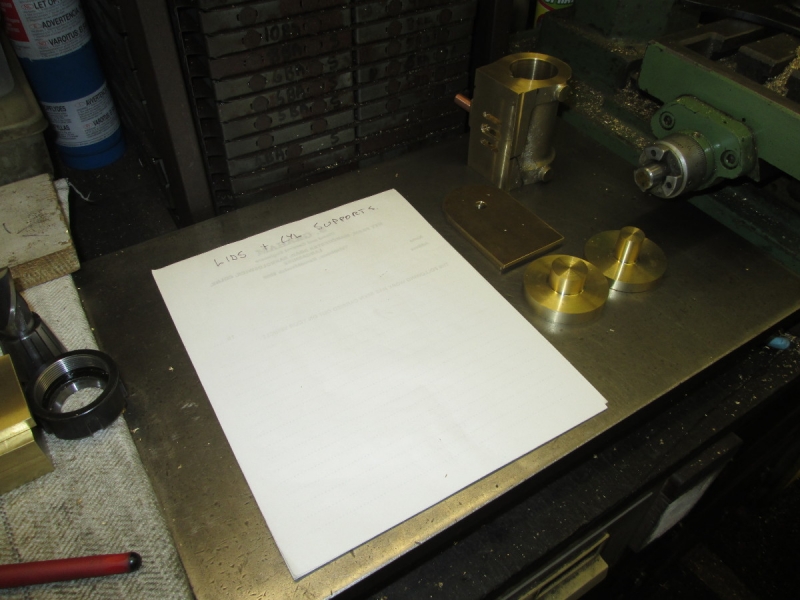
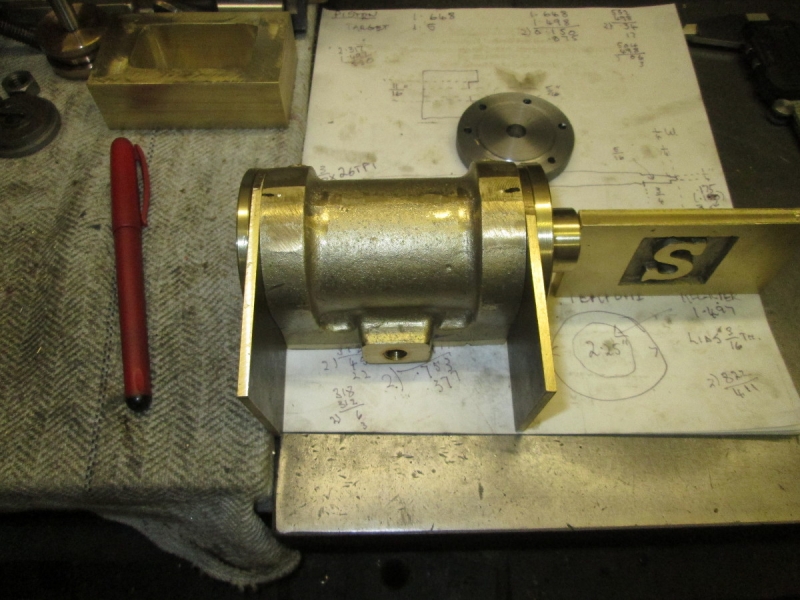
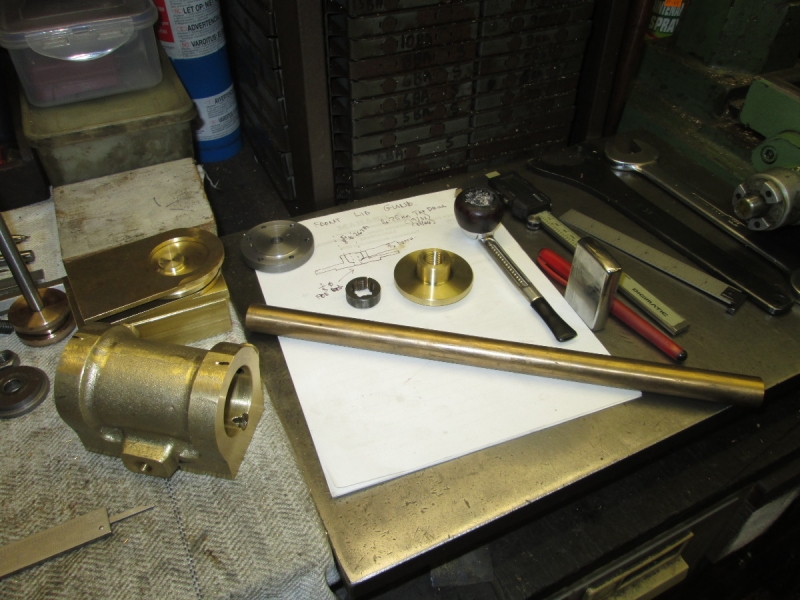
The Design Committee have been hard at work and when I went in the shed this morning I had a fair idea and made it jell by doing a bit of fag packet designing. I think you might be able to see the drawing and get an idea of what I am going to do. The problem was to fit a base to the casting and it seems to me that two target ends mounted on a base block will do. By the way, the idea I have in my head is to make an engine with the flywheel mounted centrally and driven by a crank at the end of the shaft instead of a regular style crankshaft. Rather like a donkey engine or one side of a cross compound. By the time I had finished the drawing I had a clear idea in my head. As usual I shall make the engine as it comes to me while I am working on it. I like working like that and it generally works out OK!
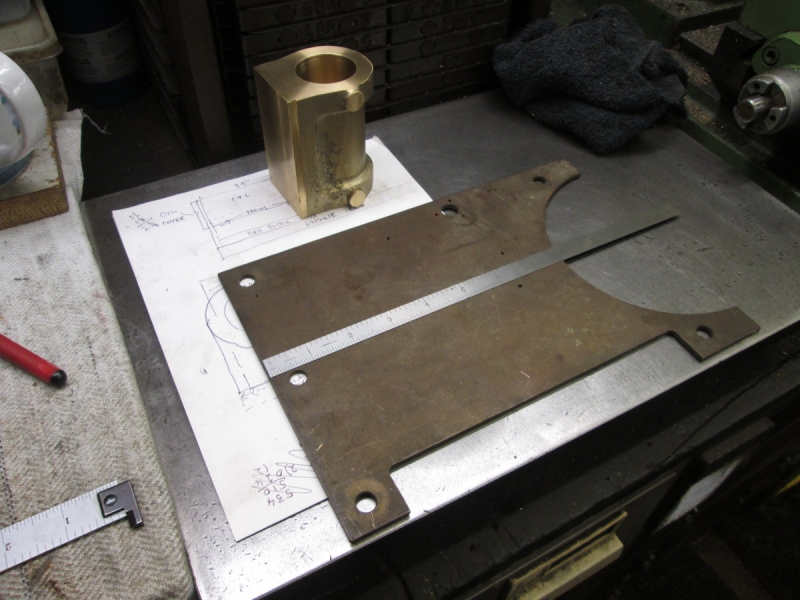
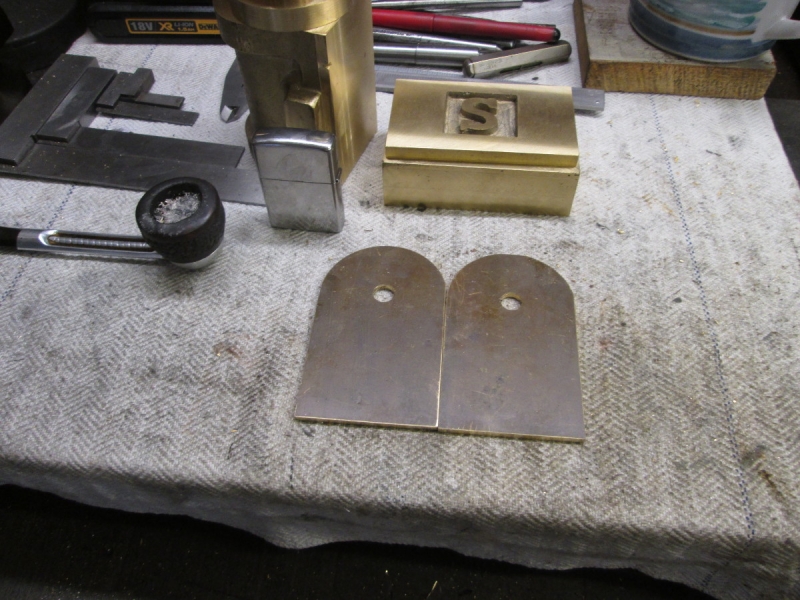
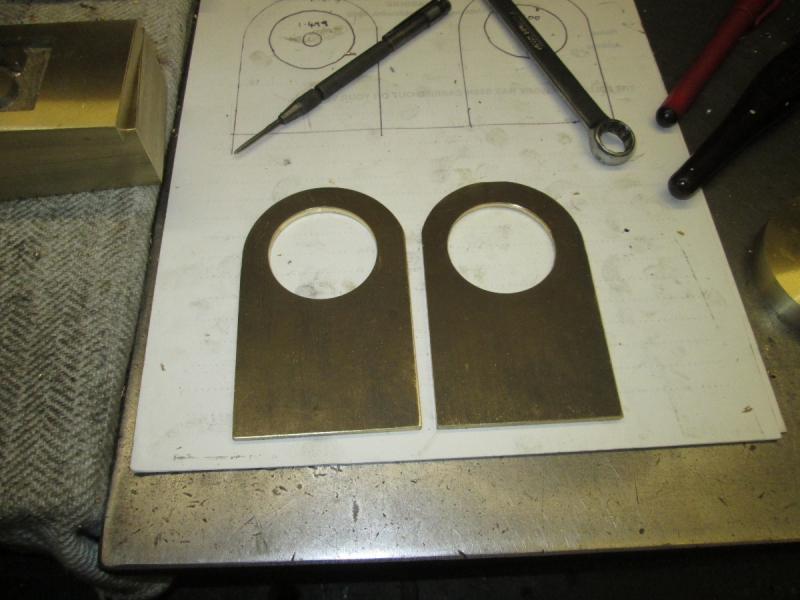
I needed just the right material for the supports. You remember me telling you about the partly made traction engine parts that Newton threw out. He started making a traction engine and started with the engine, crankshaft and horn plates but when Johnny saw it he criticised it for having too many studs and Newton threw it under the bench in disgust. This would be about a hundred years ago! Here is one of the 1/8" thick brass horn plates, just the stuff I want! So I did some rough marking and set to with the hacksaw.
A bit later and I have the two blanks cut out rough and in the VM so I can make the pieces square....
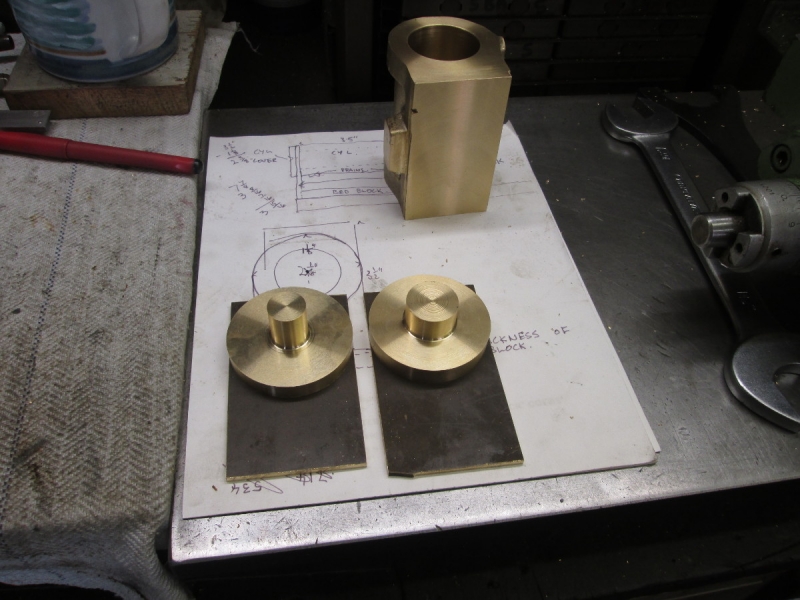
By closing time I had the two blanks square at one end and the correct width. I'm ready for marking out the curved top that will fix onto the end of the cylinder under the lid. Once I have that done I can cut them both to the correct height. My head is already working on the sub-base that will join the two supports and mount on the base plate proper. Nice interesting morning.....
Stanley Challenger Graham
Stanley's View
scg1936 at talktalk.net
"Beware of certitude" (Jimmy Reid)
The floggings will continue until morale improves!
Stanley's View
scg1936 at talktalk.net
"Beware of certitude" (Jimmy Reid)
The floggings will continue until morale improves!
-
Stanley
- Global Moderator
- Posts: 90743
- Joined: 23 Jan 2012, 12:01
- Location: Barnoldswick. Nearer to Heaven than Gloria.
Re: SHED MATTERS 2
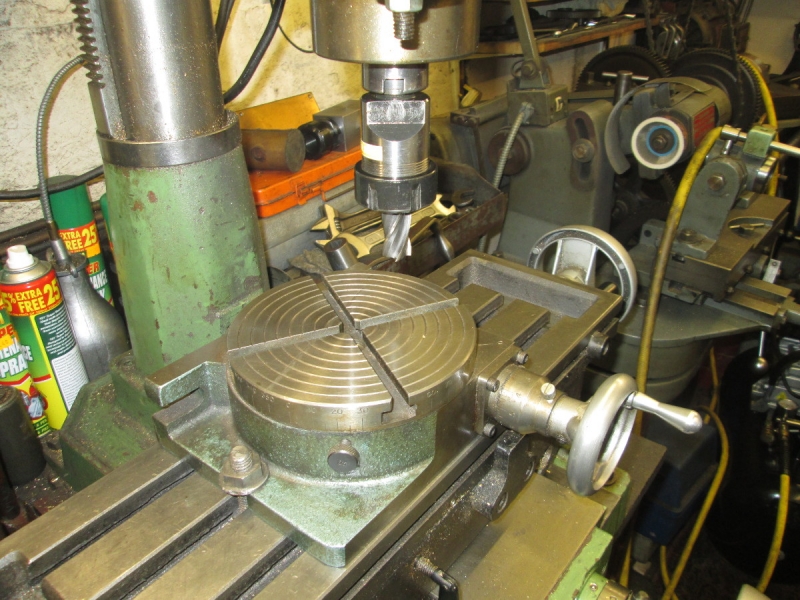
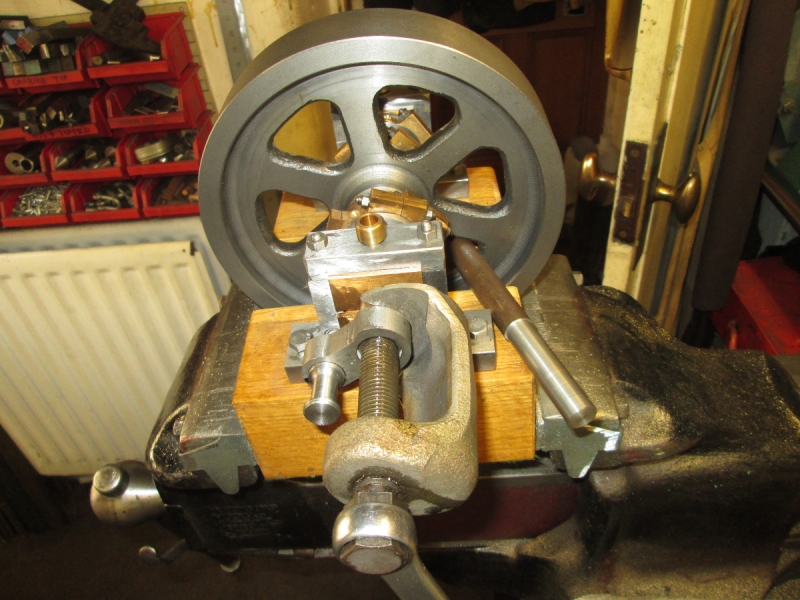
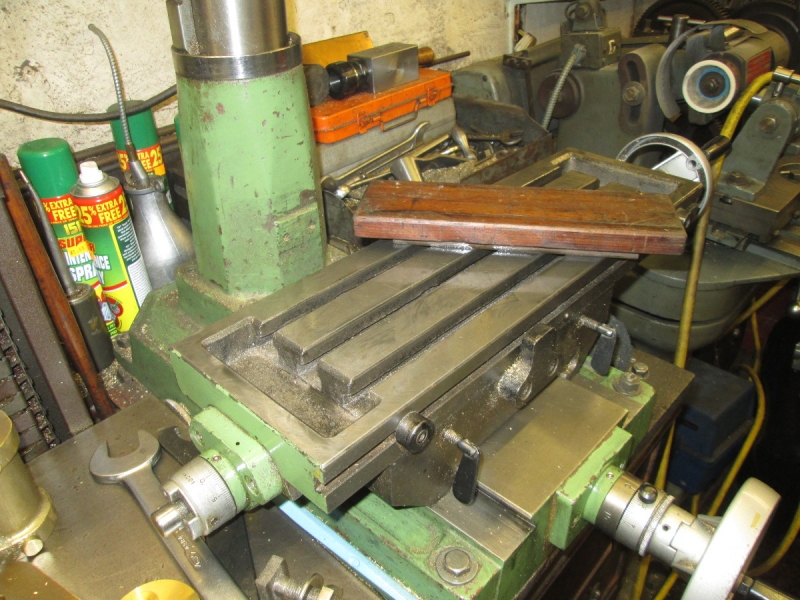
First job this morning was to set the rotary table up for shaping the cylinder supports. Put the speed up to maximum, sort a cutter out and get the table centred.
Then some marking up and drill a 3'8" hole in the centre of the arc and get set up on the table.
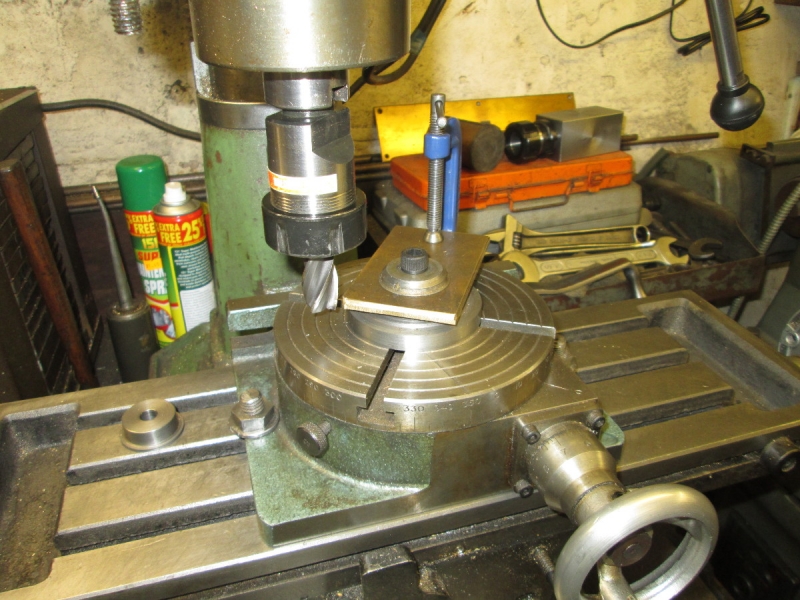
The clamp is to make absolutely certain the plates didn't shift in relationship to each other. Then some careful cutting until I had a full arc.
Then a clean up and put the vise back on the table making sure that it was properly trammed in using the Mills ball bearing.
I vacuumed the floor and then realised that I hadn't equalised and squared the bottom edges of the supports so I did that and of course put chips back on the carpet!
Here's where I finished up, two identical supports, all the edges broken and ready for the next stage.
Unfortunately that won't be for a day or two because I have two complicated documents to transcribe and that's full time work. So I'll leave you for a while.......
Stanley Challenger Graham
Stanley's View
scg1936 at talktalk.net
"Beware of certitude" (Jimmy Reid)
The floggings will continue until morale improves!
Stanley's View
scg1936 at talktalk.net
"Beware of certitude" (Jimmy Reid)
The floggings will continue until morale improves!
-
Stanley
- Global Moderator
- Posts: 90743
- Joined: 23 Jan 2012, 12:01
- Location: Barnoldswick. Nearer to Heaven than Gloria.
Re: SHED MATTERS 2
The good news is that Wendy is doing one of the documents for me and I did well this morning and steamed through the one I was doing, I had got my eye in on the clerk's handwriting. So, back in the shed tomorrow!
Stanley Challenger Graham
Stanley's View
scg1936 at talktalk.net
"Beware of certitude" (Jimmy Reid)
The floggings will continue until morale improves!
Stanley's View
scg1936 at talktalk.net
"Beware of certitude" (Jimmy Reid)
The floggings will continue until morale improves!

Re: SHED MATTERS 2
Just saw a guy on BBC4 turn a locket on a lathe from a piece of 18ct gold.
He was very careful to collect all he swarf.
He was very careful to collect all he swarf.
Born to be mild
Sapere Aude
Ego Lego
Preferred pronouns - Thou, Thee, Thy, Thine
My non-working days are Monday - Sunday
Sapere Aude
Ego Lego
Preferred pronouns - Thou, Thee, Thy, Thine
My non-working days are Monday - Sunday
-
Stanley
- Global Moderator
- Posts: 90743
- Joined: 23 Jan 2012, 12:01
- Location: Barnoldswick. Nearer to Heaven than Gloria.
Re: SHED MATTERS 2
With scrap at that price, no wonder!
Stanley Challenger Graham
Stanley's View
scg1936 at talktalk.net
"Beware of certitude" (Jimmy Reid)
The floggings will continue until morale improves!
Stanley's View
scg1936 at talktalk.net
"Beware of certitude" (Jimmy Reid)
The floggings will continue until morale improves!
-
Stanley
- Global Moderator
- Posts: 90743
- Joined: 23 Jan 2012, 12:01
- Location: Barnoldswick. Nearer to Heaven than Gloria.
Re: SHED MATTERS 2

I need a sub-base to connect the two cylinder supports and I decided that another piece of Newton's horn plate will do, by the time the cylinder is assembled it will be plenty rigid enough especially when it is bolted down to a 1/4" steel bed plate. Out with the sharp hacksaw blade and some hand work.
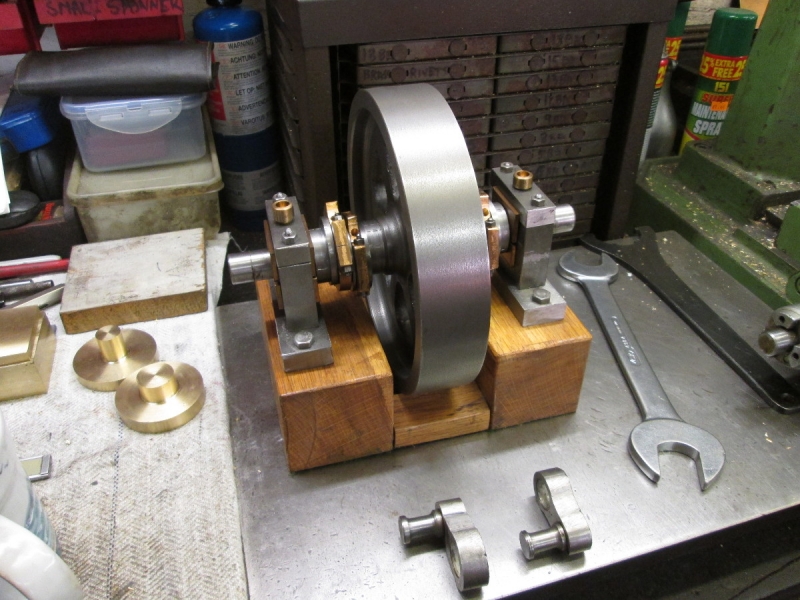
Before I made my decisions about the bed plate I got this out of the front room. You may remember I made this as an exercise as the flywheel and eccentrics are a replica of that on a cross compound engine. But I promised that there was no way I was going to go down that road, too much involved..... However, I can use this as the flywheel and crankshaft for this cylinder with some modification. I might even be able to use one of the four eccentrics I have already made. If the throw is anywhere near right I can build the valve to suit it.
I won't bore you with the milling of the base to size. This is where I ended up. I've given it plenty of height and can adjust that when I have the relative centres of the cylinder and the flywheel shaft.

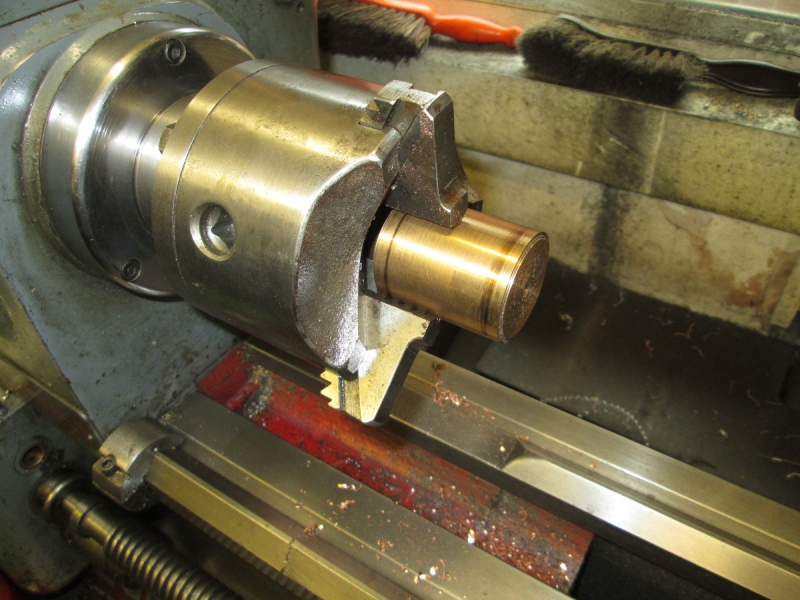
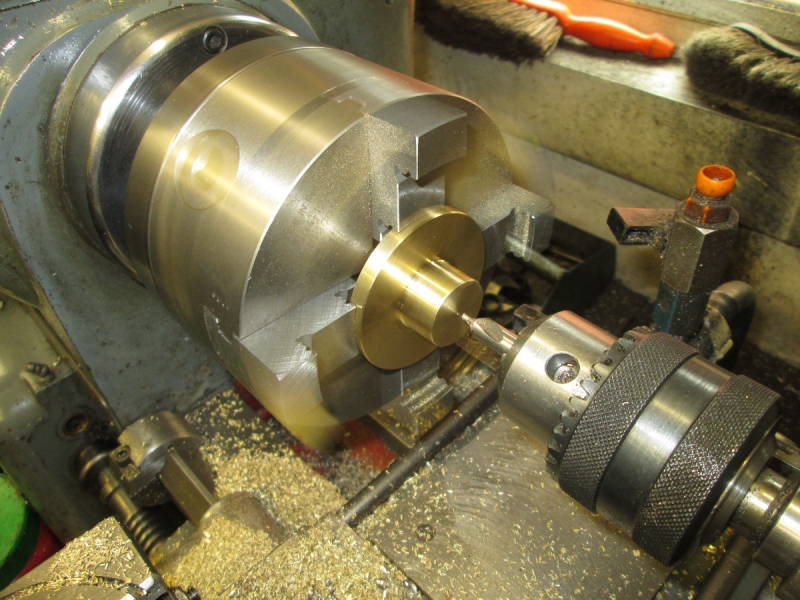
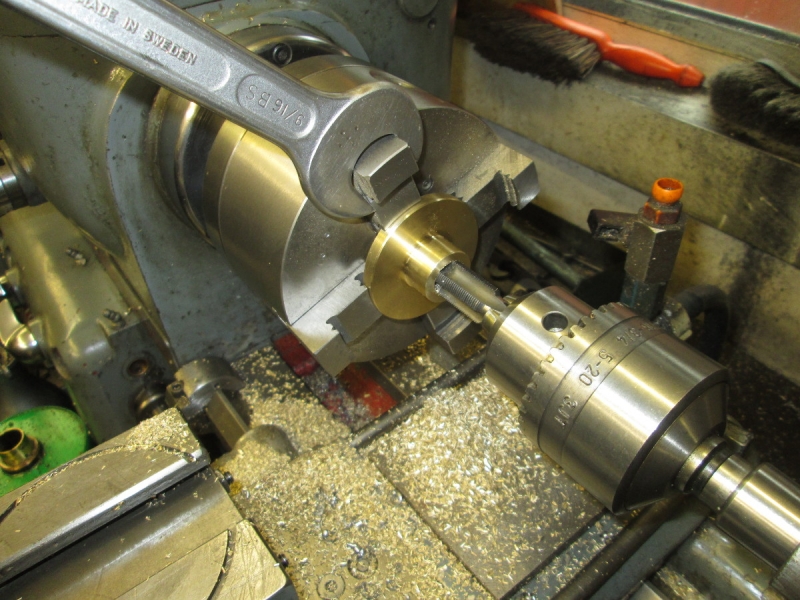
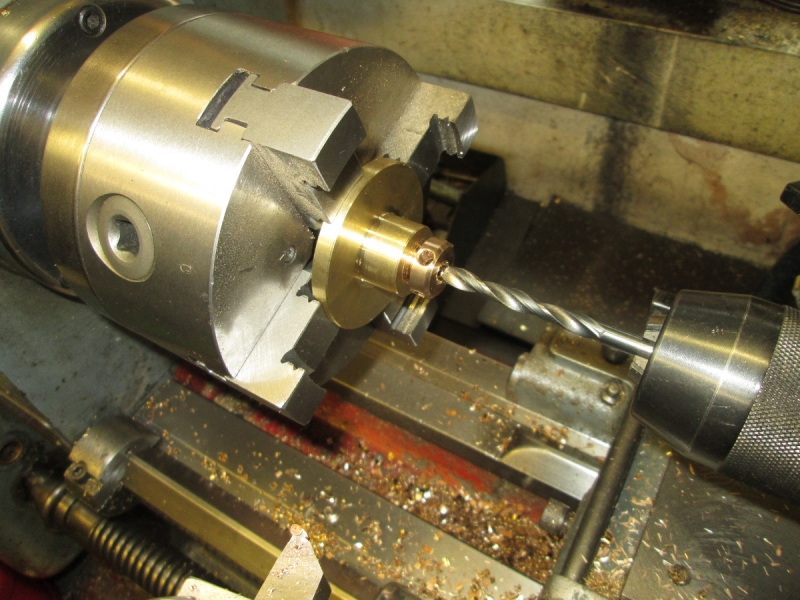
I'm going to have to draw the existing cranks off and decided to use my Sykes Pickavant steering knuckle splitter. I need it to centre on the centre hole in the end of the shaft to stop it wandering so I popped it into the Taylor chuck. The head of the bolt is too big to go through the chuck so I had to chuck it with 2 1/2" hanging out. That's bit dodgy but I tried it. It shows how good the Taylor is at gripping accurately. It ran true and I had no problem machining a small pip on it even though it is a high tensile bolt.
You can't beat a big vise either! No problem setting it up so I could get some pressure on. I decided to try to draw the cranks off without heating them to weaken the Loctite. I got them both but with a lot of pressure, they both unsealed with a bang that shook the bench. I had made a good job of fitting them!
Here we are at knocking off time. Both cranks off with no damage. I need a far bigger crank for this cylinder, these two were made with 2" stroke in mind, the cylinder is 3" stroke. I've enjoyed the morning. The design is gelling in my head and will get clearer and clearer as I go forward.
Stanley Challenger Graham
Stanley's View
scg1936 at talktalk.net
"Beware of certitude" (Jimmy Reid)
The floggings will continue until morale improves!
Stanley's View
scg1936 at talktalk.net
"Beware of certitude" (Jimmy Reid)
The floggings will continue until morale improves!
-
Stanley
- Global Moderator
- Posts: 90743
- Joined: 23 Jan 2012, 12:01
- Location: Barnoldswick. Nearer to Heaven than Gloria.
Re: SHED MATTERS 2

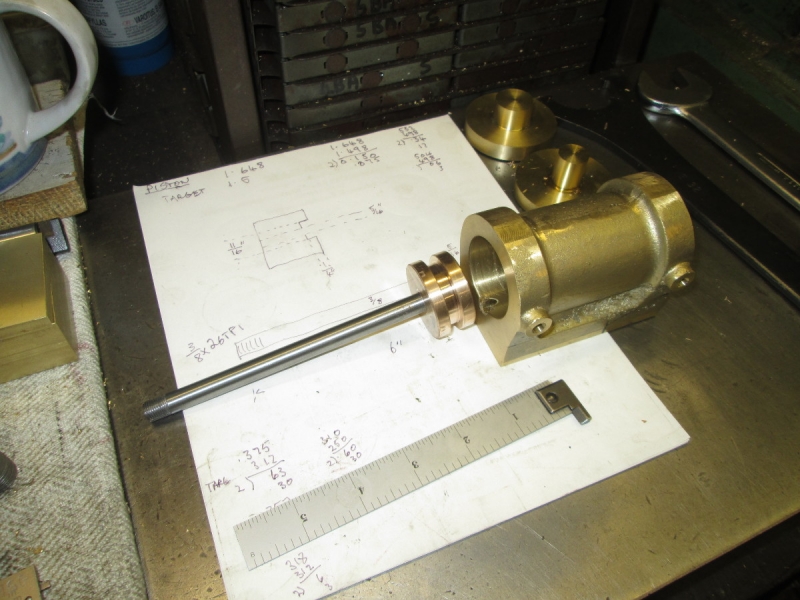
I'm still feeling my way into the design and the first thing I have to do is get the rough dimensions in my head. The best way to get into this is to sort out the flywheel and shaft for single crank and eccentric working. Before I can do this I need the assembly in pieces....
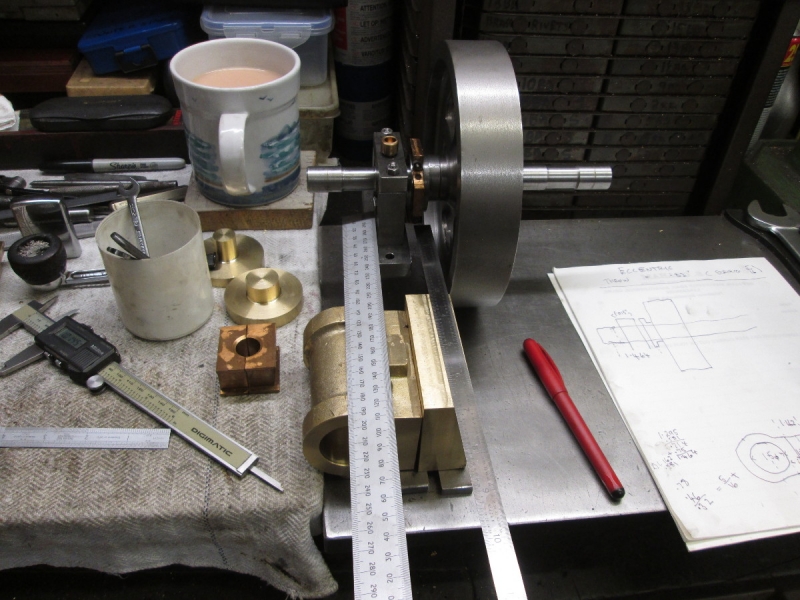
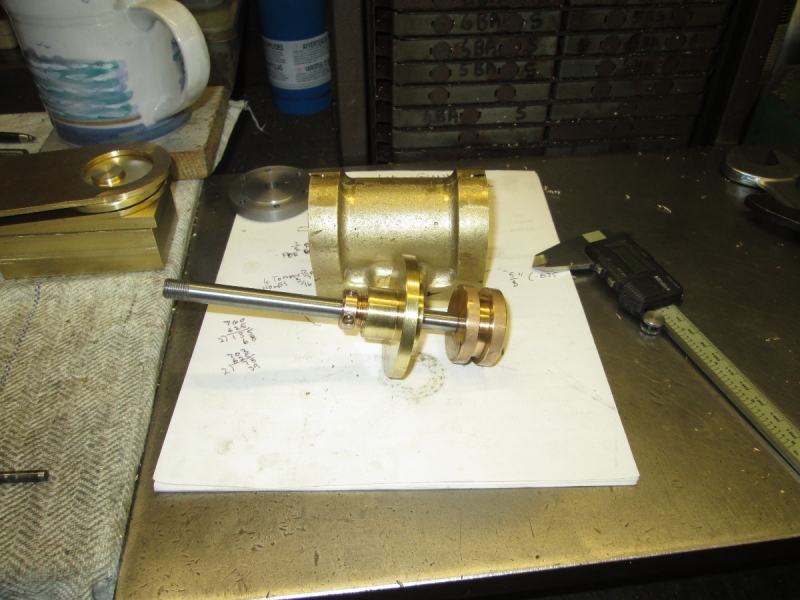
I picked out the best of the four eccentrics and set the wheel and shaft up on the bench and compared the centres of the piston and valve rods with the assembly. I'm measuring accurately but at the moment rough dimensions will do. The first thing that became obvious is that this is going to work. The second is that I don't need to shorten the shaft at this stage but reduce the ends down to the diameter of the original journal.
I checked out the other end of the shaft as well. There will be a fair bit poking out on this side but I may be fitting a gear or a pulley when I get to that stage so it can stay the same length. At this point I had re-boring the pedestal bearings out to fit the larger diameter of the shaft up to the eccentric in my mind.
At this point I marked each end of the shaft with a matching fitting mark to the bearings, important not to get lost! At the same time I checked the throw of the eccentric and it's over 5/16" so I can make that work when I cut the valve ports.
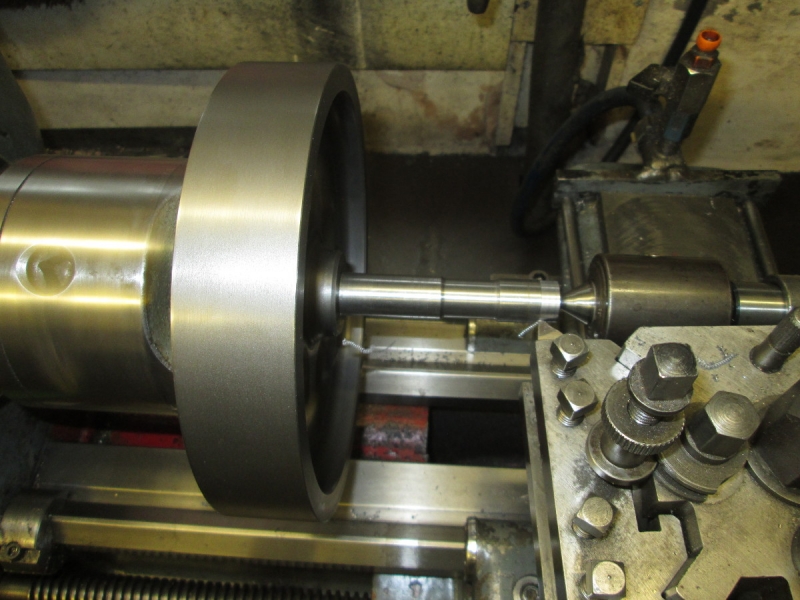
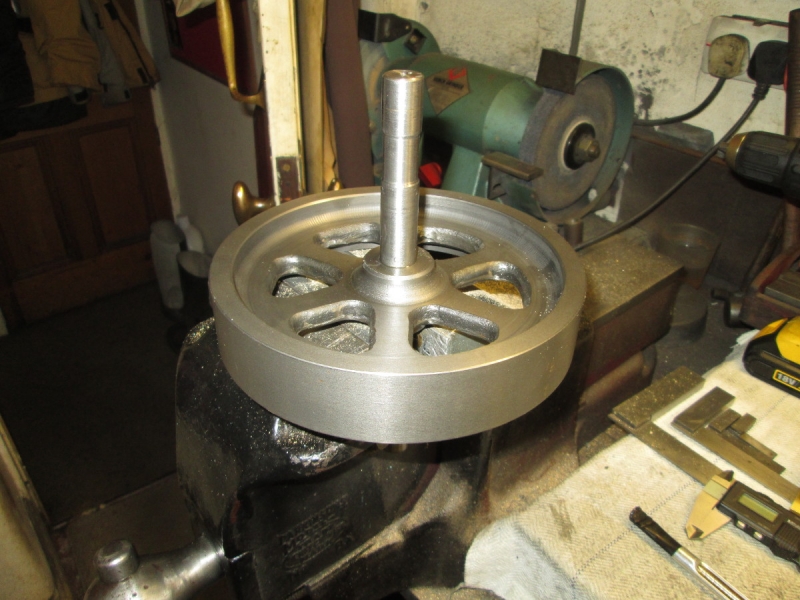
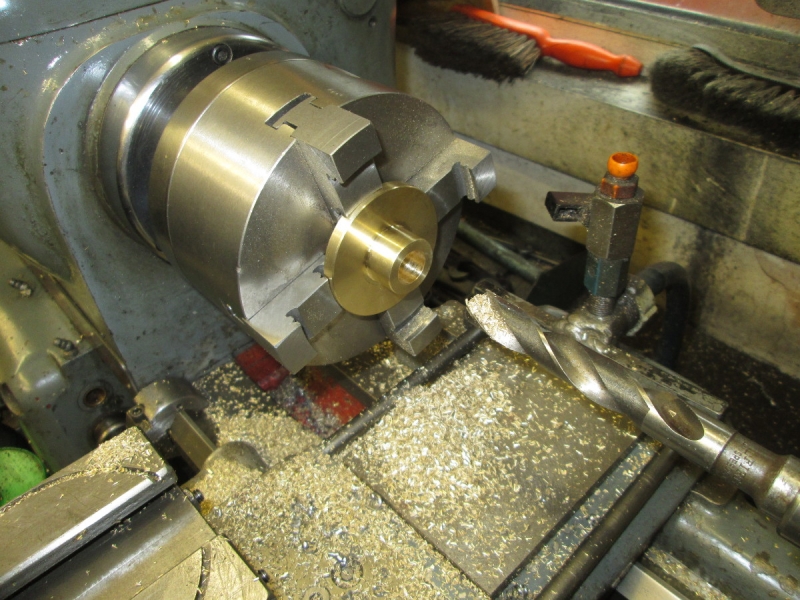
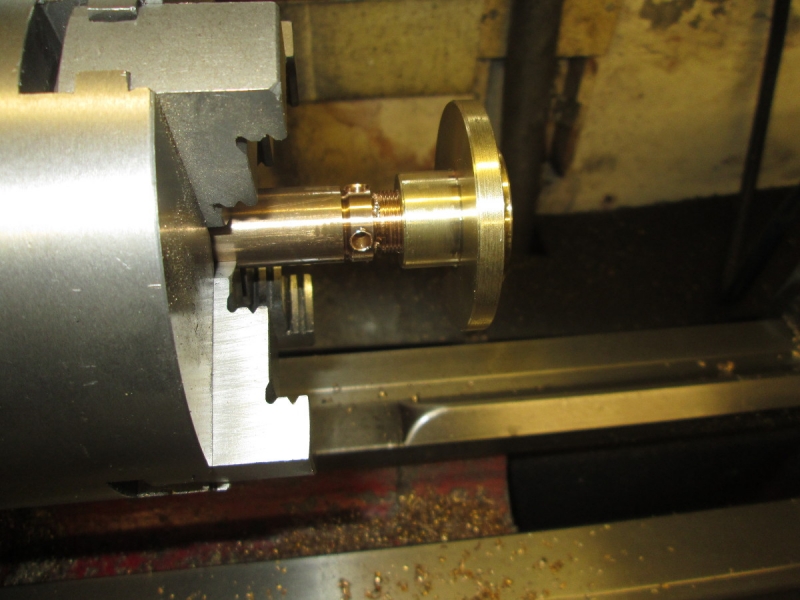
I popped the assembly into the lathe and the shaft fits up the bore of the chuck. It is as near perfectly lined up as I could wish and the flywheel runs concentric to the shaft, I made a good job of fitting it! I took the original diameter of the journal as a reference and started getting it to that size. It was while I was doing this I realised that instead of re-boring the bearings the easiest way was to reduce the shaft down to the journal size up to 1.5" from the flywheel, which gives room for the eccentric on the crank side. So I set the carriage stop up at that and did both sides.
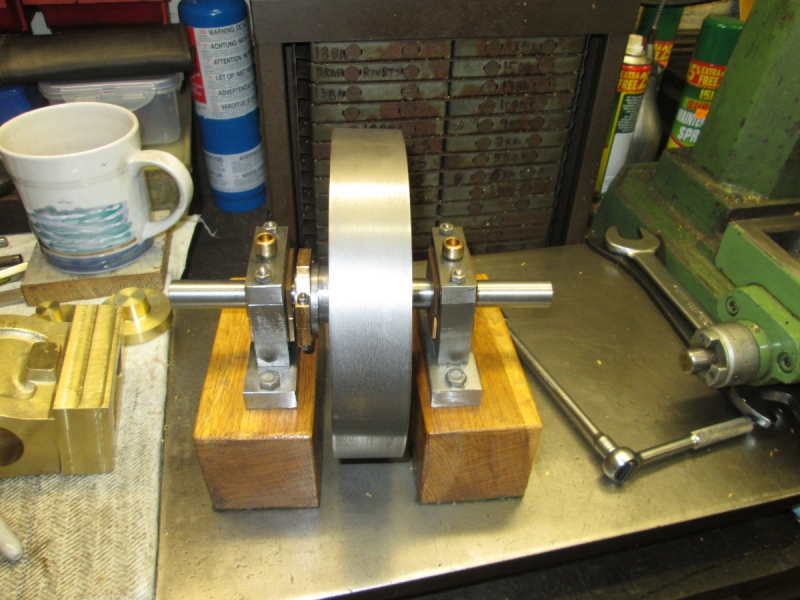
Then I set the shaft and wheel up again and used the original block beds to give the flywheel clearance. This temporary of course. The bearings are slack on the shaft but this is no matter, they were made to be easily refitted. I knocked off at this point. I have this lot ready to work on when I have progressed the cylinder. I have yet to decide on the length of the con rod but at the moment I'm favouring a shorter one than I usually use. Newton always said that the ideal length is two and a half times the stroke but I have built marine engines shorter than that and they work well. They look busier as well when running which I like......A good morning with lots of progress. I can now have another think about the cylinder but at the moment I think the way to go is to get that finished and the support adjusted to the right height for the shaft centre. Then I can start thinking about the beds and crosshead slide.
Stanley Challenger Graham
Stanley's View
scg1936 at talktalk.net
"Beware of certitude" (Jimmy Reid)
The floggings will continue until morale improves!
Stanley's View
scg1936 at talktalk.net
"Beware of certitude" (Jimmy Reid)
The floggings will continue until morale improves!
-
Stanley
- Global Moderator
- Posts: 90743
- Joined: 23 Jan 2012, 12:01
- Location: Barnoldswick. Nearer to Heaven than Gloria.
Re: SHED MATTERS 2
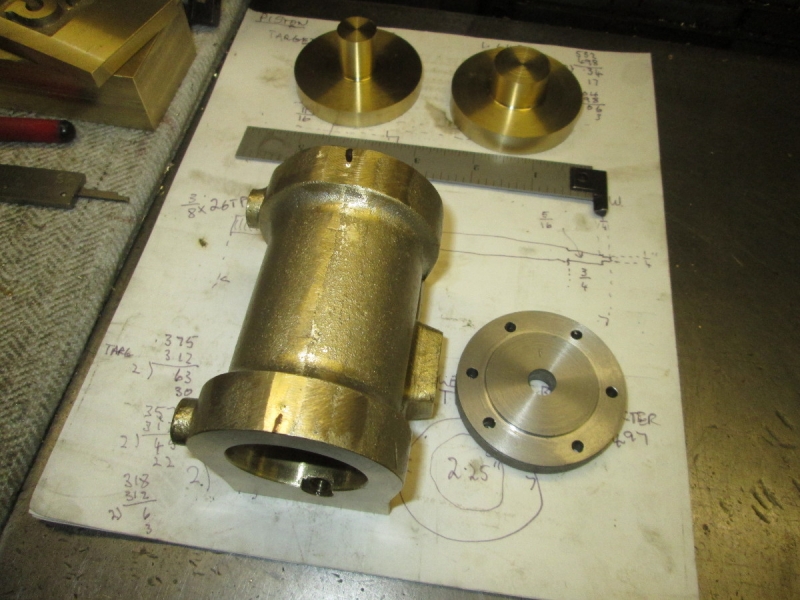
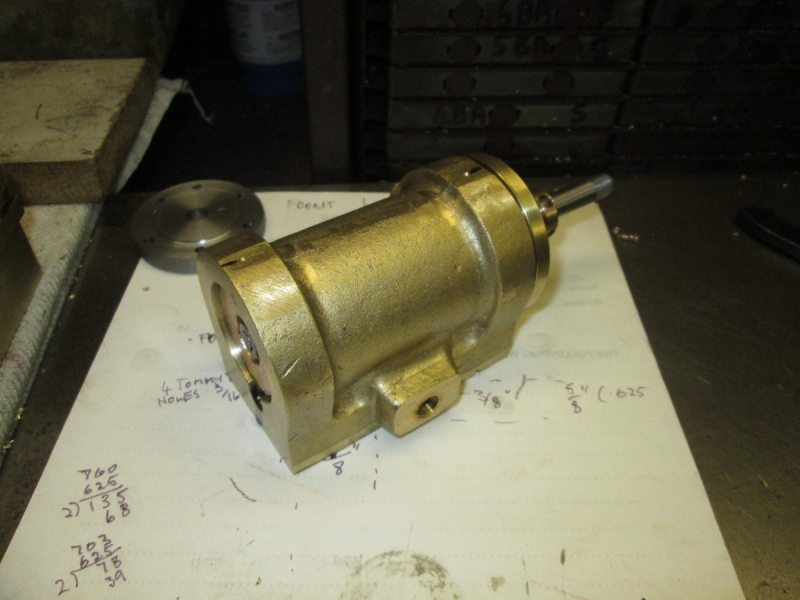
I'm concentrating on the cylinder now. So the first thing was to put the flywheel assembly out of the way in the kitchen, it's going to be an ornament for a while. Then some concentrated measuring, I want to make the steam chest and the lid fit the casting.
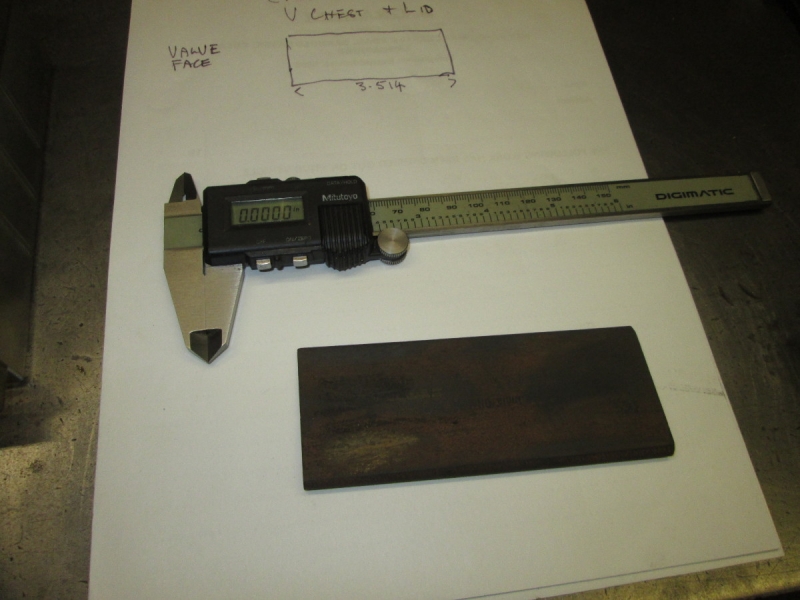
You remember me whingeing about my Mitutoyo digital calliper not repeating accurately? I came across a video on Youtube that was very informative and suggested a cure. It was shown that the problem was minute burrs on the jaws that gave false readings. The cure suggested was to use a very fine stone and gently dress the face of the jaws. The calliper was particularly bad this morning and remembering the video I gave the jaws a very light rub. Instant cure! That was the problem. So you might like to remember that one.....
Boring but essential work, mark up my cuts and mill the valve chest to size. All the faces done and checked. Not dead accurate to a tenth but considering the number of factors working against me, eyesight, measuring tackle and skills and the errors built into my El Cheapo VM, very good and I am satisfied.
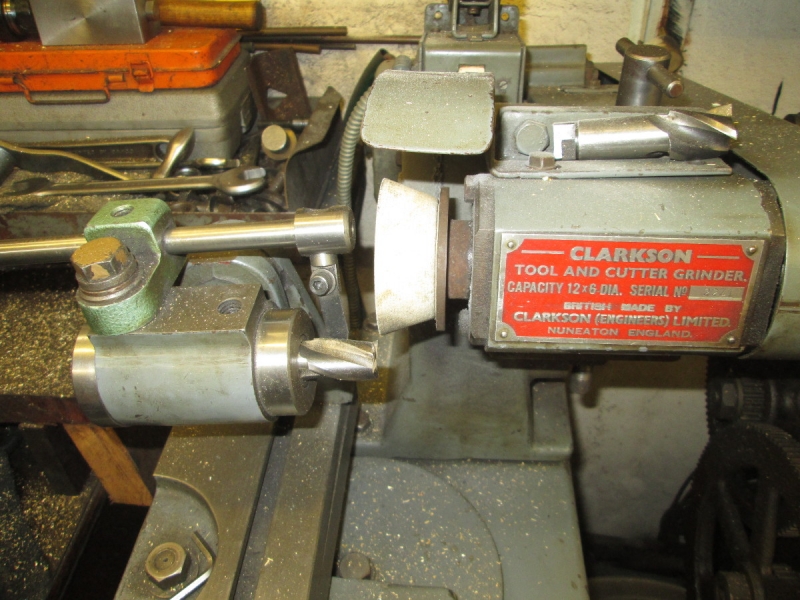
Once the outside was done I cleaned up the inside of the chest. It was rough cast of course and had the draw on it necessary to get the core out. There was quite a lot to get out and though I had my mill up to top speed (1570rpm)and used the best cutter I had it was a slow careful job. I really must have a spell of spiral grinding on the Clarkson T&C grinder....... Marvellous how you keep forgetting.
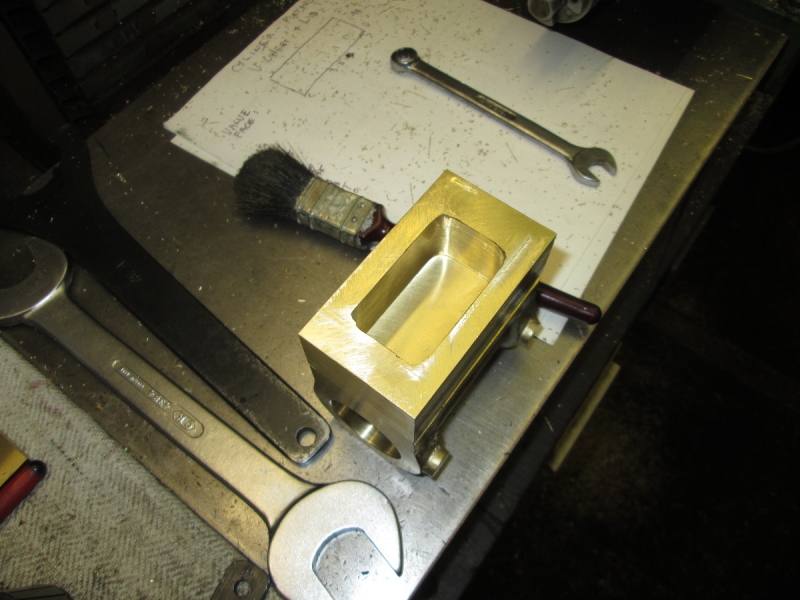
Here we are at closing time. I have a reasonably clean and accurate casting with all the edges broken. Tomorrow I shall make the lid match it. Not a bad morning's work, I'm happy.
Stanley Challenger Graham
Stanley's View
scg1936 at talktalk.net
"Beware of certitude" (Jimmy Reid)
The floggings will continue until morale improves!
Stanley's View
scg1936 at talktalk.net
"Beware of certitude" (Jimmy Reid)
The floggings will continue until morale improves!
-
Stanley
- Global Moderator
- Posts: 90743
- Joined: 23 Jan 2012, 12:01
- Location: Barnoldswick. Nearer to Heaven than Gloria.
Re: SHED MATTERS 2
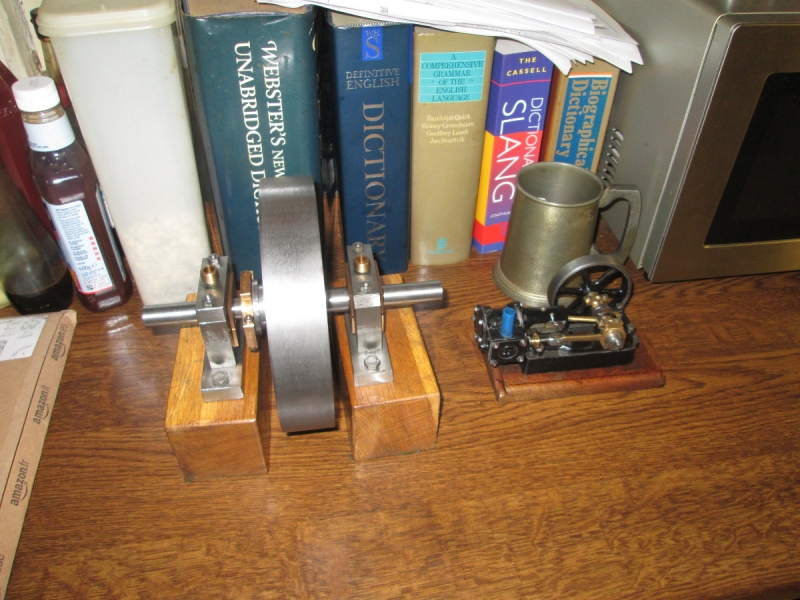
My kind of kitchen ornaments......
I made the lid the right size for the valve chest.
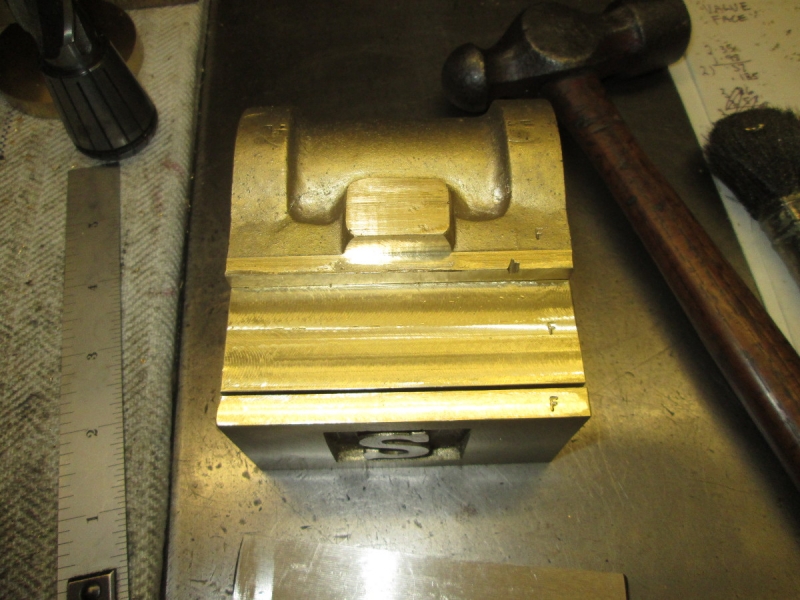
Now's the time to put fitting marks on so that these three parts maintain their relationship until completion. All marked with an 'F' for front. Complicated stuff!
The rest of the morning was taken up matching the design for the valve ports to the throw I have available from the eccentric. This is the opposite way round to the usual process of course. I think I have it right but will think about it overnight..... The 'simple' slide valve is actually one of the most complicated mechanisms in the world! My way is to ignore many of the niceties I know exist because they are only important if you are aiming for peak performance. I just want it to run when I put steam on it!
By the way, I'm making the valve ports next because it saves a speed change on the VM! This and the steam passages need small cutters and high speeds.
Stanley Challenger Graham
Stanley's View
scg1936 at talktalk.net
"Beware of certitude" (Jimmy Reid)
The floggings will continue until morale improves!
Stanley's View
scg1936 at talktalk.net
"Beware of certitude" (Jimmy Reid)
The floggings will continue until morale improves!
-
Stanley
- Global Moderator
- Posts: 90743
- Joined: 23 Jan 2012, 12:01
- Location: Barnoldswick. Nearer to Heaven than Gloria.
Re: SHED MATTERS 2
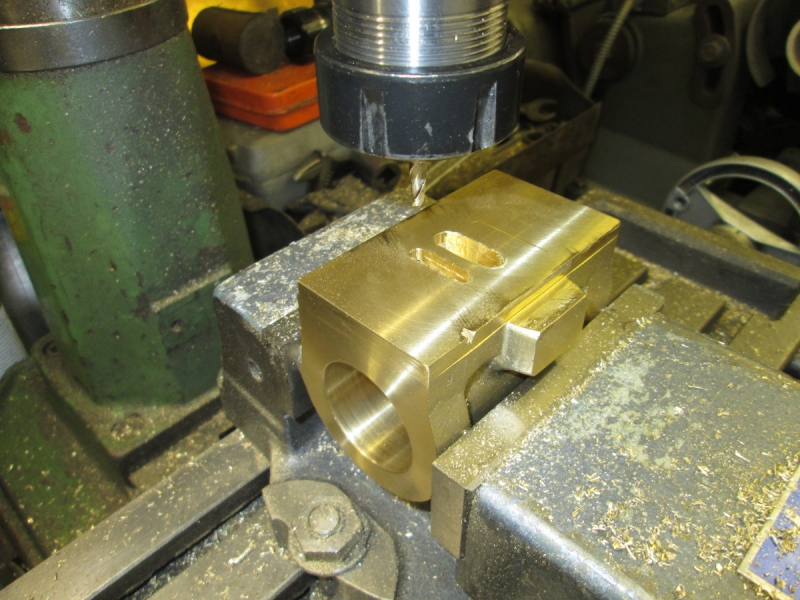
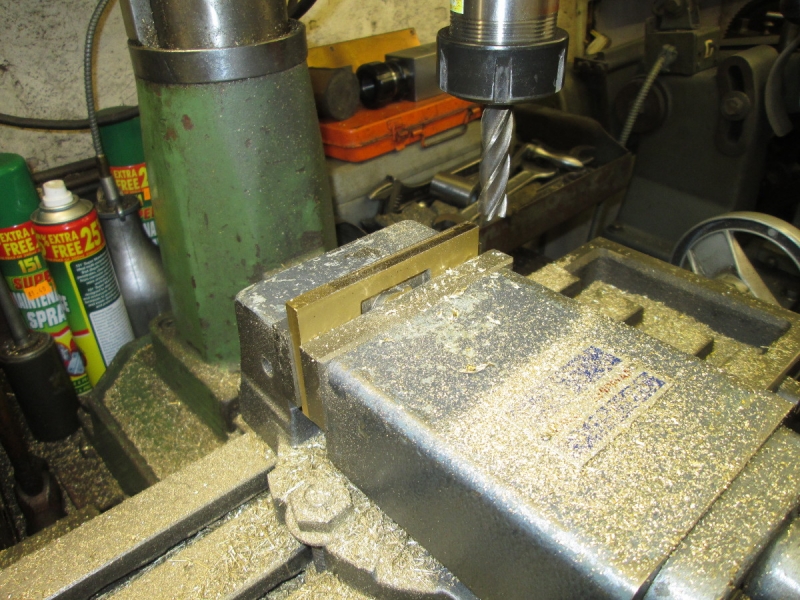
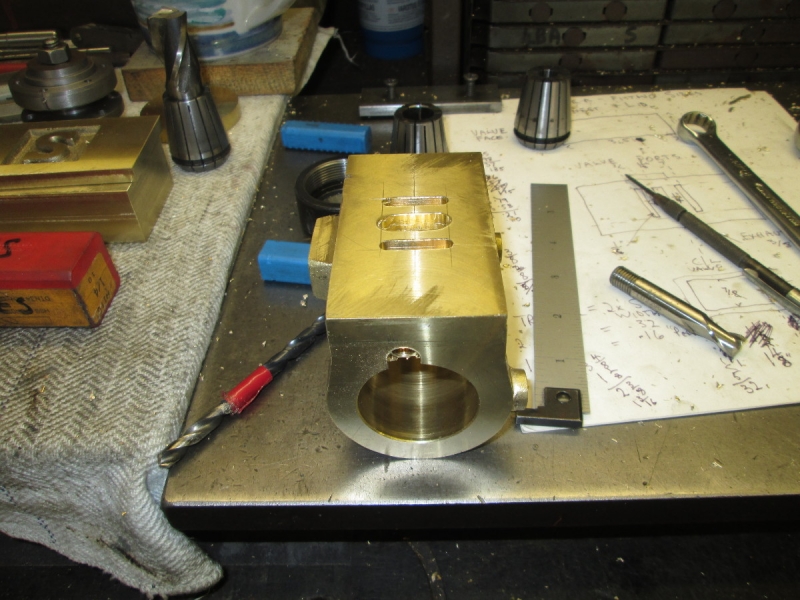
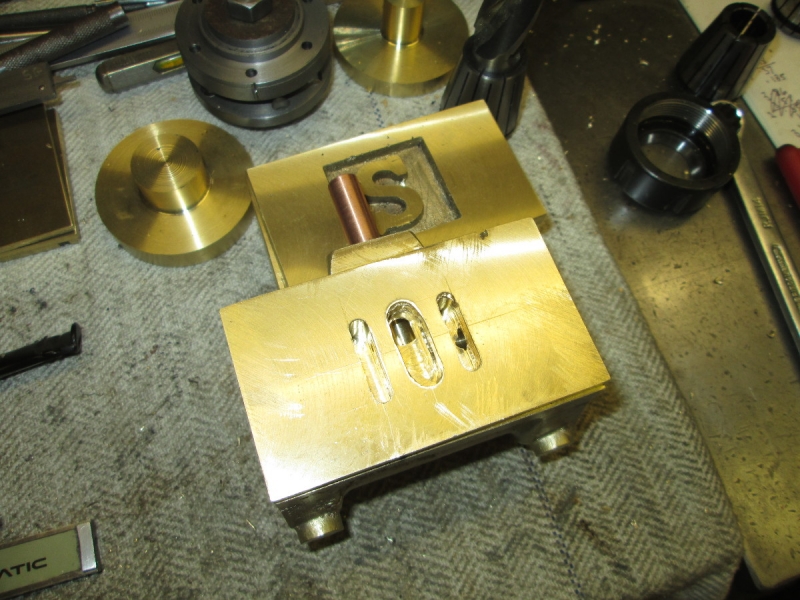
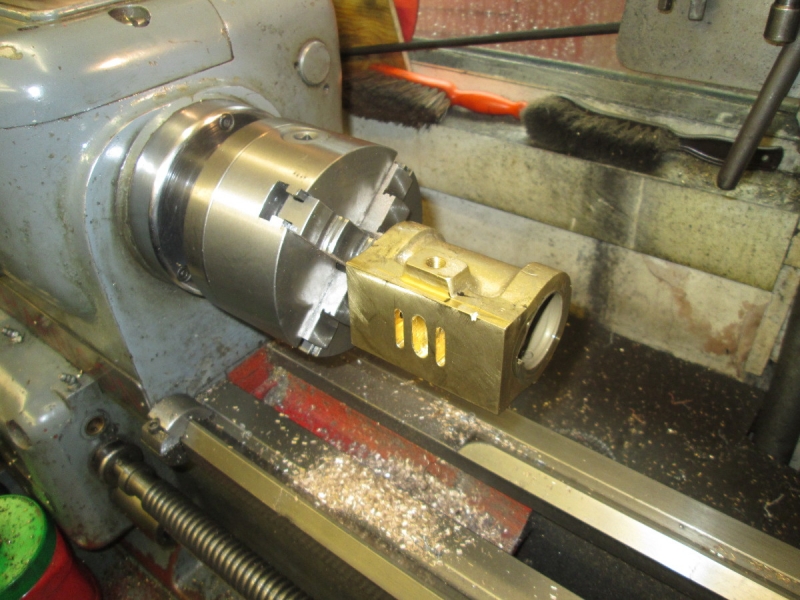
First job this morning was to clean up some of the brass chips, I'm treading them all over the house! Then get set up and mill the valve ports out. I've done the exhaust and now I'm on the steam ports. I've got plenty of metal so I'm going in just short of half an inch. Once I had them done I cleaned off the burrs and marked the side of the cylinder with the angle of the drillings for the steam passage.
I had it in my head that the next job was to put the 3/4" cutter back in the mill so I dressed the wheel on the T&C grinder and touched it up. Then of course I realised that I wasn't ready for this, I had to drill the steam passages first so I found a longer 3/8" cutter to make the flat for starting the drill.
Here we are at knocking off time, ready for the steam passages. Always remember when you are doing these that within reason, the bigger your ports and passages are, the better the engine will breathe and that makes them run better.
Stanley Challenger Graham
Stanley's View
scg1936 at talktalk.net
"Beware of certitude" (Jimmy Reid)
The floggings will continue until morale improves!
Stanley's View
scg1936 at talktalk.net
"Beware of certitude" (Jimmy Reid)
The floggings will continue until morale improves!
-
Stanley
- Global Moderator
- Posts: 90743
- Joined: 23 Jan 2012, 12:01
- Location: Barnoldswick. Nearer to Heaven than Gloria.
Re: SHED MATTERS 2
I drilled the steam passages and got the first one dead central but my eye's or brain let me down with the second. it's off centre but it won't interfere with the cylinder bolts and it will pass steam just as well!
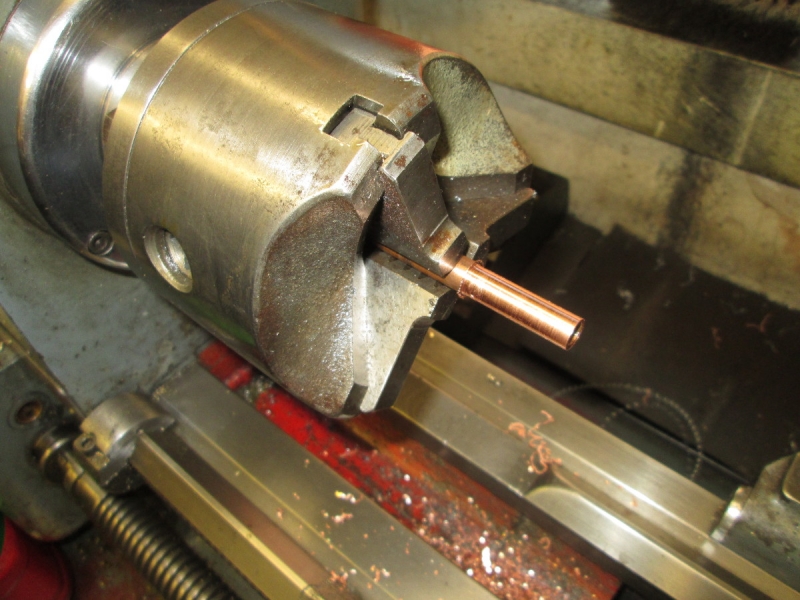
Next thing to address is the exhaust pipe. It needs to be 1/4" bore so as to breathe easily. I have some heavy wall copper tube that's 1/4" bore but it needs reducing a bit to 3/8" so I can thread it 26tpi. One tip, when threading copper a bit of Trefolex is a good idea it's sticky stuff to cut.
Here we are at knocking off time. The cylinder has steam passages and a functioning exhaust outlet. That'll do for today. I put some tackle away and now I have to get on with the housework with free leccy!
Stanley Challenger Graham
Stanley's View
scg1936 at talktalk.net
"Beware of certitude" (Jimmy Reid)
The floggings will continue until morale improves!
Stanley's View
scg1936 at talktalk.net
"Beware of certitude" (Jimmy Reid)
The floggings will continue until morale improves!
-
Stanley
- Global Moderator
- Posts: 90743
- Joined: 23 Jan 2012, 12:01
- Location: Barnoldswick. Nearer to Heaven than Gloria.
Re: SHED MATTERS 2
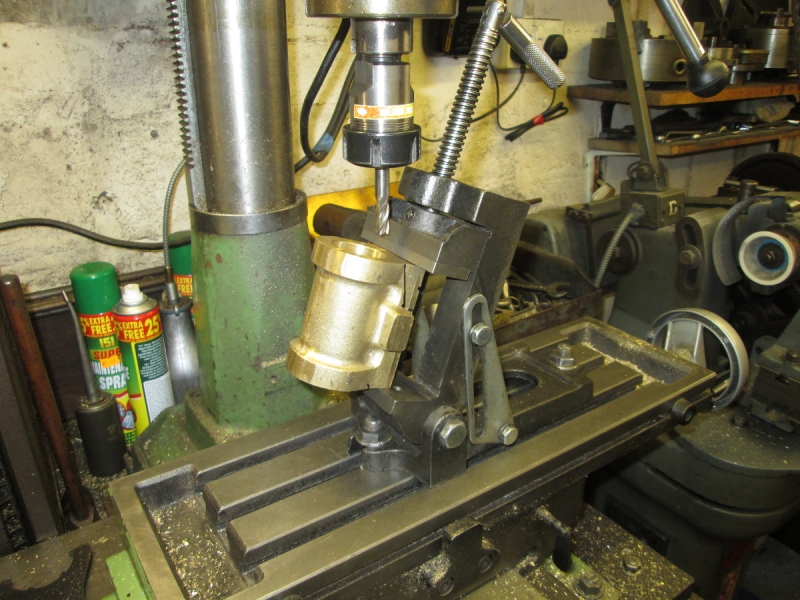
Today's task is to get on to sorting out my cylinder supports and lids so that I can get set up for drilling and tapping the cylinder ends. I measured up and decided the first thing was to put a 1.5" hole in each of the cylinder supports, they are going to be installed between the lid and the casting.
You know me well enough to know that the first thing I always do is get my ducks in a row. This morning it was a good clean up, put the angle vise away and here is a rare occasion, but I do it quite often actually, I'm rubbing the table of the VM down with a flat fine Arkansas stone to make sure that there are no scratches or dings standing proud. You can be as careful as you like but they always happen!
Then I put the regular vise back on and tram it in with a bearing tool. We're ready now!

I've missed a pic here. I put my boring head on and attempted to trepan the hole out with that. It was a disaster! The tool chattered so much I gave up and headed off in a different direction. I knew I had a 1.5" end mill which is actually far too big for my mill in normal circumstances so I got that out and tried it. It was promising but needed sharpening so into the Clarkson for a refurbish.
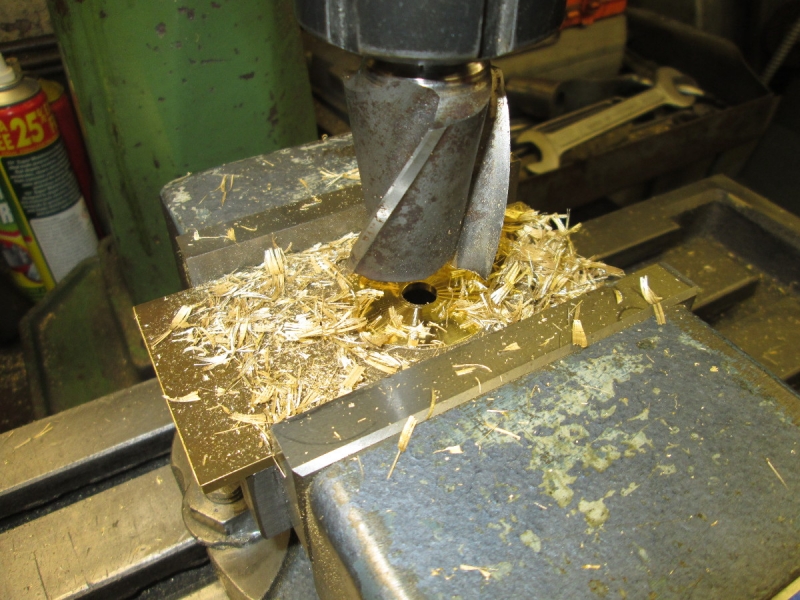
I did better but it was still too much but I persisted.
After some very careful work right at the limits of the mill I got my hole, slightly over 1.5" because of the movement in the quill under this stress.
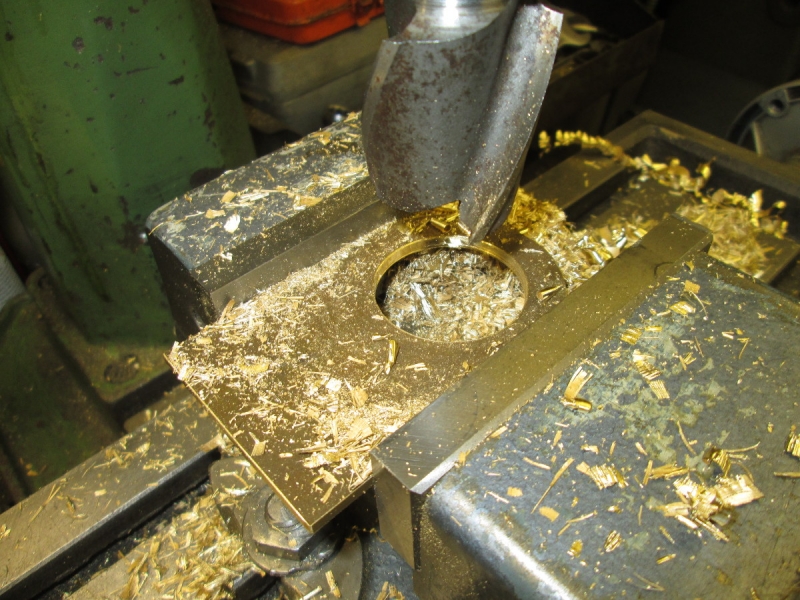
This time I used my head and got a 7/8" blacksmith's drill out, sharpened it and backed of the edge and poked a hole through the support.
Back into the VM and as you can see from the swarf, a much better cut. Still at the limits and I had to be careful but relatively easy and quick.
Knocking off time. We have what I set out to do, two 1.5" holes with the edges de-burred.
I enjoyed this morning. As is so often the case with us amateurs working with often inferior tools, the task was way beyond the methods I used but I got there with no cock-ups. The alternative of course was to chuck them in the two jaw and do a regular boring operation which would probably have been the best way but there you are. I went a different way, gained experience and achieved the object. I like that! Boring big holes in thin material is probably one of the most difficult things we ever do.
Stanley Challenger Graham
Stanley's View
scg1936 at talktalk.net
"Beware of certitude" (Jimmy Reid)
The floggings will continue until morale improves!
Stanley's View
scg1936 at talktalk.net
"Beware of certitude" (Jimmy Reid)
The floggings will continue until morale improves!
-
Stanley
- Global Moderator
- Posts: 90743
- Joined: 23 Jan 2012, 12:01
- Location: Barnoldswick. Nearer to Heaven than Gloria.
Re: SHED MATTERS 2
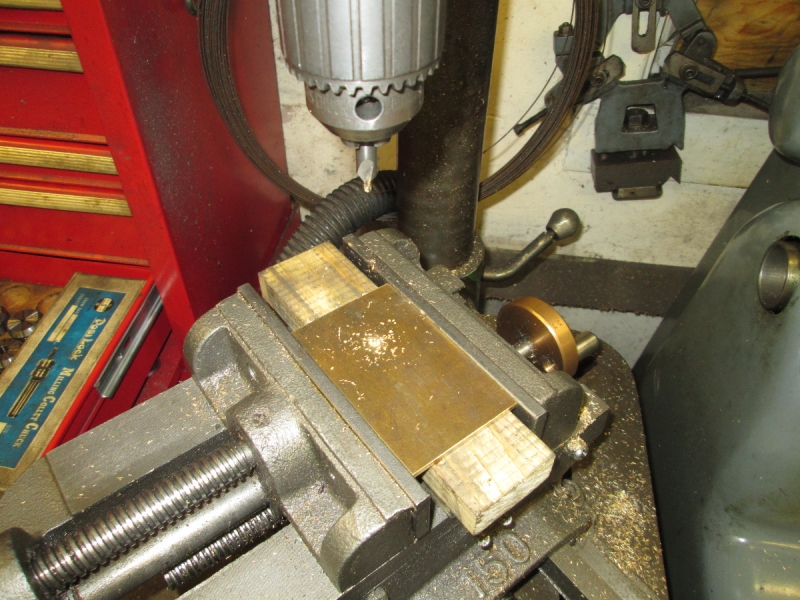
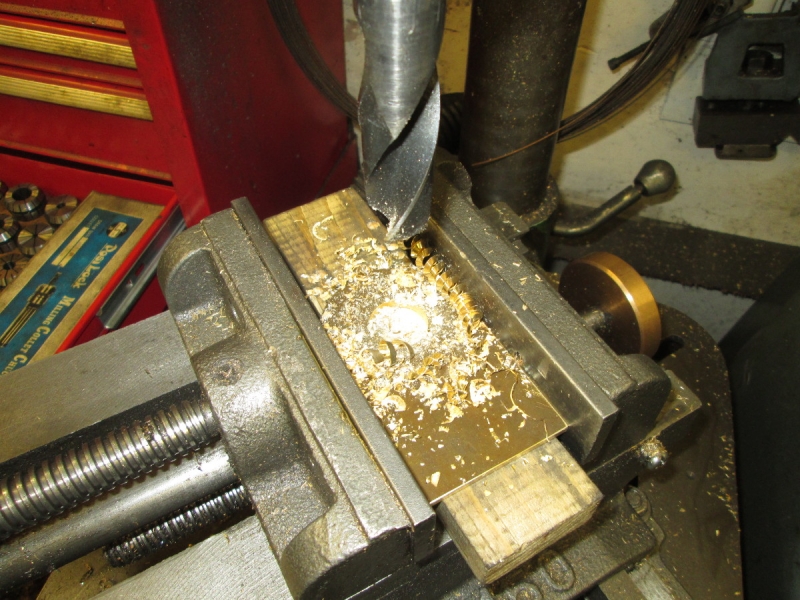
My first job was to tidy up after yesterday and after having a chip chase I was about to take the 1 1/2" cutter out but then I wondered how it would perform on a proper cut. I had it on the lowest speed for the holes yesterday so I swapped the belts to give me 340rpm and got a rough piece out of the brass offcuts stash. I got quite a surprise because I took the heaviest cut I have ever done on the mill, as you can see it's getting on for 3/16"! No problems at all so I squared the block up and returned it to the box. Time to do what I intended to do, more work on the cylinder.
This needed doing so..... I needed two threaded holes 1/4" X 40tpi, the old ME thread, for my drain cocks. I'd forgotten what thread they were and I was so surprised that the supplier had used such an old-fashioned thread that I got the tackle on the job and checked it. Perfectly right and I have the taps and dies so I popped them in.
Remember I have no drawings for this, I'm making it up as I go along. I was going to start on the lids but it struck me that before I started on them I needed to make a decision about the piston rod for making the gland. Once I started to look at this I realised the best thing to do was design the piston and rod and get it made. I soon made my decisions and did a fag packet drawing. Then a trip into the the treasure chest and found this lump of brass. It struck me how enormous this was compared with the last two engines..... I was going to change the chuck but decided to stick with the Taylor and got set up.
Nice little turning job..... 1 1/2" diameter, 5/16" bore to take the end of a 3/8" piston rod with a 1/4" Whitworth nut on the end. I reamed it to size after drilling it 1/64" under size and then I needed to put a counterbore in the end to accept the nut but also the socket for tightening it up, it makes things so much easier. So a trip in with an 11/16" end mill and a parting off.

Here's where I finished up at knocking off time. I shall finish the piston off, chamfers and packing groove, when I have it mounted on the rod. I shall make the piston rod 6" long and finally size it when we get on to the crosshead. One thing I noticed, when I re-chucked the finished piston to tidy up the parting cut it mounted as near concentric as you could wish and the Taylor jaws didn't put a mark on it! Nice morning with no cock-ups, always a good thing!
Stanley Challenger Graham
Stanley's View
scg1936 at talktalk.net
"Beware of certitude" (Jimmy Reid)
The floggings will continue until morale improves!
Stanley's View
scg1936 at talktalk.net
"Beware of certitude" (Jimmy Reid)
The floggings will continue until morale improves!
-
Stanley
- Global Moderator
- Posts: 90743
- Joined: 23 Jan 2012, 12:01
- Location: Barnoldswick. Nearer to Heaven than Gloria.
Re: SHED MATTERS 2
Piston rod today and finish the piston off. I found a nice piece of 3/8" silver steel in the treasure chest, just the job!
While I was in the good steel drawer I tripped over this piece of 22mm square Jones and Shipman Super Cobalt HSS yet again! I picked it up for £10, have a look what it would cost today.... Every time I find it I think what a good parallel it would make and this morning, seeing a touch of rust forming on it, I cleaned it up and put it with the parallels.
I'll spare you all the boring pics. Here we are with the piston fitted to the rod, the packing groove machined in it and the end threaded 3/8" X 26tpi. The length will be wrong but it can easily be reduced later when the position of the crosshead is clear.
The piston is a close fit in the bore so I lapped it in to the bore with fine valve grinding paste and then cleaned it off and oiled it. It's a nice easy fit now.
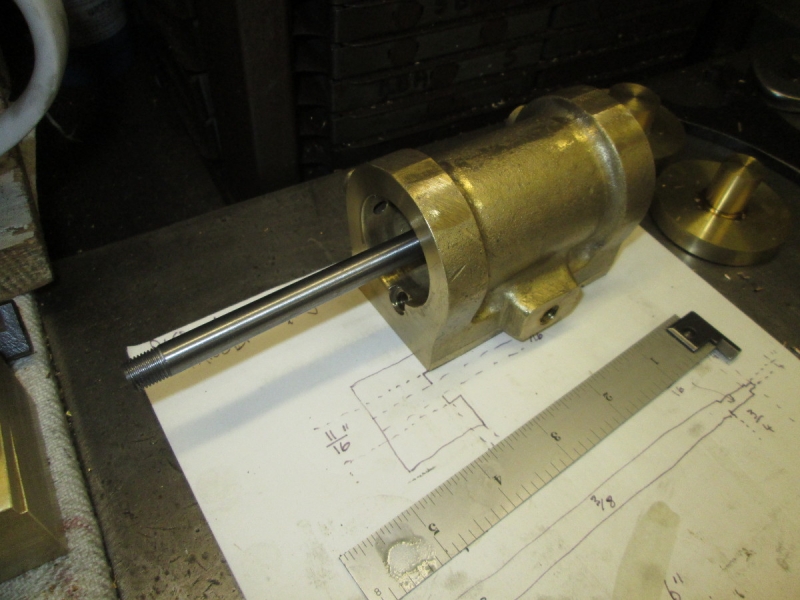
Ready for the lids!
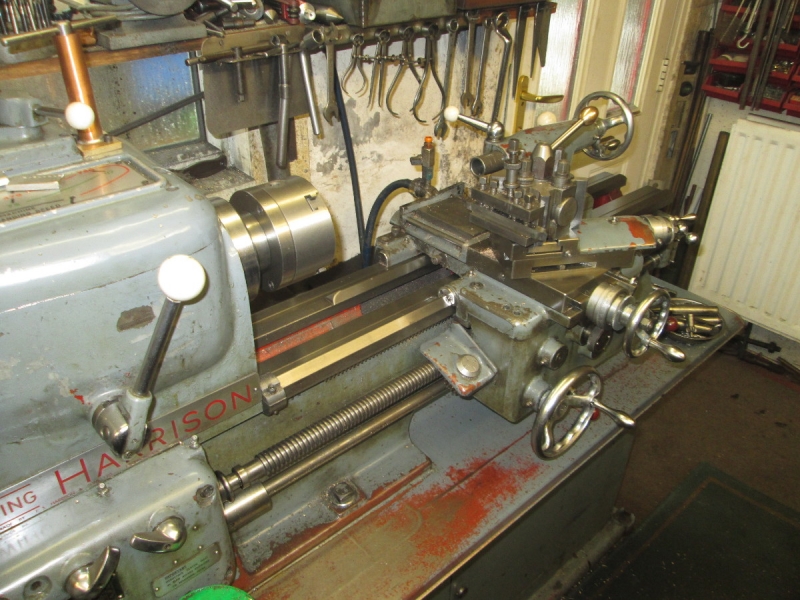
It was too close to knocking off time to start on the lids so I improved the shining hour by giving Mrs Harrison a good clean. One thing that strikes me, I watched John Mills in a blokes shed while he was in Ontario recently and he was looking at a very similar lathe to mine. It was absolutely immaculate! Shiny paint and surfaces and concourse condition. Great stuff but what struck me was that there was no evidence of it having been used, no swarf about and everything too clean. I'd rather have a lathe that looks like mine.... lived in! Tomorrow is lids!
Stanley Challenger Graham
Stanley's View
scg1936 at talktalk.net
"Beware of certitude" (Jimmy Reid)
The floggings will continue until morale improves!
Stanley's View
scg1936 at talktalk.net
"Beware of certitude" (Jimmy Reid)
The floggings will continue until morale improves!
-
Stanley
- Global Moderator
- Posts: 90743
- Joined: 23 Jan 2012, 12:01
- Location: Barnoldswick. Nearer to Heaven than Gloria.
Re: SHED MATTERS 2
Today is lids! I still have the templates from the last of John's cylinders and of course they will do for this. The hole pattern is slightly staggered as well to allow me to avoid breaking into the drains. So I modified it by putting a register on each side and marking it 'Front' on one side and 'Back' on the other. Then on with the lids.
I was originally going to poke a 3/8" hole in both lids to make them easy to hold in place when transferring the hole pattern to the cylinder but then decided against this as the back cover looks better in one piece. Here we are after a bit of careful measuring and turning, the register is deep enough to pass through the support. I think you can see the plan now.
Same job with the second and again I haven't bored it for the rod but for a different reason. Notice the little dab of Sharpie on either end. This marks a punch mark but you may not be able to see it. This matches a punch mark on the template and is an attempt to avoid any silly mistakes!
This end needs the gland for the piston rod of course. Normally I'd bore it 3/8" for the rod but I usually find after fitting the gland nut that I have to poke the drill through the assembly because the two holes, in the cylinder and the gland nut, are slightly misaligned. So this time I just drilled it 1/4" to pilot for the tapping drill.
The tapping drill for 5/8" X 26tpi is 14.75mm but I haven't got one so here's a 37/64" drill which will be just right.
Tapped full depth for the gland nut.
Now for the gland nut.... I went into the treasure chest and found an off-cut that was too big but would make the nut which will have a 3/4" head but then I thought sod it, I'm not going to live that long and I had this lump of 3/4" round. I shall make the nut tomorrow, screw it into the gland and then bore both it and the cylinder 3/8" in one pass. Knocking off time and I was ready for my meal.....
Stanley Challenger Graham
Stanley's View
scg1936 at talktalk.net
"Beware of certitude" (Jimmy Reid)
The floggings will continue until morale improves!
Stanley's View
scg1936 at talktalk.net
"Beware of certitude" (Jimmy Reid)
The floggings will continue until morale improves!
-
Stanley
- Global Moderator
- Posts: 90743
- Joined: 23 Jan 2012, 12:01
- Location: Barnoldswick. Nearer to Heaven than Gloria.
Re: SHED MATTERS 2
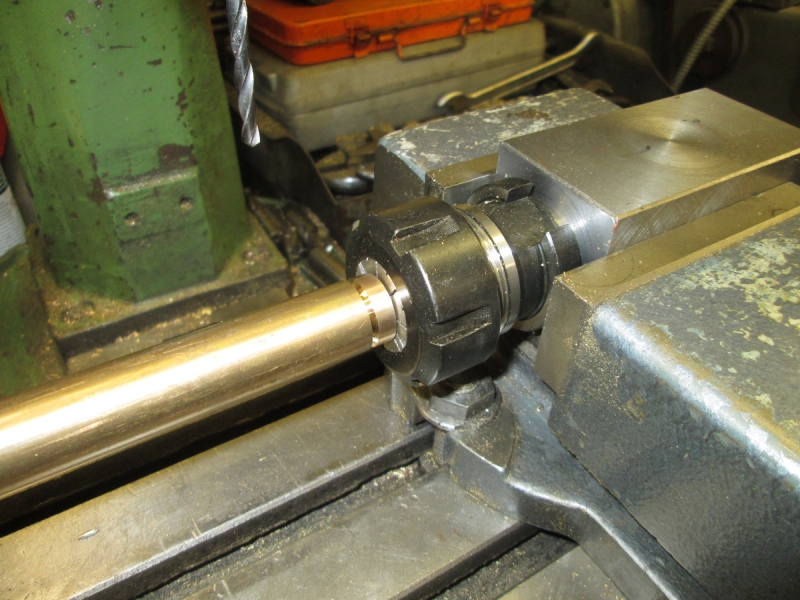
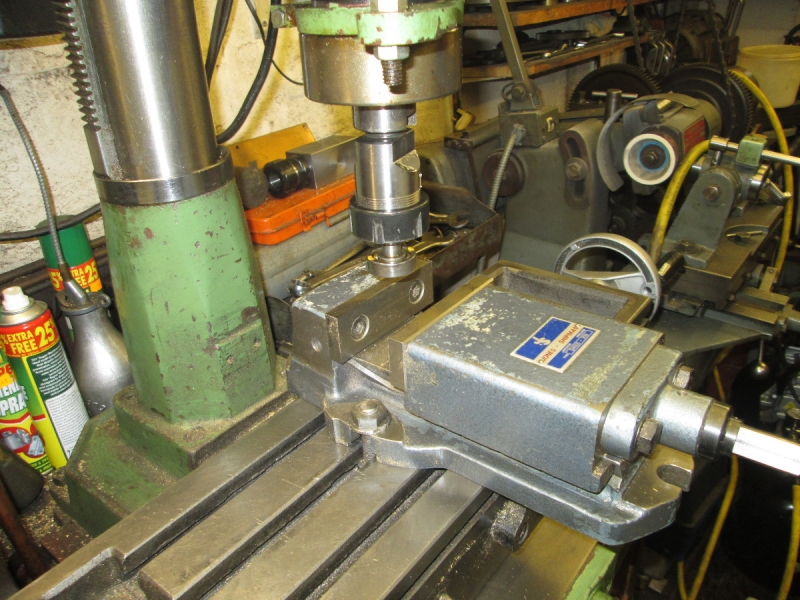
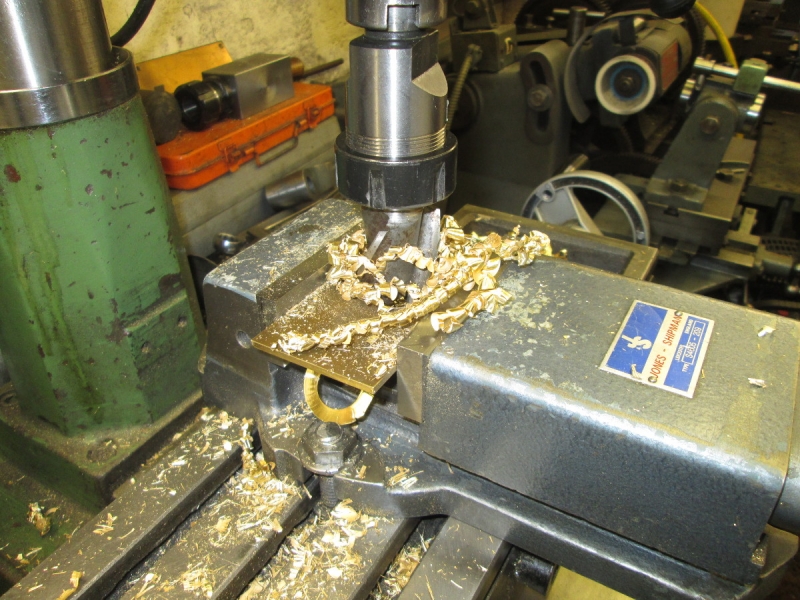
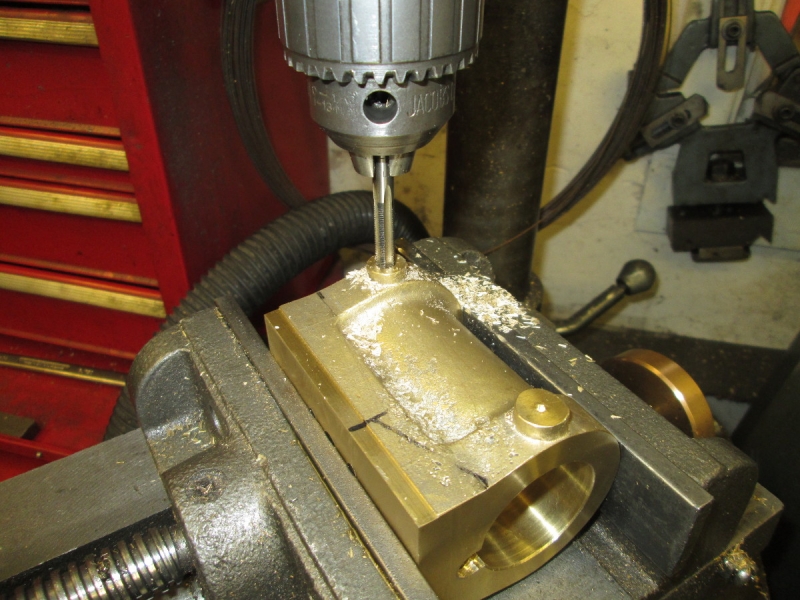
I soon had the blank to size and marked up so I to0ok it out of the chuck and popped it into the collet block to drill two 3/16" holes right through at right angles for the tommy bar holes used in adjusting. This is exactly the sort of job I made the collet block for.
Then back into the chuck and thread it 5/8" 26tpi. It's a nice fit in the gland body on the lid.
Back into the chuck after parting off and drill straight through 1/64" above 3/8" so I have a bit of wriggle room.
Here we are, we have a piston on a rod and a gland that works but it wasn't quite that simple! The gland nut expanded in the bore as I bored it and I had to run the die down it again, not as easy as it looks but big does and little does I got there.
Knocking off time. I set the piston at the back centre and wonder of wonders, My guess for the length was right. It is just right! Ian has just arrived with his pipe so unusually, back in the shed for a while.
Stanley Challenger Graham
Stanley's View
scg1936 at talktalk.net
"Beware of certitude" (Jimmy Reid)
The floggings will continue until morale improves!
Stanley's View
scg1936 at talktalk.net
"Beware of certitude" (Jimmy Reid)
The floggings will continue until morale improves!
-
Stanley
- Global Moderator
- Posts: 90743
- Joined: 23 Jan 2012, 12:01
- Location: Barnoldswick. Nearer to Heaven than Gloria.
Re: SHED MATTERS 2
He's had me on repetition work at my age! I think he's happy, and he now has a blowlamp.
Stanley Challenger Graham
Stanley's View
scg1936 at talktalk.net
"Beware of certitude" (Jimmy Reid)
The floggings will continue until morale improves!
Stanley's View
scg1936 at talktalk.net
"Beware of certitude" (Jimmy Reid)
The floggings will continue until morale improves!