Shed Matters 3

Post Reply
User avatar
Stanley
Global Moderator
Global Moderator
Posts: 90301
Joined: 23 Jan 2012, 12:01
Location: Barnoldswick. Nearer to Heaven than Gloria.

Re: Shed Matters 3

Post by Stanley »

Image

Mo and Jess visited yesterday and Mo did this pic of his future shed!
Stanley Challenger Graham
Stanley's View
scg1936 at talktalk.net

"Beware of certitude" (Jimmy Reid)
The floggings will continue until morale improves!
User avatar
Stanley
Global Moderator
Global Moderator
Posts: 90301
Joined: 23 Jan 2012, 12:01
Location: Barnoldswick. Nearer to Heaven than Gloria.

Re: Shed Matters 3

Post by Stanley »

Image

Today was making the lever for the regulator. I started by putting a handle on one end and drilling a 3/16" hole for the fulcrum at the other. This is an offer up to make sure my guesses were working out. It's going to be OK.

Image

Then start to put a bit of shape in with the VM. I finished off the curve on the grinding wheel.

Image

I've decided that the lever end of the link is going to be a clevis so I needed to reduce the thickness of the lever. It will also look better. So into the VM and reduce each side until the cutter was just touching the minor diameter of the handle.

Image

Here's where I ended up. As I suspected, I am going to have to adjust the thickness of the fulcrum end to get the clevis directly in line with the regulator rod. I shall do that tomorrow and make the link. Notice that the crosshead is left on the bed. That's to remind me that I have slipped up, I should have mounted it before I put the back lid on because I have to put a socket on the nut that holds the piston on the rod to screw the rod into the crosshead. Annoying but not a biggie.
Stanley Challenger Graham
Stanley's View
scg1936 at talktalk.net

"Beware of certitude" (Jimmy Reid)
The floggings will continue until morale improves!
User avatar
Big Kev
Site Administrator
Site Administrator
Posts: 10957
Joined: 23 Jan 2012, 20:15
Location: Foulridge

Re: Shed Matters 3

Post by Big Kev »

Stanley wrote: 24 Sep 2018, 03:21 I'm a bit baffled Kev.... Were you on the right topic?
I read Shed Matters when I'm in the office, usually just before lunch when I'm having a brew.
Kev

Stylish Fashion Icon.
🍹
User avatar
Stanley
Global Moderator
Global Moderator
Posts: 90301
Joined: 23 Jan 2012, 12:01
Location: Barnoldswick. Nearer to Heaven than Gloria.

Re: Shed Matters 3

Post by Stanley »

Ah! Makes sense knowing that. I hope you weren't disappointed Kev! It's growing slowly....
Stanley Challenger Graham
Stanley's View
scg1936 at talktalk.net

"Beware of certitude" (Jimmy Reid)
The floggings will continue until morale improves!
User avatar
Big Kev
Site Administrator
Site Administrator
Posts: 10957
Joined: 23 Jan 2012, 20:15
Location: Foulridge

Re: Shed Matters 3

Post by Big Kev »

Stanley wrote: 25 Sep 2018, 03:00 Ah! Makes sense knowing that. I hope you weren't disappointed Kev! It's growing slowly....
It's looking good :good:
Kev

Stylish Fashion Icon.
🍹
User avatar
Stanley
Global Moderator
Global Moderator
Posts: 90301
Joined: 23 Jan 2012, 12:01
Location: Barnoldswick. Nearer to Heaven than Gloria.

Re: Shed Matters 3

Post by Stanley »

:good:
Stanley Challenger Graham
Stanley's View
scg1936 at talktalk.net

"Beware of certitude" (Jimmy Reid)
The floggings will continue until morale improves!
User avatar
Stanley
Global Moderator
Global Moderator
Posts: 90301
Joined: 23 Jan 2012, 12:01
Location: Barnoldswick. Nearer to Heaven than Gloria.

Re: Shed Matters 3

Post by Stanley »

Image

I started the day by cutting the rest of the operating lever down to the same thickness as the rest. It worked out just right and enabled me to file the stud on top of the pillar down so it looked tidy.

Image

I was tempted to jump straight into design of the link but decided to fix my crosshead problem. I took the lid off, tightened the piston rod in the crosshead and replaced some of Newton's studs which were a bit dodgy. Then lace it all up again and measure for the link and do a fag packet drawing. Then I squared the ends and did some marking. Another thing I decided against was breaking the edges on the lever and making it pretty. I shall leave that until I have made the link and do them both at the same time.

Image

I needed a slot in the clevis .200" so I found a cutter that was close and did the cut in the horizontal mill. This is one of the cutters that had teeth broken out of it and some would reject it but it cut fine and did a good job. I wasn't wasting my time when I had that grinding fest!

Image

Closing time after a nice productive morning. The cut in the blank is just right, not too tight. I shall finish the link tomorrow with a fair wind! Then I can do some prettification!
Stanley Challenger Graham
Stanley's View
scg1936 at talktalk.net

"Beware of certitude" (Jimmy Reid)
The floggings will continue until morale improves!
User avatar
Stanley
Global Moderator
Global Moderator
Posts: 90301
Joined: 23 Jan 2012, 12:01
Location: Barnoldswick. Nearer to Heaven than Gloria.

Re: Shed Matters 3

Post by Stanley »

Image

Today is more work on the link for the regulator rod. The hole in the existing clevis on the rod is 1/8" diameter, I decided that the one on the lever would be the same so some careful marking and two holes drilled in the blank.

Image

Then some careful milling to get the link to fit the clevis. This included shortening the regulator end so it would fit. No rounding off yet, all I did was make sure the 1/8" drill fitted in the clevis and link.

Image

I rounded the regulator end by eye, I couldn't hold it to mill it. Then I shortened the end of the link that will fit on the lever and rounded it under the VM. Once this was done I marked the position it would fit on at the lever end. All the holes chamfered by hand with the countersink in the De Walt drill. Next was to mark the lever and drill a central 1/8" hole in the marked position.

Image

Here's where I ended up. We have a raw link that fits nicely. Tomorrow I will make both the lever and the link pretty, I shall spend a bit of time on that. Then there is the matter of what the pin is at each end. I considered simply putting a BA nut and bolt at each end which would fill the bill but then I decided that there was nothing trying to lift the pins out so I am going to make two very small clevis pins that are a good fit in the holes and each with a nice head. These will be a bit of a fiddle but will look nicer than a simple BA nut and bolt.
All told a morning of small cuts and holes but it's working out nicely and is going to look OK. Very satisfying slow and careful progress. Nice......
Stanley Challenger Graham
Stanley's View
scg1936 at talktalk.net

"Beware of certitude" (Jimmy Reid)
The floggings will continue until morale improves!
User avatar
Stanley
Global Moderator
Global Moderator
Posts: 90301
Joined: 23 Jan 2012, 12:01
Location: Barnoldswick. Nearer to Heaven than Gloria.

Re: Shed Matters 3

Post by Stanley »

Image

I won't bore you with the first hour and a half of this morning's activities.... Using a battery of files and abrasives I spent a long time making the lever and link look pretty. This bores me to tears and is incredibly tiring! Then I did a bit of measuring and drew a fag packet drawing. I needed some 3/16" stock.....

Image

Not very promising eh? But it will be OK, it's just that it's had a rough life!

Image

Newton always said that if you had a big lathe you could always make small parts on it. The difficult bit is doing the opposite..... Into Mrs Harrison, top speed and polish then turn the end down to 1/8" for half an inch.

Image

Looking better but my problem is that the chuck won't grip 1/8". No problem.

Image

Into the front room and fire up Johnny's copy of the Birch lathe. Cut the pins back, face the ends and file a chamfer on the head. I do like using this lathe!

Image

Knocking off time, we have two pins that look the part and are a nice fit. They don't need fastening down, they aren't going to jump out. Tomorrow I'll have a look at the length of the studs on the cylinder......
Stanley Challenger Graham
Stanley's View
scg1936 at talktalk.net

"Beware of certitude" (Jimmy Reid)
The floggings will continue until morale improves!
User avatar
plaques
Donor
Posts: 8094
Joined: 23 May 2013, 22:09

Re: Shed Matters 3

Post by plaques »

Is this lever a simple on/off or does it require a detent for intermediate positions. Drop in pins are Ok until you have to move the thing, Then its. "where did the little blighter go?
User avatar
Stanley
Global Moderator
Global Moderator
Posts: 90301
Joined: 23 Jan 2012, 12:01
Location: Barnoldswick. Nearer to Heaven than Gloria.

Re: Shed Matters 3

Post by Stanley »

It controls the regulator valve in the box P. Like the regulator on a loco, it is stiff enough to stay in any position you adjust it to. The pins do not need to be touched, they are only fulcrum points in the linkage. Trust me, it will be OK.
Stanley Challenger Graham
Stanley's View
scg1936 at talktalk.net

"Beware of certitude" (Jimmy Reid)
The floggings will continue until morale improves!
User avatar
Stanley
Global Moderator
Global Moderator
Posts: 90301
Joined: 23 Jan 2012, 12:01
Location: Barnoldswick. Nearer to Heaven than Gloria.

Re: Shed Matters 3

Post by Stanley »

Image

Sorry about yesterday, life got in the way of the shed! I'm not sure how to tell you about this morning in relation to the three pics, I'll just crash on. The first thought was to tidy up all the studs on the cylinder to make it look pretty but I soon realised that the cylinder end and the valve chest lid are better left until later as they will both have to come off at some point so I finished up just tidying the ones on the regulator box. Having got that far I looked at the Piste and decided the next aiming point would be to install the motion so that I could mount the crankshaft and the pedestals so that I can get the studs made for that. Once that is done I can get proper measurements for the valve eccentric and rod. I had to detach the connecting rod from its bearing on the crank pin to make it easier to fit the rod to the pin.

Image

Then it got interesting! The first thing that happened was that I realised the connector for the valve rod had to be dismantled so that I could get at the crosshead so that I could fit the crosshead pin. Then I found out that even when I had done that the pin was fouling the casting for the valve rod connector so I had to grind a flat on the head so it could pass. But then I found that that wasn't enough as I couldn't get the piston back far enough. So I had to loosen the lid nuts on the back lid so I could get the crosshead back far enough. Then I hit another problem. When I screwed the piston rod tight into the crosshead the end of it intruded slightly into the bore for the pin, so I had to get in there with the round file and ease the bore until the pin fitted. Once I got it in place I fitted the collar and the taper pin and drove it home before cutting the excess off each end of it. It's not coming off again! I finished up by re-tightening the back lid......(At the same time I decided I would perhaps replace a couple of the shorter studs but that can come later.) Then I reconnected the con rod to it's bearing on the crank pin.

Image

My last blow before I knocked off was to place the crankshaft and pedestal correctly making sure the piston stopped 1/8" before it reached the lid. Once I was satisfied with that I marked the holes for the long 2BA studs with a transfer punch. That's where I am going next......
Stanley Challenger Graham
Stanley's View
scg1936 at talktalk.net

"Beware of certitude" (Jimmy Reid)
The floggings will continue until morale improves!
User avatar
Stanley
Global Moderator
Global Moderator
Posts: 90301
Joined: 23 Jan 2012, 12:01
Location: Barnoldswick. Nearer to Heaven than Gloria.

Re: Shed Matters 3

Post by Stanley »

Image

We need four long 2BA studs to fasten the pedestals down. Four bits of rusty 3/16" rod cut off ready to make them. I say 'fasten' the pedestals, eventually they will do that but I have cut them longer than I need because Initially I simply want to locate the crankshaft assembly so that I can measure for the valve eccentric rod. I want to be able to unscrew them easily during that process so I've left some stick out......

Image

We need to remove the crankshaft to allow access to drill and tap the holes in the bed. I also need a 4.1mm tapping drill, 0.1mm bigger than recommended I know for 2BA but I don't want any possibility of a broken tap and I shall thread the holes the full half inch so there will be plenty of stud in the hole, more than enough to give a firm hold. Out with the BA threading tackle and sort out a tap and die. Everything ready and to hand.

Image

Here we are in the compound vice under the pillar drill. (One of the best investments I ever made, I urge you all to consider buying one!) It's an exercise in patience now, no rush, drill each hole and tap on the same setting then clean out the hole with compressed air and screw a 2BA set screw in to keep the holes clean. I reversed the tap on every revolution to clear the cutting edge, I am not going to slip up! Trefolex as usual for the cutting lubricant, I've never found anything better.

Image

Over an hour later and we have our four tapped holes, all tested with a set screw and I've left them in to keep them clean. Doesn't look a lot for one morning I know but that's because I didn't rush the tapping. Quiet, patient and steady progress with no mistakes..... (As long as they are in the right place!). Nice morning.......
Stanley Challenger Graham
Stanley's View
scg1936 at talktalk.net

"Beware of certitude" (Jimmy Reid)
The floggings will continue until morale improves!
User avatar
Stanley
Global Moderator
Global Moderator
Posts: 90301
Joined: 23 Jan 2012, 12:01
Location: Barnoldswick. Nearer to Heaven than Gloria.

Re: Shed Matters 3

Post by Stanley »

Image

The aim today is to make some long 2BA studs and mount the crankshaft on them so I can measure for the valve rod and eccentric. I've already got 4 rusty lengths of 3/16" rod ready so the first job was to face and chamfer each end and clean them up by filing them in the lathe, no need for any polishing.

Image

Next I threaded the end of each one 1/2" of 2BA thread, nothing on the other end yet.

Image

Looking a bit more business-like!

Image

Next I tried them all in their threaded holes, the far one is not quite threaded all the way through. Good job I checked, I want the fitting to be as easy as possible.

Image

That's better, an easy fit all the way in. By the way, using the slightly oversize tapping drill hasn't affected the fit.

Image

The stud drillings were all spot on, no problem fitting the studs with fingers only, just what I wanted. The pedestals are rock solid in terms of orientation. So far so good but then I realised that I had got the position of the crankshaft slightly too far forwards. I couldn't get a full rotation, the piston was fouling the front lid before the crank pin was over centre. This is the same effect as the con rod being slightly too short. Annoying but not terminal. What I need to do is find how much adjustment I need and insert a spacer between the brass bearing and the foot of the con rod. These things happen when you are building without drawings and tomorrow I'll have the interesting job of getting it right! But that's for tomorrow. By the way, the deficiency is so small, I'm guessing about 1/16", that it's no good thinking about adjusting the position of the holes in the base. I shall leave the crankshaft assembly where it is and do it via the con rod length.
Stanley Challenger Graham
Stanley's View
scg1936 at talktalk.net

"Beware of certitude" (Jimmy Reid)
The floggings will continue until morale improves!
User avatar
Stanley
Global Moderator
Global Moderator
Posts: 90301
Joined: 23 Jan 2012, 12:01
Location: Barnoldswick. Nearer to Heaven than Gloria.

Re: Shed Matters 3

Post by Stanley »

Image

The first thing I did was make sure I had the bearing assembled correctly, left the bolts loose and rotated the shaft and adjusted everything until I was sure it was right and measured the gap. Notice how I did it, you have a good set of gauge pins in every bank of drills on the shelf, not a bad tip, remember it!

Image

Now I need a shim, 5/64".... This treasure chest doesn't often get an airing. Lots of shim steel from .001" upwards but unfortunately none that would do. more searching.....

Image

I thought this sheet of copper might fill the bill bit it was 8 thou shy so I had a furtle in the box of packings I use for centring lathe tools and found this bit of steel, just 2thou over but I can handle that.

Image

I cut off a piece that was approximately the right length and started to mill it to the correct size.

Image

This was my final cut to width. Notice that I had to be imaginative looking for a parallel that would do, I had to use the narrow ruler from my Starrett depth gauge. I am close to the width and a bit of careful filing will get it spot on. Tomorrow I'll adjust the length and get the ends square.
Stanley Challenger Graham
Stanley's View
scg1936 at talktalk.net

"Beware of certitude" (Jimmy Reid)
The floggings will continue until morale improves!
User avatar
Stanley
Global Moderator
Global Moderator
Posts: 90301
Joined: 23 Jan 2012, 12:01
Location: Barnoldswick. Nearer to Heaven than Gloria.

Re: Shed Matters 3

Post by Stanley »

Image

The spacer..... First job was to square one end.

Image

Then I removed half of the bearing and used it as a template to mark the length I need.

Image

After I had got the length right and squared the end I used the bearing brass as a template and drilled the spacer for the bolts.

Image

I refitted the con rod with the spacer and it's successful, it clears at both ends but there is another problem.... (That's fitting for you!)

Image

Can you remember me saying I was deliberately making a short con rod as I wanted to keep the length of the engine down and give it plenty of wag so that when it's running it looks busy? The shorter the rod and the more angularity on the rod and here's where I have been caught out by working out of my head with no initial drawing with everything carefully calculated. The con-rod is fouling the end of the bottom guide on both strokes. This isn't Newton's fault, it is entirely down to me. So what to do? The nuclear option is to start again with a new bed and con rod and end up with a long ungainly engine. After a bit of thought I decided that the tapering horns that Newton had made were actually cosmetic, they do nothing to support the crosshead so I decided to cut the end off and file the guide back until the con rod cleared. I could have dismantled everything but I decided to go the cheap and cheerful way and this is my set up. I set to, cut the end off and then filed the end of the guide back until I had clearance.

Image

A bit later.... Lovely! Free rotation and the con rod clears the guide. (I'm considering cutting the top one back as well to match the bottom. I'll take a decision on that later).

Image

Here we are after a productive hour in the shed. I've replaced the valve rod guide which I took off in order to get the hacksaw blade in. I'm ready now to make my decisions about the design of the eccentric and its rod. Can you see why fitting is so satisfying? Nothing quite like hitting problems, identifying exactly what they are and curing the trouble. A nice morning!
Stanley Challenger Graham
Stanley's View
scg1936 at talktalk.net

"Beware of certitude" (Jimmy Reid)
The floggings will continue until morale improves!
User avatar
Stanley
Global Moderator
Global Moderator
Posts: 90301
Joined: 23 Jan 2012, 12:01
Location: Barnoldswick. Nearer to Heaven than Gloria.

Re: Shed Matters 3

Post by Stanley »

I am about to be taken to what Susan calls planet underpant, Boundary Mill Stores, by Mick so this is a bit rushed. I did get 90 minutes in the shed.

Image

I have to design the eccentric so the first thing to do is measure the throw of the slide valve. I was rather surprised actually how much it is, 7/16". Then I measured everything else and put the lid back on. I was almost diverted to addressing the studs but managed to stop myself, that comes later.

Image

Mrs McMaster was called on to do two cuts. Lovely sound......

Image

While the saw was working I swapped the chuck to the smaller 4 jaw. This is what I'll need.

Image

Closing time. I have my drawing and a piece of stock. I am ready to do battle tomorrow. Not a lot to show but an interesting morning.
Stanley Challenger Graham
Stanley's View
scg1936 at talktalk.net

"Beware of certitude" (Jimmy Reid)
The floggings will continue until morale improves!
User avatar
Stanley
Global Moderator
Global Moderator
Posts: 90301
Joined: 23 Jan 2012, 12:01
Location: Barnoldswick. Nearer to Heaven than Gloria.

Re: Shed Matters 3

Post by Stanley »

Image

Eccentric turning.... I started by cleaning Mrs Harrison....

Image

Then I dialled the stock in.... I could just leave it at that but a funny thing happened. I kept making the wrong decisions and it took me over half an hour to suss what it was I was doing wrong, and then the penny dropped! I can't explain why it happened but I can tell you it was bloody annoying. I hadn't dialled my brain in!

Image

Eventually I got going and stopped making mistakes! Nothing too esoteric and I put the groove in for the strap.

Image

Closing time. At times it was frustrating morning, totally down to me. I'm ready for marking for the eccentric turning bit. It will do tomorrow......
Stanley Challenger Graham
Stanley's View
scg1936 at talktalk.net

"Beware of certitude" (Jimmy Reid)
The floggings will continue until morale improves!
User avatar
Stanley
Global Moderator
Global Moderator
Posts: 90301
Joined: 23 Jan 2012, 12:01
Location: Barnoldswick. Nearer to Heaven than Gloria.

Re: Shed Matters 3

Post by Stanley »

Image

Sorry about yesterday lads, usual reason, life and housework got in the way. I resisted cooking this morning and got in the shed by 8AM. First job was to mark out the centre for the shaft which is 7/32" off centre to give us 7/16" of throw. A good punch mark and under the pillar drill for a centre hole.

Image

Then into the 4 jaw and set the eccentric up with the centre of the bore and the tail stock dead centre. Not as easy as it looks and I spent quite a lot of time getting it right.

Image

I used the big Jacobs Superchuck because I know it is dead accurate and very rigid. 1/4", 1/2" and 3/4" drills in succession and we have a bore. Actually I could stop here, the eccentric would function just as well but it will look so much better if the body round the bore is concentric. One warning if you are doing this on your own eccentric. Be very careful when you are designing it to make sure that when you bore it, that the bore doesn't break into into the channel the eccentric runs in. On small engines this is a common fault. Despite the fact that this is a heavy shaft, 3/4", we have plenty of meat, I made sure of that.

Image

After a bit of careful turning I got the bit concentric with the bore finished and moved on to parting it off from the stock. Not comfortable turning as it was an interrupted cut but I'd rather it was eccentric at the beginning of the cut , it will be concentric as soon as I get down towards the bore. I had to give the tool a bit more stick out to cope with the wall thickness so that made it even more dodgy. Very careful hand feeding and a lot of patience.

Image

Knocking off time. I need to do some prettying up and fitting at least one set screw to lock the eccentric onto the shaft. I'm satisfied with this morning, I shall attend to finishing it off and then I have to design the strap.
Stanley Challenger Graham
Stanley's View
scg1936 at talktalk.net

"Beware of certitude" (Jimmy Reid)
The floggings will continue until morale improves!
User avatar
Stanley
Global Moderator
Global Moderator
Posts: 90301
Joined: 23 Jan 2012, 12:01
Location: Barnoldswick. Nearer to Heaven than Gloria.

Re: Shed Matters 3

Post by Stanley »

I'll be absent this morning Lads. It's a medical day for both myself and Jack. Me to find out why the doctor is fascinated with my pee and Jack for a check-up and annual jobs with his favourite vet, the wonderful Gillian.
I'll be in tomorrow! (If they haven't rushed me into hospital!)
Stanley Challenger Graham
Stanley's View
scg1936 at talktalk.net

"Beware of certitude" (Jimmy Reid)
The floggings will continue until morale improves!
User avatar
Stanley
Global Moderator
Global Moderator
Posts: 90301
Joined: 23 Jan 2012, 12:01
Location: Barnoldswick. Nearer to Heaven than Gloria.

Re: Shed Matters 3

Post by Stanley »

Sorry lads! A big admin matter connected with yesterday reared its head and had to be dealt with. I'm frustrated!
Stanley Challenger Graham
Stanley's View
scg1936 at talktalk.net

"Beware of certitude" (Jimmy Reid)
The floggings will continue until morale improves!
User avatar
Stanley
Global Moderator
Global Moderator
Posts: 90301
Joined: 23 Jan 2012, 12:01
Location: Barnoldswick. Nearer to Heaven than Gloria.

Re: Shed Matters 3

Post by Stanley »

Image

Another busy morning outside the shed but I was determined to get something done! First job was to clean Mars Harrison, can't do with muck lay about!

Image

Today's first job is to fit two 1/4" whit socket head set screws to lock the eccentric on the shaft. So I sorted the screws, checked I had the thread right and found a tap and a tapping drill.

Image

Then under the pillar drill and the usual game of spotting, drilling and tapping all on the same setting.

Image

Job done, now I want to break all the edges and make the eccentric look as though someone cares.

Image

Over half an hour later and employing all the tools. You'd be amazed how many edges needed breaking and surfaces improving, including the groove for the eccentric strap.

Image

Next we have to sort some material for the strap, so a trip into the treasure chest. This is for tomorrow and it was knocking off time.

Image

I took Jack for a walk and when I got back Stuart was on the doorstep with this worm out of his mincer, a sheared pivot on the end. The replacement you see here cost him £80! So this will be the first job tomorrow. Bit of a change.....
Stanley Challenger Graham
Stanley's View
scg1936 at talktalk.net

"Beware of certitude" (Jimmy Reid)
The floggings will continue until morale improves!
User avatar
Stanley
Global Moderator
Global Moderator
Posts: 90301
Joined: 23 Jan 2012, 12:01
Location: Barnoldswick. Nearer to Heaven than Gloria.

Re: Shed Matters 3

Post by Stanley »

Image

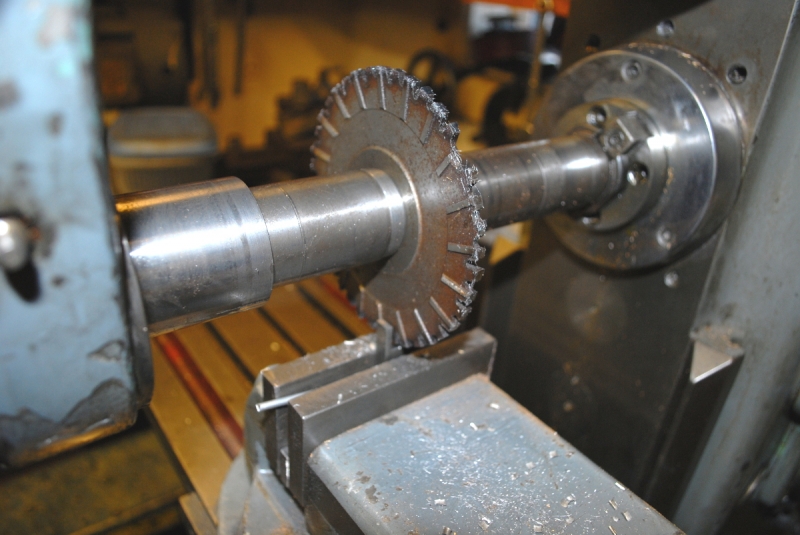
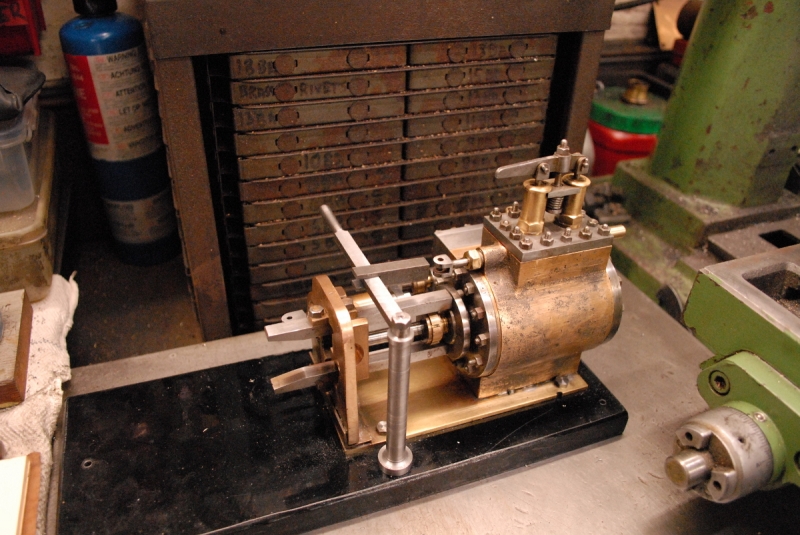
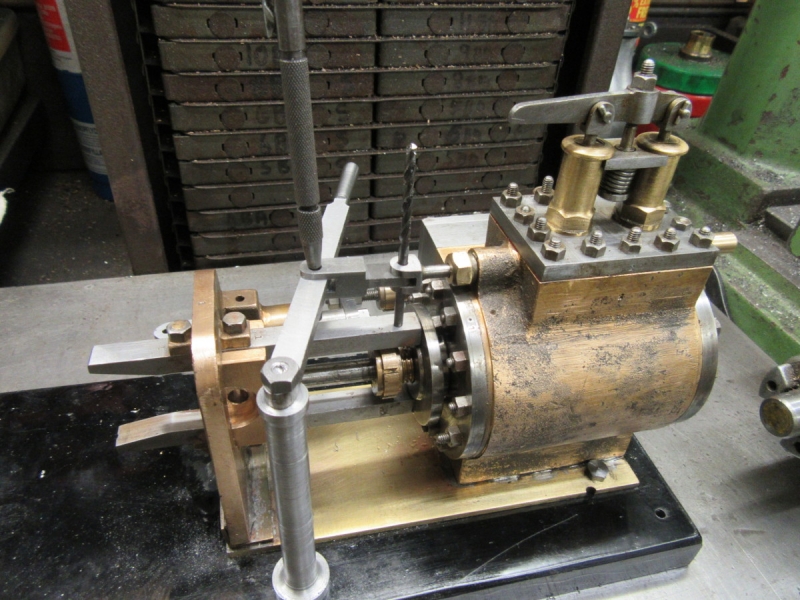
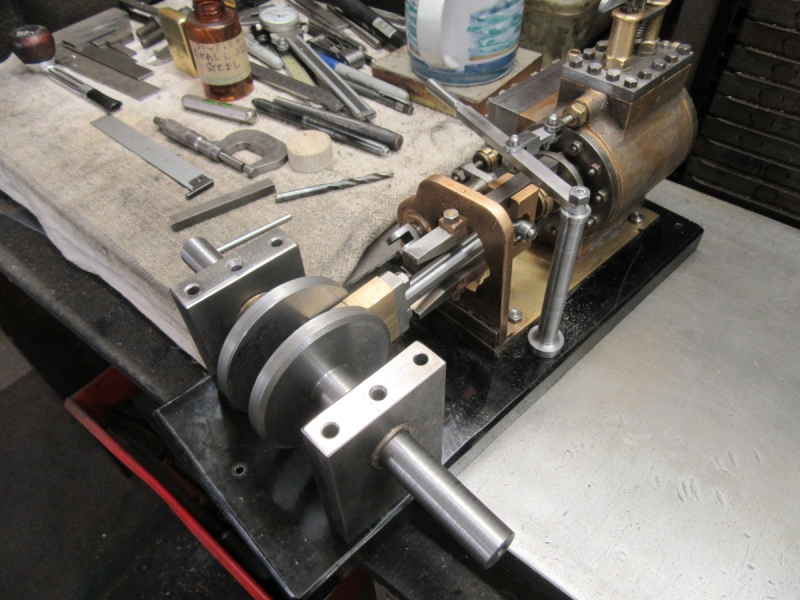
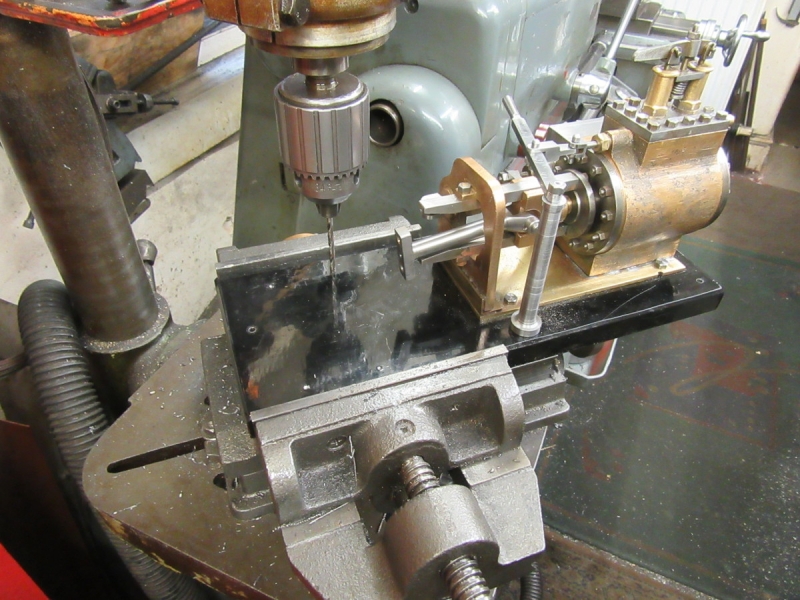
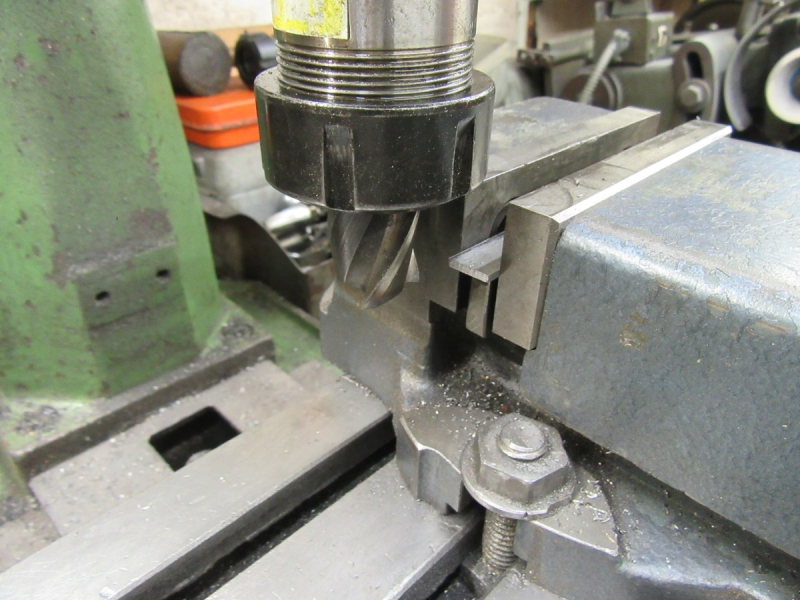
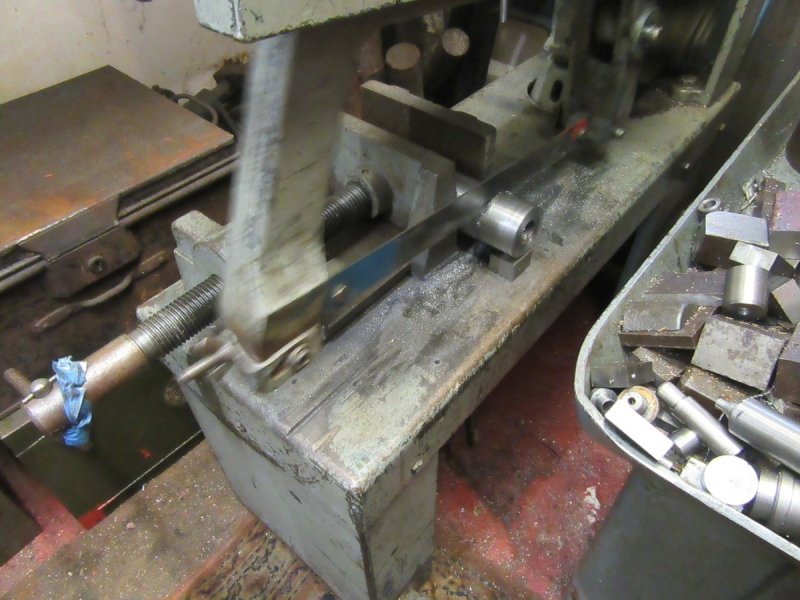
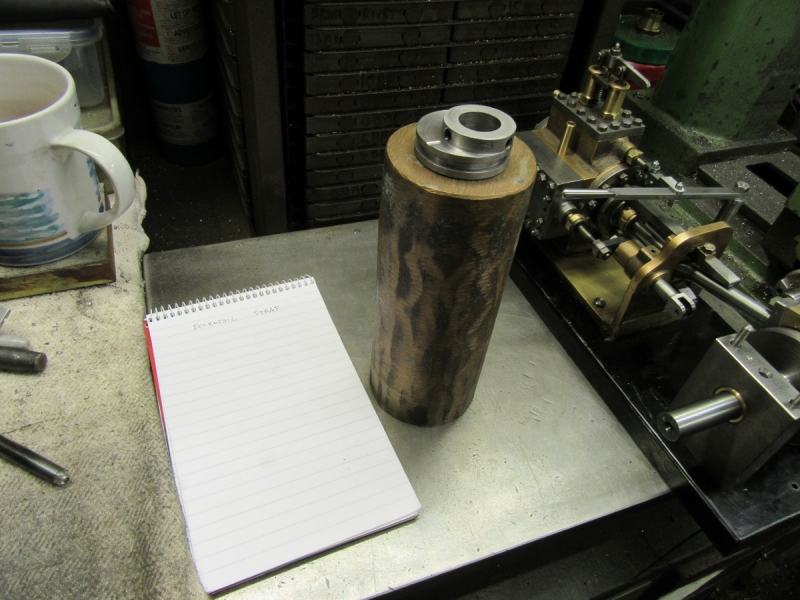
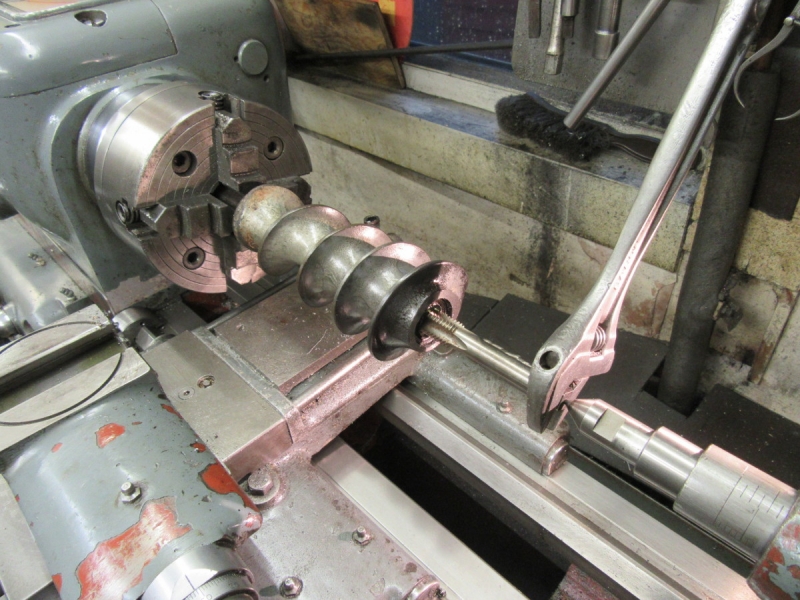
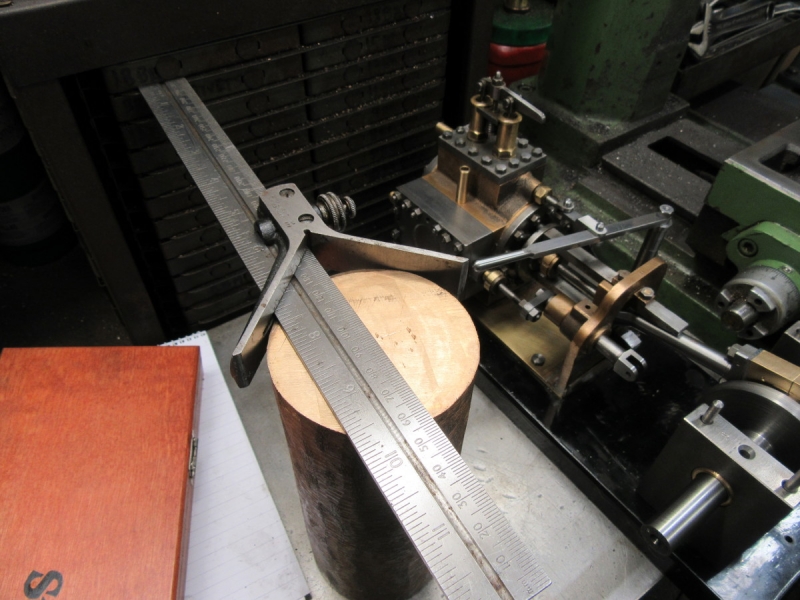
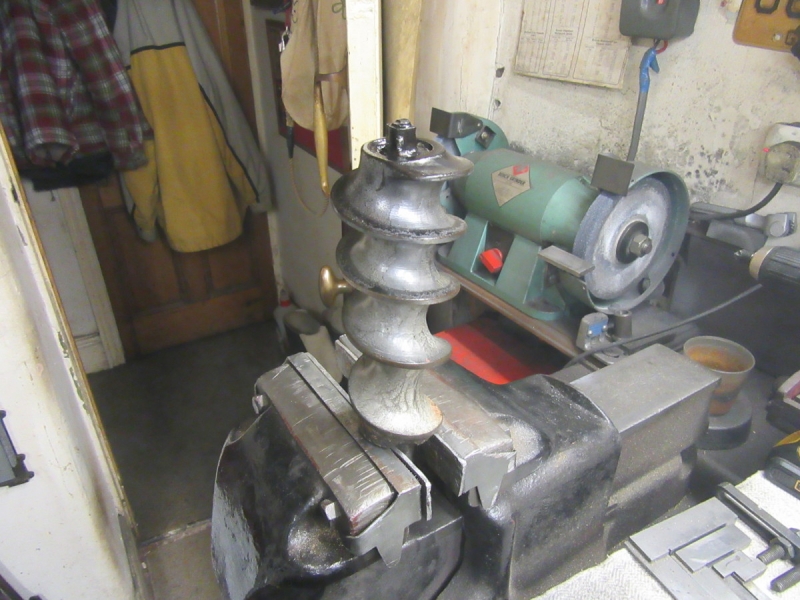
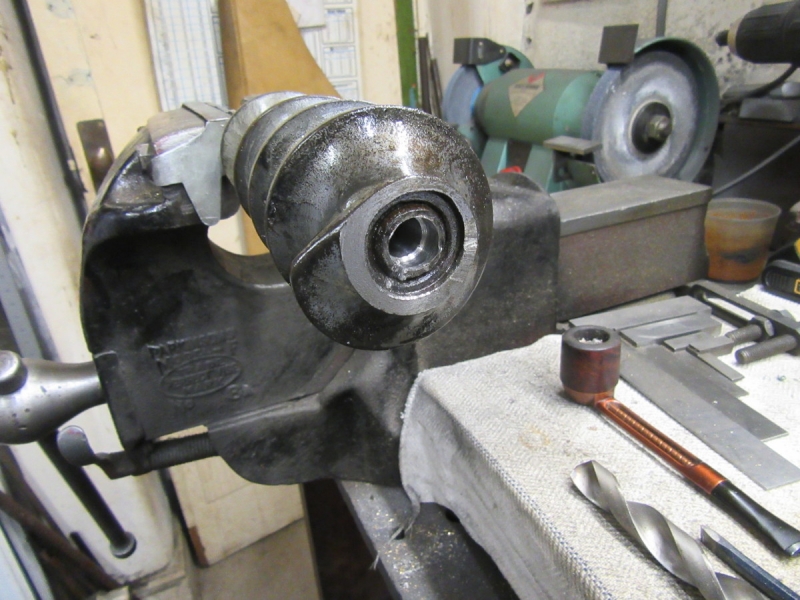
Last thing yesterday I set the worm up in the vice and filled the depression at the top with penetrating oil on the grounds it could do nothing but good. First thing I gripped it in the vice and tried the threaded insert with the square on the end with a big adjustable spanner. Obvious it wasn't going to even think about shifting.

Image

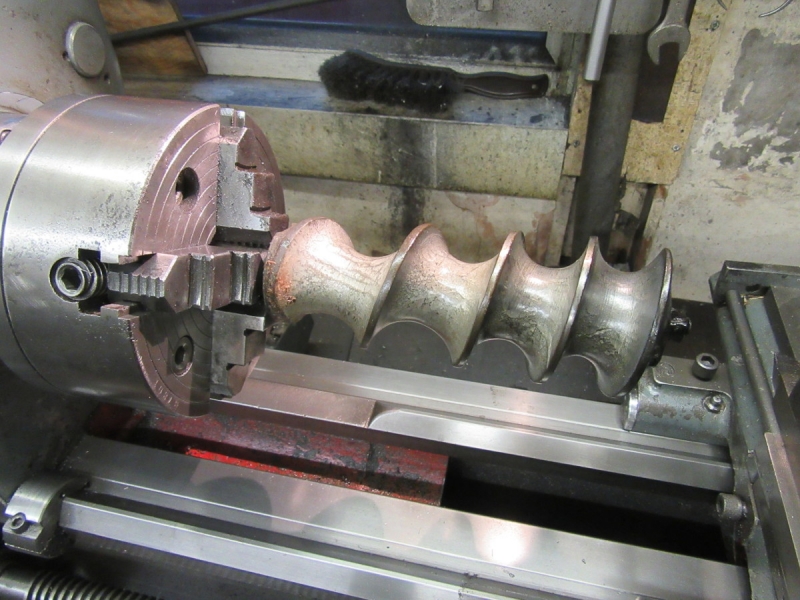
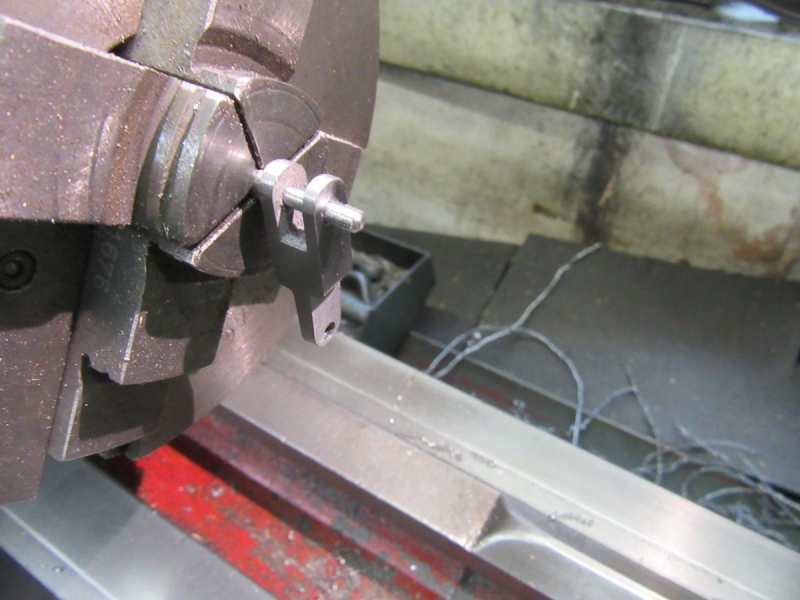
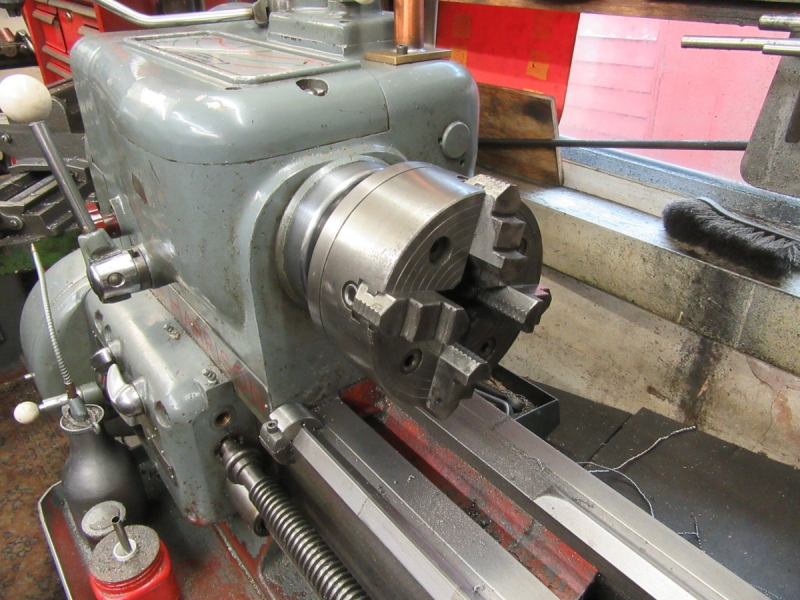
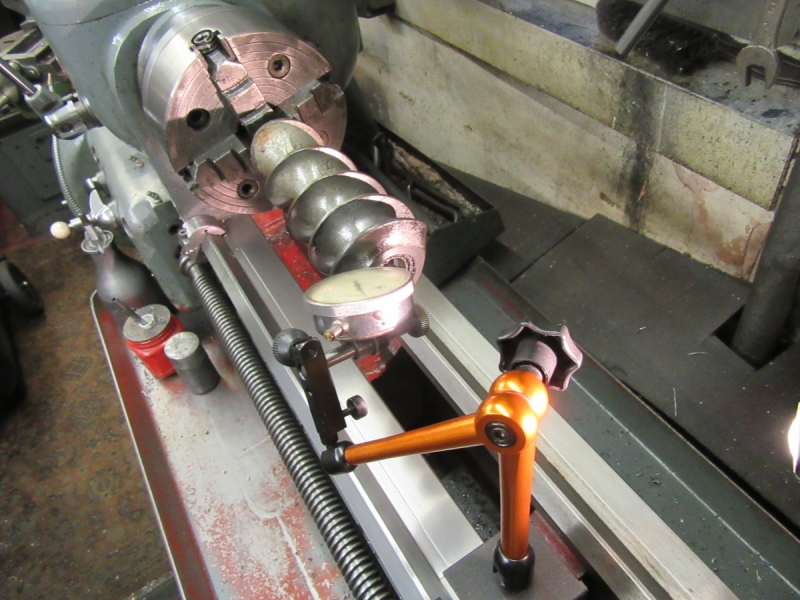
I set it up in the 4 jaw and got it as near running true at the end as I could. No chance of using an indicator on it, I had to do it by eye using the cutter. It's not bad. Then I faced the broken end of the pivot and found out that the square is hardened which makes things interesting!

Image

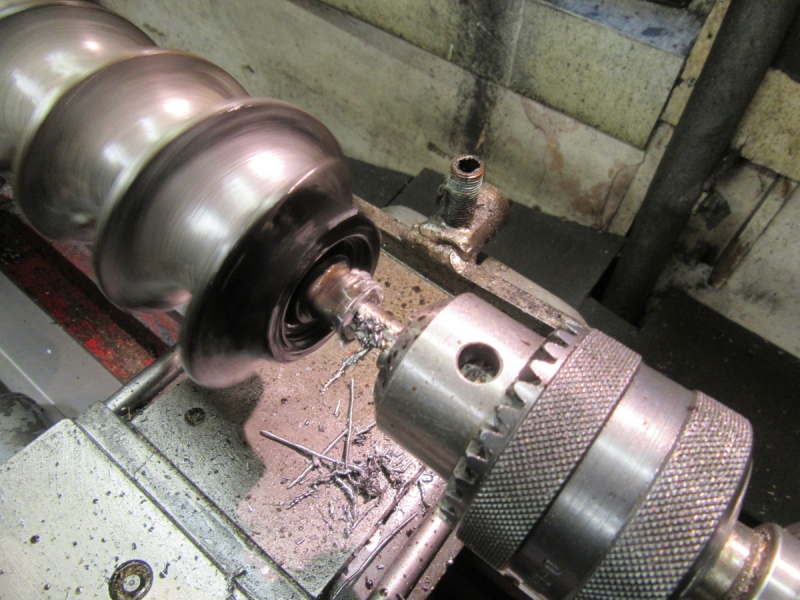
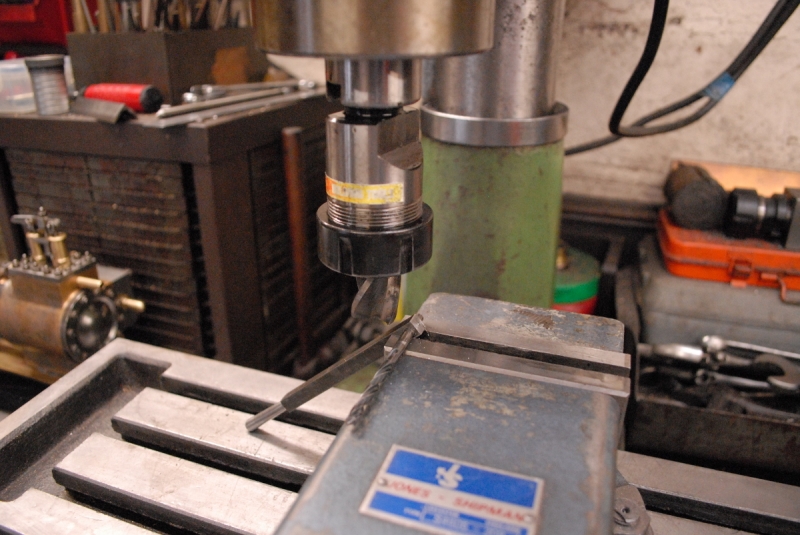
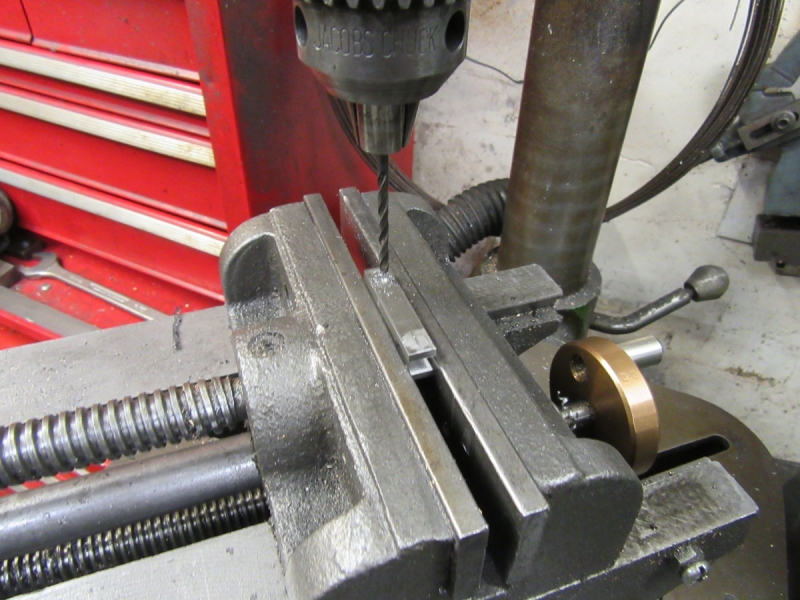
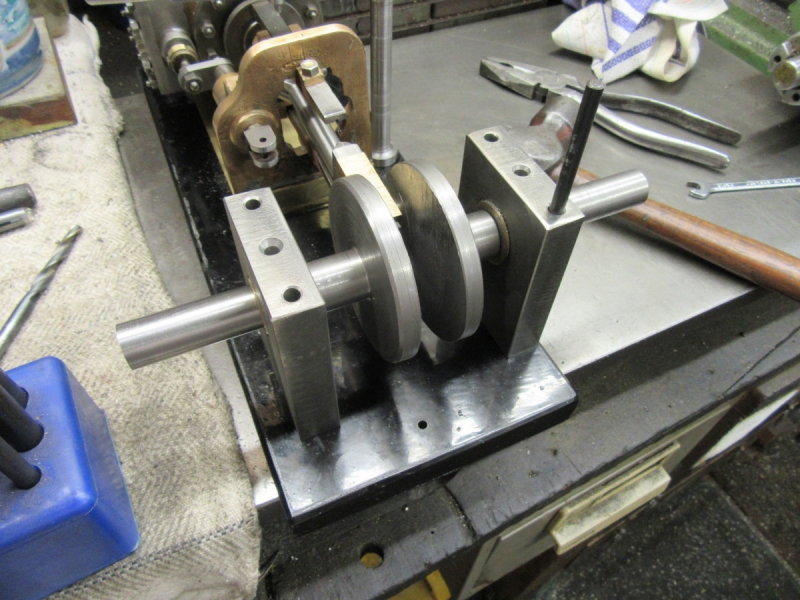
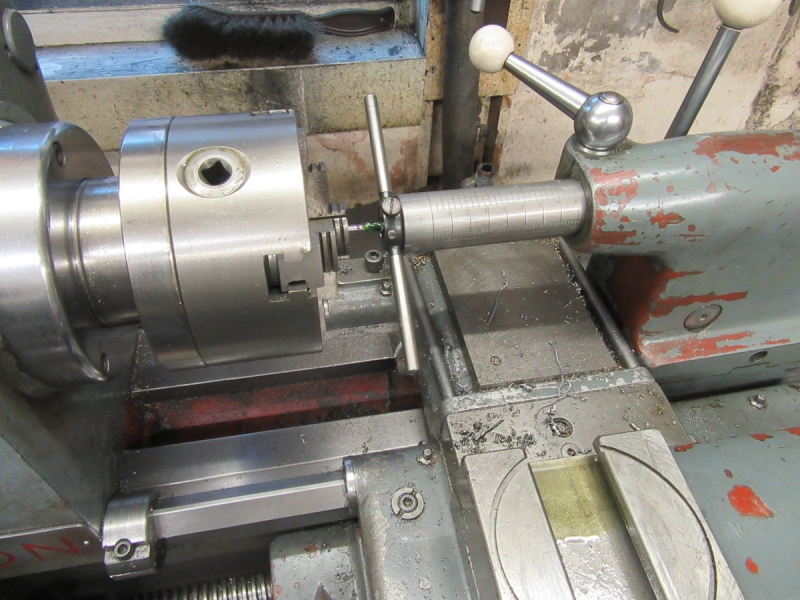
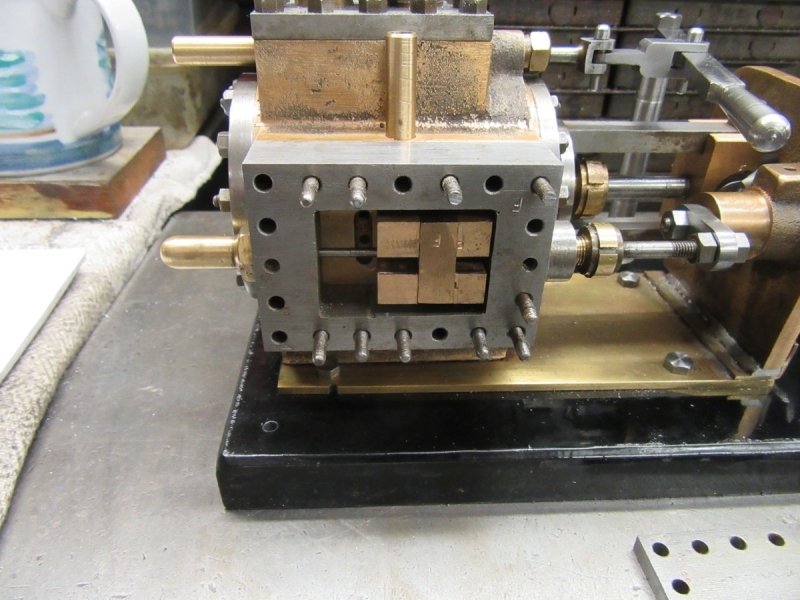
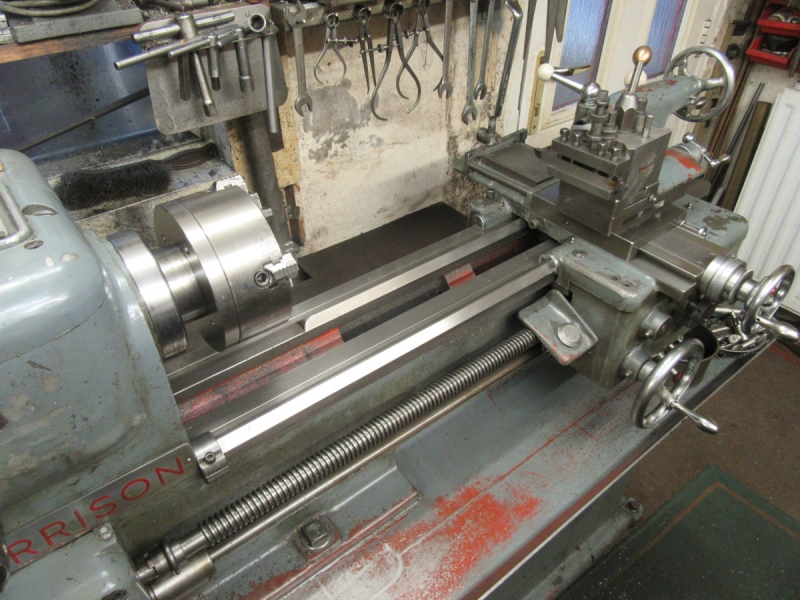
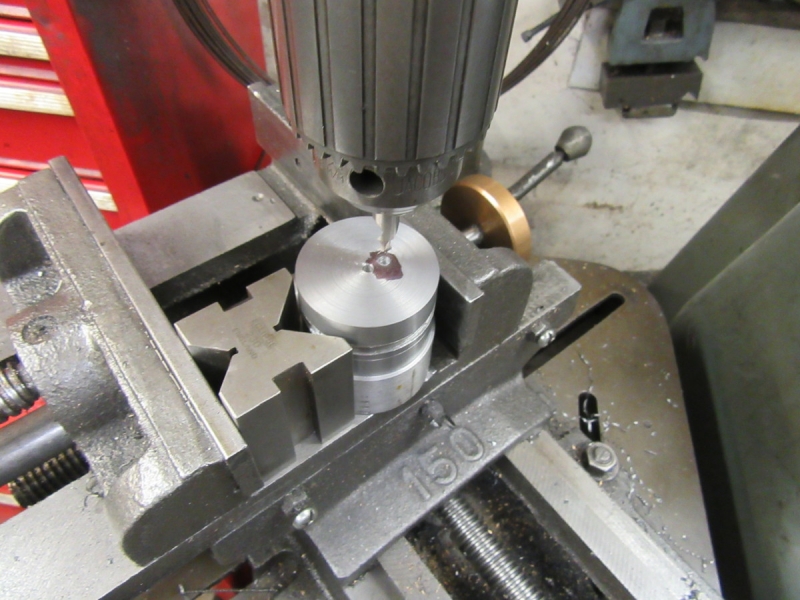
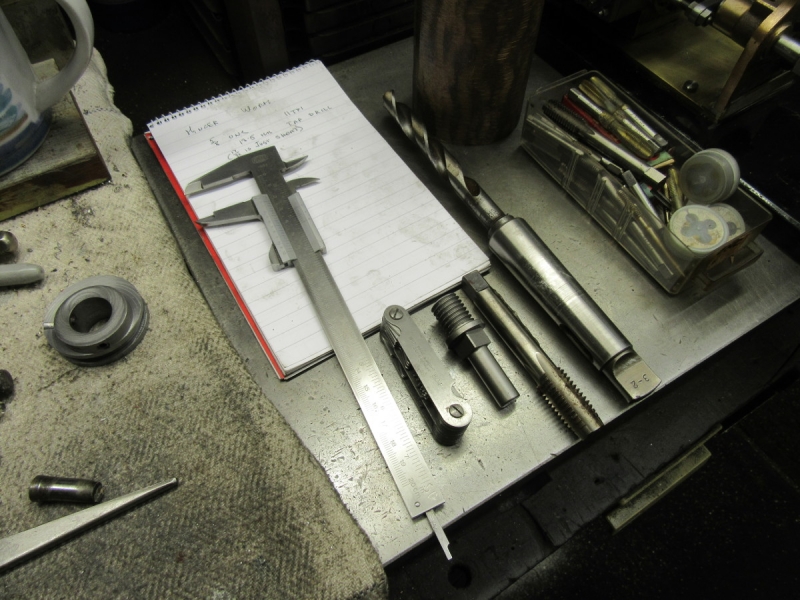
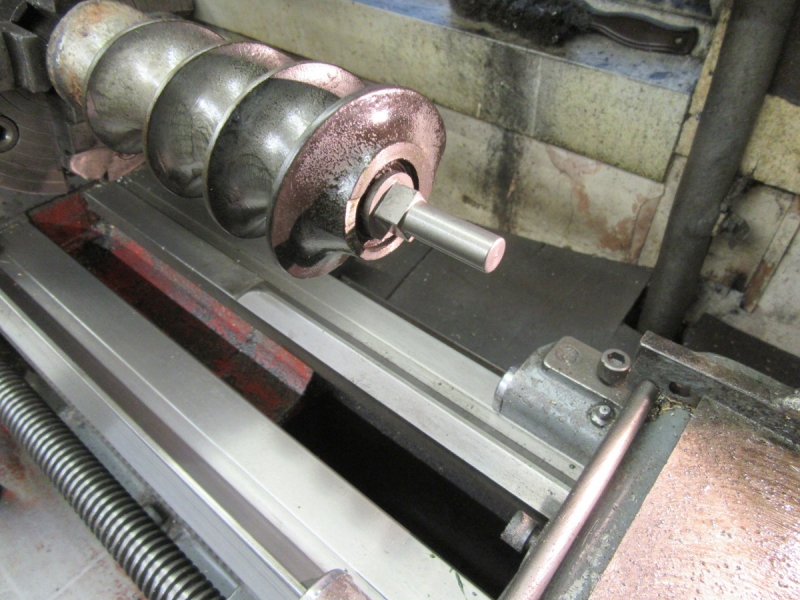
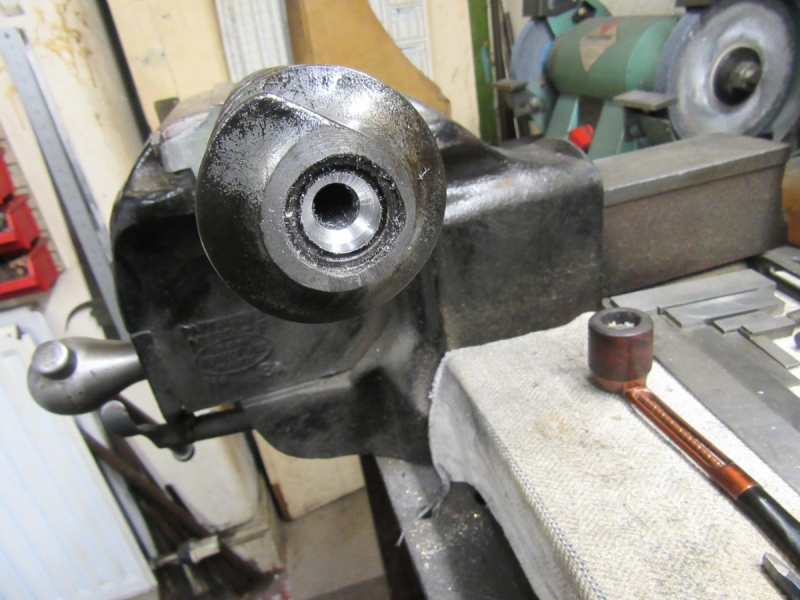
Next job was to put a good centre hole in the end. It looks surprisingly central!

Image

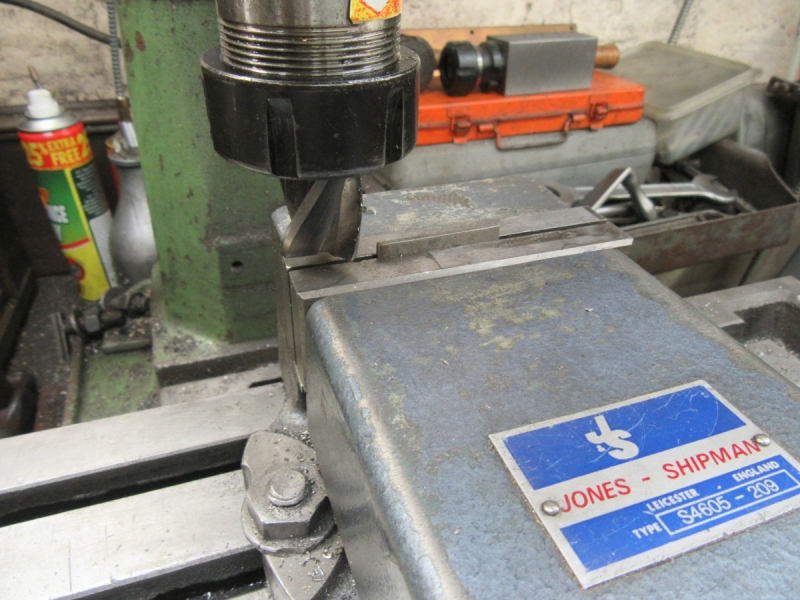
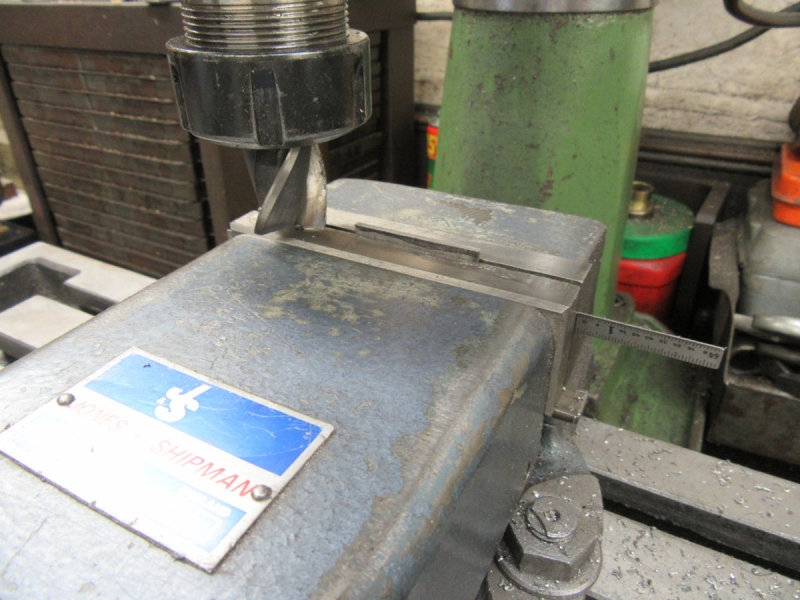
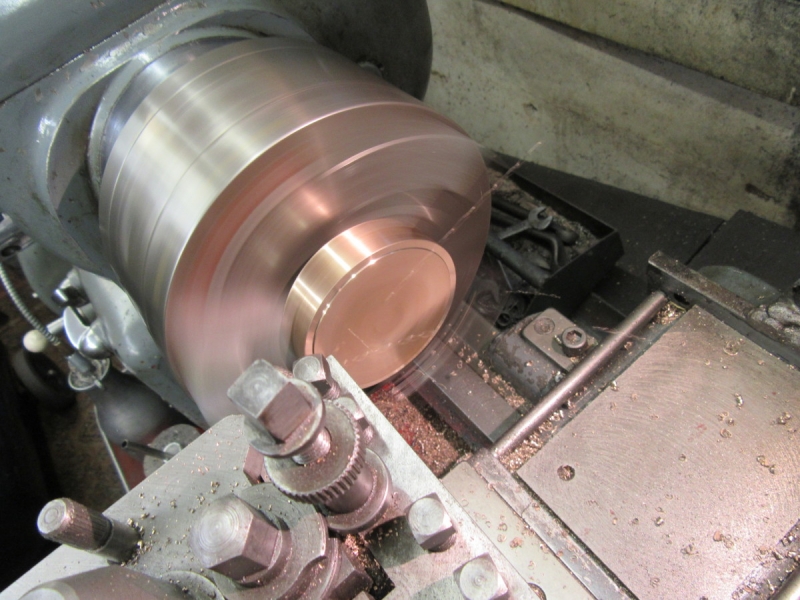
I used the 3/4" capacity Superchuck because it's the most rigid and accurate one I have. I started with the 1/4" drill and went in until I broke through the body of the stud and entered the cavity underneath.

Image

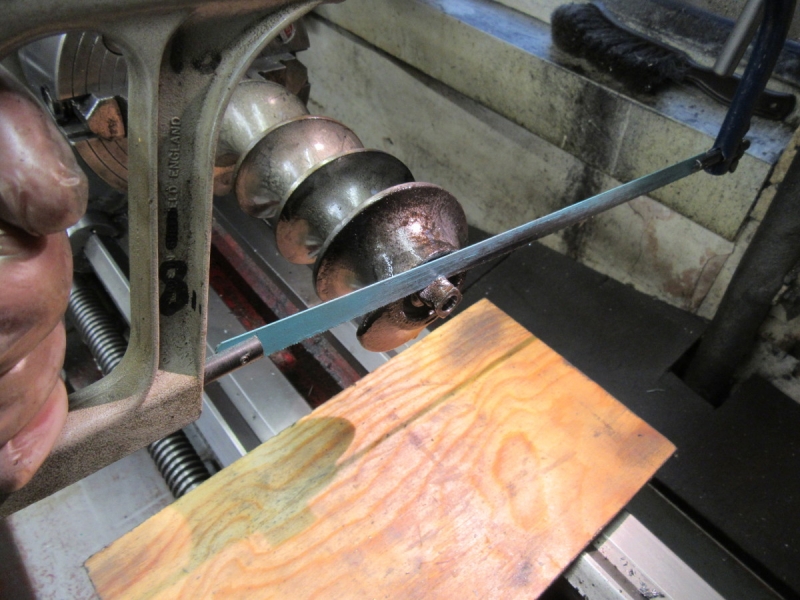
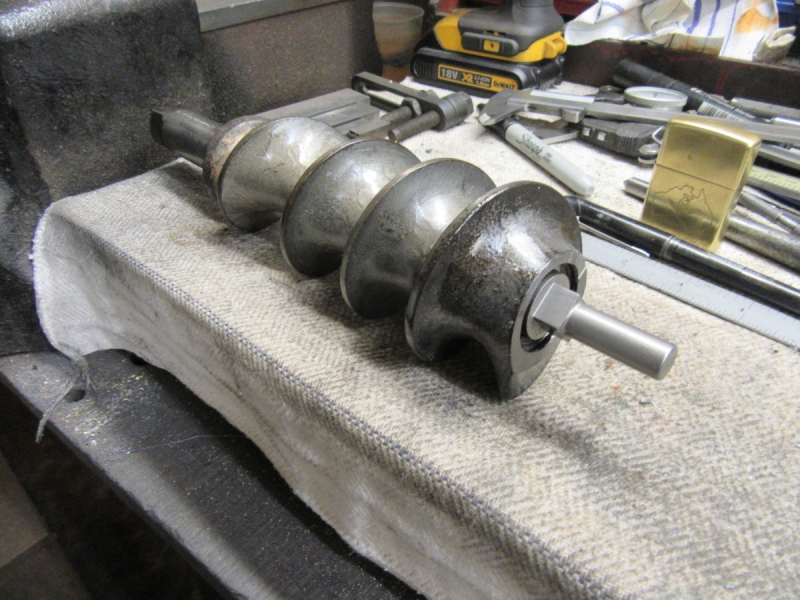
I bit the bullet and decided I could do without the square, the way out of this is going to bore the old stud out. Or at least that was what I assumed......

Image

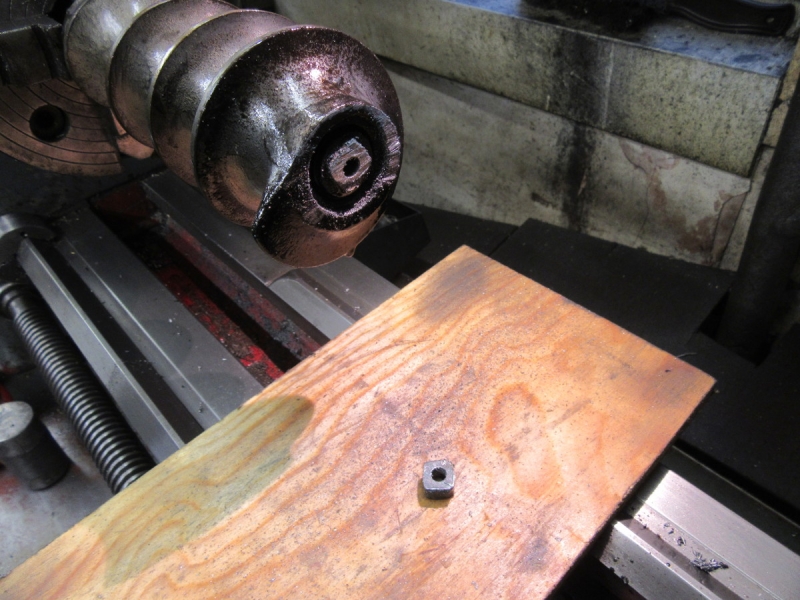
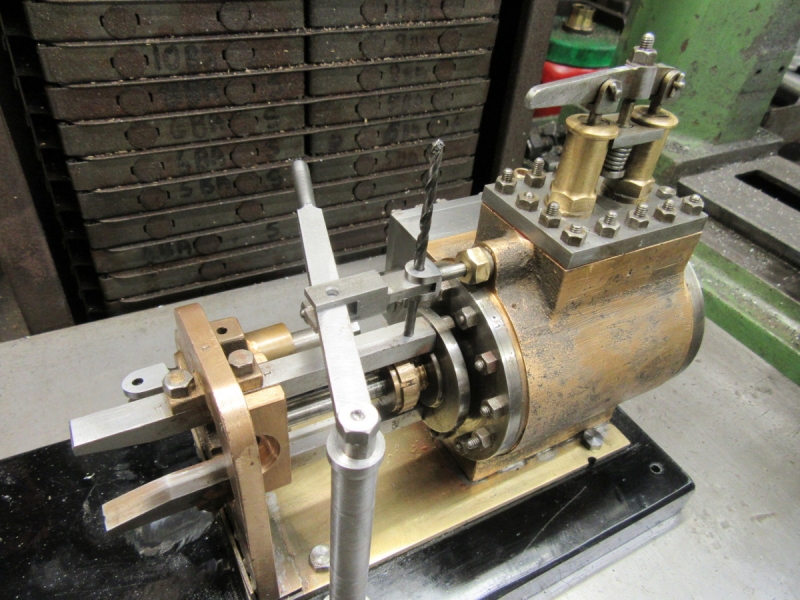
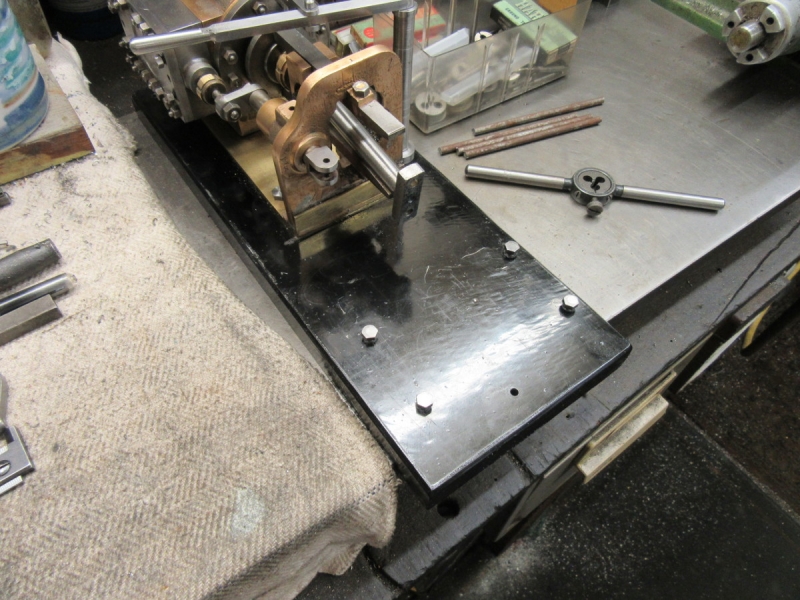
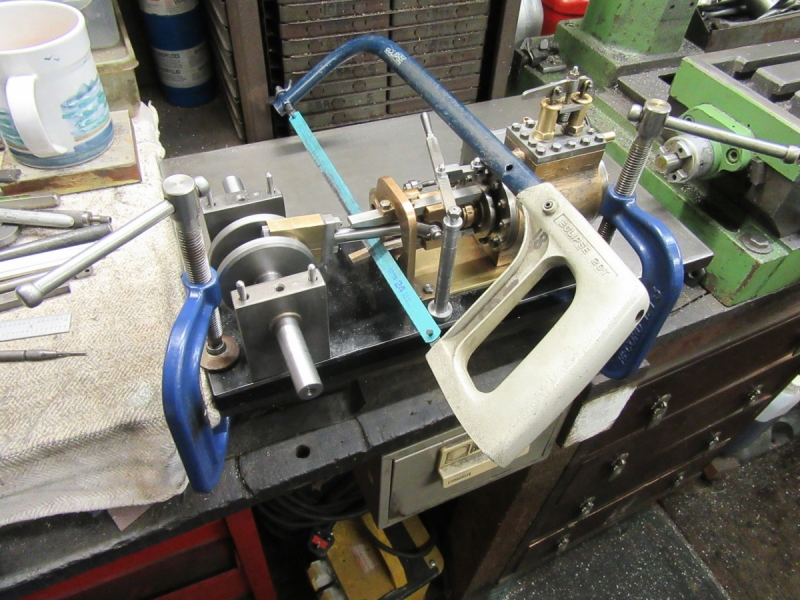
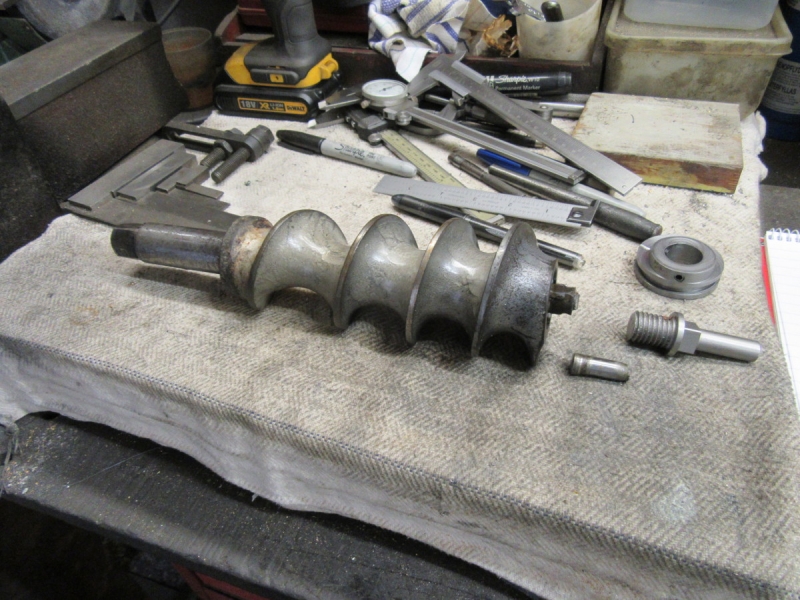
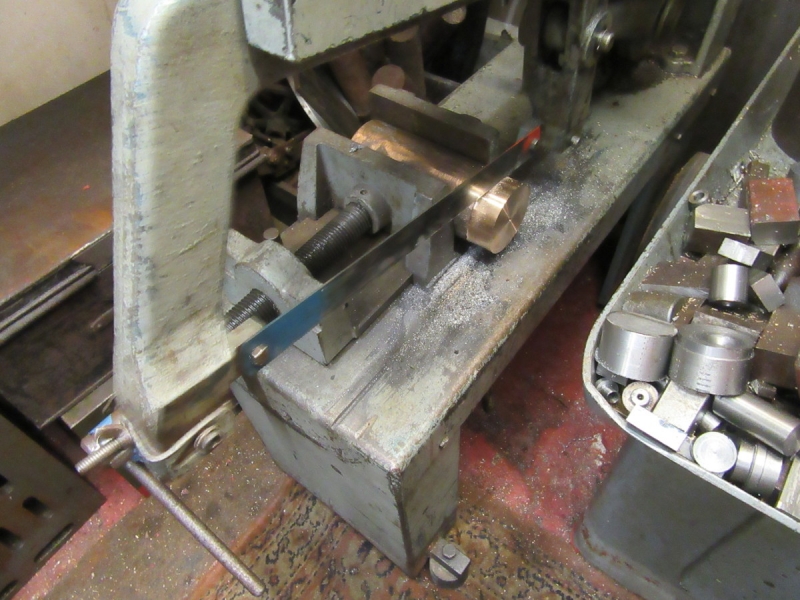
Off with it! It didn't do the hacksaw blade a lot of good..... Then I faced the end of the worm and the saw cut so I had a square cut.

Image

Image

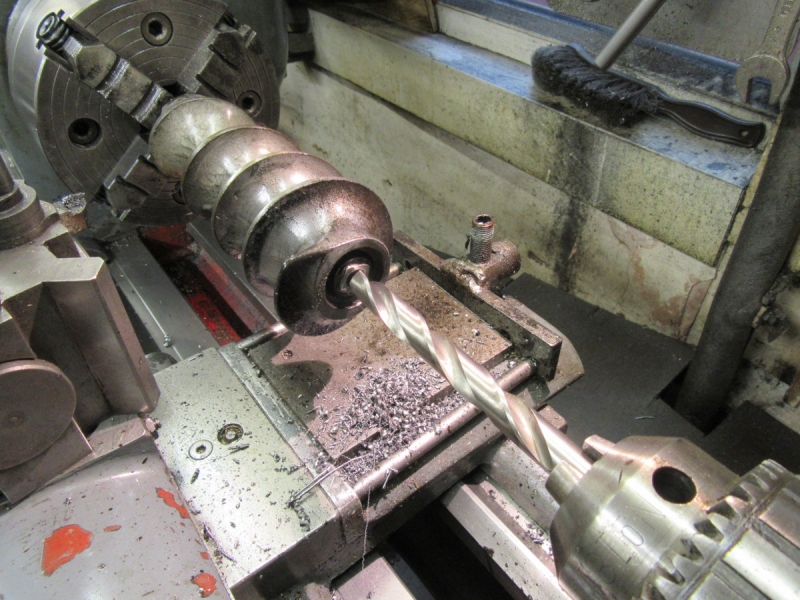
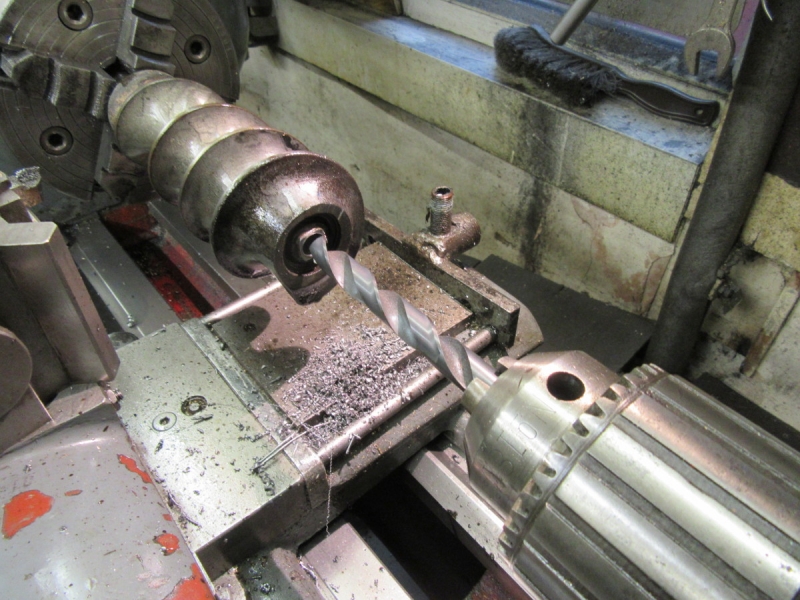
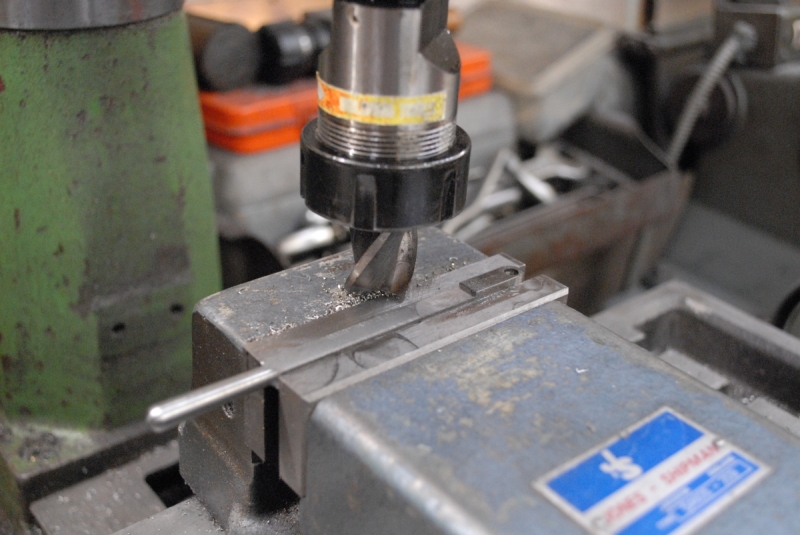
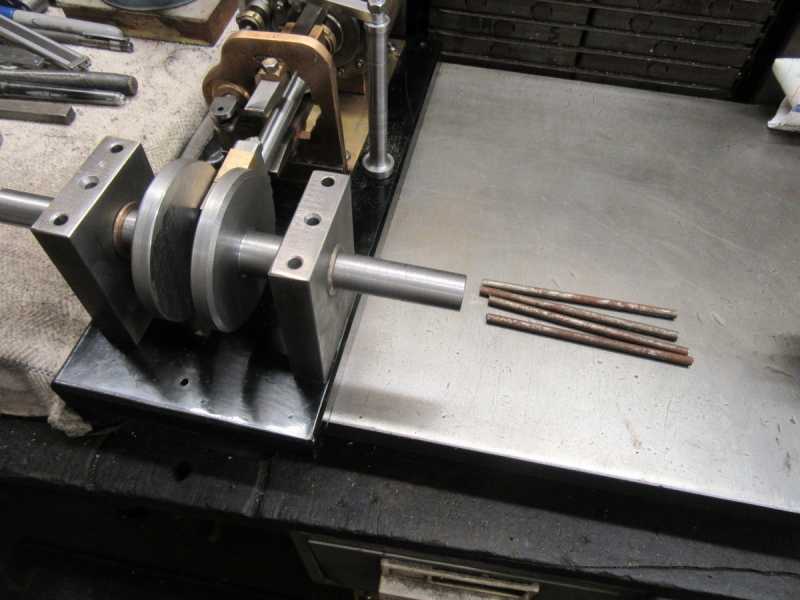
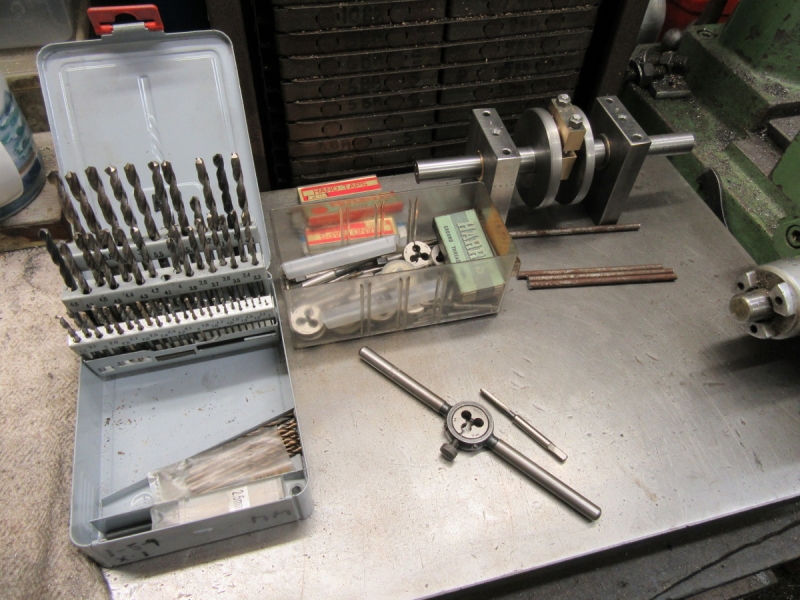
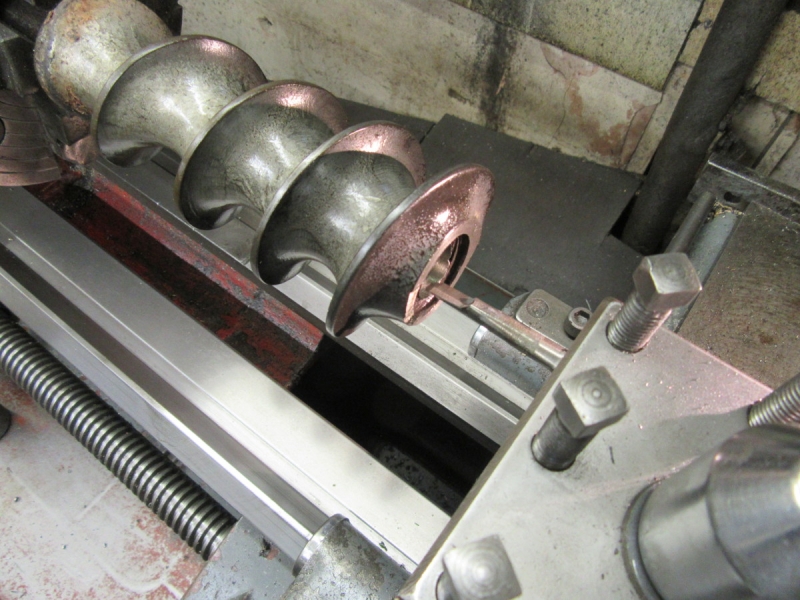
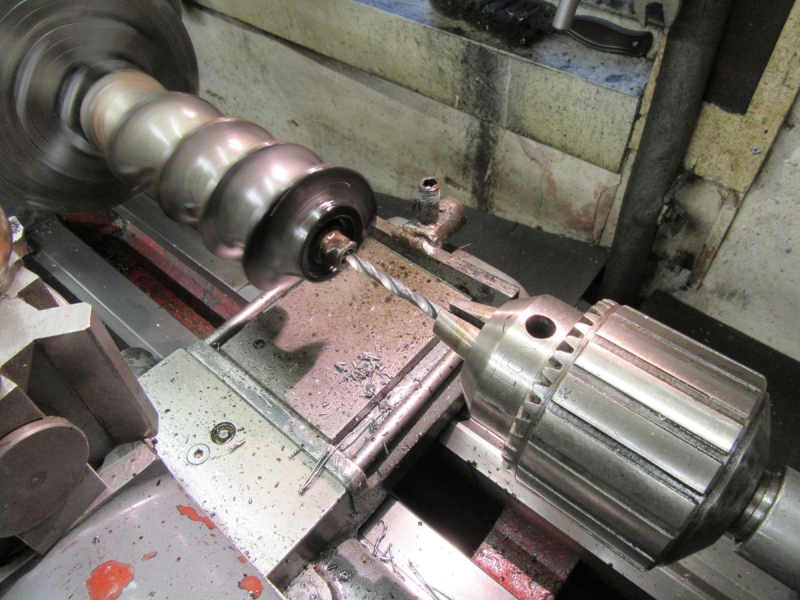
Careful increases in the size of the drill.

Image

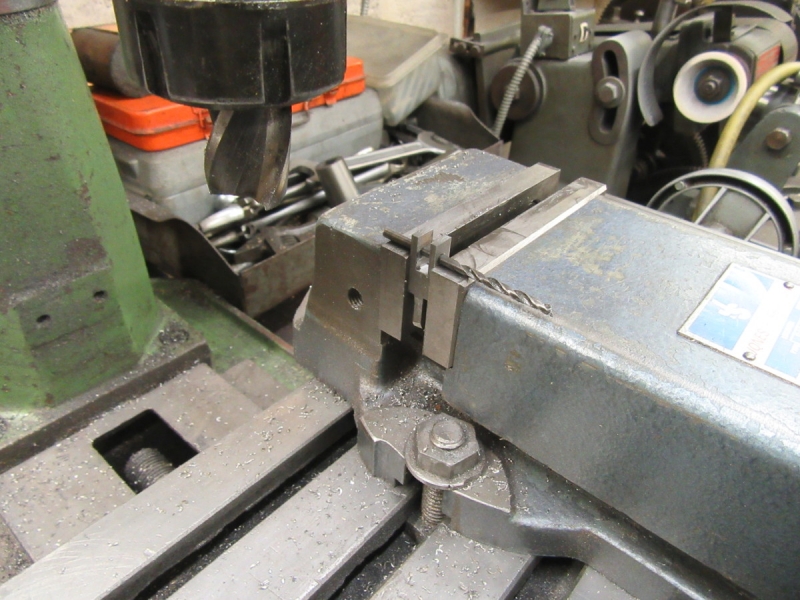
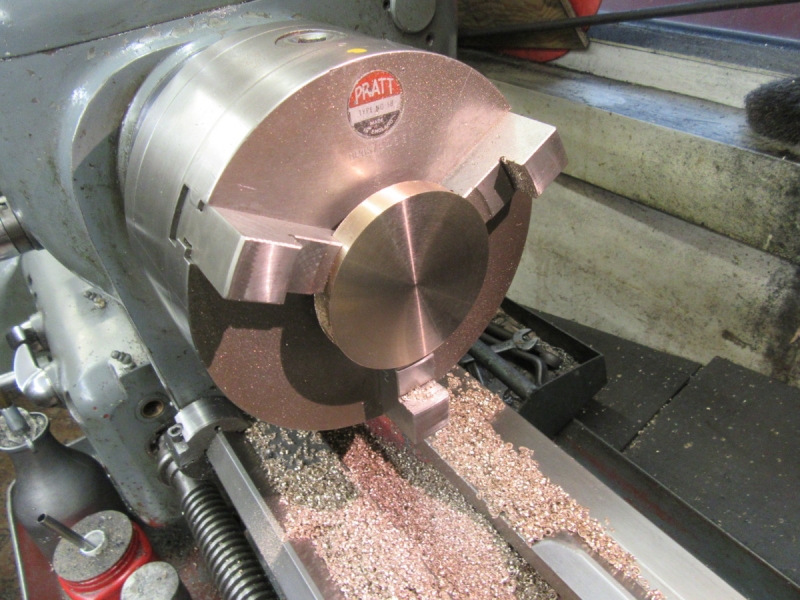
Then I countersunk the end hoping to undercut the flange. but it didn't work. I tried to cut the flange with a small sharp chisel but it's too thick still. Something very strange going on here.

Image

I made one last attempt but still no joy. Here I stopped. I have come to the conclusion that the new replacement insert which is 5/8" UNC is the wrong one. I ought to be finding the edge by now. I suspect it's a larger Whitworth thread. I can't make a new one as I have no reliable way of hardening the square drive. So I have decided to face the end of it in the bore, drill the old stud to tapping size for the new one, thread it 5/8" UNC and fit it with Loctite. That's the only way out I see. No point trying to get hold of an original that's the right size, I suspect the machine is older than I am and getting a new stud will be impossible.
Interesting if frustrating morning. Quietly forward tomorrow!
Stanley Challenger Graham
Stanley's View
scg1936 at talktalk.net

"Beware of certitude" (Jimmy Reid)
The floggings will continue until morale improves!
User avatar
Stanley
Global Moderator
Global Moderator
Posts: 90301
Joined: 23 Jan 2012, 12:01
Location: Barnoldswick. Nearer to Heaven than Gloria.

Re: Shed Matters 3

Post by Stanley »

Image

I have been debating whether to thread the bore by screwcutting on the lathe or with a tap. I decided on the tap, it just so happened I have a second 5/8" UNC tap about my person. One thing I haven't got is a 13.5mm tapping drill, however I have a 17/32" drill which is 13.494mm so a bit undersize but almost all drills cut a shade oversize so that will be OK. One advantage of the tap is the thread will be perfect and the right form.

Image

So, a cursory clean up of Mrs Harrison and get the worm into the 4 jaw. I have a concentric face in the end now so I was able to dial it in reasonably accurately. This is going to be plenty accurate enough for an old machine like the mincer!

Image

Here's the set up. The tap is an old one and a bit blunt so it was very hard work, in fact at one point I almost opened the tapping bore up a bit but decided to proceed with care clearing the tap frequently and re-lubricating with Trefolex. It took a while but eventually I broke through into the cavity behind the remains of the seized stud.

Image

I tried the new stud and it's a perfect fit, in fact if anything it's tight which is even better. Despite the counterbore I had to put in it has over 1/2" of grip which is plenty. Big sigh of relief.....

Image

If you remember there's still some of the hardened part of the old stud in the counterbore and I need the face flat to give a good seat for the flange of the new stud. Not a lot of room so it was only a small bar and I very carefully took some face cuts until I had both the remains of the old stud and the cast iron body flat and clean. There was still some of the hardened case in there and it was a bit dodgy but we managed.

Image

Just after 9AM. I cleaned the thread and the stud with brake cleaner to degrease it, applied a good coat of Loctite 638 and screwed it home as tight as I could. That's not going to move! The square on the end is the drive for the cutter plates of the mincer and if you look at the worm you'll see the direction it turns (to force the meat into the cutter) and as the stud is right hand thread any force on it will tend to tighten it up if anything. But it's not going to move. I rang Kath and she came up for it. She asked how much I wanted and I told her to tell Stuart he couldn't afford it if I charged him! I won't lose anything, he has a way of getting back at me with free meat!
That was interesting and challenging, I'm glad it turned out so well and that it's out of the door!
Stanley Challenger Graham
Stanley's View
scg1936 at talktalk.net

"Beware of certitude" (Jimmy Reid)
The floggings will continue until morale improves!
User avatar
Stanley
Global Moderator
Global Moderator
Posts: 90301
Joined: 23 Jan 2012, 12:01
Location: Barnoldswick. Nearer to Heaven than Gloria.

Re: Shed Matters 3

Post by Stanley »

Image

Today I am back on solid if challenging ground. Making the eccentric strap. First I need a blank cut out of this slug of cast bronze. There is still a place on the bench for the old fashioned centre finder. Once I had a mark I drilled a centre hole by holding the slug in the vice and using the DeWalt drill.

Image

I cleaned Mrs Harrison because I want to harvest the bronze chips, then I put the big three jaw SC on and mounted the slug using the centre.

Image

Then I peeled the skin off and faced the end. I know I have plenty of meat so no measuring needed.

Image

Then I popped the slug into the arms of Mrs McMaster and cut the blank off. It wasn't as simple as that, the blade was well worn and wasn't attacking the bronze at all so I stretched a point and fitted a brand new blade. (If I remember right the old one was secondhand when I put it in). It made all the difference, it was sliced off in no time.

Image

I put the blank in the inside jaws and faced the newly sawn end as it was most likely to be out of square, it wasn't but......

Image

Then I reversed it and started to cut it back to the thickness I want, 7/16".

Image

Closing time, it's the right thickness and big enough to make the strap. I've left it in the chuck because I will have to have a think. I might take the meat out of the centre before I split it to do the final bore, it'll be easier to saw! I'll have a think tomorrow before I start......
Stanley Challenger Graham
Stanley's View
scg1936 at talktalk.net

"Beware of certitude" (Jimmy Reid)
The floggings will continue until morale improves!
Post Reply

Return to “Crafts”