Shed Matters 3

User avatar
Stanley
Global Moderator
Global Moderator
Posts: 90439
Joined: 23 Jan 2012, 12:01
Location: Barnoldswick. Nearer to Heaven than Gloria.

Re: Shed Matters 3

Post by Stanley »

Image

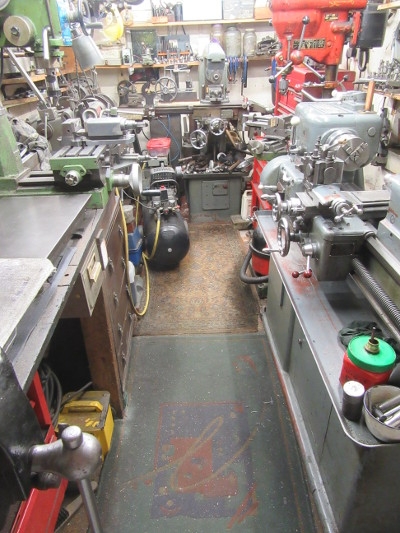
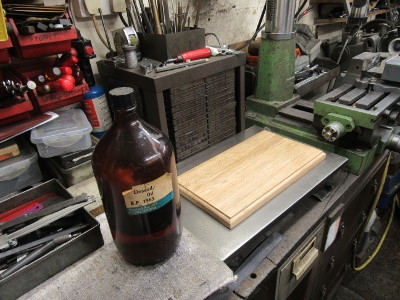
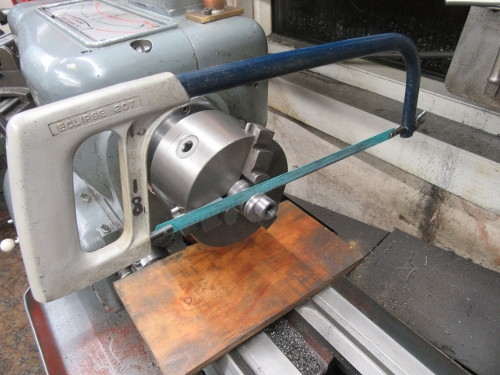
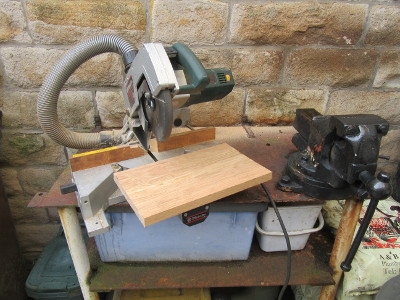
Unusually I did a bit of shed at midday today. I am at the point where I will need the base in order to start the final build. I need daylight for that as it has to be done outside and as it was dry I decided to do it today. The first job was to set the chop saw up and cut myself a piece of oak.

Image

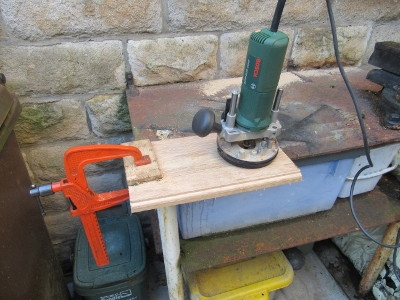
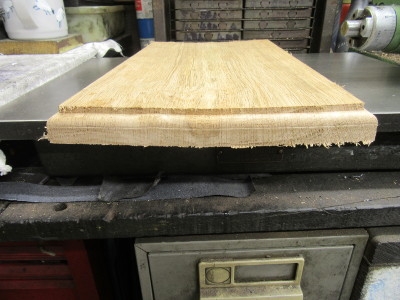
Then, and I hate this tool, it frightens me!, I cut the shape of the moulding round the outside of the base. Sanding and varnishing can be done during the hours of darkness!

Image

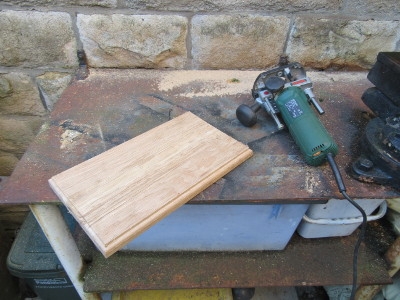
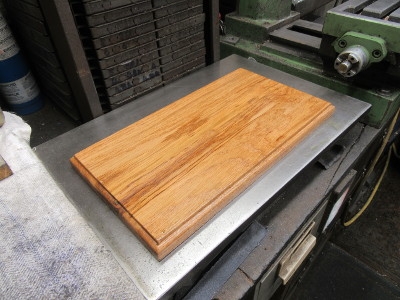
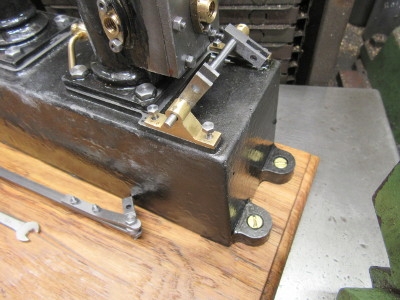
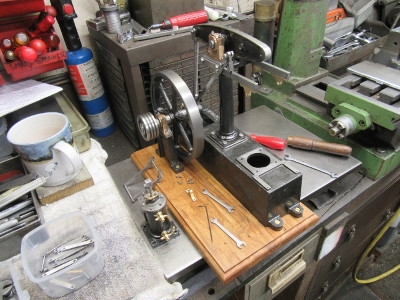
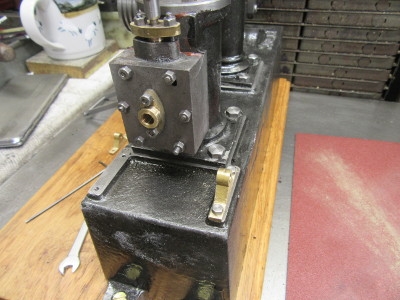
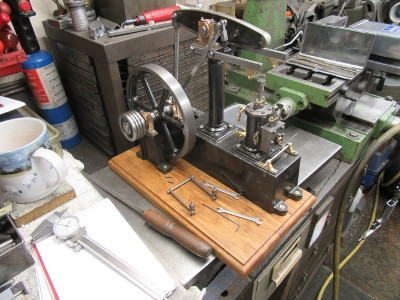
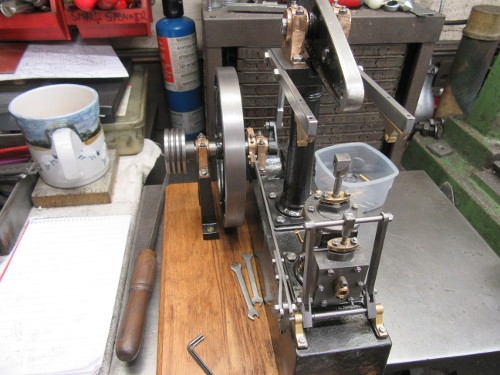
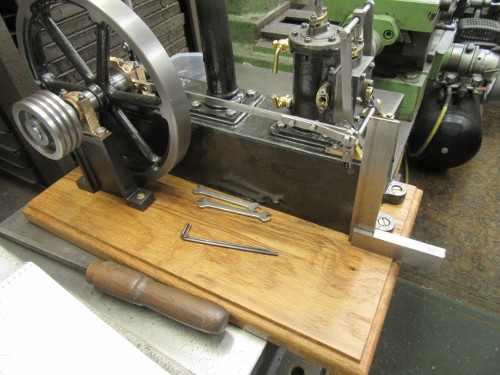
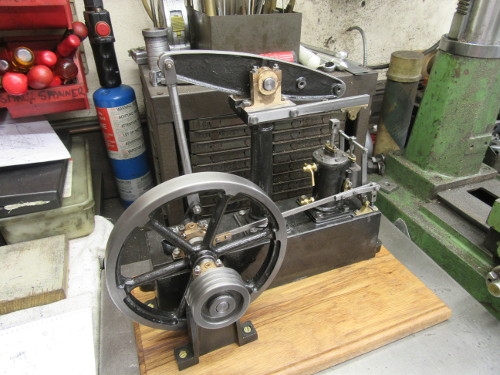
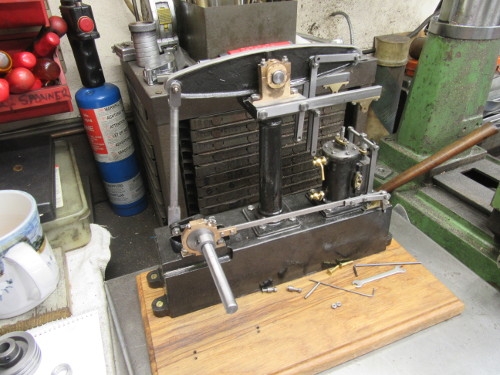
Here's where I finished up before I had a sweep up and tried to get rid of the sawdust!
Stanley Challenger Graham
Stanley's View
scg1936 at talktalk.net

"Beware of certitude" (Jimmy Reid)
The floggings will continue until morale improves!
User avatar
Stanley
Global Moderator
Global Moderator
Posts: 90439
Joined: 23 Jan 2012, 12:01
Location: Barnoldswick. Nearer to Heaven than Gloria.

Re: Shed Matters 3

Post by Stanley »

Image

Here's the store of parts all ready for finishing and final fitting. The fact that I have these at this stage was the reason for cutting the base yesterday. So this morning I went in the shed with the intention of sanding the base and finishing it, oiling it with Linseed Oil (I decided against varnish. This is oak and will enjoy Linseed).

Image

However, the best laid schemes o' mice and men gang aft agley! When I went to sand it I realised that the base was badly bowed. I looked at the board and it's the damp storage in the shed in the yard that has caused this. I had to have a rethink!

Image

I've sanded it and put it on top of the radiator in the hall. I brought the rest of the oak in to the house and it will straighten itself up. I shan't put it outside again. I'll bet it's straight by tomorrow....

Image

Then I improved the shining hour by having a good clean up and chip chase, about time! Hopefully I can make some progress tomorrow. If not, that's no problem, its just a matter of time.
So, not the day I was expecting but still progress. I have no problems with it. Now let's see what that base looks like tomorrow.
Stanley Challenger Graham
Stanley's View
scg1936 at talktalk.net

"Beware of certitude" (Jimmy Reid)
The floggings will continue until morale improves!
BobH
Regular User
Posts: 133
Joined: 15 Nov 2019, 18:09
Location: Rochdale

Re: Shed Matters 3

Post by BobH »

I’ve have finished the second axle pump and got the twin pumps mounted back in the frames. Next job is to plumb them in. I think I will make a couple of small manifolds to get the 2 inlet and outlet pipes joined into one.
You do not have the required permissions to view the files attached to this post.
User avatar
Stanley
Global Moderator
Global Moderator
Posts: 90439
Joined: 23 Jan 2012, 12:01
Location: Barnoldswick. Nearer to Heaven than Gloria.

Re: Shed Matters 3

Post by Stanley »

Beyond my pay grade Bob! Looks very good. A good overall standard.
Stanley Challenger Graham
Stanley's View
scg1936 at talktalk.net

"Beware of certitude" (Jimmy Reid)
The floggings will continue until morale improves!
BobH
Regular User
Posts: 133
Joined: 15 Nov 2019, 18:09
Location: Rochdale

Re: Shed Matters 3

Post by BobH »

I wouldn’t say this was beyond you Stanley. This is only a rebuild though I am upgrading some parts as I go. At the current rate of working I could never envisage building a complete steam locomotive, like you, I will stick to stationary engines.
I did get the first manifold ready to silver solder today.
EE3BB80B-88A9-4395-A094-970D30C5B7D1.jpeg
I used an extra fire brick to keep the heat in. I was using the small burner on the propane torch.
5183FC1F-EDBE-4B31-B4CC-D594228798DF.jpeg
After soldering it looked like this.
54A67113-900C-4705-897F-04D50D8CECD9.jpeg
Then after acid pickling it looked a bit better. Ready for a bit of a rub and fitting tomorrow.
269C8B1C-A264-4131-A270-9000EA9342A6.jpeg
You do not have the required permissions to view the files attached to this post.
User avatar
Stanley
Global Moderator
Global Moderator
Posts: 90439
Joined: 23 Jan 2012, 12:01
Location: Barnoldswick. Nearer to Heaven than Gloria.

Re: Shed Matters 3

Post by Stanley »

What make is that burner Bob?
Stanley Challenger Graham
Stanley's View
scg1936 at talktalk.net

"Beware of certitude" (Jimmy Reid)
The floggings will continue until morale improves!
User avatar
Stanley
Global Moderator
Global Moderator
Posts: 90439
Joined: 23 Jan 2012, 12:01
Location: Barnoldswick. Nearer to Heaven than Gloria.

Re: Shed Matters 3

Post by Stanley »

I waited until it was daylight so I could go in the yard but as it turned out it wasn't needed. Time and a dryer atmosphere have been doing their work. The baseboard is as near flat as made no odds. I gave it a good sanding and got out the raw linseed oil that Margaret Sharples got for me many years ago, very close to the 1963 on the label!

Image

Image

Here it is sat flat on the surface plate with a good coat of linseed oil soaking in. It will be ready for shaving tomorrow!
Stanley Challenger Graham
Stanley's View
scg1936 at talktalk.net

"Beware of certitude" (Jimmy Reid)
The floggings will continue until morale improves!
BobH
Regular User
Posts: 133
Joined: 15 Nov 2019, 18:09
Location: Rochdale

Re: Shed Matters 3

Post by BobH »

You asked about the gas torch Stanley, it is made by Clarke Tools. There are 3 interchangeable burners of various sizes. I was given a 6Kg Calor propane bottle many years ago and I am still using the first fill of gas. I also have a Silverline burner which has several nozzles of different shapes. That one has the air holes much further back just in front of the handle so it is good for use in confined spaces such as boiler fireboxes.
User avatar
Stanley
Global Moderator
Global Moderator
Posts: 90439
Joined: 23 Jan 2012, 12:01
Location: Barnoldswick. Nearer to Heaven than Gloria.

Re: Shed Matters 3

Post by Stanley »

Thanks for that Bob.

Image

I want to start transferring the engine to the final base board. At the same time I'll be making sure the parts are finished and actually fit!

Image

I have it on the board and will start with the eccentric rod and valve gear, a lot of fitting needed here!

Image

Image

Apart from making sure that I have the necessary bolts and fittings I need to make sure that all the holes were big enough for the bolts and shafts. Lots of little adjustments that need doing so quietly away.

Image

At knocking off time I had got here, almost all the valve gear ready for fitting. Slow work but this is final fitting. Worth taking the time.
Stanley Challenger Graham
Stanley's View
scg1936 at talktalk.net

"Beware of certitude" (Jimmy Reid)
The floggings will continue until morale improves!
User avatar
Stanley
Global Moderator
Global Moderator
Posts: 90439
Joined: 23 Jan 2012, 12:01
Location: Barnoldswick. Nearer to Heaven than Gloria.

Re: Shed Matters 3

Post by Stanley »

Image

Time to put the drain cocks on before the cylinder is cluttered up with all the linkages that have to be installed. This is probably the easiest thing I will do today.

Image

First task, installing the valve gear. The bearing that supports the shaft had to be removed to do this.

Image

Image

Then I was into a world of small adjustments, improving threads, modifying fastenings to cope with the lack of clearances and repeated refitting. You just have to be patient and keep improving the situation.

Image

Here I am at closing time after a good hour and a half. We have progress but still lots to do. Not sure if all the dimensions are right, all will become clear. I think we are all right.....
Stanley Challenger Graham
Stanley's View
scg1936 at talktalk.net

"Beware of certitude" (Jimmy Reid)
The floggings will continue until morale improves!
BobH
Regular User
Posts: 133
Joined: 15 Nov 2019, 18:09
Location: Rochdale

Re: Shed Matters 3

Post by BobH »

Nice progress Stanley, I have been doing a bit of test fitting myself as well as searching boxes for parts. This locomotive came to me in bits and the drawings are not very detailed which doesn’t help. Today I have ordered some 8BA and 10BA screws from ekp supplies in Devon.
I also converted the hearth area for painting and put a coat of etch primer on the bottom half of the smoke box.
7A6D66FE-351C-475F-87B9-E358E998486F.jpeg
You do not have the required permissions to view the files attached to this post.
User avatar
Stanley
Global Moderator
Global Moderator
Posts: 90439
Joined: 23 Jan 2012, 12:01
Location: Barnoldswick. Nearer to Heaven than Gloria.

Re: Shed Matters 3

Post by Stanley »

8BA and 10BA are dirty words to me Bob. :biggrin2:
Stanley Challenger Graham
Stanley's View
scg1936 at talktalk.net

"Beware of certitude" (Jimmy Reid)
The floggings will continue until morale improves!
User avatar
Stanley
Global Moderator
Global Moderator
Posts: 90439
Joined: 23 Jan 2012, 12:01
Location: Barnoldswick. Nearer to Heaven than Gloria.

Re: Shed Matters 3

Post by Stanley »

Image

Back to fitting the valve gear. One job was cutting back the excess thread on fastenings and reducing the heads of the bolts where necessary to get clearance.

Image

You can see here that we have several issues with clearance. I battled on addressing each problem as I came to it but eventually realised that I was on a hiding to nothing with the linkage as the fault is in the cylinder casting, I need more clearance on the flywheel side. I shall address what I can do about that tomorrow. It could involve skimming some off the assembly under the mill.
Oh, by the way, notice I have the outrigger bearing and the crankshaft population in place.

Image

I didn't expect to be doing this..... I shall address it tomorrow!
Stanley Challenger Graham
Stanley's View
scg1936 at talktalk.net

"Beware of certitude" (Jimmy Reid)
The floggings will continue until morale improves!
User avatar
Stanley
Global Moderator
Global Moderator
Posts: 90439
Joined: 23 Jan 2012, 12:01
Location: Barnoldswick. Nearer to Heaven than Gloria.

Re: Shed Matters 3

Post by Stanley »

I wasn't looking forward to the shed because I knew I had to do some tidying up after sub standard work earlier. Not a good place to start.

Image

The first thing I have to address is the fact that the cylinder block, or rather the valve chest, is interfering with the valve gear. This is high risk milling! I've only a minimal hold.

Image

I did both sides and then reinstated it on the bed and fitted one of the valve gear bearings.

Image

Next I made sure that both cranks were the same size, .130" instead of an 1/8" I made sure the bearings were the same.

Image

remember this shaft? The one that is the wrong size in the drawing? When I made it I did it carelessly and so I'll make it again and this time make sure that the business parts of the shaft are .130" the actual size of the bores through the cranks.

Image

Image

Image

Some very careful turning and I now have a shaft that is a good fit in both the cranks and the bearings and the cranks thus getting rid of excess play in the linkage.

Image

Here we are at closing time. Not completely sorted yet but definitely in a better place than we were when I started. That'll do. More of the same tomorrow.
Stanley Challenger Graham
Stanley's View
scg1936 at talktalk.net

"Beware of certitude" (Jimmy Reid)
The floggings will continue until morale improves!
User avatar
Stanley
Global Moderator
Global Moderator
Posts: 90439
Joined: 23 Jan 2012, 12:01
Location: Barnoldswick. Nearer to Heaven than Gloria.

Re: Shed Matters 3

Post by Stanley »

Image

I spent the first half hour going through the shaft and crank assembly. making sure it was all free running and clearing the castings of the steam chest.

Image

This is the crank that connects the eccentric rod to the cross shaft. There's something wrong with the thread so I decided to replace the 1/8" Unbrako set screw with a 3/16" one. There's just enough room for it.

Image

Image

Image

These three pics tell a nasty little story. Just the thing you don't want at this stage. I broke a blunt HSS tap and was very lucky to get it out by grabbing what was left in the mill vice. Gott sei dank!

Image

This was knocking off time. I have the eccentric crank fitted and the valve gear is fine now, it's working as it should now all the play has been taken out of it. This means I can do a proper assessment and I have found the really big problem, the first time I have ever had it in an engine. There isn't enough throw on the eccentric. I can cure that by making another eccentric, this strap and rod will still fit it. So that's tomorrows job. Sloppy work always catches up with you!
Stanley Challenger Graham
Stanley's View
scg1936 at talktalk.net

"Beware of certitude" (Jimmy Reid)
The floggings will continue until morale improves!
User avatar
Stanley
Global Moderator
Global Moderator
Posts: 90439
Joined: 23 Jan 2012, 12:01
Location: Barnoldswick. Nearer to Heaven than Gloria.

Re: Shed Matters 3

Post by Stanley »

Image

The first job this morning was to measure how much throw we actually had on the eccentric. That's why there is a square stood at the end of the bed. Very effective and I soon had a measurement that was lower than it should have been.

Image

Next job was to strip the crankshaft down to get the eccentric and the rod off and then do a lot of very careful measuring and deciding what to do. I got all my measurements and found a piece of stock, I shall make another eccentric and I think I can get away with that as long as it is done carefully.

Image

Image

I have my measurements and went at cutting a new blank for the eccentric a bit too enthusiastically. I got near my major measurement and want to hit it exactly but my stock is too hot. Only one thing to do, knock off earlier and leave it to cool down. No rush, accuracy is more important.
Stanley Challenger Graham
Stanley's View
scg1936 at talktalk.net

"Beware of certitude" (Jimmy Reid)
The floggings will continue until morale improves!
User avatar
Stanley
Global Moderator
Global Moderator
Posts: 90439
Joined: 23 Jan 2012, 12:01
Location: Barnoldswick. Nearer to Heaven than Gloria.

Re: Shed Matters 3

Post by Stanley »

Image

Straight into the eccentric and the first job was to get the major diameter correct. Here I am giving evidence that it's OK! I then went on to cut the groove for the strap with the parting tool but never got a photograph because in the middle of doing that my parting tool tip decided to give up the ghost, smashed and jammed in the groove pulling the work piece partially out of the chuck. A right little mess and it took some time to get set up and finish the groove.

Image

Then a careful measure and punch the centre position. I think I have it right this time!

Image

Then change over to the 4 jaw and get the stock set up on the offset centre and everything concentric. This is not easy and probably took almost half an hour. This is as close as I can get it.

Image

Image

Then bore for the crankshaft and turn the excess metal off the eccentric very carefully! No slip ups on the last lap.

Image

Then I parted the eccentric off the stock. I wanted to do this without altering the position of the stock but couldn't quite finish the cut before the cutter fouled the chuck. No matter it's almost off and just needs a bit of attention with the hacksaw and then facing off and that can wait until tomorrow. I was over two hours in the shed and I have other fish to fry. We've almost finished getting out of this bit of the problems! Good!
Stanley Challenger Graham
Stanley's View
scg1936 at talktalk.net

"Beware of certitude" (Jimmy Reid)
The floggings will continue until morale improves!
User avatar
Stanley
Global Moderator
Global Moderator
Posts: 90439
Joined: 23 Jan 2012, 12:01
Location: Barnoldswick. Nearer to Heaven than Gloria.

Re: Shed Matters 3

Post by Stanley »

I changed over to the 3 jaw chuck so that I could give a further polish to the eccentric groove.

Image

Image

Image

Then I just got on with the fiddly job of re-fitting not only the eccentric but the rest of the population on the crankshaft. I think I have it right this time!

Image

Here we are at knocking off time. Ready for refitting the valve gear after the modifications. But that's for tomorrow, two hours in the shed is quite enough for me old legs!
Stanley Challenger Graham
Stanley's View
scg1936 at talktalk.net

"Beware of certitude" (Jimmy Reid)
The floggings will continue until morale improves!
User avatar
Stanley
Global Moderator
Global Moderator
Posts: 90439
Joined: 23 Jan 2012, 12:01
Location: Barnoldswick. Nearer to Heaven than Gloria.

Re: Shed Matters 3

Post by Stanley »

Image

I started by tightening everything up on the shaft and locking the valve gear in place. A turn over of the flywheel told me two things. First I have cured the gear and now have enough action for the engine to run. The second thing is that the set screw in the flywheel isn't big enough it need to be replaced with a 3/16" one. That can be later.

Image

Then I laced the parallel motion up and again discovered two things. First is that the piston rod/clevis combination is too short. Either lengthen the rod or re-make the clevis. I chose the latter because I don't like the present clevis!
The second thing I found was that the two outside links in the parallel motion that connect to the fulcrum points on the end of the entablature beams are slightly short on the centres and I need to make two new ones.

Image

I went looking for the 3/8" stock and had to go into the key steel treasure chest. But I have a piece and am ready to get straight into that tomorrow. An interesting hour and a half. I am coming to the conclusion I that I was in a very sloppy mood when I made this engine. Not one of my best ventures.
[It makes me wonder whether I am getting too familiar with these beam engines. My next one will be something different!
Stanley Challenger Graham
Stanley's View
scg1936 at talktalk.net

"Beware of certitude" (Jimmy Reid)
The floggings will continue until morale improves!
BobH
Regular User
Posts: 133
Joined: 15 Nov 2019, 18:09
Location: Rochdale

Re: Shed Matters 3

Post by BobH »

I have moved the locomotive chassis to the back of the bench whilst I paint small parts. The coach enamel takes 24hours to dry for handling and much longer to harden. So while I am waiting I have got out a casting set bought a few years back. The unexpected arrival of the locomotive derailed my plan to build this Stuart 10H.
54A8D296-CE3F-486B-A0EF-1909C0F28221.jpeg
You do not have the required permissions to view the files attached to this post.
User avatar
Stanley
Global Moderator
Global Moderator
Posts: 90439
Joined: 23 Jan 2012, 12:01
Location: Barnoldswick. Nearer to Heaven than Gloria.

Re: Shed Matters 3

Post by Stanley »

Nice to have one in stock.... better than my treasure chests Bob! 10H is a nice little engine but I am getting a bit fidgety about my next engine. I might push the boat out and get something bigger. All this 7BA crap is bad for my health and temper. (It's reared its head again this morning.)

Image

I have one or two matters that need attention and have the handicap this morning that I have to knock off before 07:00 to go to the Co-op for my weekly shop before it gets busy. I decided to address the fact that the set screw in the flywheel isn't performing as it should. So I stripped the crankshaft. I hit a problem straight away, I couldn't get the bad set screw out of the wheel. It took me about twenty minutes to solve that one. I've drilled for the 3/16" Whitworth Unbrako set screw and now I've hit another problem, I can't find a way of driving the tap that isn't interfered with by the flywheel. I shall solve that tomorrow but at the moment it's a bit of a puzzle!

Image

Bread and butter stuff as I'm sure Bob will agree... But bloody annoying! I have to remind myself, I have all the time in the world!
Stanley Challenger Graham
Stanley's View
scg1936 at talktalk.net

"Beware of certitude" (Jimmy Reid)
The floggings will continue until morale improves!
User avatar
Big Kev
Site Administrator
Site Administrator
Posts: 10976
Joined: 23 Jan 2012, 20:15
Location: Foulridge

Re: Shed Matters 3

Post by Big Kev »

You got a long quarter inch socket extension bar?
Kev

Stylish Fashion Icon.
🍹
User avatar
Big Kev
Site Administrator
Site Administrator
Posts: 10976
Joined: 23 Jan 2012, 20:15
Location: Foulridge

Re: Shed Matters 3

Post by Big Kev »

You got a quarter inch socket extension bar and a rachet? Presuming the tap has a quarter inch head on it that is...
Kev

Stylish Fashion Icon.
🍹
BobH
Regular User
Posts: 133
Joined: 15 Nov 2019, 18:09
Location: Rochdale

Re: Shed Matters 3

Post by BobH »

It is bread and butter stuff Stanley but that is where the real work is and the model is made or spoilt. I cleaned up the box bed for the 10H but when I mated the main casting to it there was considerable rocking. I referred to Harold Hall's notes on making the 10 series engines. He reported that his box bed casting was warped, well so was mine! I guess it could be a design problem in that the open casting has little torsional rigidity. So it was a chance to try out my new 2" cutter on the milling machine.
20210121_133815.jpg
I took a skim of the base until the whole face was nice and shiny, then turned it over and did the same on the top face.
20210121_140003.jpg
In all I took of 32thou" I didn't want to take off more as the casting height started out only 5thou" over the specified height.
20210121_150439.jpg
I finished off by putting a coat of primer on the fresh cut casting, don't want it rusting whilst it waits the engine to go on it.
20210121_163146.jpg
The new cutter might be a cheap Chinese one but it certainly did the job.
You do not have the required permissions to view the files attached to this post.
User avatar
Stanley
Global Moderator
Global Moderator
Posts: 90439
Joined: 23 Jan 2012, 12:01
Location: Barnoldswick. Nearer to Heaven than Gloria.

Re: Shed Matters 3

Post by Stanley »

Kev, it's a 3/16" Whitworth tap and the square head is 9/64"....
Bob, I have resisted modern cutters. I am old fashioned, for wide cuts I use fly cutters I made myself out of scrap.
I shall solve the tap problem no doubt but at the moment the route is unclear!
Stanley Challenger Graham
Stanley's View
scg1936 at talktalk.net

"Beware of certitude" (Jimmy Reid)
The floggings will continue until morale improves!
Post Reply

Return to “Crafts”