Shed Matters 3

User avatar
Stanley
Global Moderator
Global Moderator
Posts: 90293
Joined: 23 Jan 2012, 12:01
Location: Barnoldswick. Nearer to Heaven than Gloria.

Re: Shed Matters 3

Post by Stanley »

Image

I polished the boss of the eccentric while it was central in the 4 jaw then swapped for the 3 jaw SC and gave Mrs Harrison a clean. Now we can remount the eccentric to cut the groove in it.

Image

The groove for the eccentric strap cut in the eccentric, much easier than doing it the opposite way round.

Image

Then reverse the eccentric in the chuck, get it running true and turn the excess metal off rather than trying to do it with a parting tool. Not much hold in the jaws!

Image

A little later we have an eccentric that fits the shaft!

Image

Then I set up under the pillar drill and drilled and tapped for the 5BA grub screw which will fasten the eccentric on the crankshaft. Now I have to make the rough bronze casting into an eccentric strap and fit it. I'd done an hour and a half and so I'll leave starting that until tomorrow.
Stanley Challenger Graham
Stanley's View
scg1936 at talktalk.net

"Beware of certitude" (Jimmy Reid)
The floggings will continue until morale improves!
User avatar
Stanley
Global Moderator
Global Moderator
Posts: 90293
Joined: 23 Jan 2012, 12:01
Location: Barnoldswick. Nearer to Heaven than Gloria.

Re: Shed Matters 3

Post by Stanley »

Image

Today's task is simple. Turn a rough casting into a thing of accuracy and beauty. The first stages didn't need any measuring, just squaring the surfaces that can be reached by some intelligent and careful milling. This is the start here. I managed to get to all the flat surfaces in this plane.

Image

Next job is the other plane, the two faces. I started by cleaning the back up taking as little as possible off. Still no measuring needed.

Image

Here it is cleaned up. Note that this is a dodgy stage, you can't put too much pressure on in the vise otherwise the weak casting can be distorted or even broken. Next a quick clean up of the edges and reverse it to mill the other side. This time we have to measure. 1/4" overall thickness of the body and 3/32" for the tongue that will connect to the eccentric rod.

Image

Here we are at knocking off time after an hour in the shed. I have to go to the Co-op for some essential supplies but this is no problem because I have finished the first stage. Next I have to break all the edges and split the casting before fitting the connecting bolts. Then comes the tricky bit of boring it to the size and profile needed to fit the eccentric itself. I'm happy with the morning.....
Stanley Challenger Graham
Stanley's View
scg1936 at talktalk.net

"Beware of certitude" (Jimmy Reid)
The floggings will continue until morale improves!
User avatar
Stanley
Global Moderator
Global Moderator
Posts: 90293
Joined: 23 Jan 2012, 12:01
Location: Barnoldswick. Nearer to Heaven than Gloria.

Re: Shed Matters 3

Post by Stanley »

Image

First job is to break most of the edges and make the eccentric strap look as though someone cares.

Image

Next I marked the eccentric up and got it under the pillar drill to drill the two clearance holes through the lugs 7/64", clearance for 7BA.

Image

Next job is to split the casting. So a careful mark up.

Image

Image

I could have cut it by hand but this way means we have a far more accurate and controllable cut.

Image

Then a bit of filing and fitting and a search through my stock for the bolts I fastened the two halves together. Then I had a quick measure and I am OK, I can bore it to the right size for the eccentric. Sigh of relief.

Image

One last job before I stopped. I caught the hardened jaw of the mill vise when I was milling the eccentric, not badly, only a touch but now was the time to sharpen it before I put it back in the mill. I've said it before but I don't understand how anyone can run HSS in a mill if they havens got a T&C grinder. One more thought as I used the small slitting saw which was sharp, I wasn't wasting my time when I spent all that time sharpening cutters!
A nice morning and solid progress.
Stanley Challenger Graham
Stanley's View
scg1936 at talktalk.net

"Beware of certitude" (Jimmy Reid)
The floggings will continue until morale improves!
User avatar
Stanley
Global Moderator
Global Moderator
Posts: 90293
Joined: 23 Jan 2012, 12:01
Location: Barnoldswick. Nearer to Heaven than Gloria.

Re: Shed Matters 3

Post by Stanley »

Image

I had two choices, do the strap in the 4 jaw chuck on the lathe or use the boring head on the mill. I've decided for various reasons that the boring head is the best bet.

Image

Here's the set up. Not very safe as you can't tighten the vise on the strap, you'd just crush it and so it's a matter of judgement! I'll spare you the ticklish task of centring the head on the job, it had to be done by eye because the hole in the casting isn't round. Patience and lots of small adjustments.

Image

I've bored the centre out to fit and now I'm cutting back to get the clearance on the body of the eccentric. No heavy cuts!

Image

Then turn it over and bore the clearance in the other side.

Image

I tried the strap and it doesn't quite fit but that's OK that was my aim, I had decided to make the final adjustment to the eccentric, not the strap. So an eighth inch warding file and some careful work.

Image

Some time later and we have an eccentric and strap. It's tight but I can turn it with my fingers. It will soon bed in as it is rotated. It's a very good fit. A very good result after some extremely high risk cutting! I am a happy bunny.
Stanley Challenger Graham
Stanley's View
scg1936 at talktalk.net

"Beware of certitude" (Jimmy Reid)
The floggings will continue until morale improves!
User avatar
Stanley
Global Moderator
Global Moderator
Posts: 90293
Joined: 23 Jan 2012, 12:01
Location: Barnoldswick. Nearer to Heaven than Gloria.

Re: Shed Matters 3

Post by Stanley »

Image

I've had a good hour in the shed. The design committee told me that the fit of the eccentric isn't good enough. So I stripped it down and went over all the surfaces with fine emery paper then reassemble and run it in. I did that in a slightly risky way. I put it in the chuck and ran the lathe while holding the eccentric. I finished up running it at 300rpm and it was OK. Much better!

Image

Image

Once I had it running perfectly freely I checked the orientation on the drawing and made sure the oil hole was at the top when it's installed. It's ready to install now on the engine once I have made the valve rod which needs to be installed first. I can do the making and fitting of the parallel motion and the valve gear on the assembled engine but the valve rod needs to be ready first.
Not what I was thinking of doing but as it turned out exactly the right thing and I am happy with it now. (And so is the design committee!)
Stanley Challenger Graham
Stanley's View
scg1936 at talktalk.net

"Beware of certitude" (Jimmy Reid)
The floggings will continue until morale improves!
User avatar
Stanley
Global Moderator
Global Moderator
Posts: 90293
Joined: 23 Jan 2012, 12:01
Location: Barnoldswick. Nearer to Heaven than Gloria.

Re: Shed Matters 3

Post by Stanley »

Image

We need an eccentric rod. So out with the drawing and find the 1/4" X 3/32" stock. A good start.

Image

Some measuring up and marking.

Image

It's amazing how long things like this take. Identifying and finding the right fastenings.

Image

From going in the shed to getting to this stage took an hour.

Image

I cut the rod to its finished size so I could get the assembly into the vise under the Pillar drill.

Image

The usual round of careful drilling of small holes.

Image

That's good! Just right. But it was at this moment as I prepared to move on that I had a moment of pure rage with myself because I had cut the bloody rod 1/4" too short. But as I always say, mistakes don't matter, it's how you retrieve them that counts. So I re-designed it to be better than theirs. That's not a joke, it is because it's more in line with the centre of the eccentric and only involves drilling the same number of holes.

Image

The start of the come back.

Image

The finished shape and the tools used to get it!

Image

At Knocking off time I had the forks adjusted for the necessary 1/4" gap.
That's quite enough for today, over two hours in the shed and me knees hurt, but despite the alarums and excursions I am happy with progress....
Stanley Challenger Graham
Stanley's View
scg1936 at talktalk.net

"Beware of certitude" (Jimmy Reid)
The floggings will continue until morale improves!
User avatar
Whyperion
Senior Member
Posts: 3068
Joined: 23 Jan 2012, 22:13
Location: Stockport, after some time in Burnley , After leaving Barnoldswick , except when I am in London

Re: Shed Matters 3

Post by Whyperion »

Stanley wrote: 06 Jun 2020, 08:40
That's good! Just right. But it was at this moment as I prepared to move on that I had a moment of pure rage with myself because I had cut the bloody rod 1/4" too short. But as I always say, mistakes don't matter, it's how you retrieve them that counts. So I re-designed it to be better than theirs. That's not a joke, it is because it's more in line with the centre of the eccentric and only involves drilling the same number of holes.


At Knocking off time I had the forks adjusted for the necessary 1/4" gap.
I am not quite sure what you have done, looking at the diagram the set length of the rod immediately abuts the eccentric bearing and is drilled and fitted with two bolts/nuts , one of which appears to be dead flush to the outside face, presumably to prevent it potentially working loose in operation, is that the normal full(larger) sized method ( other mechanical tethers could be used such as a pinned crown nut ), Does the positioning of the hole in the 'tang' (is there a proper name for that) of the machined eccentric potentially weaken the tang according to its distance from the eccentric , again, if it were consistent high speed running over a long period of time would there be more wear as you appear to have positioned the rod a slight distance away from the eccentric end - if that is 1/4 did the Y yoke distance need modifying ? I also note that the eccentric drawing appears to have a curvature of greater radius) where the tang/rod abut, you appear to have machined it squared off - is there any relevance of is it just the angle of the photo of the drawing. I would not know how to machine any such radius and I cannot see one measured off on the drawing but It looked noteworthy.
User avatar
Stanley
Global Moderator
Global Moderator
Posts: 90293
Joined: 23 Jan 2012, 12:01
Location: Barnoldswick. Nearer to Heaven than Gloria.

Re: Shed Matters 3

Post by Stanley »

Believe me, what's wrong is the rod is a 1/4" short.....
Stanley Challenger Graham
Stanley's View
scg1936 at talktalk.net

"Beware of certitude" (Jimmy Reid)
The floggings will continue until morale improves!
User avatar
Stanley
Global Moderator
Global Moderator
Posts: 90293
Joined: 23 Jan 2012, 12:01
Location: Barnoldswick. Nearer to Heaven than Gloria.

Re: Shed Matters 3

Post by Stanley »

Image

The aim today is to make the jaw ready for fitting to the eccentric rod. Here's the start, holding the two elements together with the narrow jaw Mole grips so I can mark for the 1/8" hole at the end and drill it.

Image

Here we are under the pillar drill.

Image

That worked!

Image

Then I inserted a scrap piece of the rod material to mimic the spacing when its finally assembled and made sure that the holes were still in line by cleaning up the holes with the drill while clamped in the vise. I also de-burred the holes with a countersink.

Image

The 7BA nuts and bolts supplied aren't long enough now and I have some nice long 6BA set screws so I decided to use them. Another consideration was that I have about my person some brand new ground thread HSS taps and they will obviously be good. It was after I had sorted these out and the tapping drill that I realised this was wrong, I need clearance holes not tapping holes! No matter, a quick change of tack and I sorted a no. 35 number drill.

Image

First hole drilled and checked with the 1/8" drill. So some marking and punching for the second hole.

Image

That went well and I'm ready for a final measure up and fitting the jaw to the rod. It's been a busy morning and I had done over an hour so at this point I knocked off. No rush and it's been a good morning. It's when I push things that I tend to make mistakes. We've had a good spell, I am a happy bunny and I am not going to spoil it.
Stanley Challenger Graham
Stanley's View
scg1936 at talktalk.net

"Beware of certitude" (Jimmy Reid)
The floggings will continue until morale improves!
User avatar
Stanley
Global Moderator
Global Moderator
Posts: 90293
Joined: 23 Jan 2012, 12:01
Location: Barnoldswick. Nearer to Heaven than Gloria.

Re: Shed Matters 3

Post by Stanley »

Image

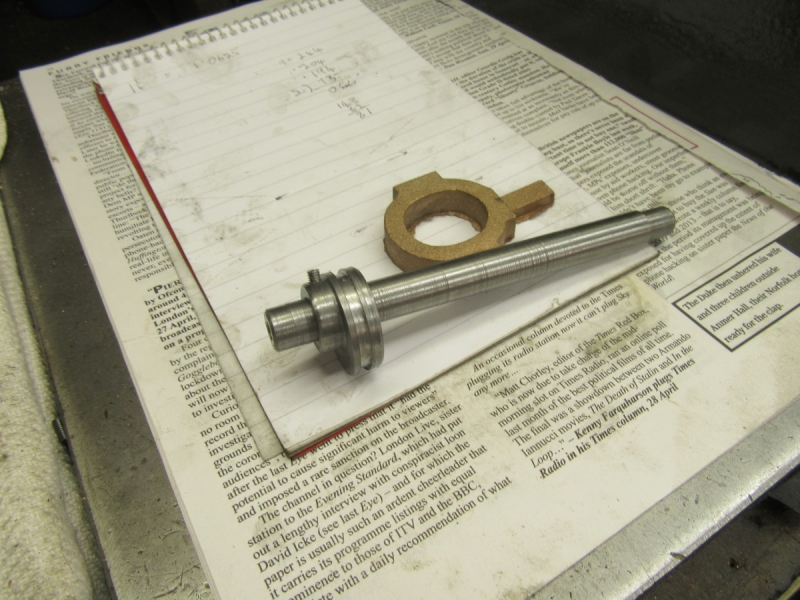
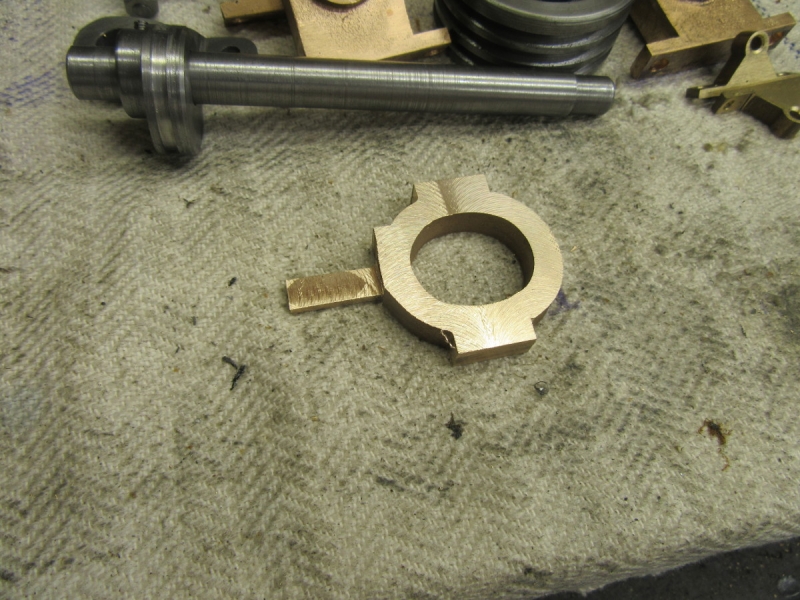
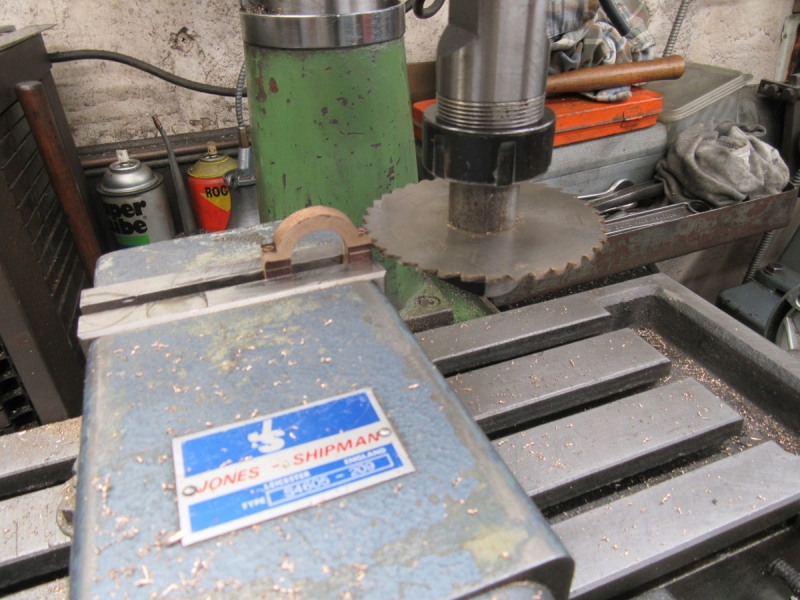
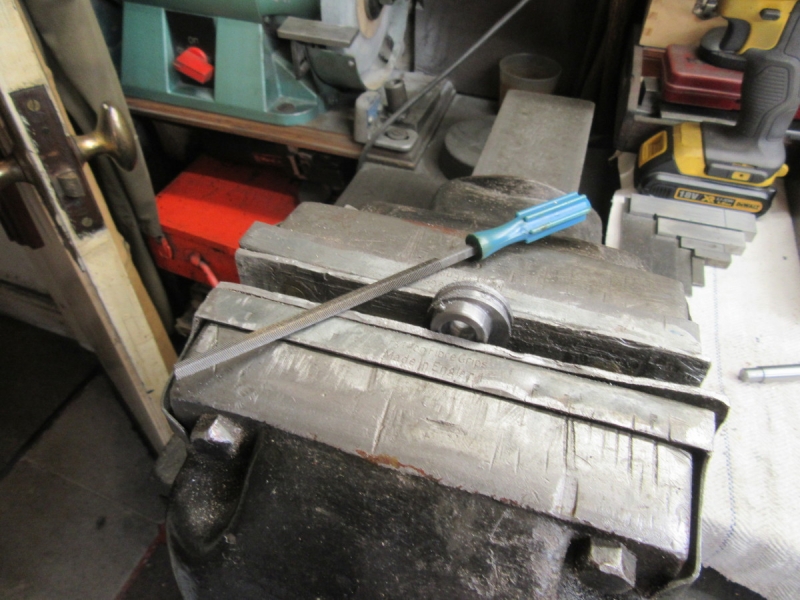
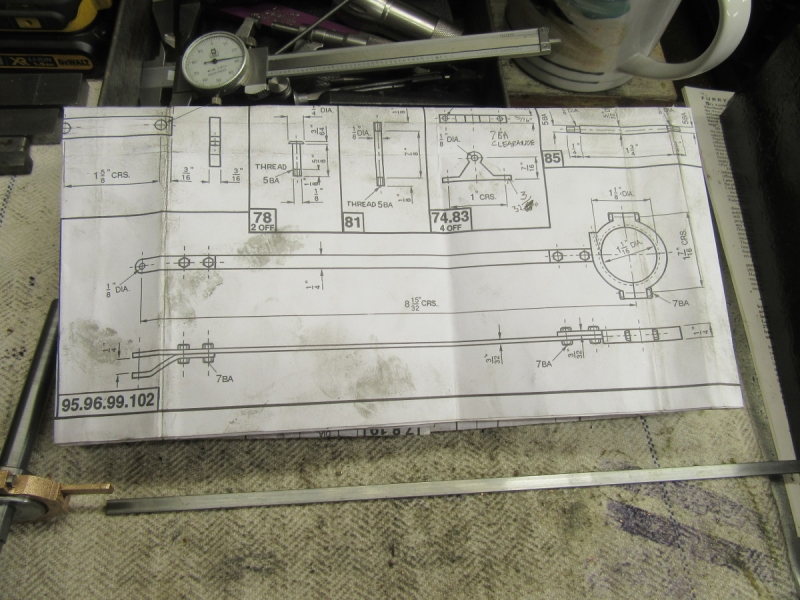
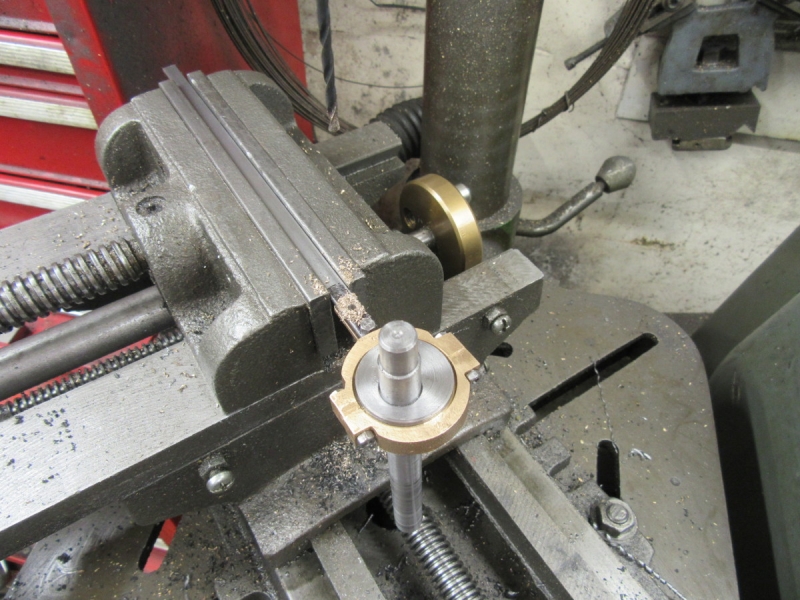
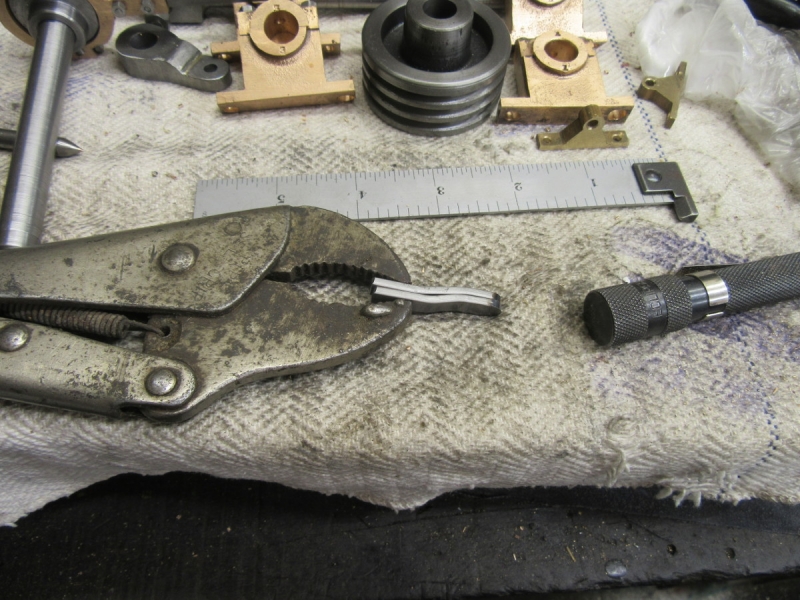
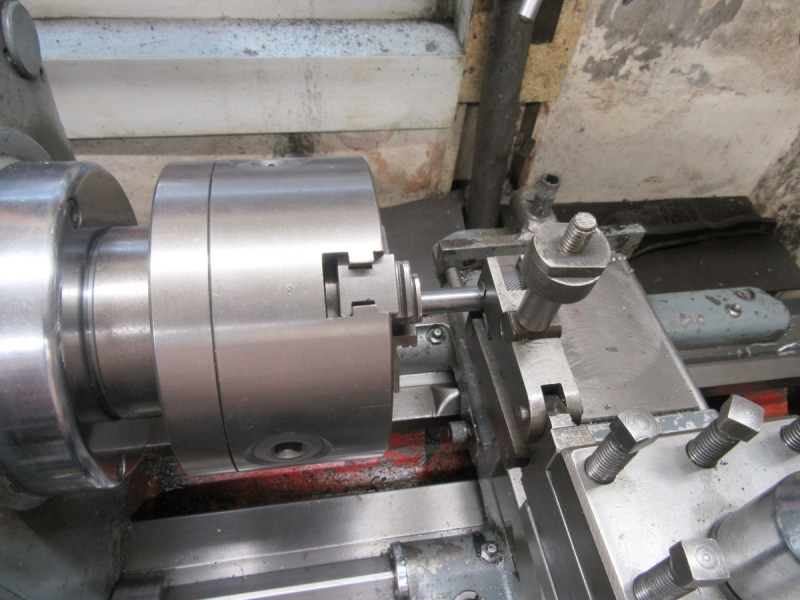
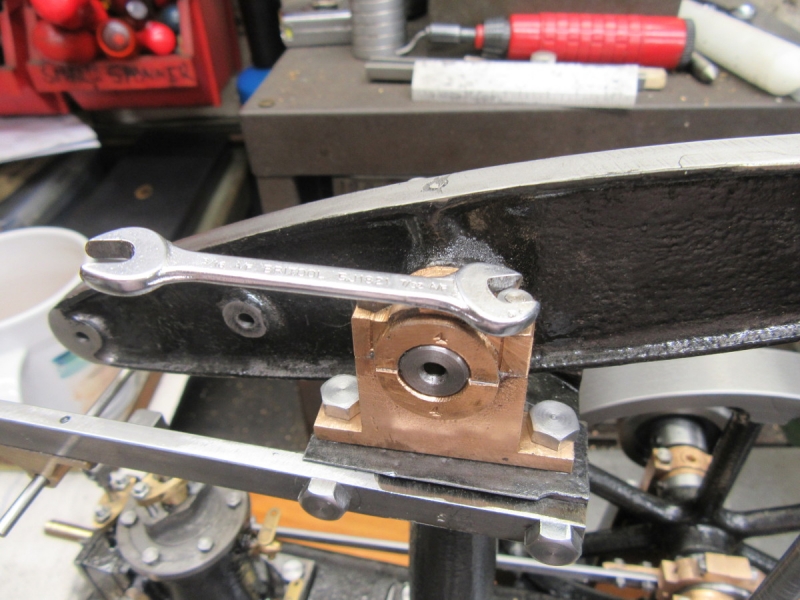
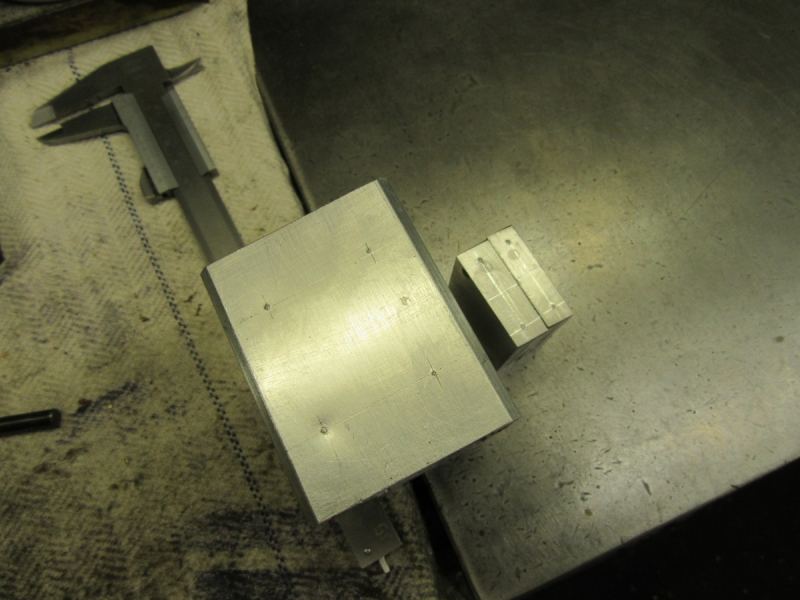
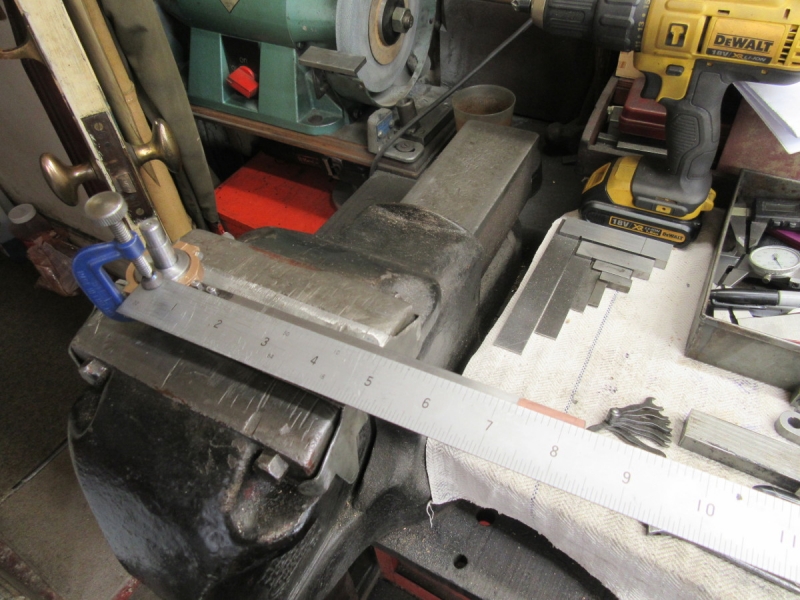
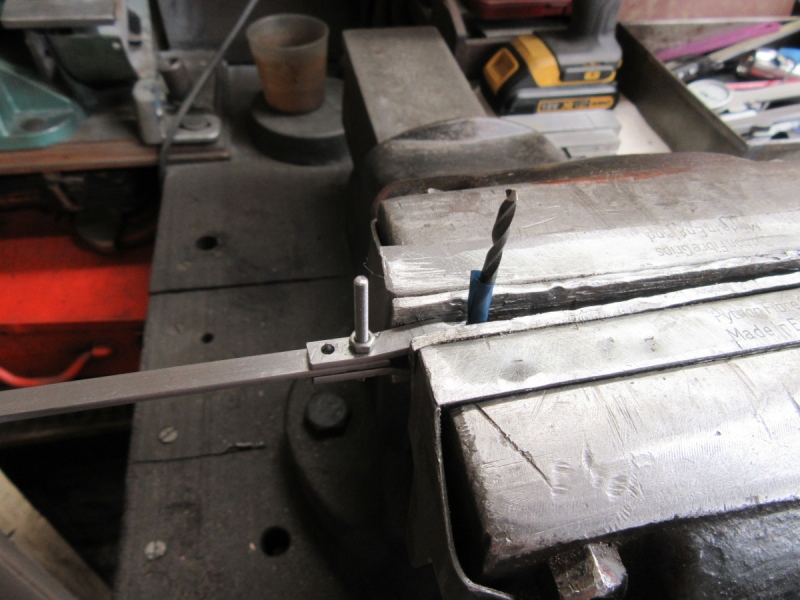
Still the eccentric rod. Here I am measuring up yet again. Essential before I make the holes for the mounting bolts. As usual I shall fit one and then drill for the second after I have the first secured.

Image

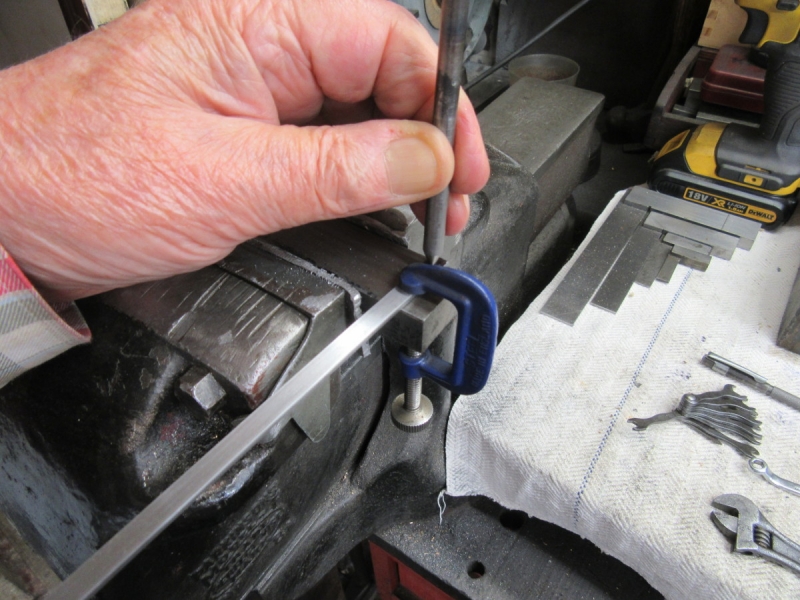
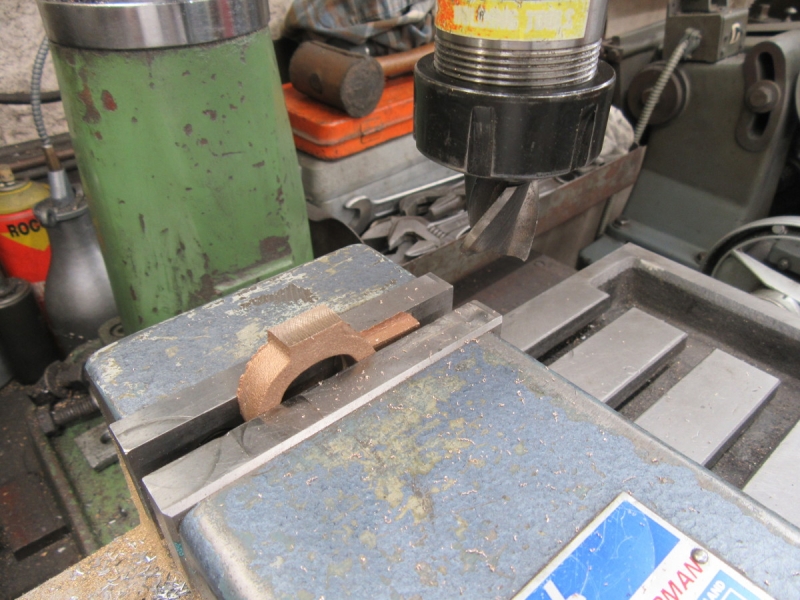
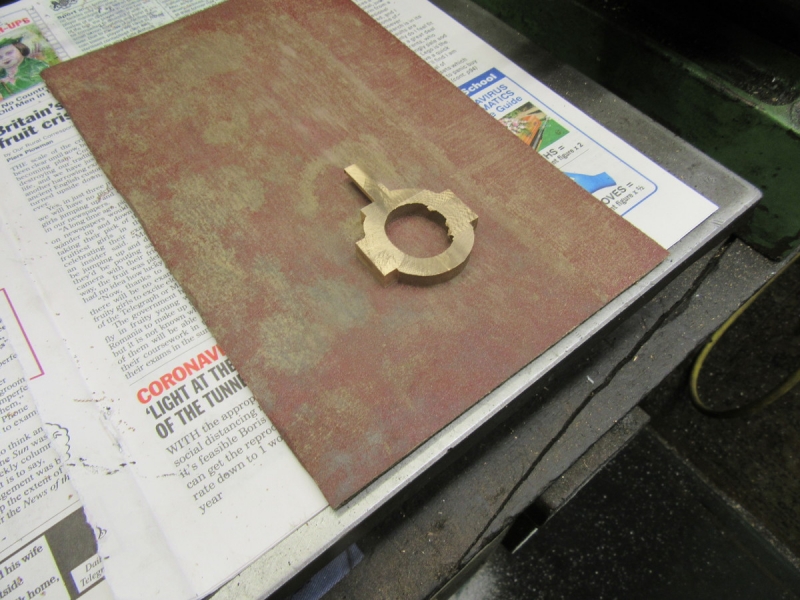
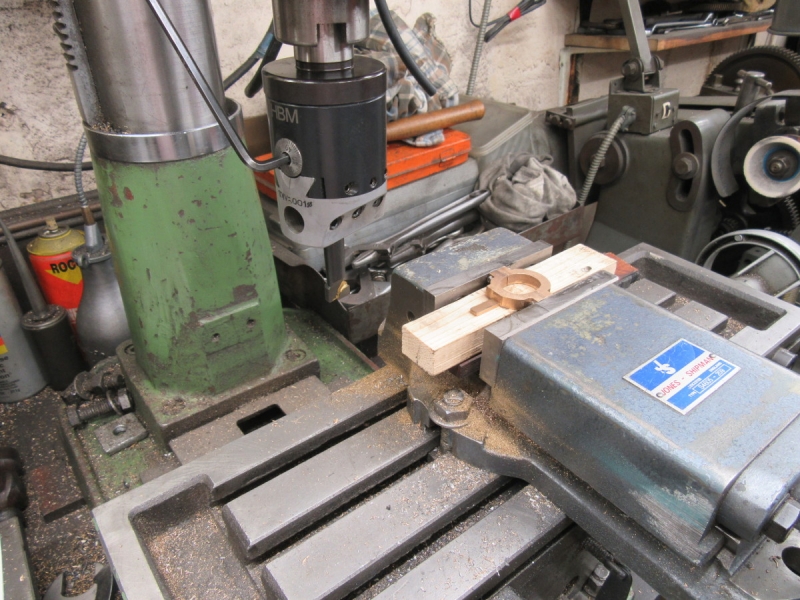
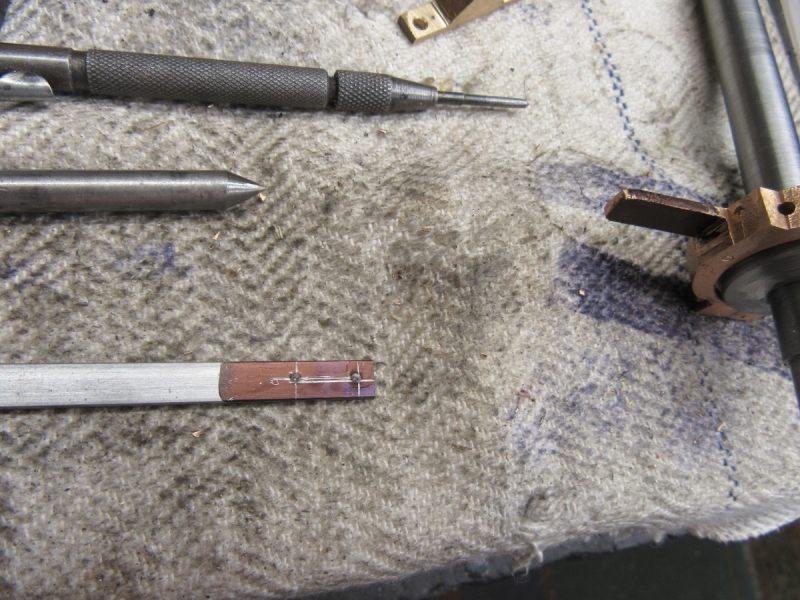
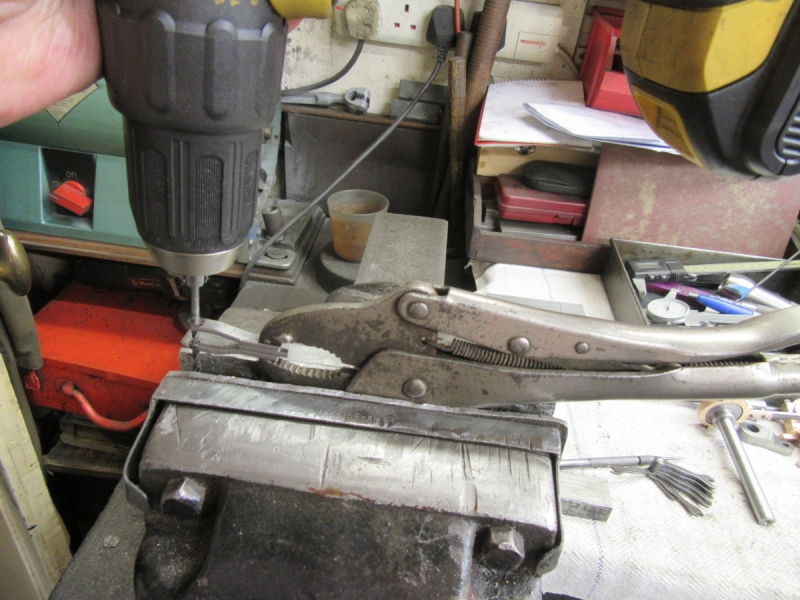
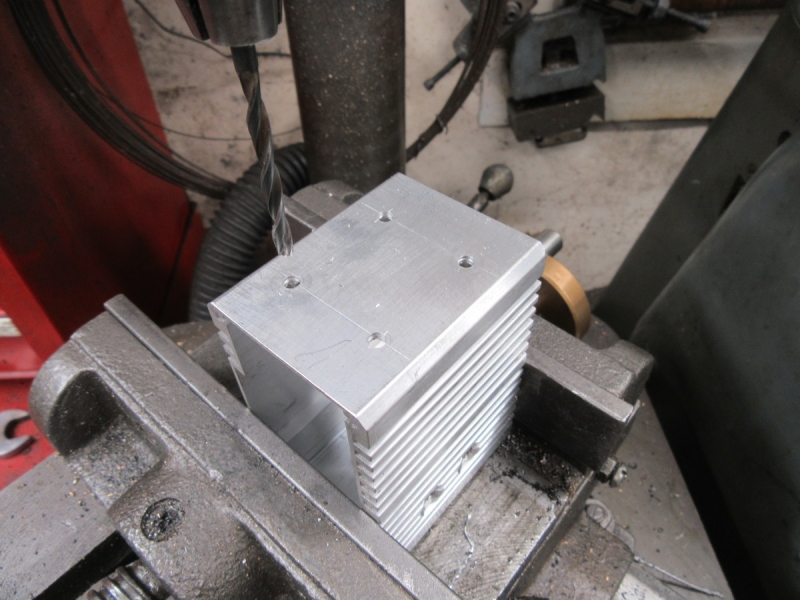
You need three hands to hold everything while you punch the first mark accurately. Imagination has to be used, but I got it right.

Image

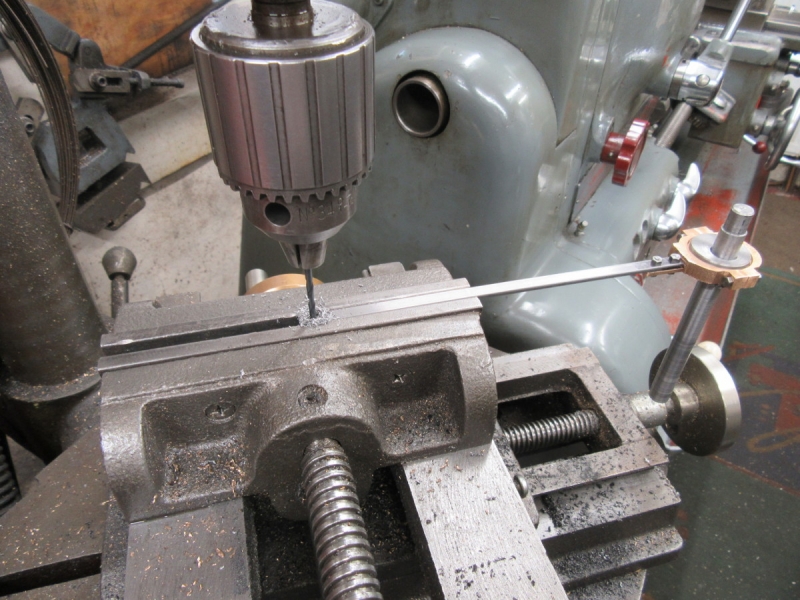
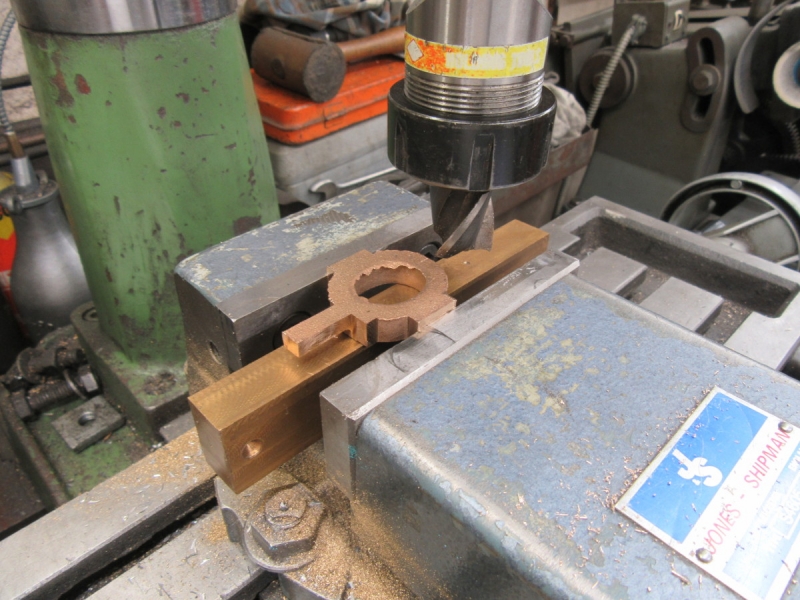
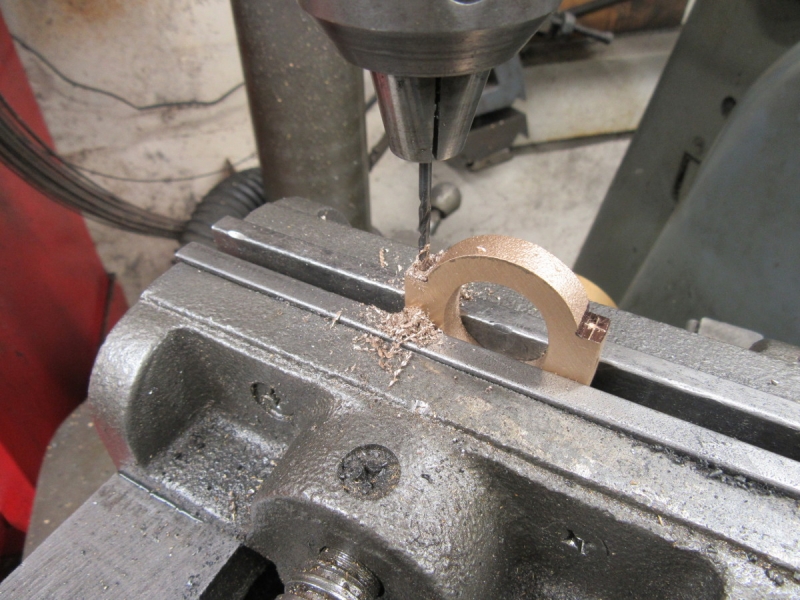
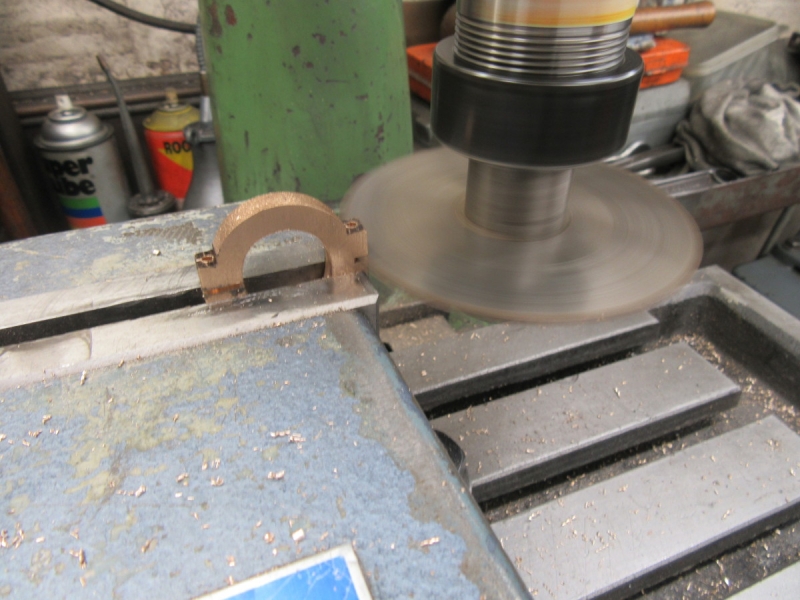
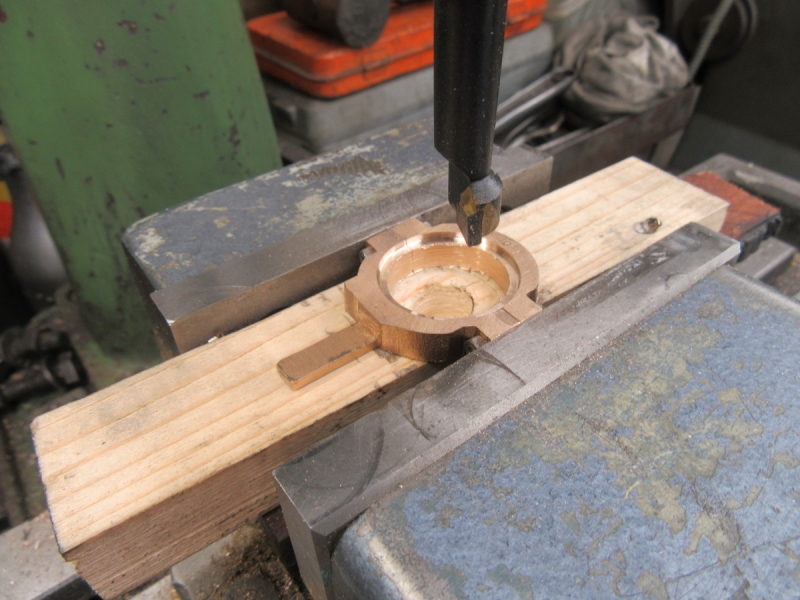
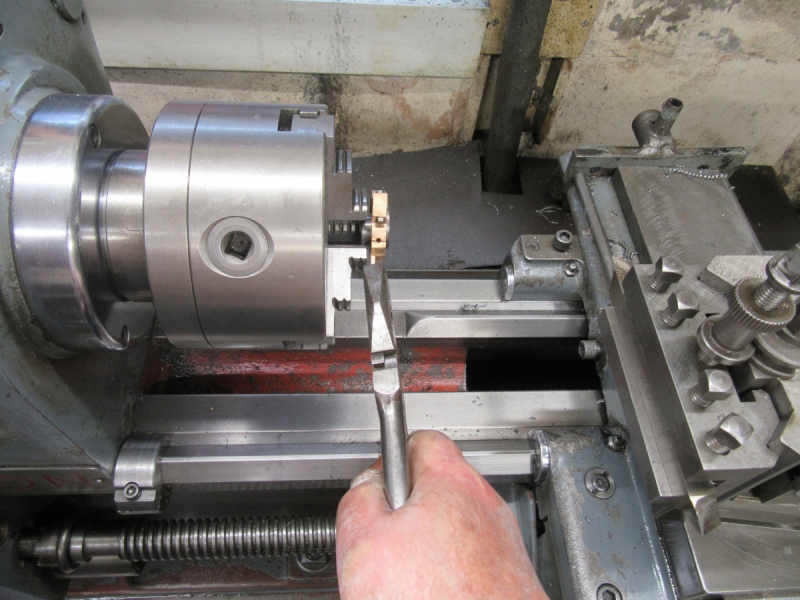
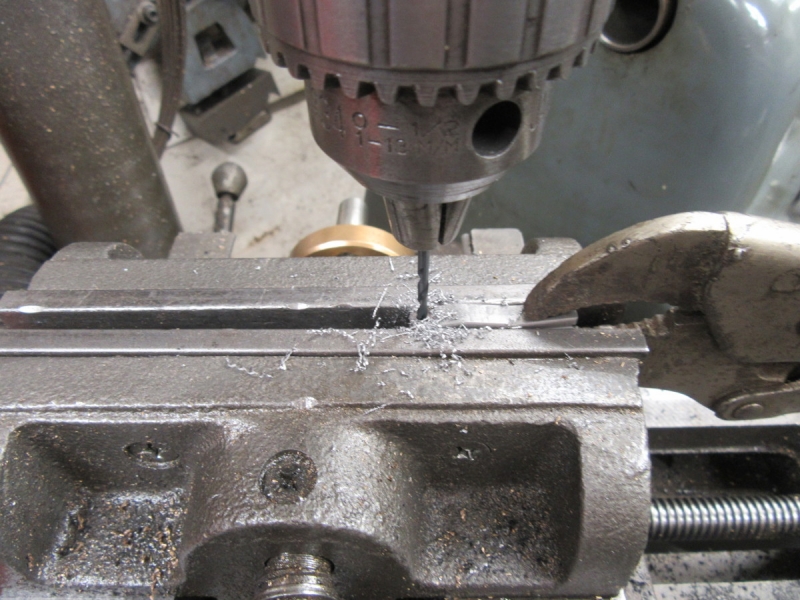
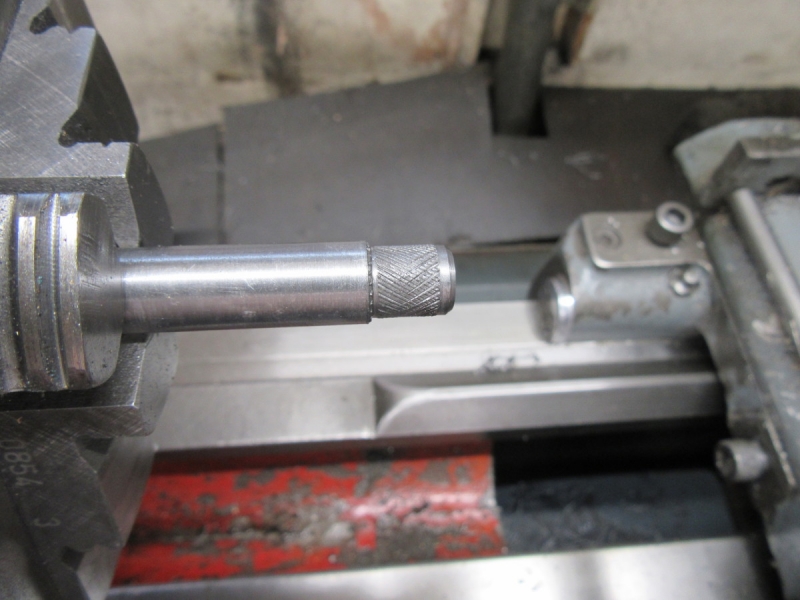
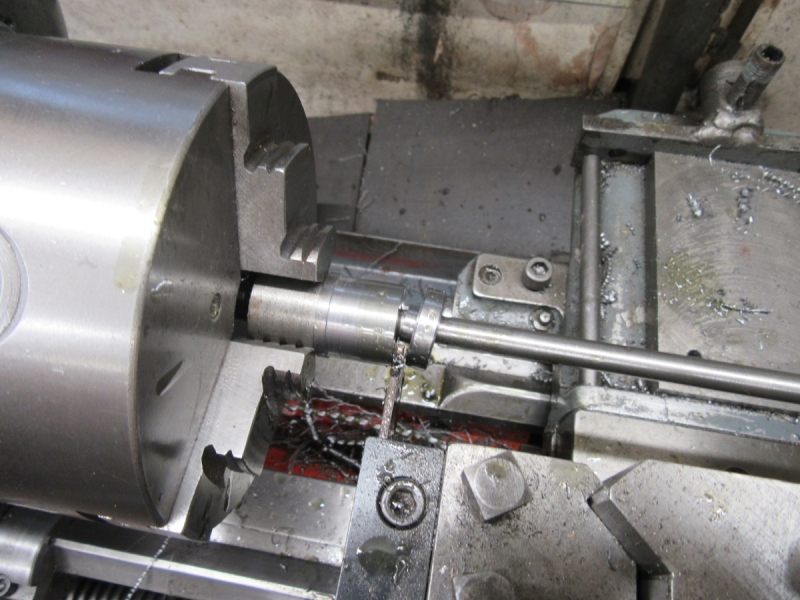
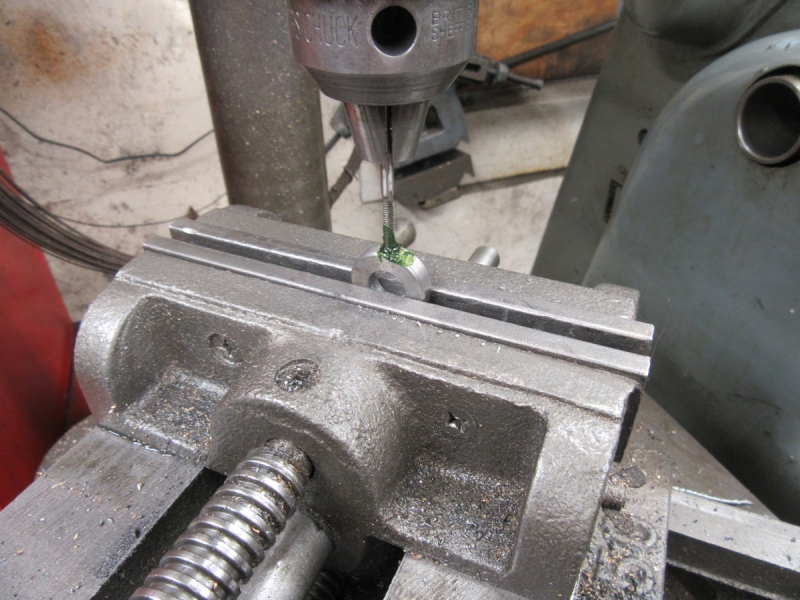
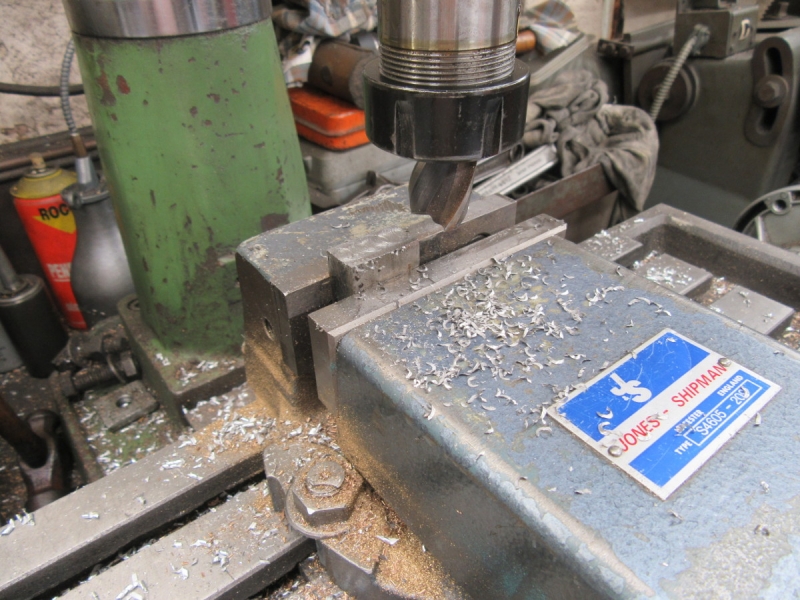
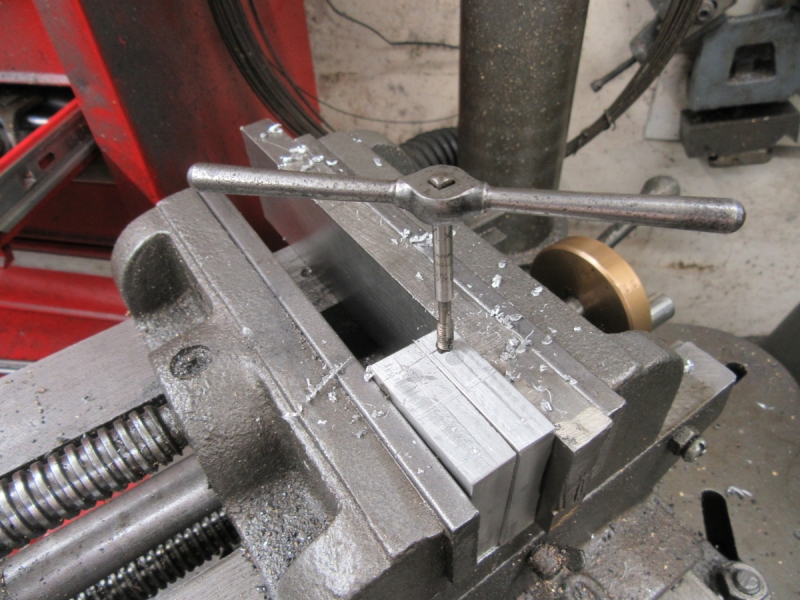
Then drill it, no going back now. By the way, I had to shorten the rod first so it fits the new fork. Note that I am not wearing cloves this morning, they get in the way of small components!

Image

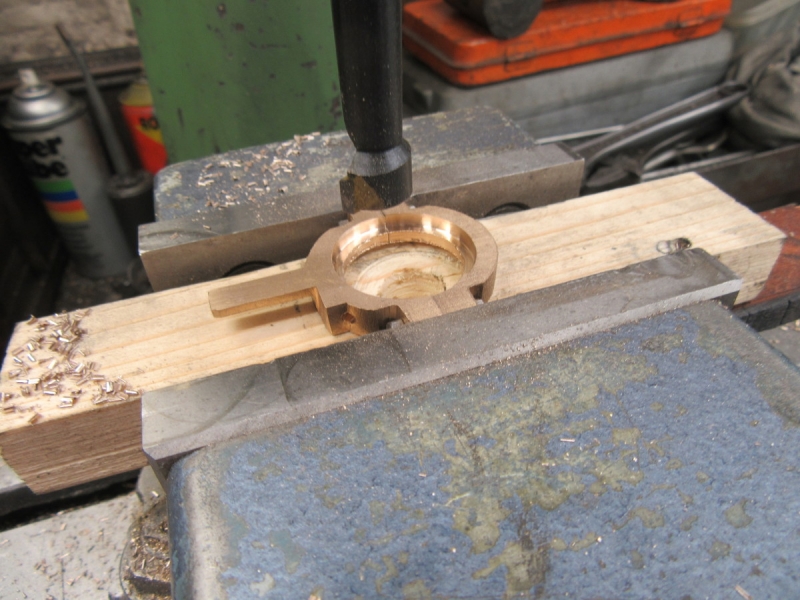
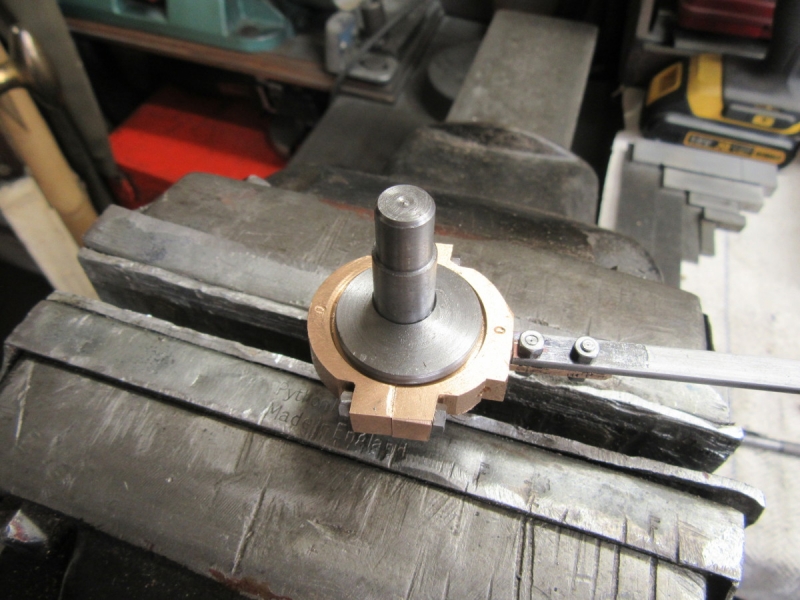
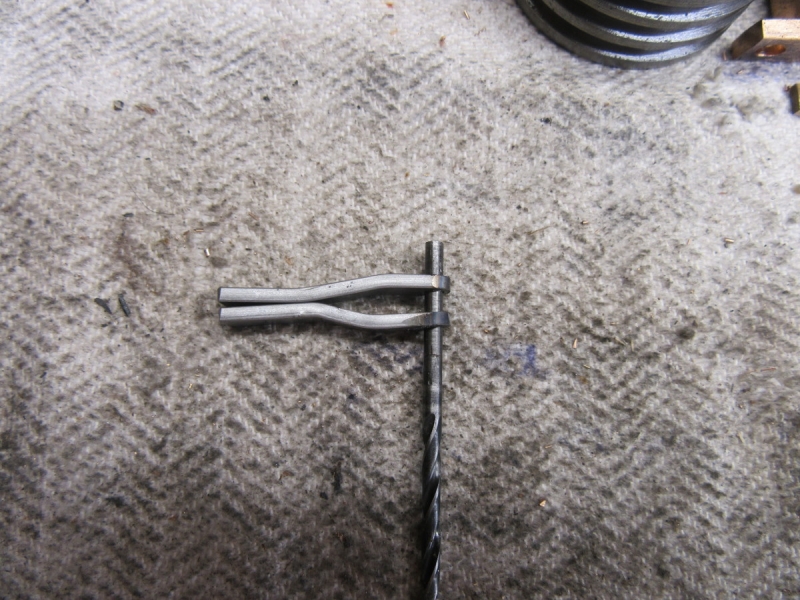
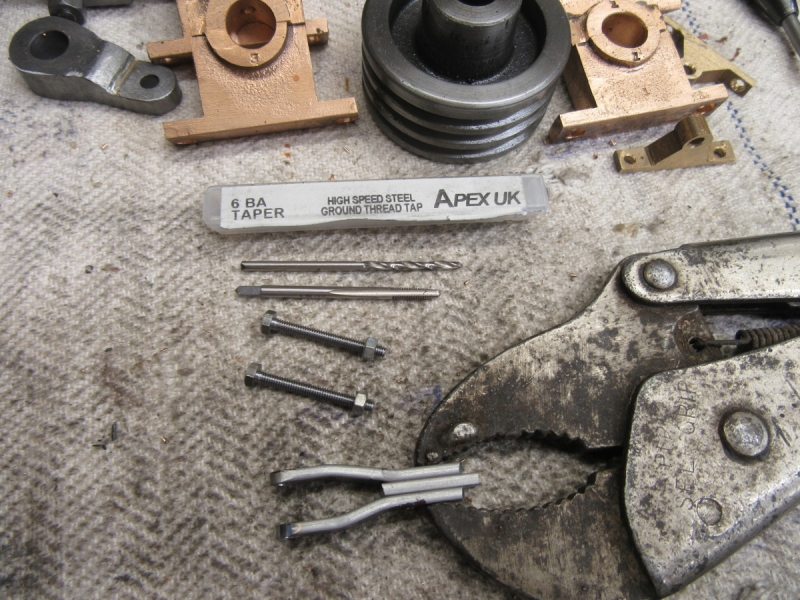
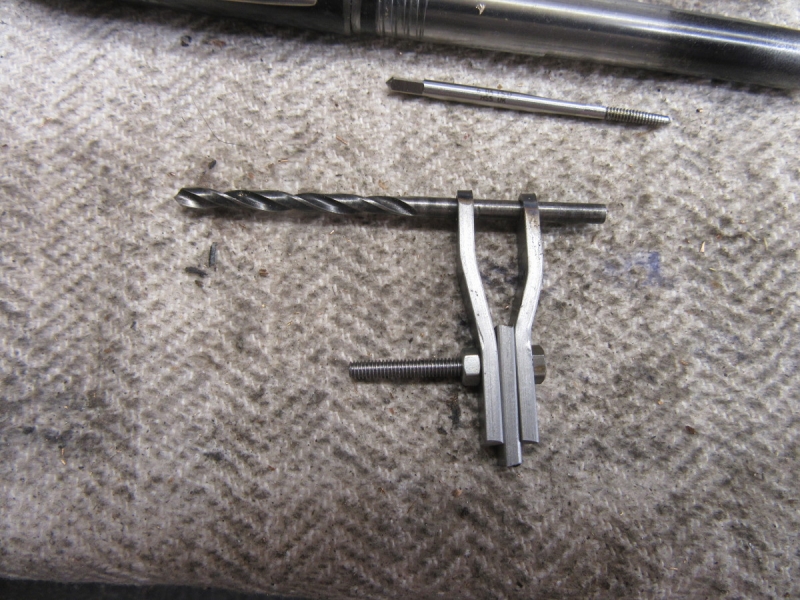
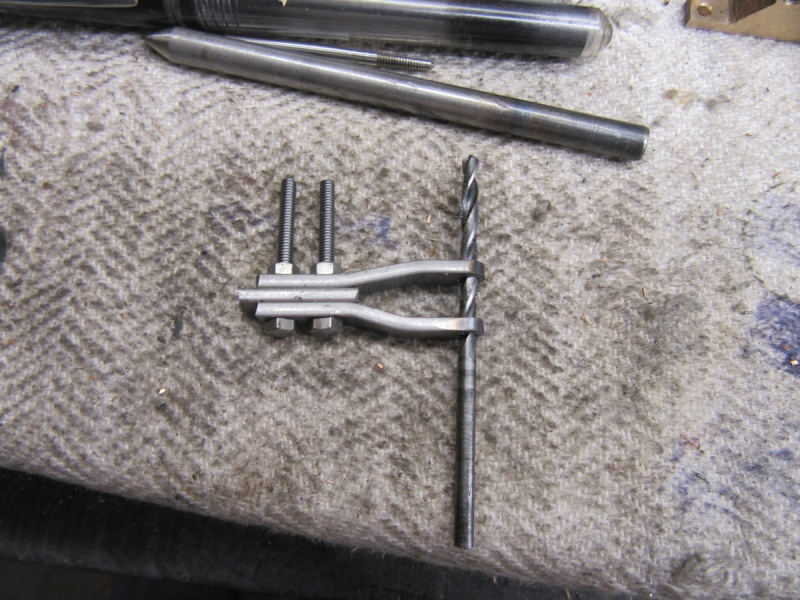
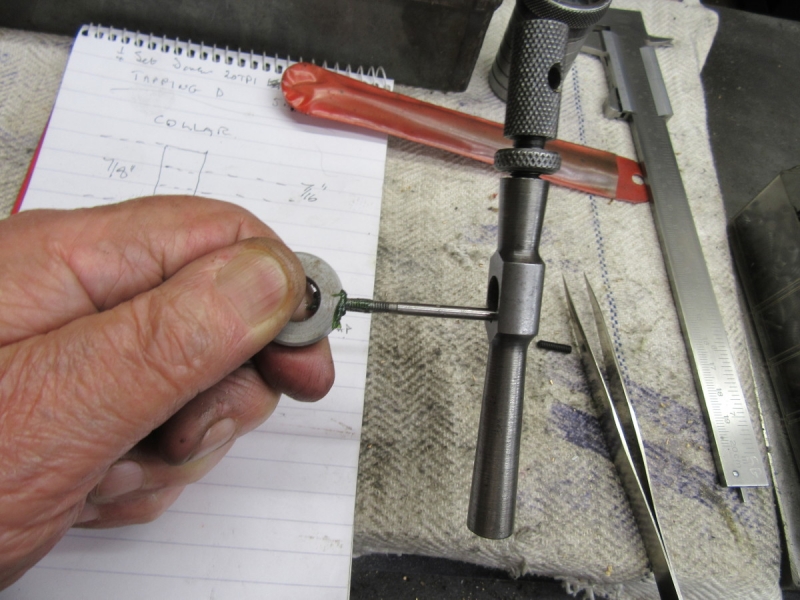
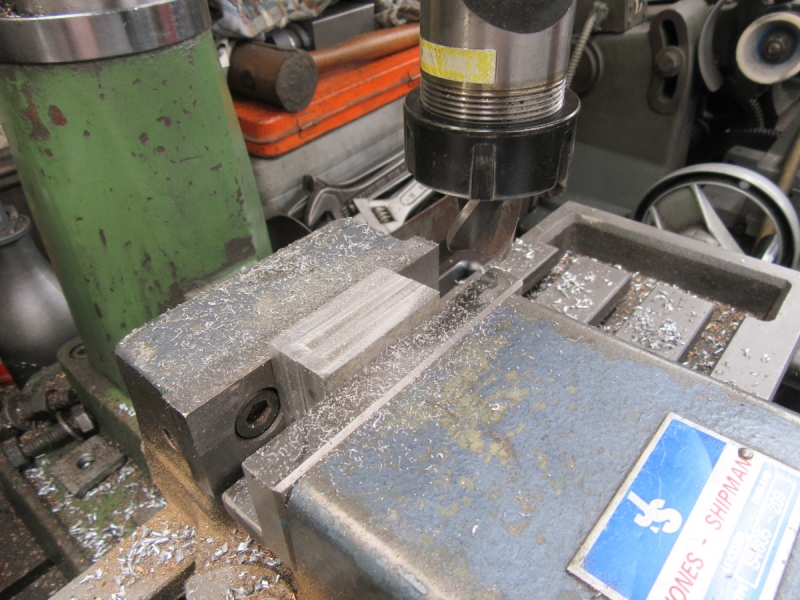
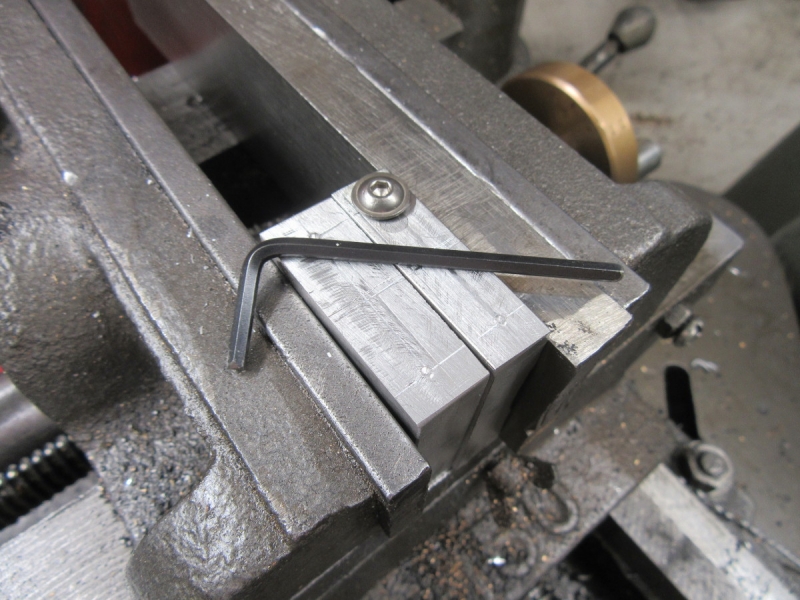
Then assemble the fork on the end of the rod with the 1/8" drill in place to ensure that the holes line up. Tighten up the 6BA setscrew and it's ready for drilling the second hole.

Image

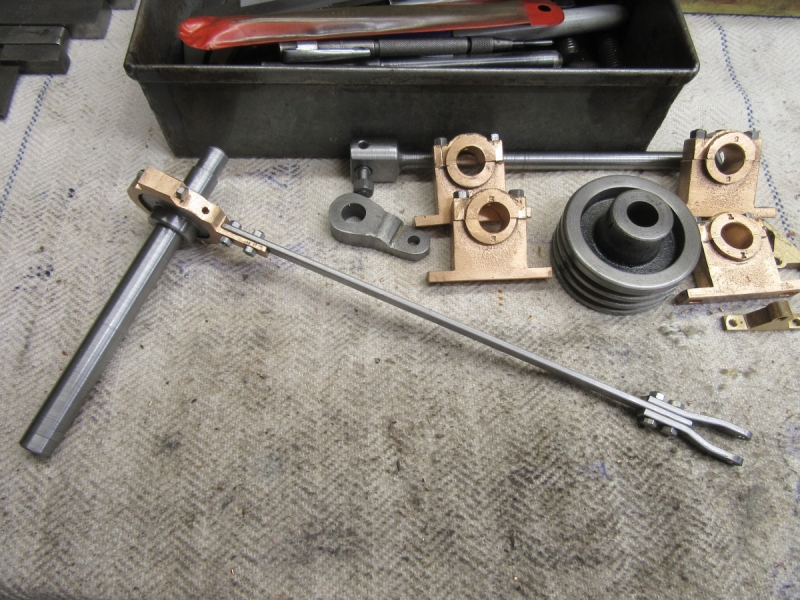
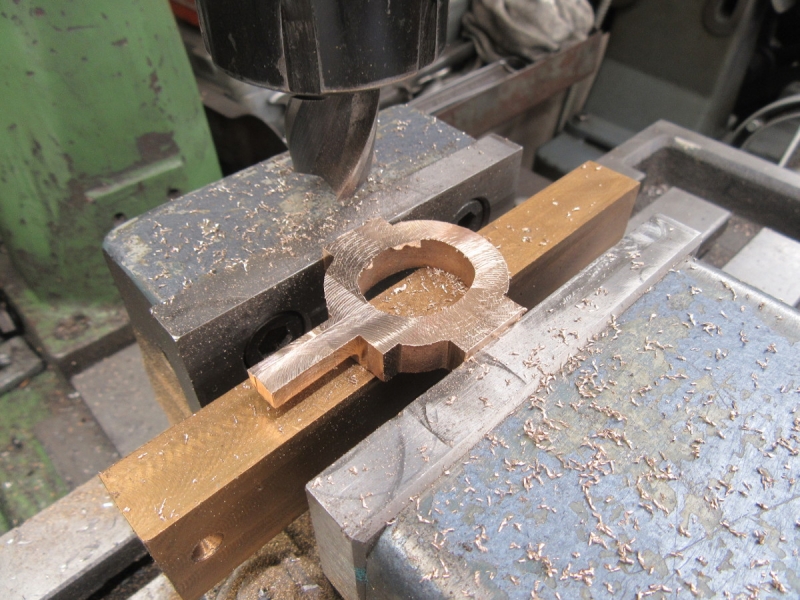
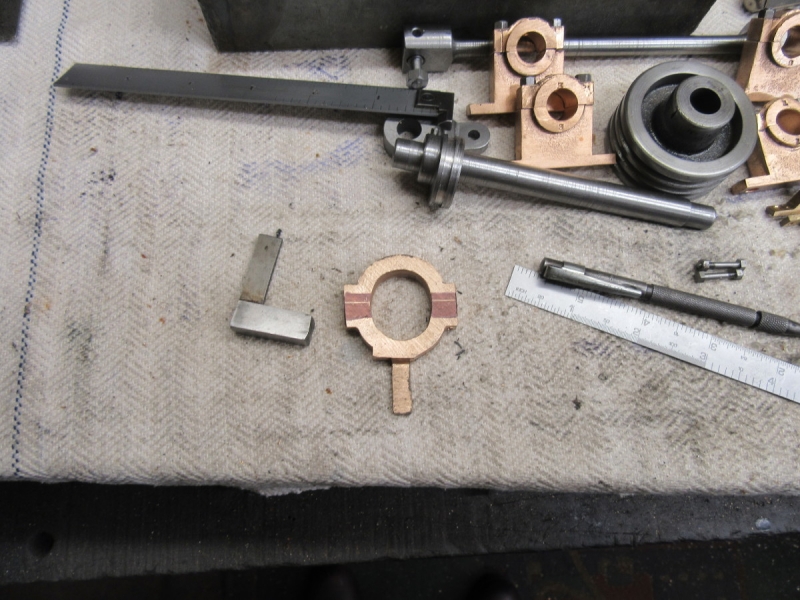
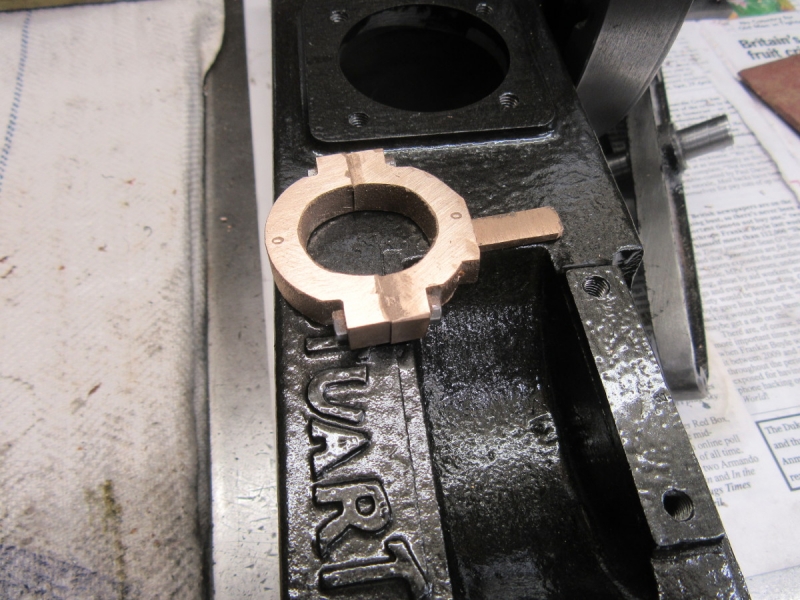
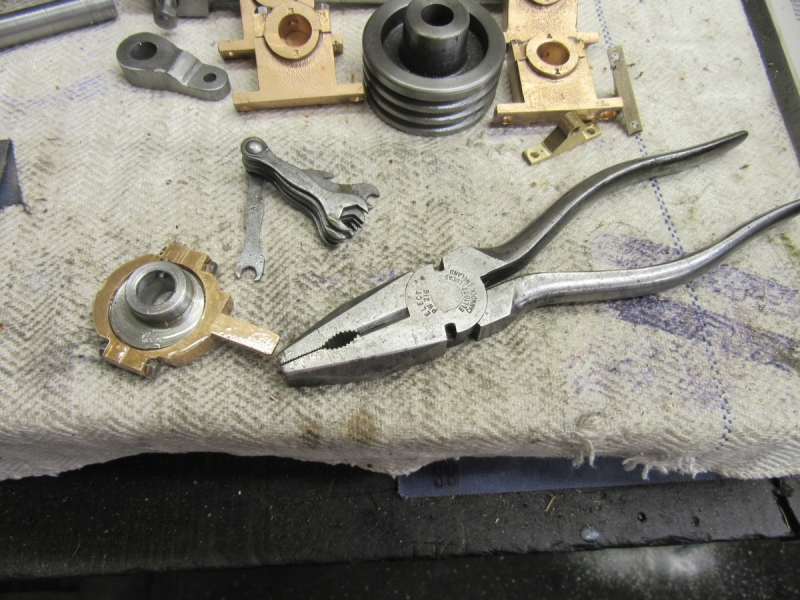
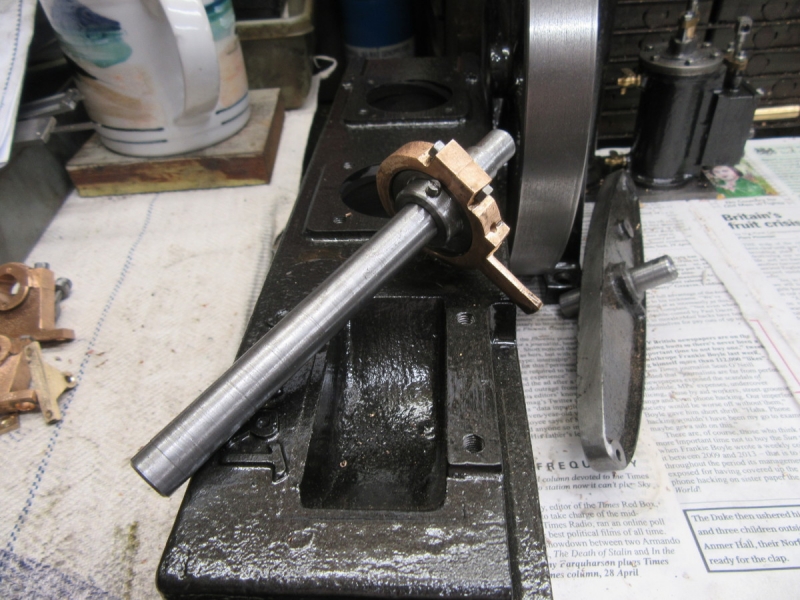
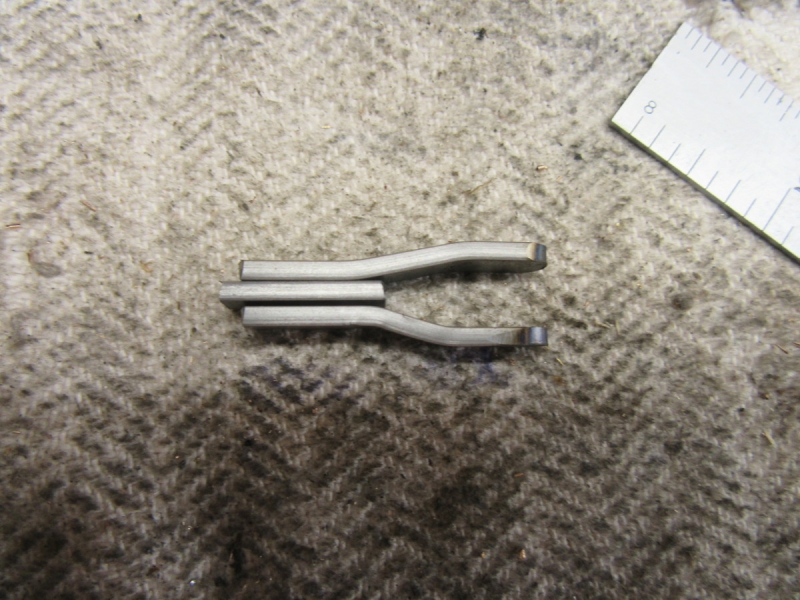
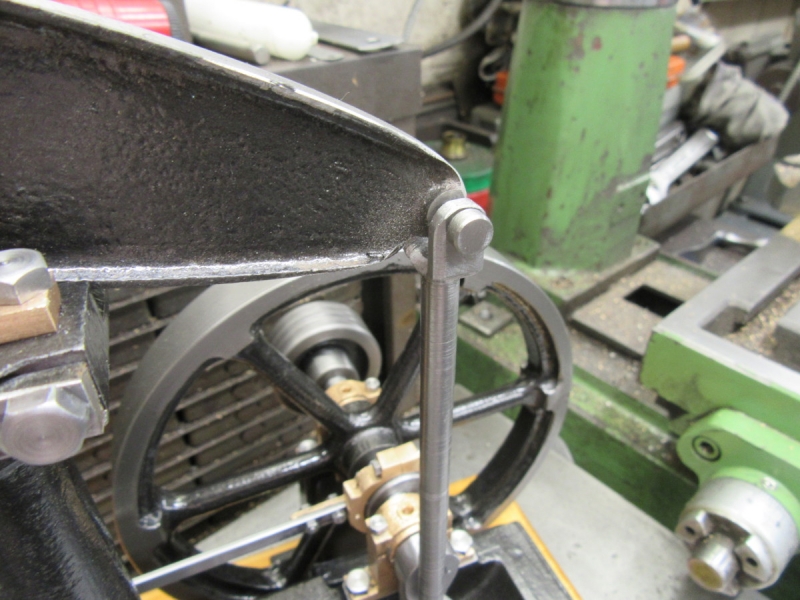
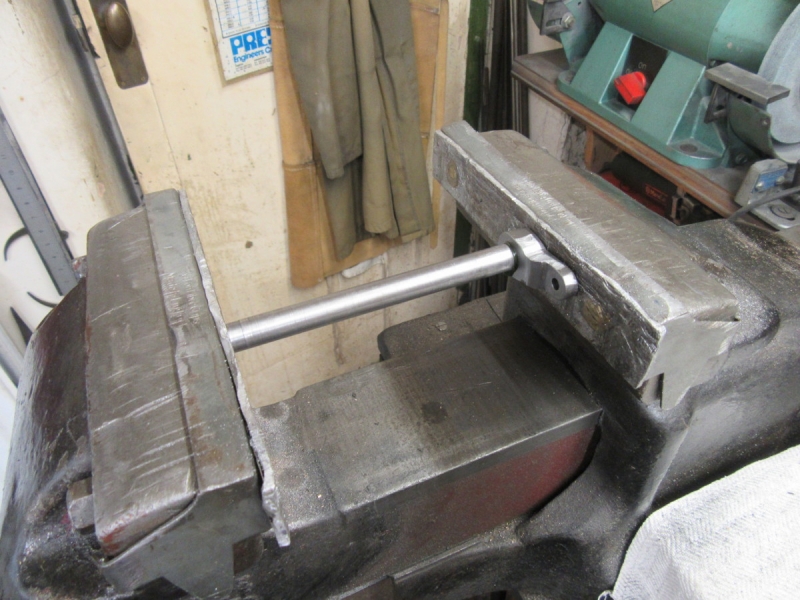
Here we are, for better or for worse, we have a fork on the end of the rod. If you thought I was pushing it a bit when I said my design was better when I made the mistake, look at the way the fork is now central on the rod and hence the eccentric. This is an improvement on the original design which was offset.

Image

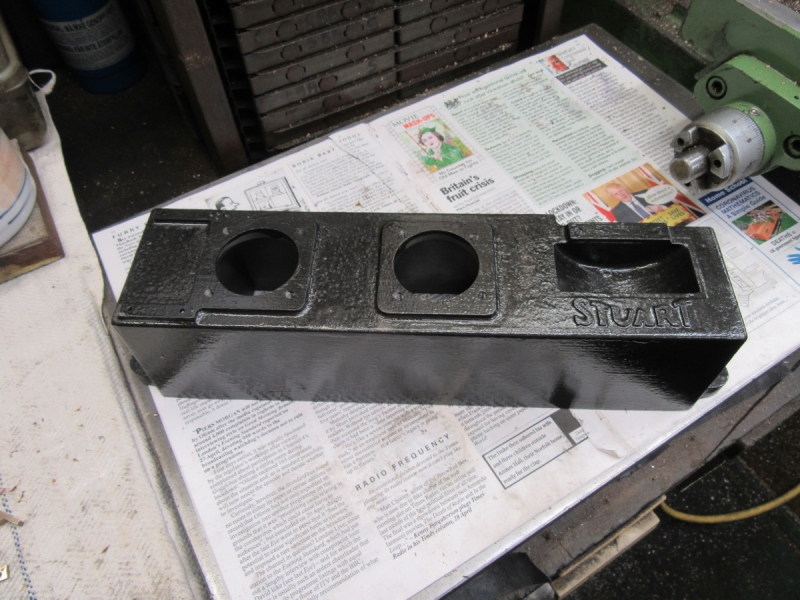
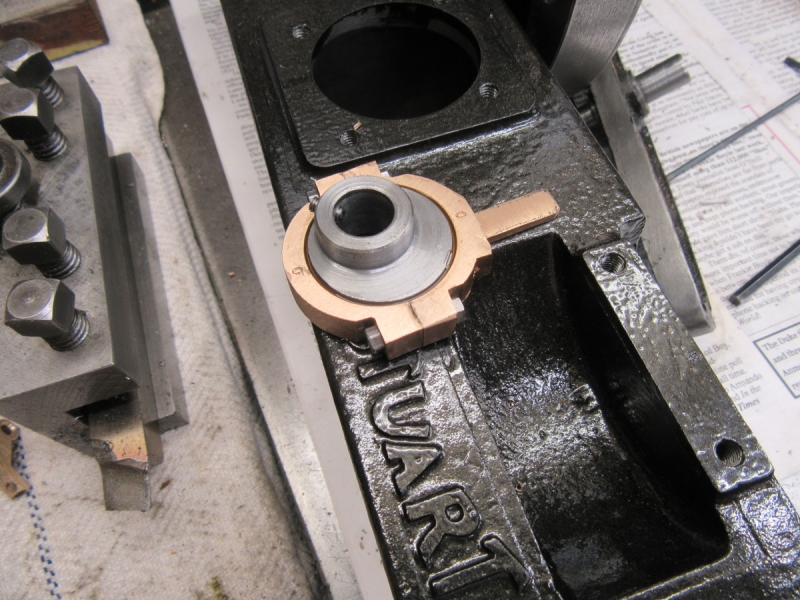
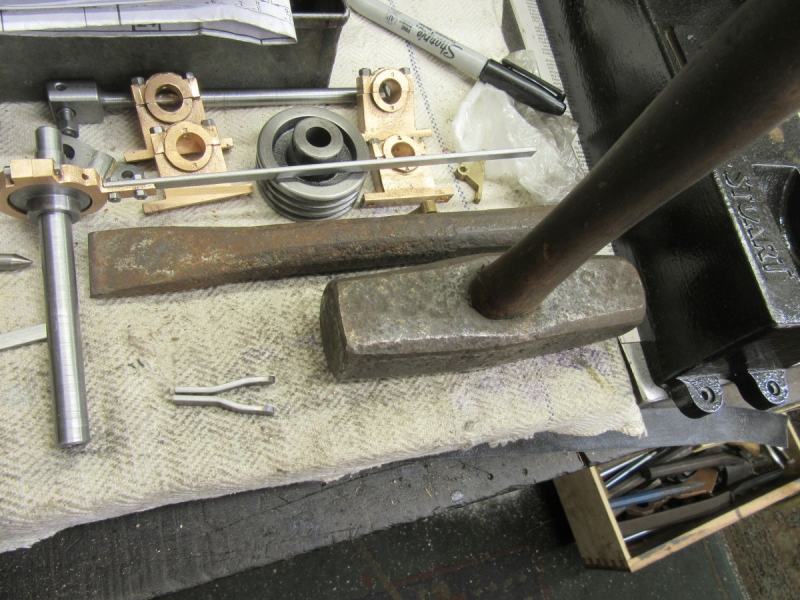
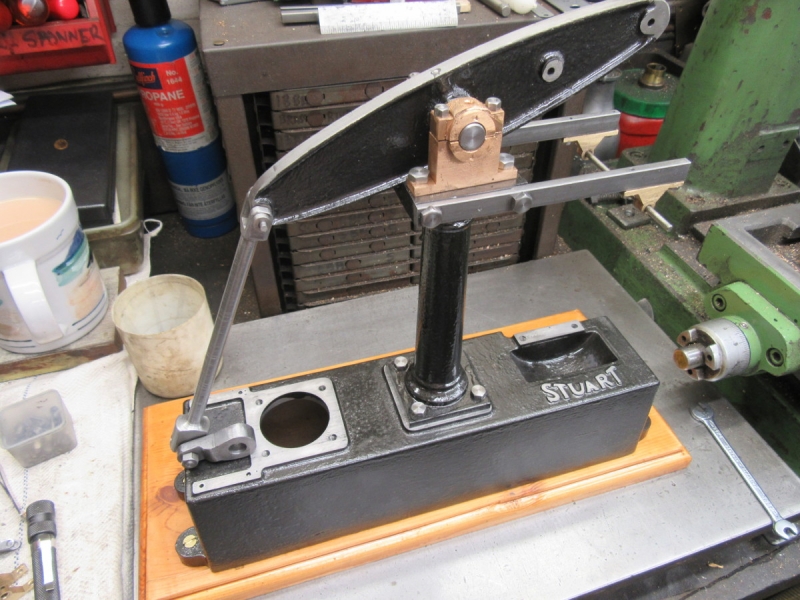
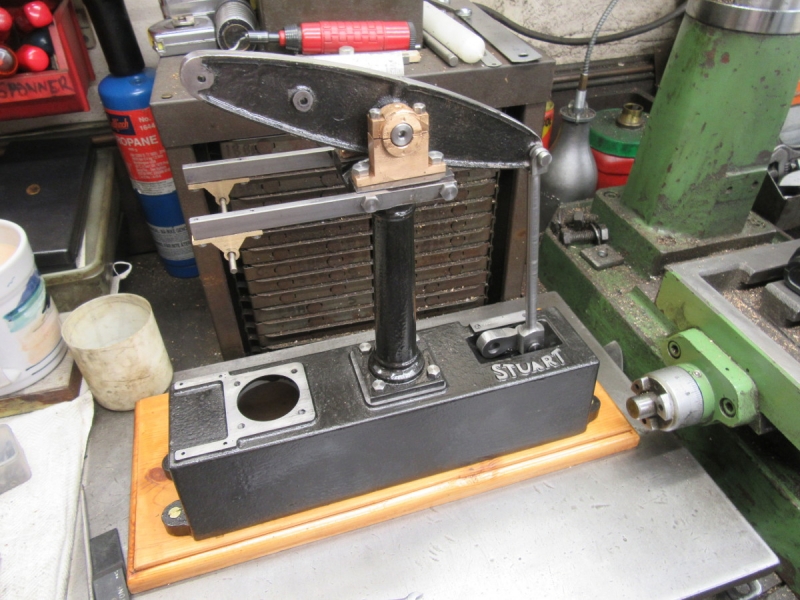
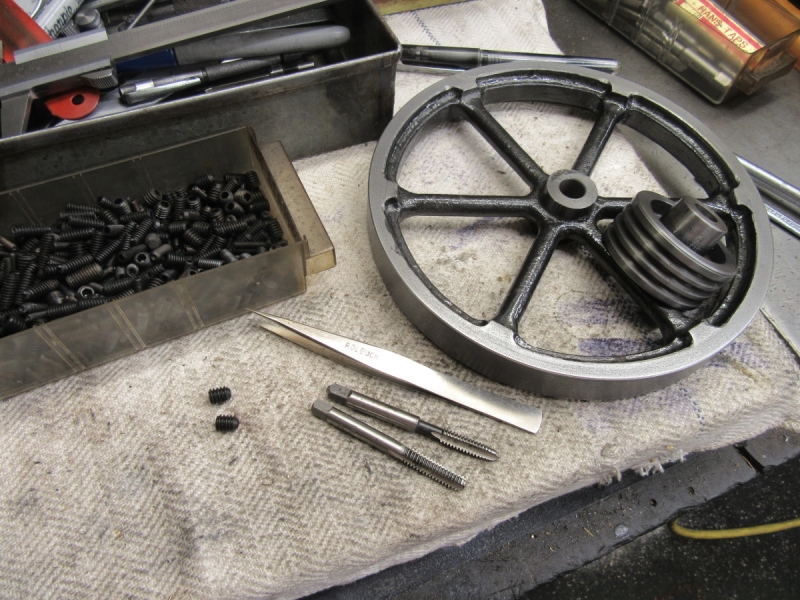
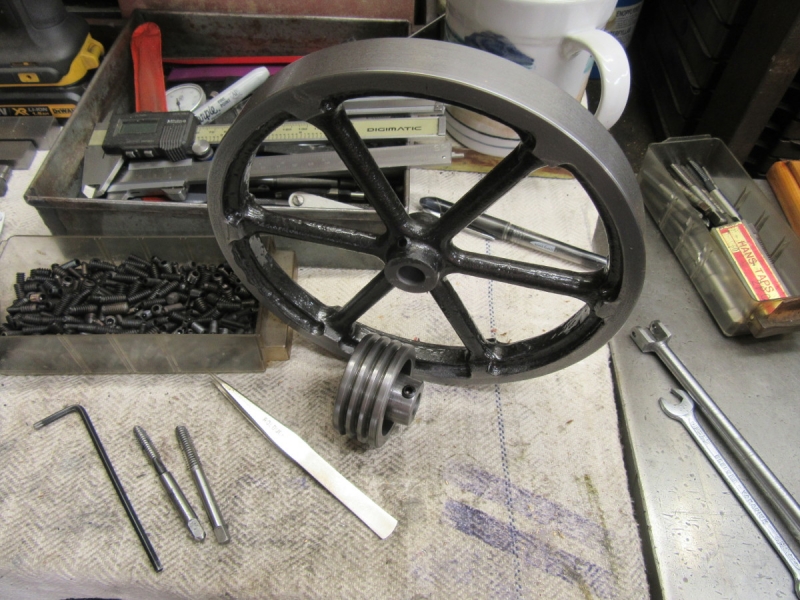
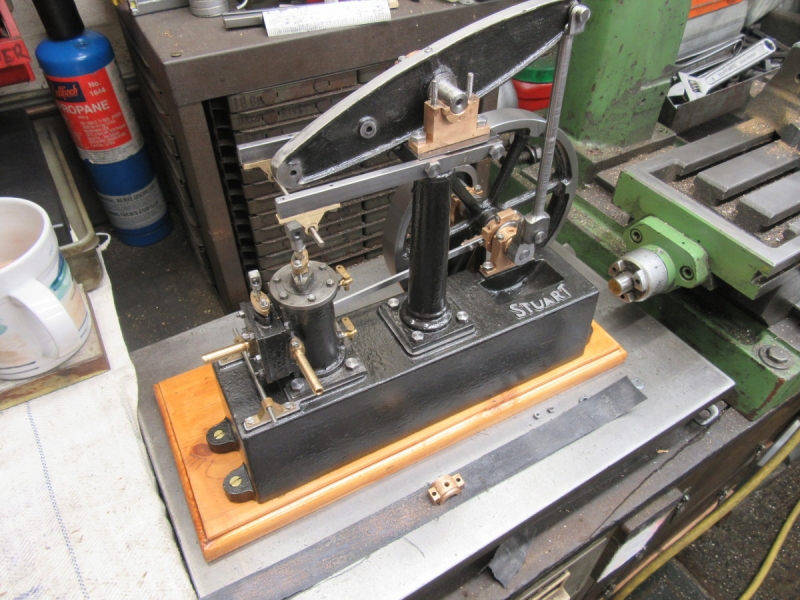
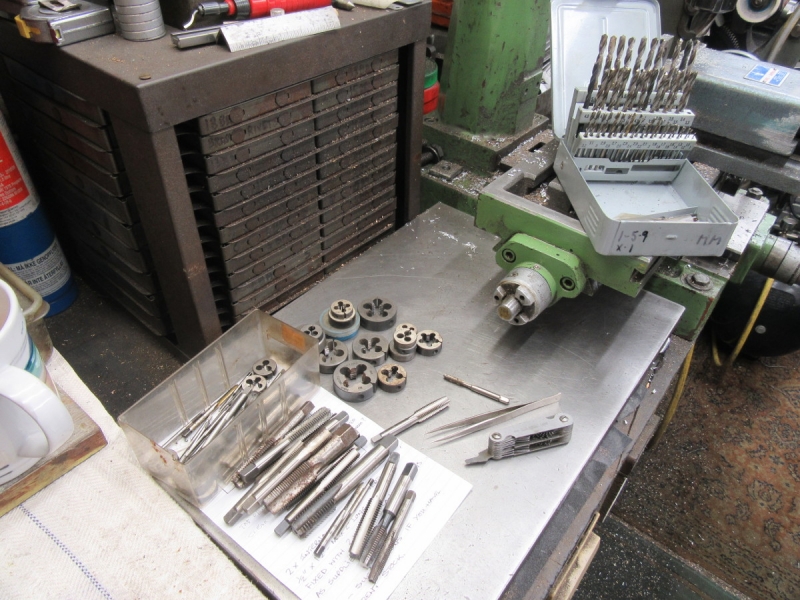
Then a complete change. I put tackle away and cleaned up a bit and cleared the decks for the next move. I used a scraper and then a file to clean the paint off the bearing surfaces where attachments have to be made and cleaned the Stuart logo up as well.

Image

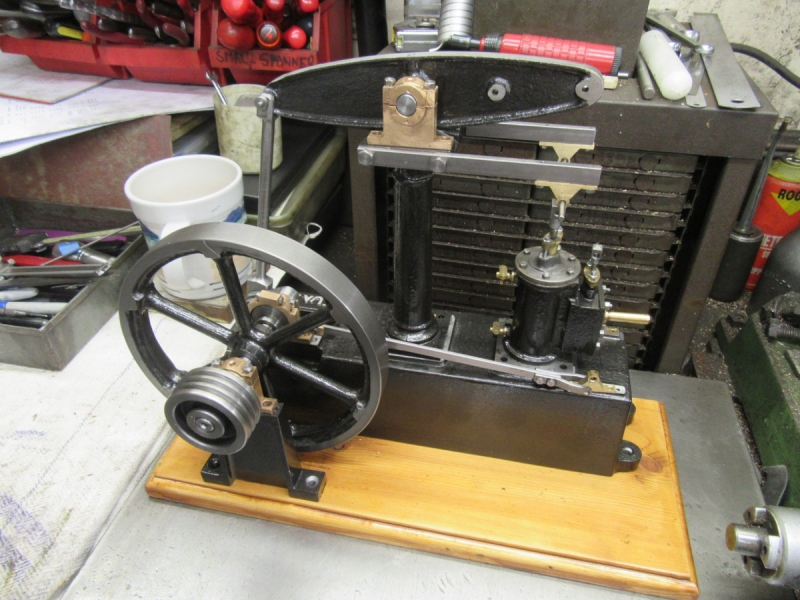
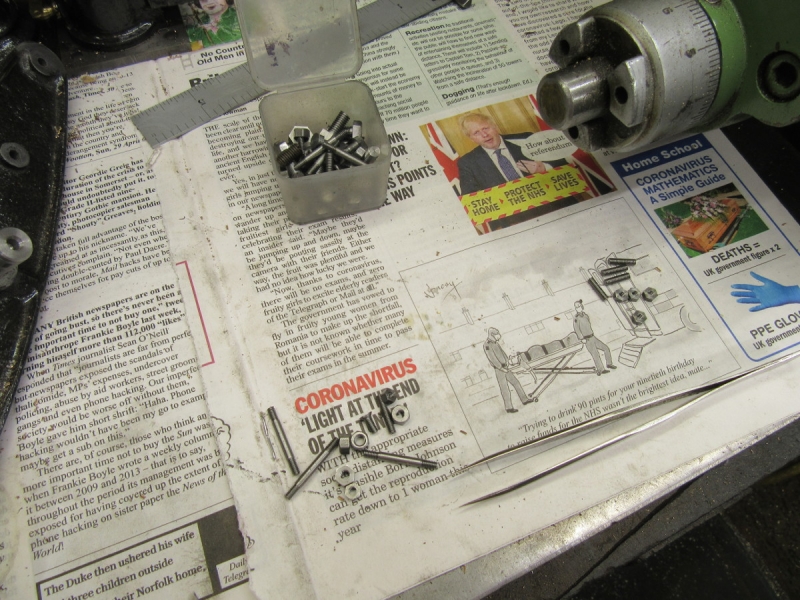
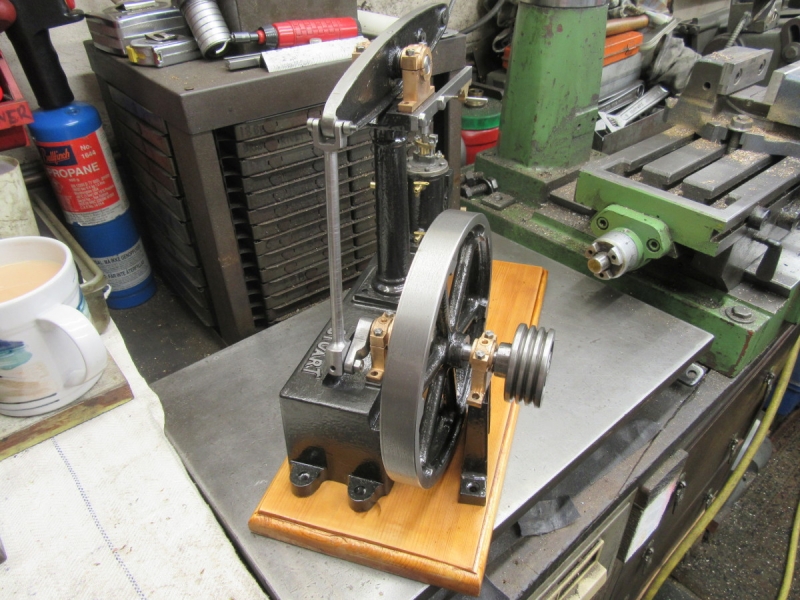
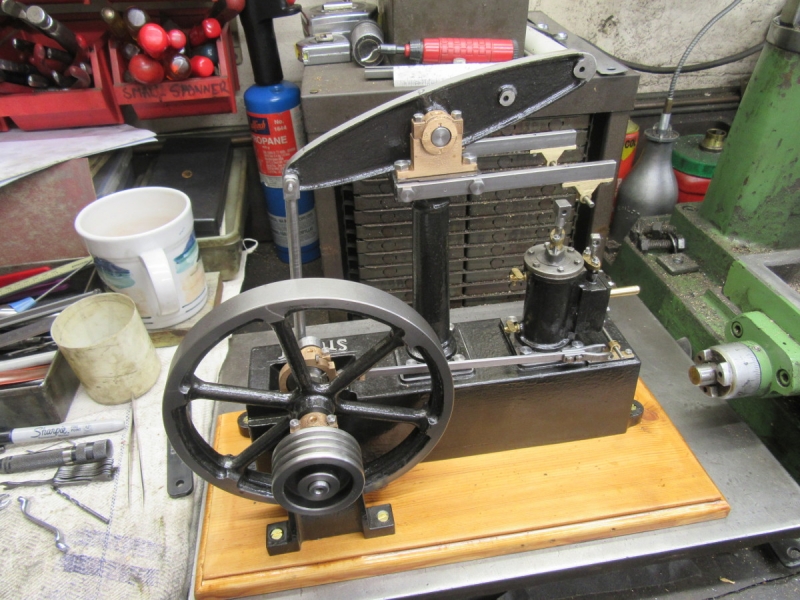
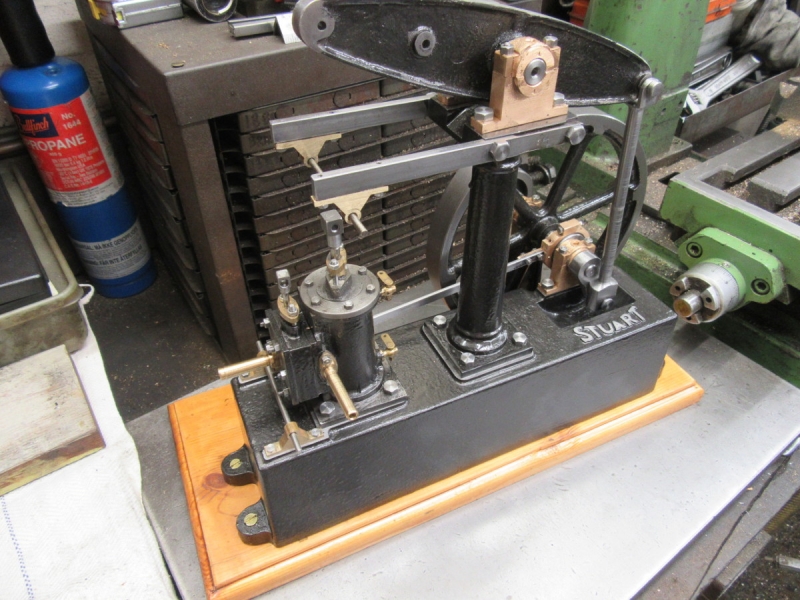
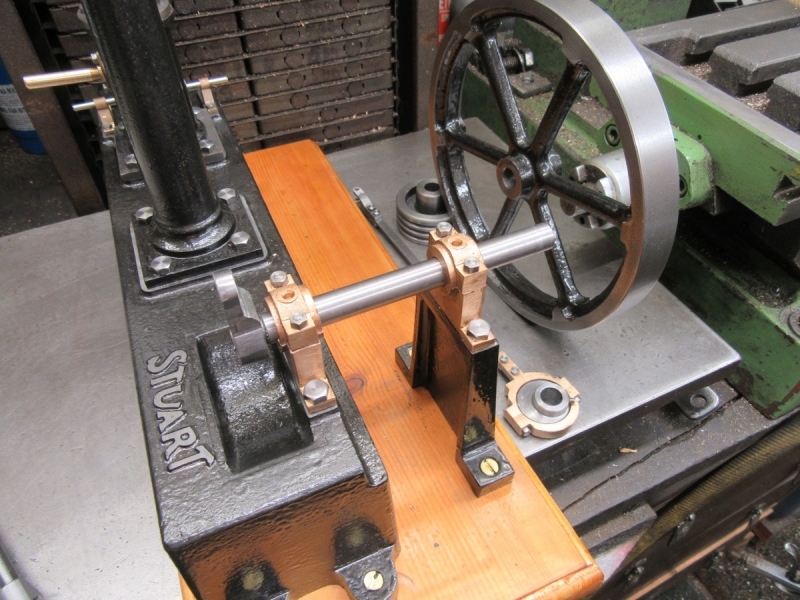
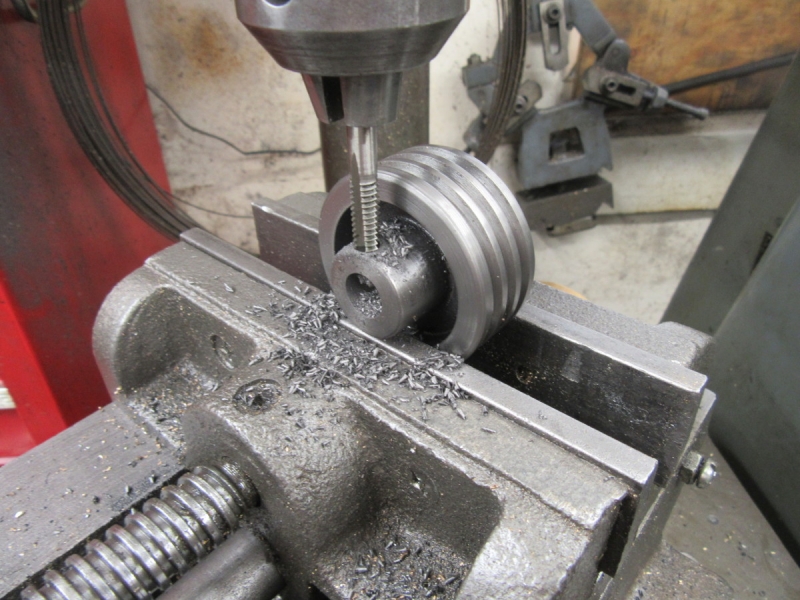
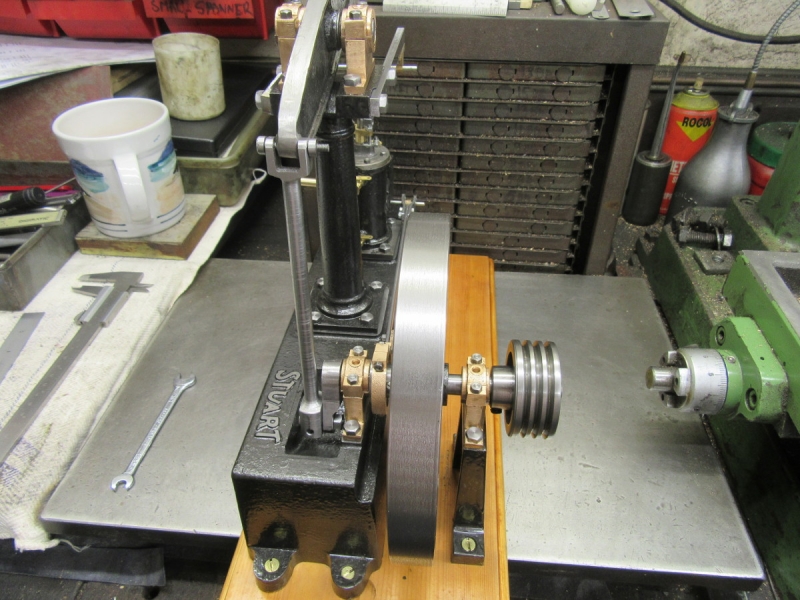
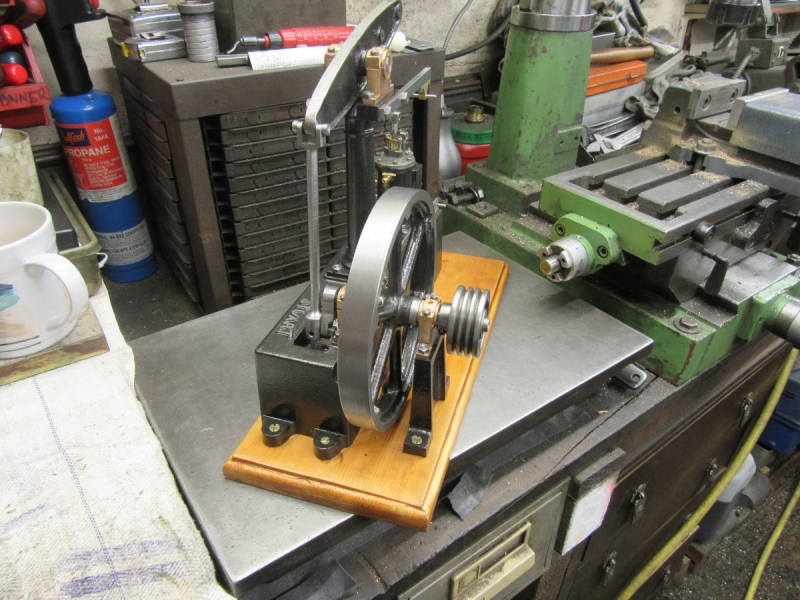
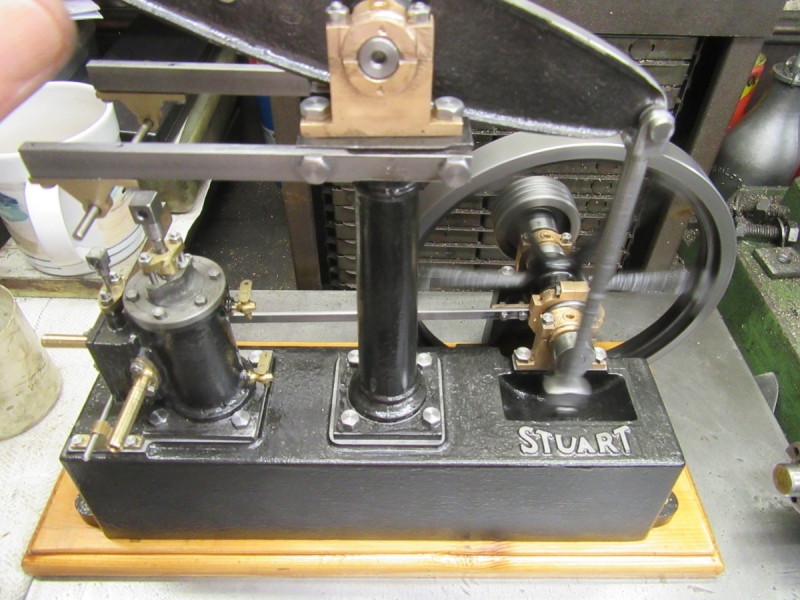
Then a bit of fun (but with a serious intent), I made a quick build of all the parts so I could make sure I had got everything right. One thing I realised is that I have yet to put a grub screw in the flywheel.
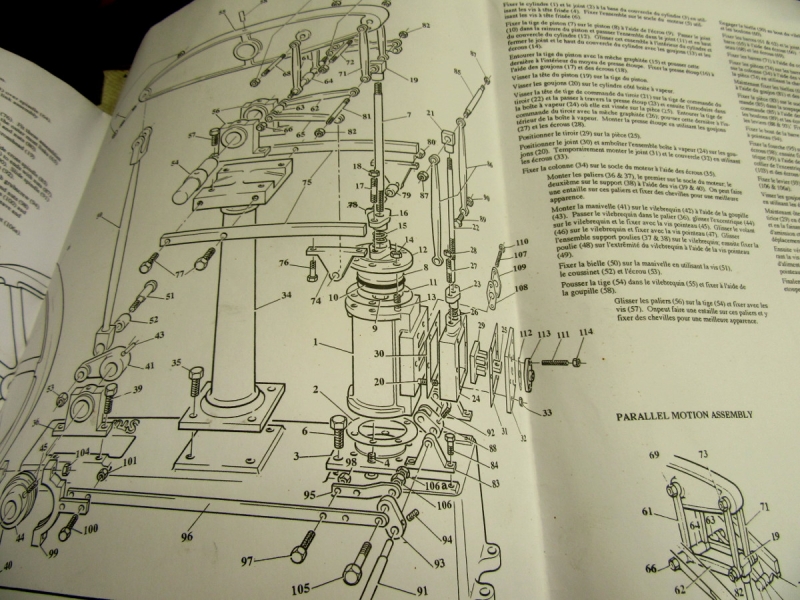
But this is the first time we can get an impression of what it will look like. I like it. Now I have to do a build and some proper fitting and then into the ticklish job of the parallel motion and the valve gear. We'll get there in the end....
Stanley Challenger Graham
Stanley's View
scg1936 at talktalk.net

"Beware of certitude" (Jimmy Reid)
The floggings will continue until morale improves!
User avatar
chinatyke
Donor
Posts: 3831
Joined: 21 Apr 2012, 13:14
Location: Pingguo, Guangxi, China

Re: Shed Matters 3

Post by chinatyke »

Looks good. Thanks for the preview! Looks to have shrunk now it is all together.
User avatar
Stanley
Global Moderator
Global Moderator
Posts: 90293
Joined: 23 Jan 2012, 12:01
Location: Barnoldswick. Nearer to Heaven than Gloria.

Re: Shed Matters 3

Post by Stanley »

I noticed that as well China. It's a nice size.....
Stanley Challenger Graham
Stanley's View
scg1936 at talktalk.net

"Beware of certitude" (Jimmy Reid)
The floggings will continue until morale improves!
User avatar
Stanley
Global Moderator
Global Moderator
Posts: 90293
Joined: 23 Jan 2012, 12:01
Location: Barnoldswick. Nearer to Heaven than Gloria.

Re: Shed Matters 3

Post by Stanley »

Image

Before I start the serious build I have to decide on the position of the base on its board so the first job this morning, and the reason for the loose build was to get a clear picture, adjust the positions and mark for my holding down screws. I'm going to fasten it down with countersunk heat brass screws. No point in trying to make it look as though it's bolted down when anyone looking at it can see that it isn't. That's my story and I'm sticking to it! (It's easier to do as well)

Image

The base is fastened to the board and the next move was bolt the column down. This was today's 'Oh Shit' moment. Can you see the mistake? The entablature is on the wrong side. The base of the column is fine and to turn it round bodily would mean serious modification to the base so I swapped the entablature round instead. That meant a lot of refitting and wasn't simple. Deep breath and get on with it Stanley!

Image

A while later and it looks better! Then I got stuck in with the cylinder, the bearings and positioning the outrigger and fastening it down.

Image

Image

Here's where we are after two and half hours of honest endeavour. Lots still left to do and I have identified several small jobs that need doing before I go any further with fastening the crankshaft and its components after which I think I can start on the parallel motion and valve gear. Note that I have checked the fit of the shafts in the entablature bearings and the two small bearings on the base that the valve gear runs on.
A good morning and a significant step forwards. I am a happy bunny again.
Stanley Challenger Graham
Stanley's View
scg1936 at talktalk.net

"Beware of certitude" (Jimmy Reid)
The floggings will continue until morale improves!
User avatar
Stanley
Global Moderator
Global Moderator
Posts: 90293
Joined: 23 Jan 2012, 12:01
Location: Barnoldswick. Nearer to Heaven than Gloria.

Re: Shed Matters 3

Post by Stanley »

I've had two and a half hours in the shed interrupted at one point by a 20 minute break to go to the Co-op for milk.

Image

This morning was always going to be about small fitting improvements. Nothing spectacular but all important. This first pic is of one such adjustment. Something was fouling and interfering with a full rotation of the crankshaft and I identified it as a fault in the clevis at the con rod end of the beam. So I've ground some metal out of the clevis and some off the crank. It's free now.

Image

Image

Image

Image

Next job was the crank. The drawings suggest a set screw but no crank ever had one of them. I want to press it on. The shaft was a good fit in the crank but too free so I Lightly knurled the end of it, Pressed it in with Shaft Fit Loctite and mounted it back in the bearings. No way that will ever come loose.

Image

Next I had a look at how the eccentric, the flywheel and the pulley are fastened to the shaft. I can't do anything about the eccentric as there is limited room and I have to use the puny MS set screw with a slotted head. The flywheel and the pulley are different, there's room to use a proper Unbrako grub screw, so I drilled and tapped them and installed proper grub screws.

Image

Image

Image

The dedicated tap and die set was one of my better buys when I came across it. You can see how useful it was doing the flywheel where the tapping had to be on an angle.

Image

Knocking off time, I am ready to assemble the crankshaft etc. I did a tidy up and put tackle away and called it a good morning!
Stanley Challenger Graham
Stanley's View
scg1936 at talktalk.net

"Beware of certitude" (Jimmy Reid)
The floggings will continue until morale improves!
User avatar
Stanley
Global Moderator
Global Moderator
Posts: 90293
Joined: 23 Jan 2012, 12:01
Location: Barnoldswick. Nearer to Heaven than Gloria.

Re: Shed Matters 3

Post by Stanley »

Image

The design committee was busy during the night and this morning pointed out that the design had a shortcoming in that the way end float was limited in the crankshaft , in their design it relies on the eccentric and the crank and there was a better way of doing it. This was to introduce a collar on the shaft that. together with the pulley, would locate the crankshaft and prevent any end float. Further, it used the outrigger as an anchor point and it was much better. So that's today's task. What we have here is a loose build to check the concept and get the measurements.

Image

So, into the scrap box for a piece of mild steel and get stuck in.

Image

Then part it off, we have a collar.

Image

Then decide on a grub screw, 1/8" 40tpi Whitworth, then find the tap and the tapping drill.

Image

Image

Drill and start tapping under the pillar drill and then finish off the tapping by hand. Note that once again, no gloves they get in the way with fiddly little things like 1/8" grub screws!

Image

This was knocking off time. I finished the collar off ready for fitting and fitted all the elements of the shaft and tightened all the grub screws except for the one on the eccentric. This end of the engine is built and doesn't need any more attention. I oiled the bearings and spun the flywheel by hand. Everything is tight but runs freely and smoothly and most of all, the flywheel spins perfectly true on the shaft. I'm ready now for the valve gear! Nice productive morning.
Stanley Challenger Graham
Stanley's View
scg1936 at talktalk.net

"Beware of certitude" (Jimmy Reid)
The floggings will continue until morale improves!
User avatar
Stanley
Global Moderator
Global Moderator
Posts: 90293
Joined: 23 Jan 2012, 12:01
Location: Barnoldswick. Nearer to Heaven than Gloria.

Re: Shed Matters 3

Post by Stanley »

Image

When I spun the flywheel yesterday I noticed that the trunnion bearings for the beam were a bit slack, no problem but I decided to adjust both of them by sanding a bit off the face of the top cap.

Image

Always nice when you have the right spanner for the job.

Image

I gave it a good spin afterwards and caught it in motion. Very free and goes well with no knocks or taps. Very smooth.

Image

Then I had a look at the rabbit, I got the drawing out and studied the exploded diagram. I have to admit that my first impression was 'Oh Shit!'. Then I studied it a bit more and whilst I don't fully understand it yet I know where to start and once I start building it up I am sure all will become clear. (At had better!)
Stanley Challenger Graham
Stanley's View
scg1936 at talktalk.net

"Beware of certitude" (Jimmy Reid)
The floggings will continue until morale improves!
User avatar
plaques
Donor
Posts: 8094
Joined: 23 May 2013, 22:09

Re: Shed Matters 3

Post by plaques »

No problem there Stanley. The parallelogram is probably dimensioned so that the closure effect is equal to the loss caused by he arc of the beam. No design committee required.
User avatar
Stanley
Global Moderator
Global Moderator
Posts: 90293
Joined: 23 Jan 2012, 12:01
Location: Barnoldswick. Nearer to Heaven than Gloria.

Re: Shed Matters 3

Post by Stanley »

What a good job we have clever buggers on the site to reassure us! (NOT!) :biggrin2:
Stanley Challenger Graham
Stanley's View
scg1936 at talktalk.net

"Beware of certitude" (Jimmy Reid)
The floggings will continue until morale improves!
User avatar
Stanley
Global Moderator
Global Moderator
Posts: 90293
Joined: 23 Jan 2012, 12:01
Location: Barnoldswick. Nearer to Heaven than Gloria.

Re: Shed Matters 3

Post by Stanley »

Image

Much of this morning was taken up by cooking but I pushed myself and got in the shed to start making and fitting Ian's heat sinks. On the right you'll see there are two pieces of aluminium, the smaller one is definitely the best candidate but I had to make an executive decision, the heat sinks will be slightly thinner than the 1/2" Ian asked for. It's only a matter of a 3/64" thinner so that's what I am going for.

Image

First job was to get one square end. So under the mill.

Image

That's better!

Image

Then put a slitting saw in the HM and chop it off to length.

Image

I had to go into the mill to cut a piece of steel exactly the same size as the stock so I can have a piece in the opposite end of the vise when I mount the stock. Otherwise you distort the vise.

Image

Here's the set up and the cut in progress to split the stock down the middle.

Image

Knocking off time. We have two rough heat sinks, they now need cleaning up and fitting. Not a bad hour!
Stanley Challenger Graham
Stanley's View
scg1936 at talktalk.net

"Beware of certitude" (Jimmy Reid)
The floggings will continue until morale improves!
User avatar
PanBiker
Site Administrator
Site Administrator
Posts: 16447
Joined: 23 Jan 2012, 13:07
Location: Barnoldswick - In the West Riding of Yorkshire, always was, always will be.

Re: Shed Matters 3

Post by PanBiker »

Excellent Stanley and thanks, we're not going to argue over 3/64ths of an inch. Who's going to notice anyway once they are fitted inside. :smile:
Ian
User avatar
Stanley
Global Moderator
Global Moderator
Posts: 90293
Joined: 23 Jan 2012, 12:01
Location: Barnoldswick. Nearer to Heaven than Gloria.

Re: Shed Matters 3

Post by Stanley »

:good:
Stanley Challenger Graham
Stanley's View
scg1936 at talktalk.net

"Beware of certitude" (Jimmy Reid)
The floggings will continue until morale improves!
User avatar
PanBiker
Site Administrator
Site Administrator
Posts: 16447
Joined: 23 Jan 2012, 13:07
Location: Barnoldswick - In the West Riding of Yorkshire, always was, always will be.

Re: Shed Matters 3

Post by PanBiker »

The screws are 3mm bog standard metric thread if that makes any sense.
Ian
User avatar
Stanley
Global Moderator
Global Moderator
Posts: 90293
Joined: 23 Jan 2012, 12:01
Location: Barnoldswick. Nearer to Heaven than Gloria.

Re: Shed Matters 3

Post by Stanley »

I'll sort them out Ian. We have the technology.
Stanley Challenger Graham
Stanley's View
scg1936 at talktalk.net

"Beware of certitude" (Jimmy Reid)
The floggings will continue until morale improves!
User avatar
Stanley
Global Moderator
Global Moderator
Posts: 90293
Joined: 23 Jan 2012, 12:01
Location: Barnoldswick. Nearer to Heaven than Gloria.

Re: Shed Matters 3

Post by Stanley »

Image

The heat sinks... First job was to clean them up and break all the edges. Not pristine pieces, for one thing one is slightly thicker than the other and one face was only finished by sanding it. None of these things matter as long as they are clean and fit the body, it's their mass that is their attraction!

Image

A trial run to check the fit.

Image

Then a lot of careful measuring and marking.

Image

I've sorted out the size and thread, they are M4, .07mm pitch and actually measure 3.87mm so the clearance drill is 4mm. Under the pillar drill and drill the four holes.

Image

Start the tap up in the hole at the same setting as the drill and then some very careful hand tapping with a starter tap and a bottoming one. Last thing we want is a broken tap at this stage. (WD 40 is a good lubricant for aluminium)

Image

Then prove the concept and make sure the tapped hole is deep enough. We're OK. At this point I'd done almost two hours and I'm getting tired. Better if I leave it now and do the last three and the fitting tomorrow.

Image

Amazing how much tackle you need and what a good job I have a full set of metric taps and dies. I know pics like this must be depressing to some who haven't had fifty years to build up the resources of their shed. Don't let it get you down, Like me you will take every opportunity and eventually finish up with more tackle than me. Be very discriminatory and only add good stuff and it will last you out!
Nice morning, they will be installed and the job finished tomorrow.
Stanley Challenger Graham
Stanley's View
scg1936 at talktalk.net

"Beware of certitude" (Jimmy Reid)
The floggings will continue until morale improves!
User avatar
PanBiker
Site Administrator
Site Administrator
Posts: 16447
Joined: 23 Jan 2012, 13:07
Location: Barnoldswick - In the West Riding of Yorkshire, always was, always will be.

Re: Shed Matters 3

Post by PanBiker »

Good progress Stanley, and looking good, just the job. I thought after I had posted 3mm that they looked nearer 4mm. I used M3's for mounting the resistor. What you get with measuring them with a steel ruler and rack of the eye. :extrawink:
Ian
Post Reply

Return to “Crafts”