SHED MATTERS 2

Locked
User avatar
Stanley
Global Moderator
Global Moderator
Posts: 90298
Joined: 23 Jan 2012, 12:01
Location: Barnoldswick. Nearer to Heaven than Gloria.

Re: SHED MATTERS 2

Post by Stanley »

Image

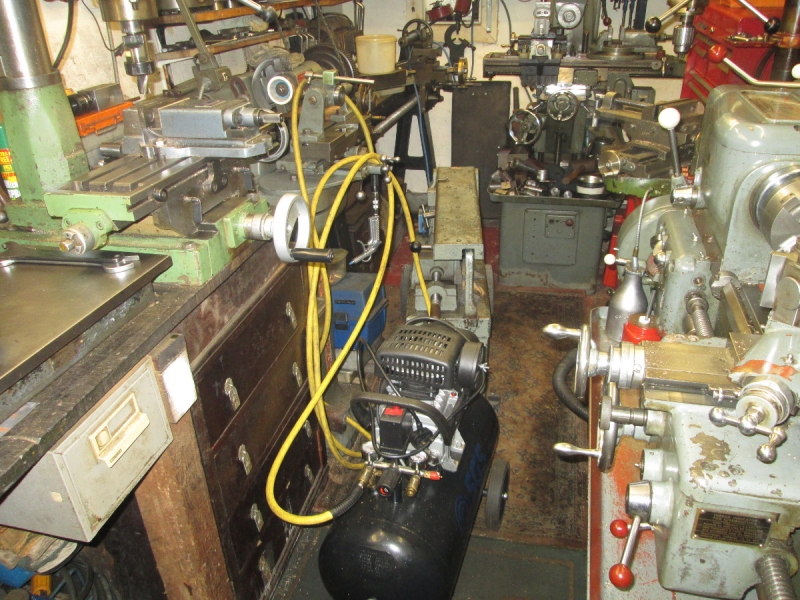
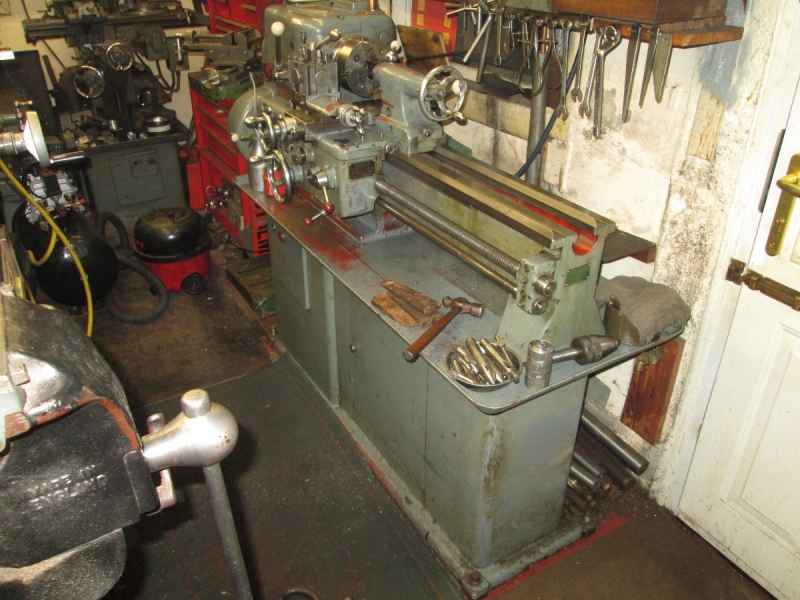
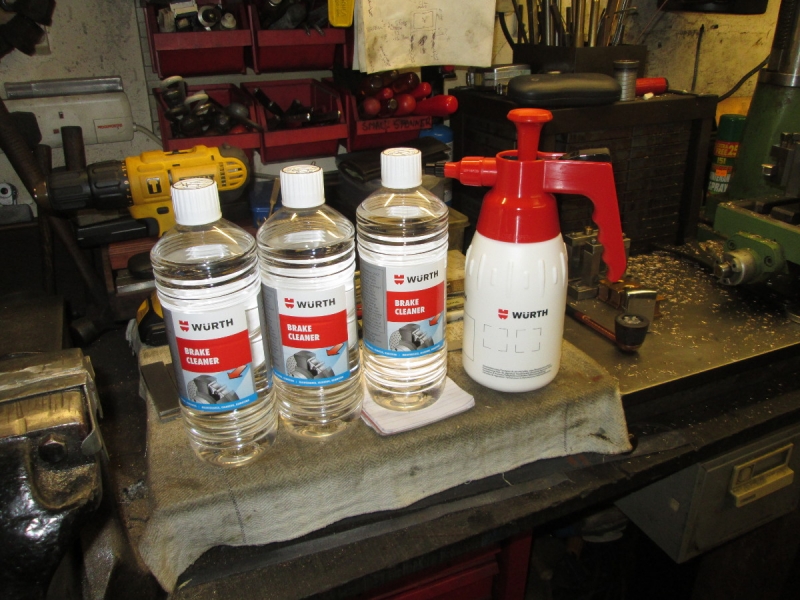
When John gave me a can of brake cleaner last time he visited he opened my eyes, I didn't know it existed and up to then I had been using the cleaner that comes in a dye penetration test kit and I had run out. So I went looking and found this, 3 litres and a sprayer. It's been a while coming from Germany and I had to tweak their tail but it arrived yesterday.

Image

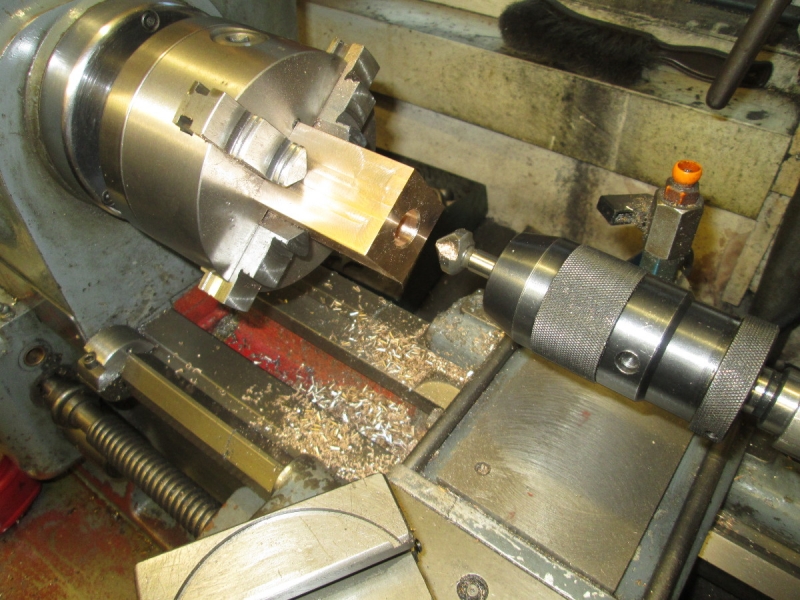
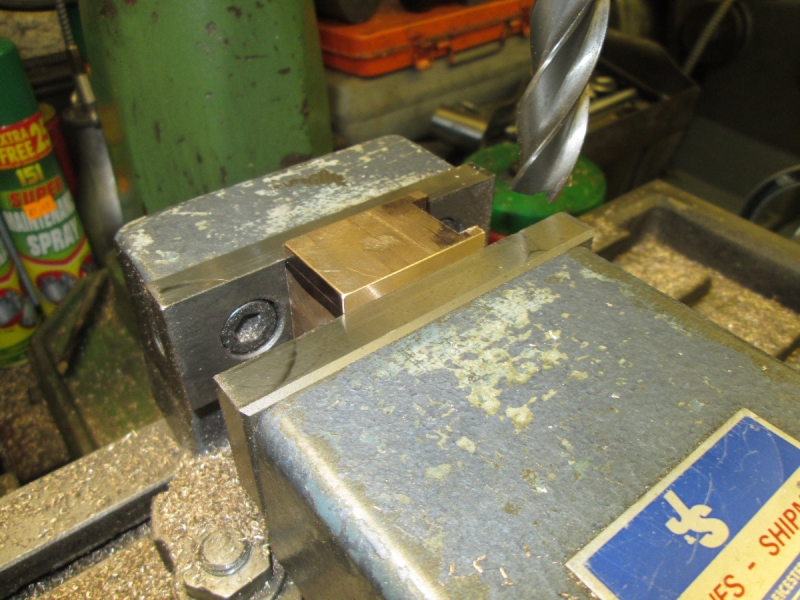
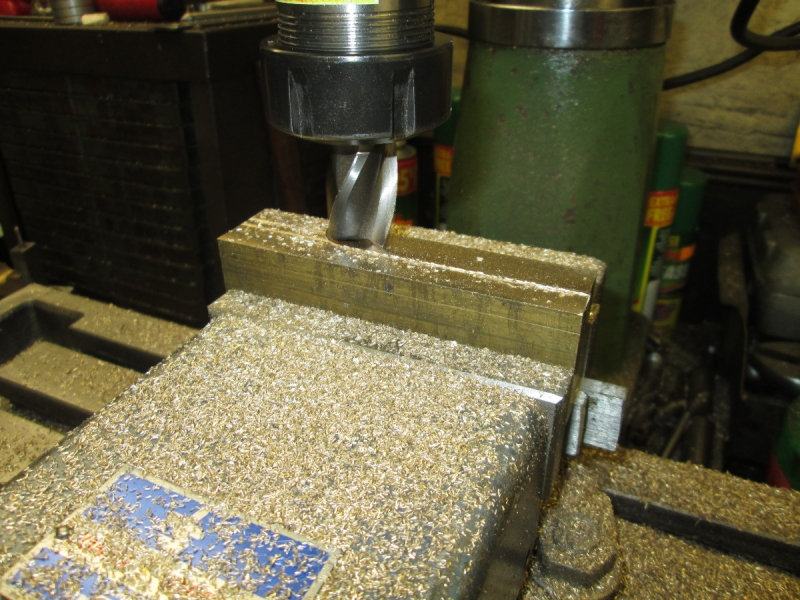
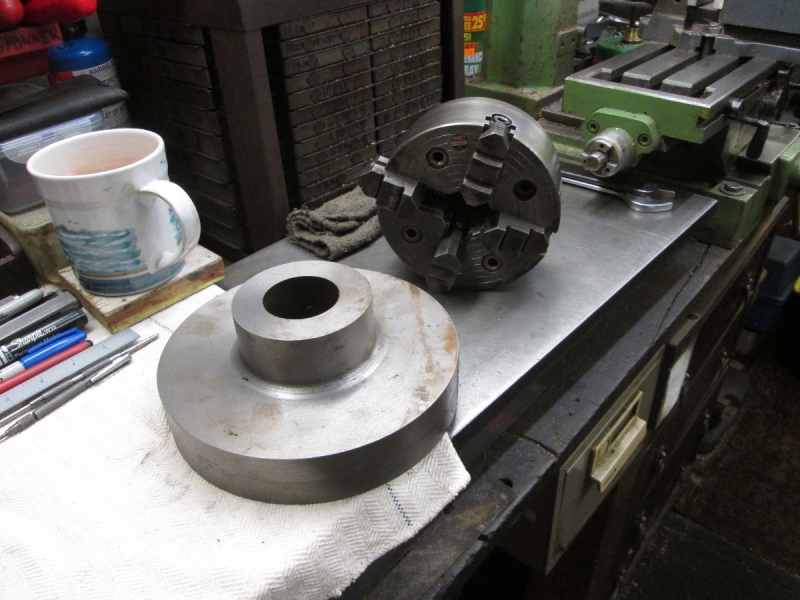
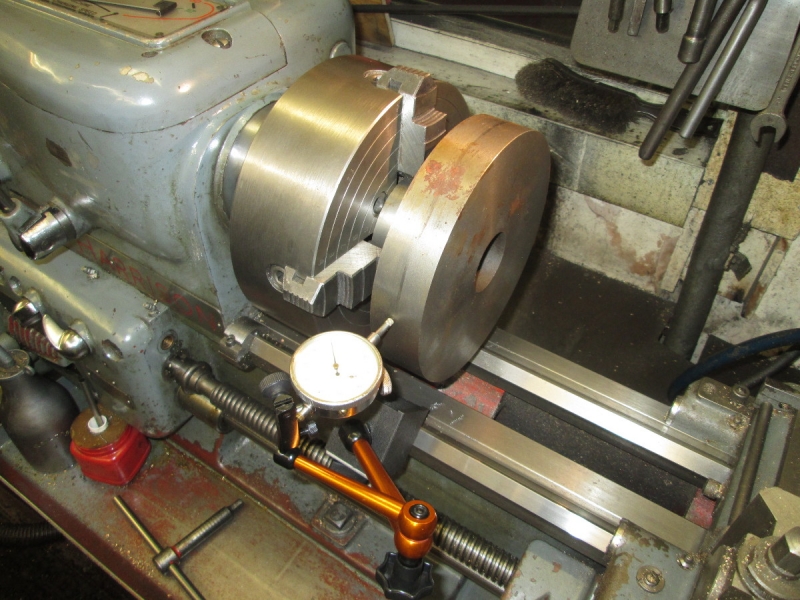
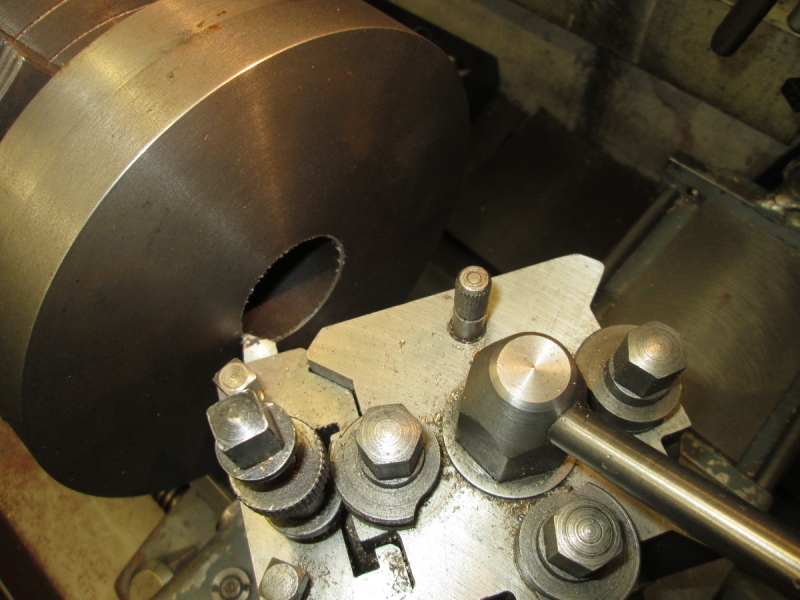
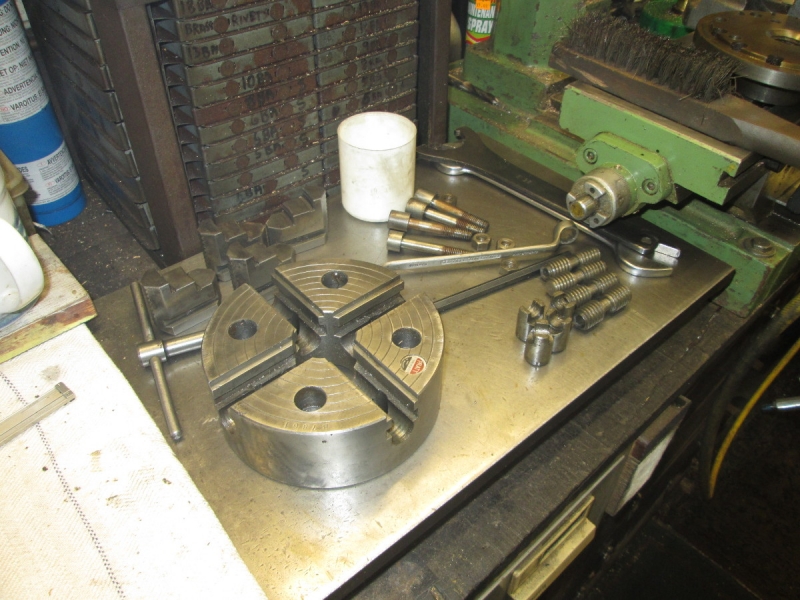
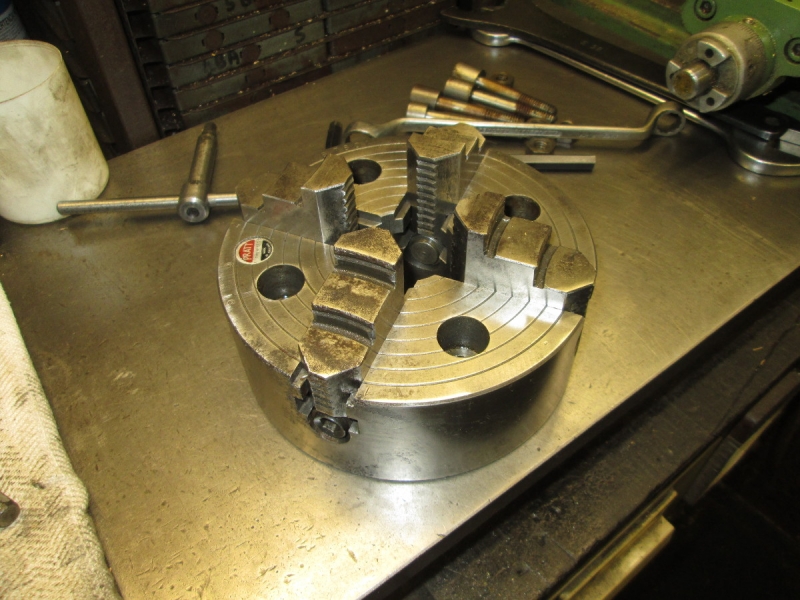
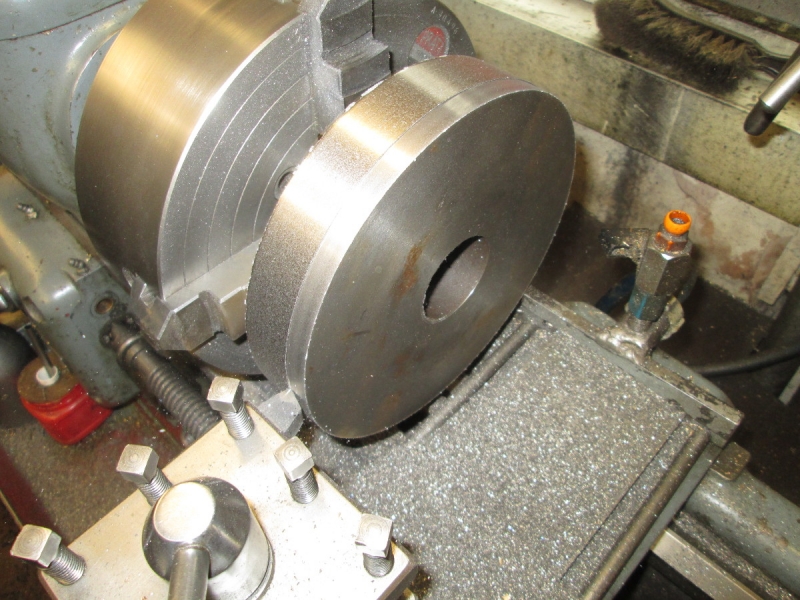
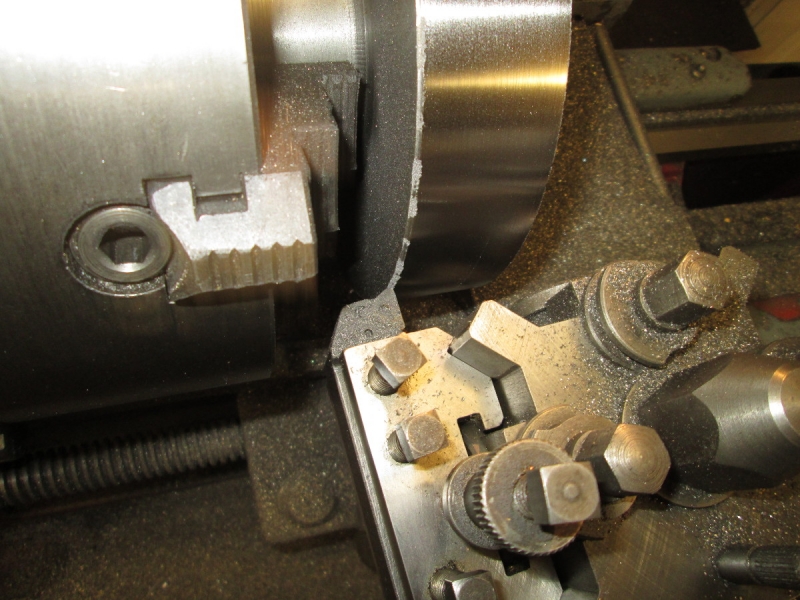
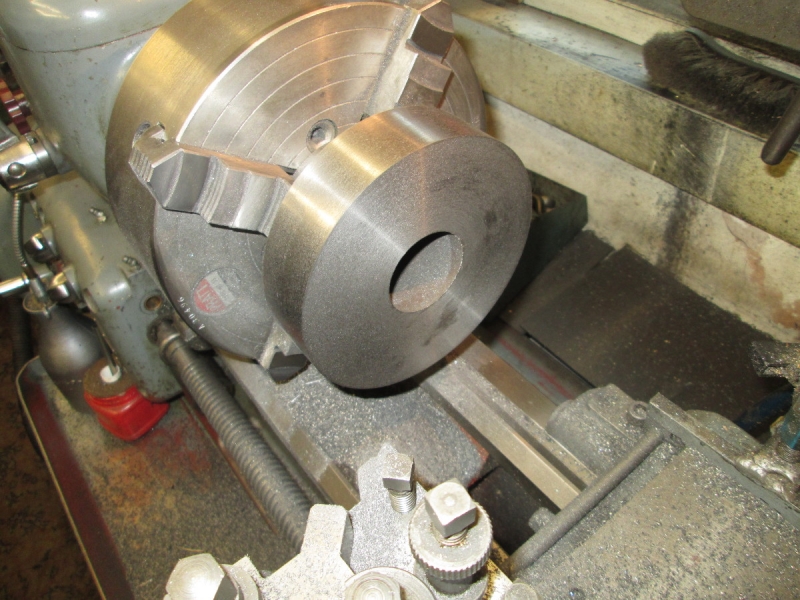
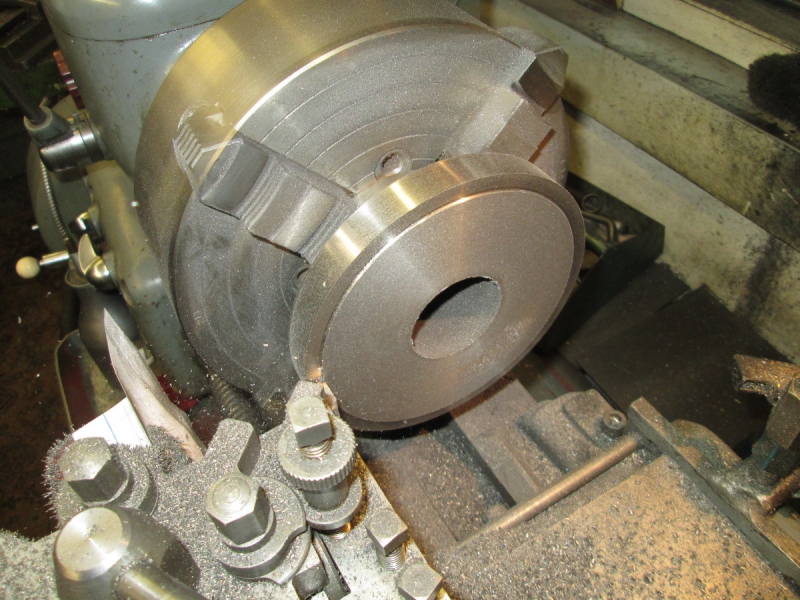
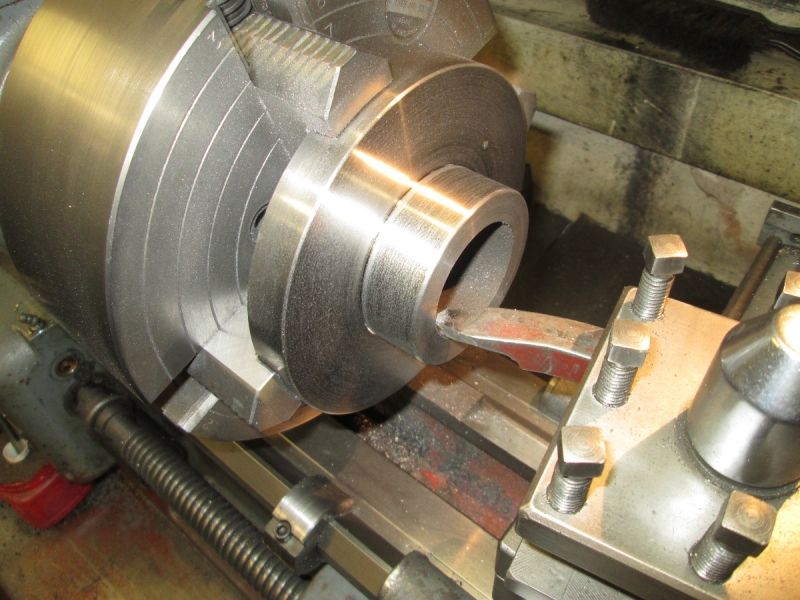
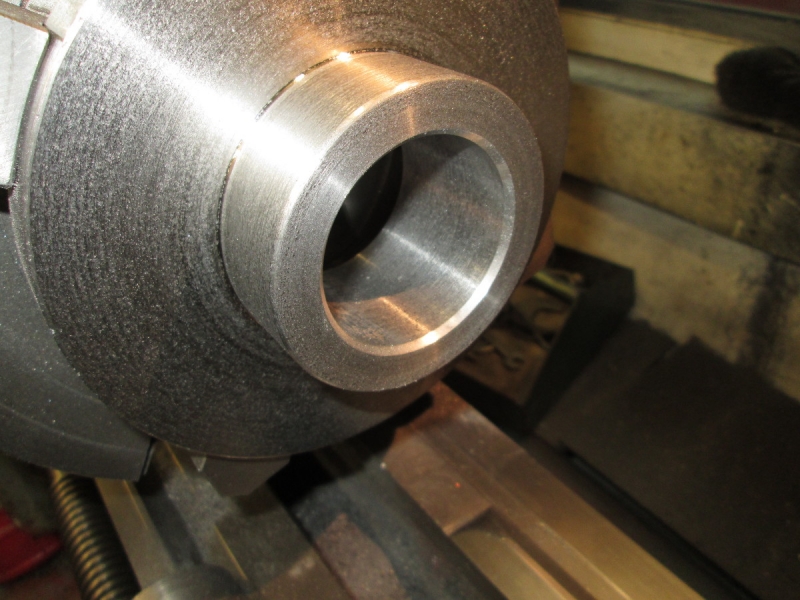
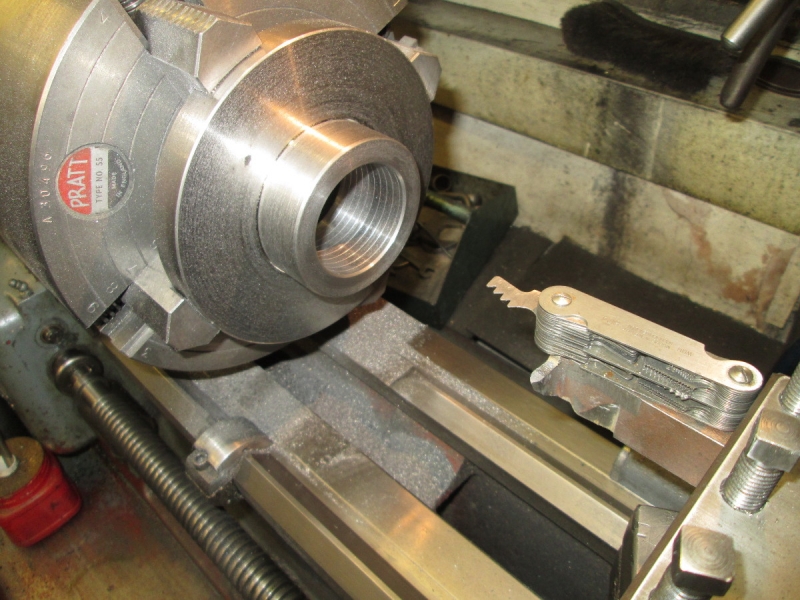
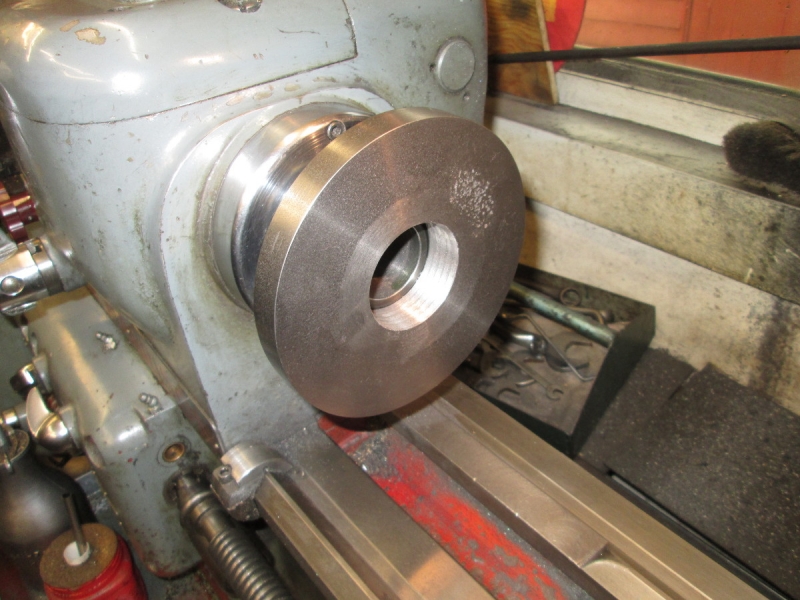
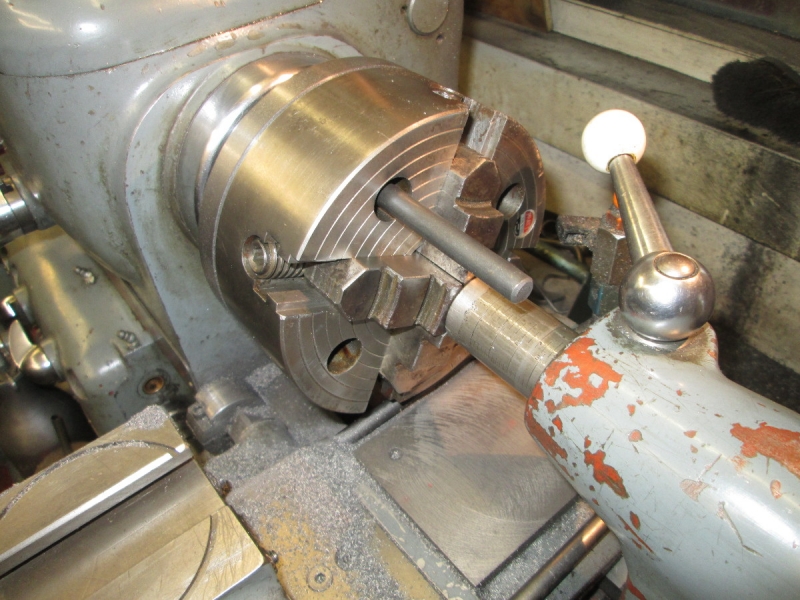
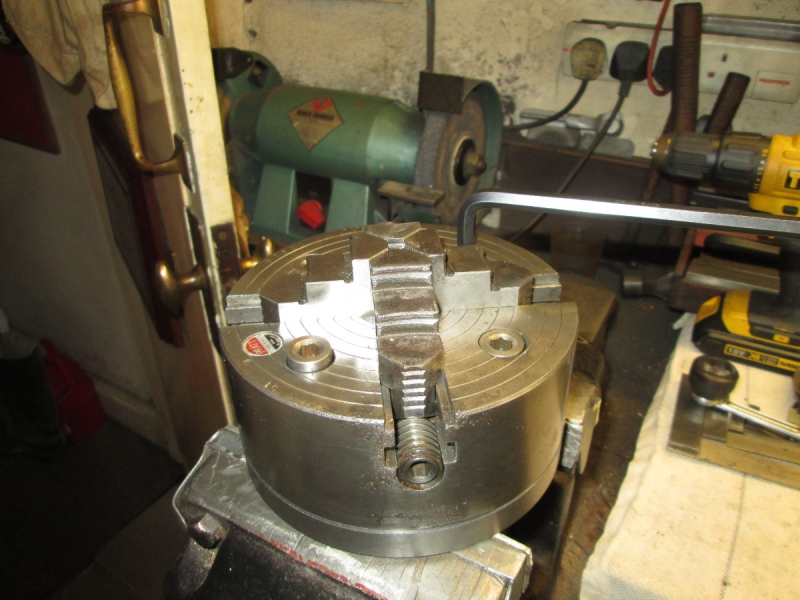
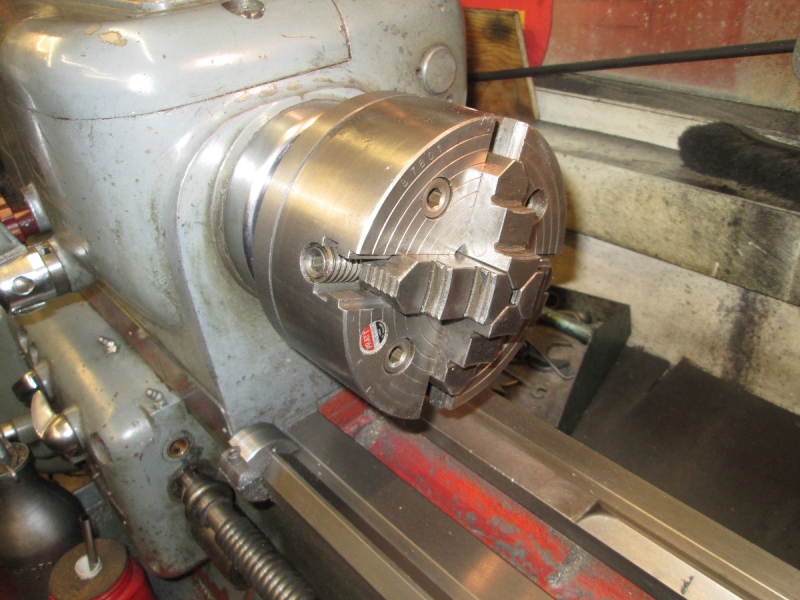
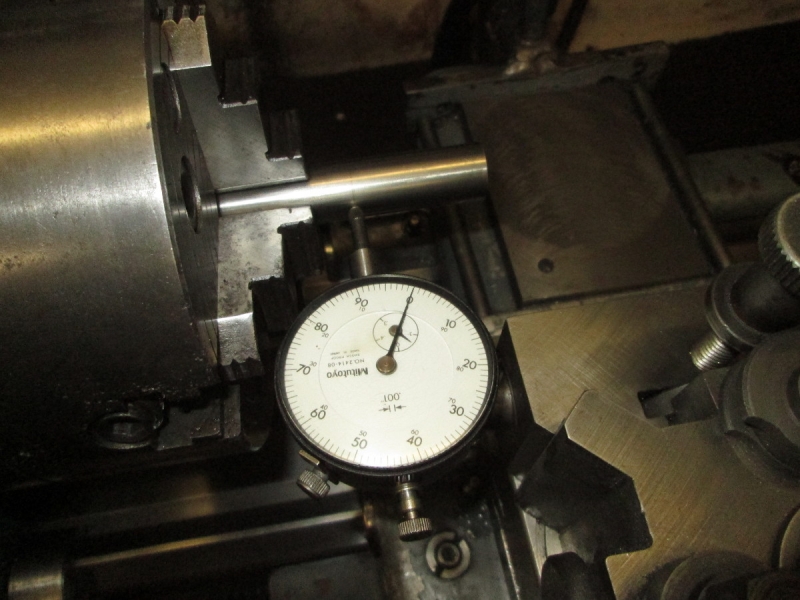
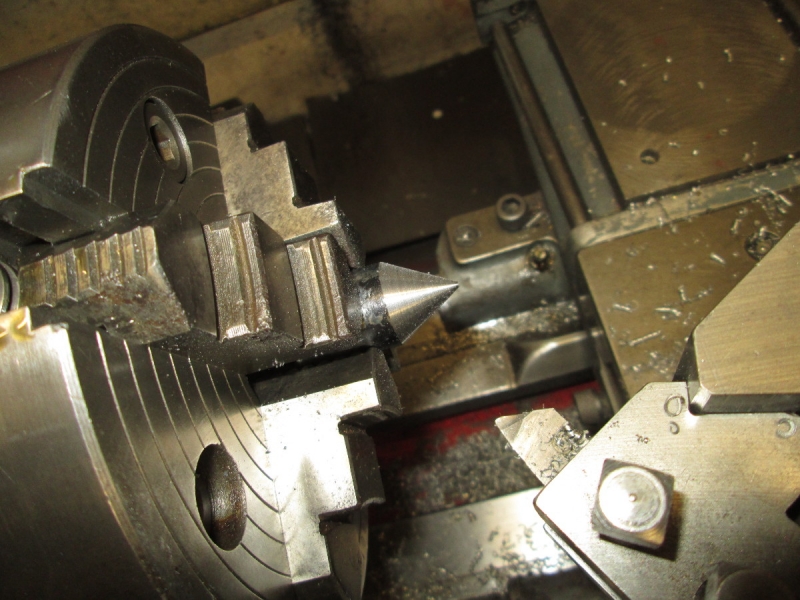
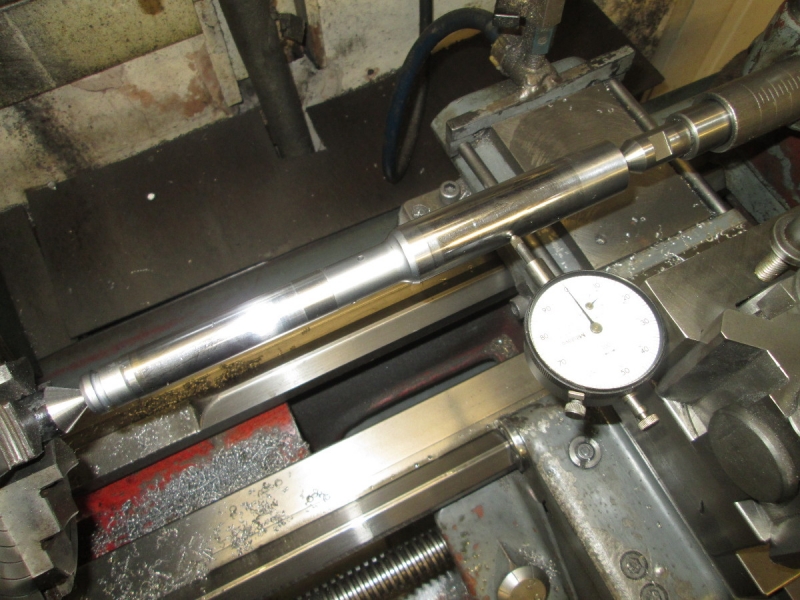
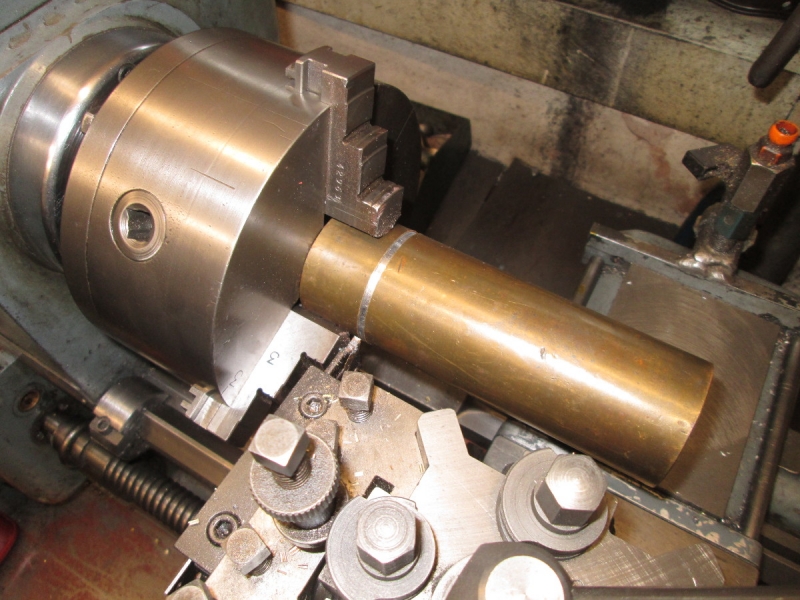
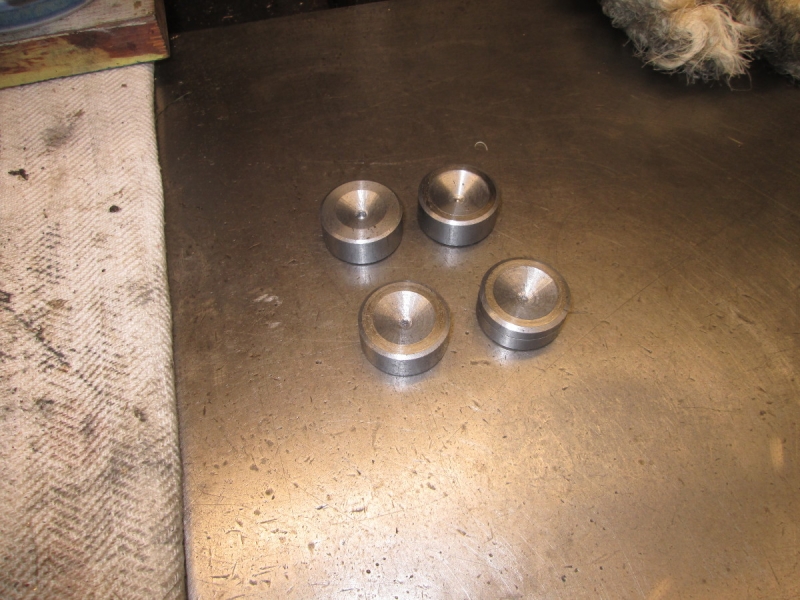
The morning has as usual been busy but I have got all my jobs done. Then on with my bearings. I made sure I had a clean face and countersunk the end of the bore.

Image

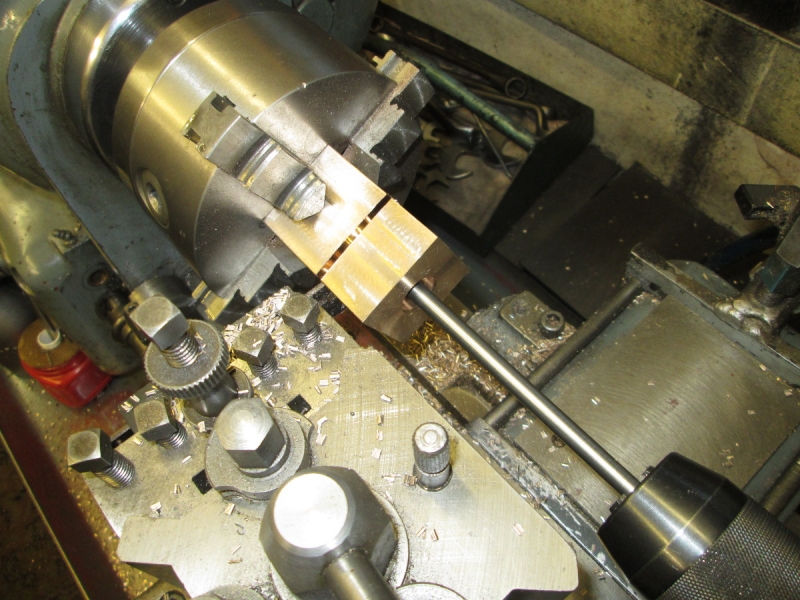
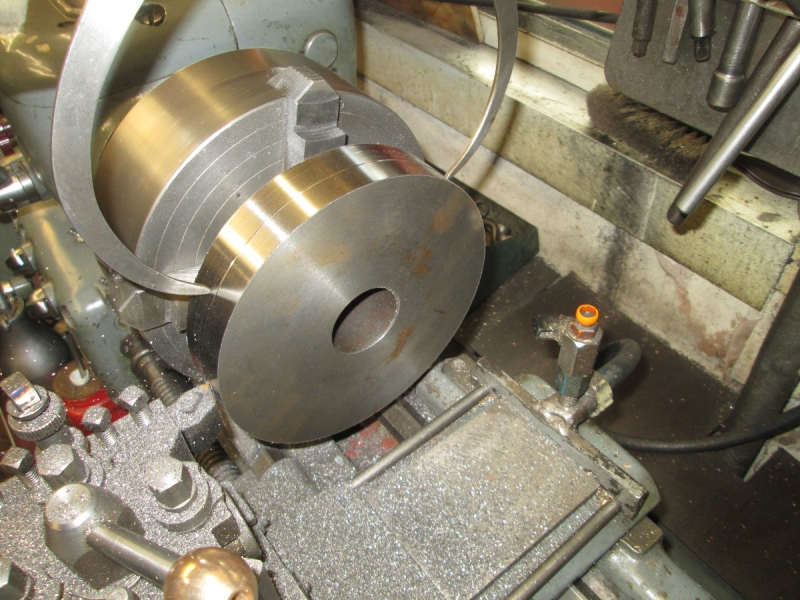
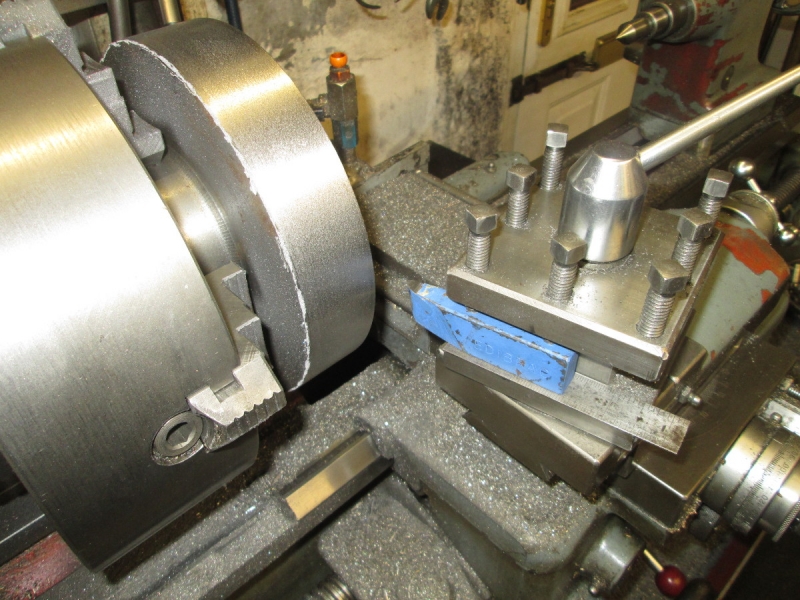
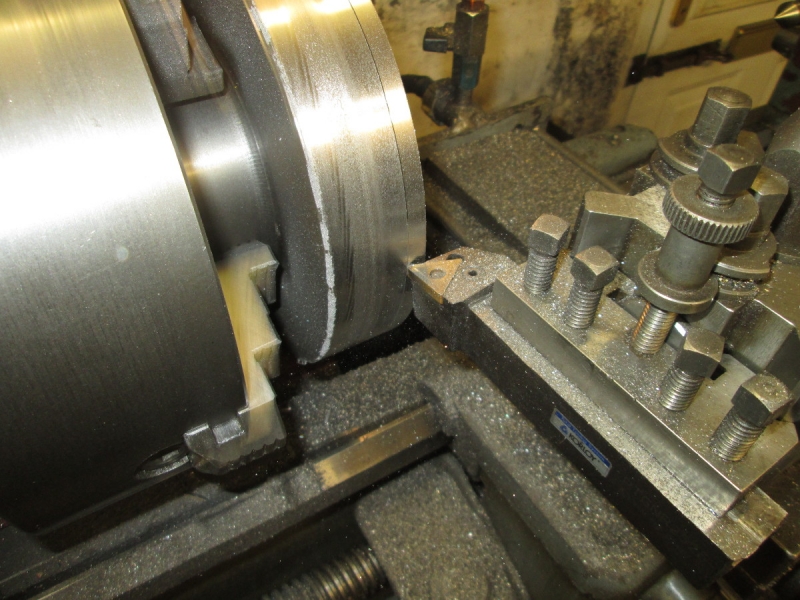
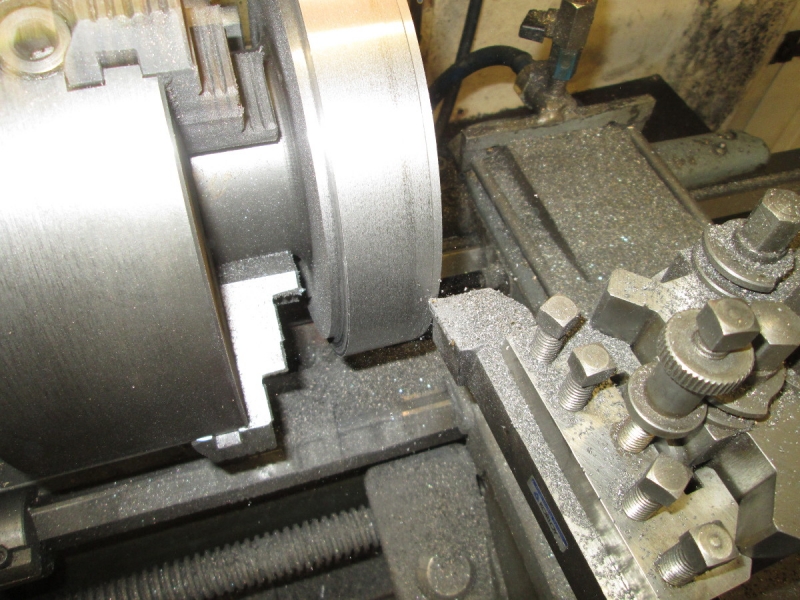
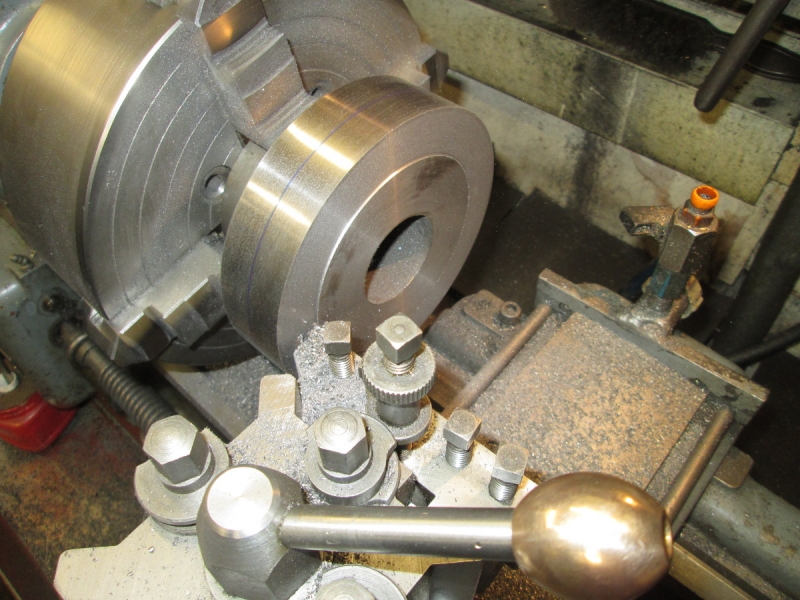
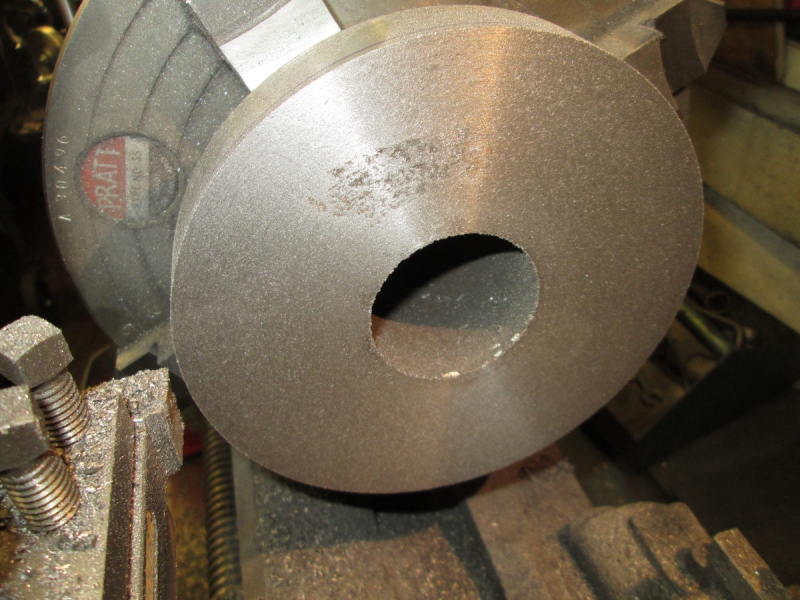
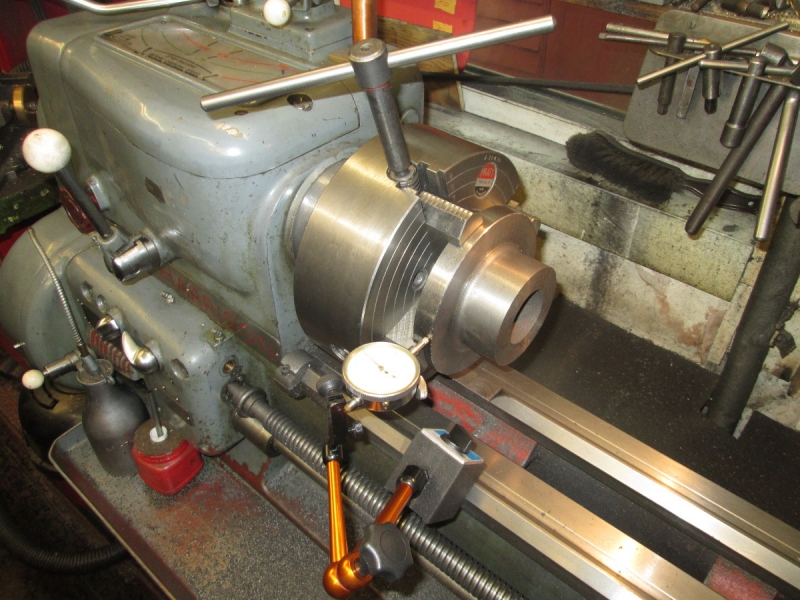
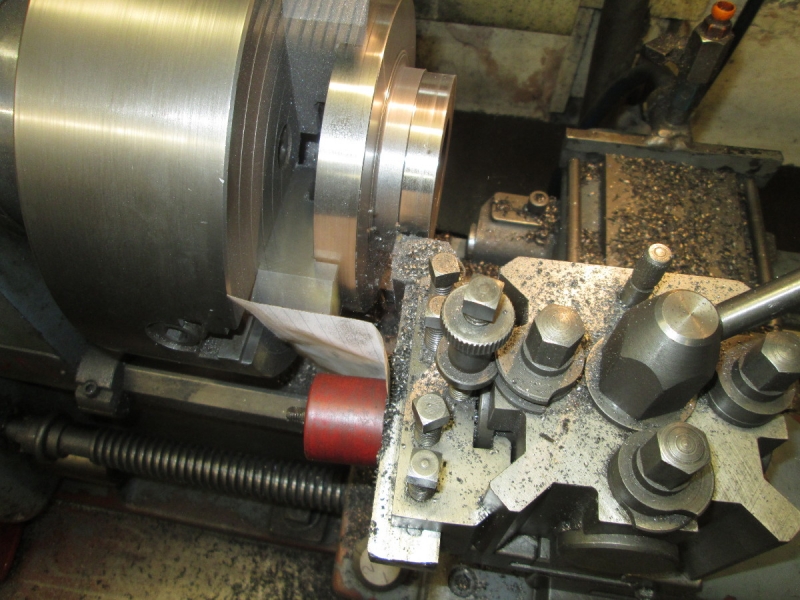
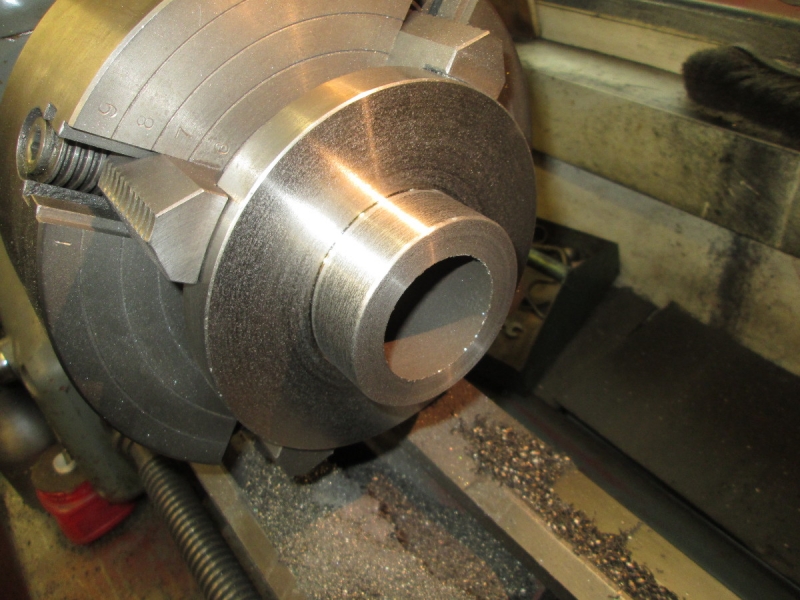
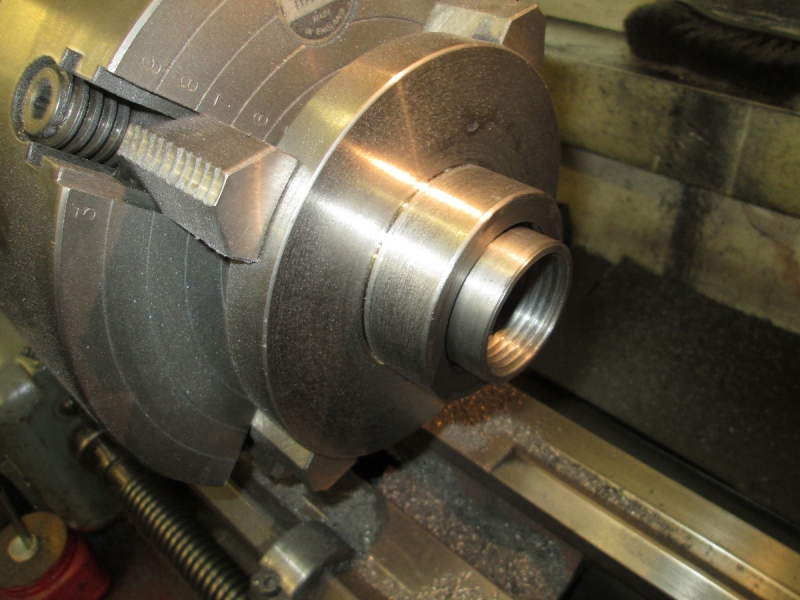
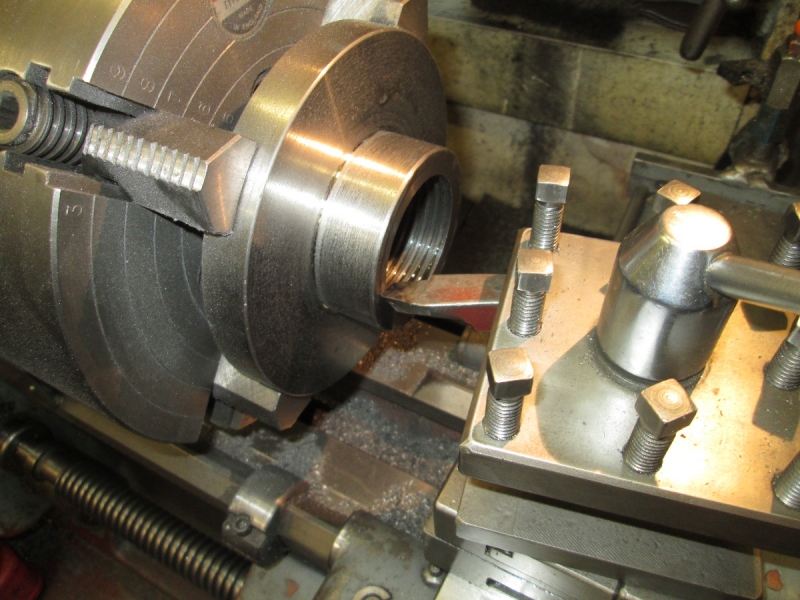
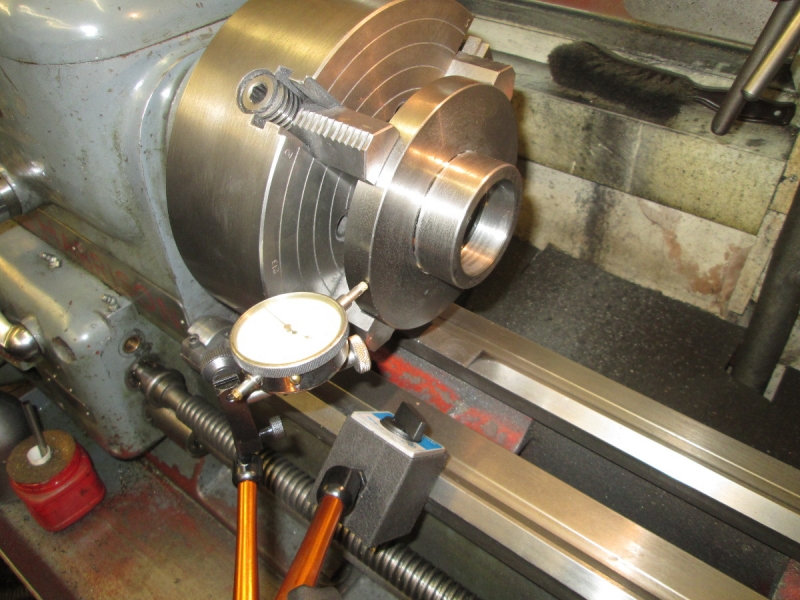
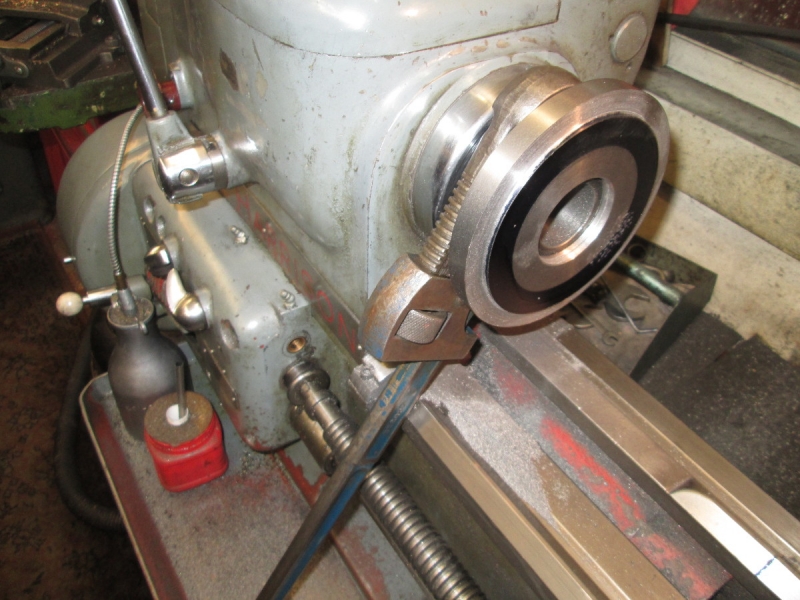
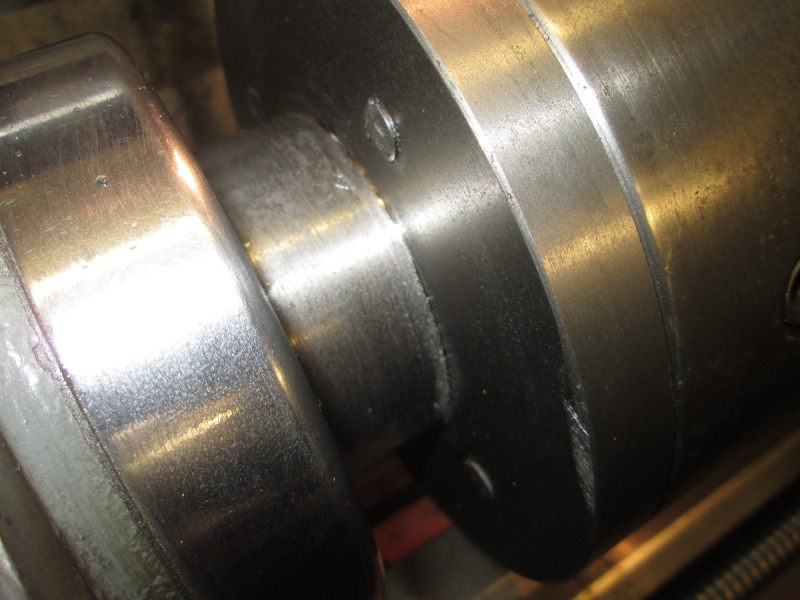
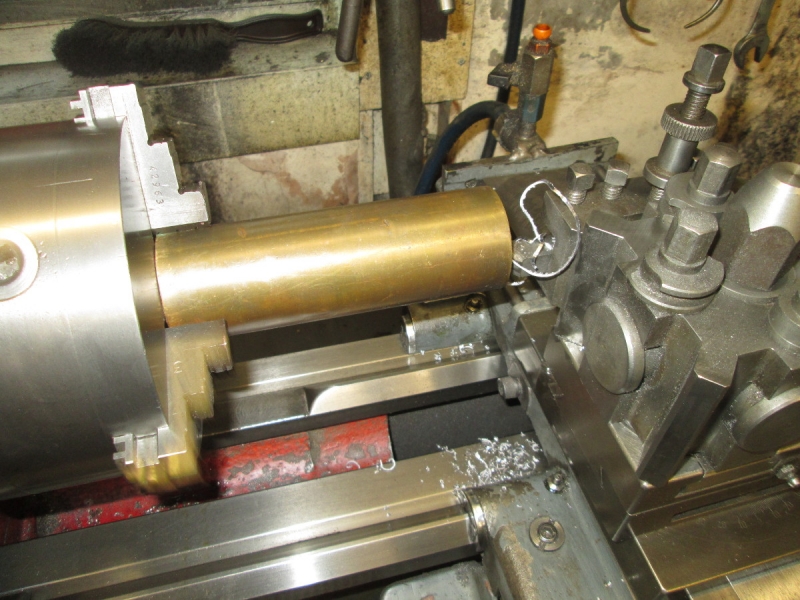
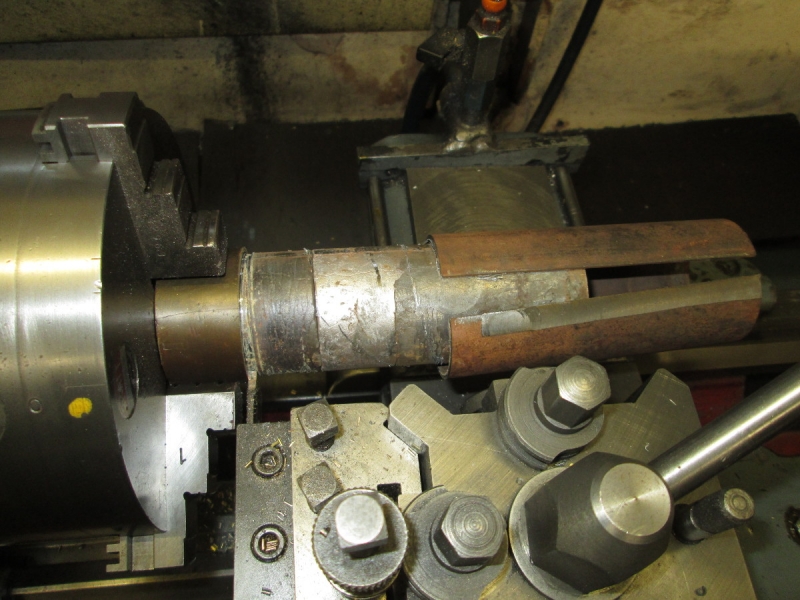
Then I parted the first bearing off at slightly more than the 1" I need. Then I faced the end left in the chuck and countersunk that as well before reversing it and parting the spare metal off, and then facing that one and countersinking it. Then I put the first one back in the chuck, faced the end that had been parted off and countersunk that as well.

Image

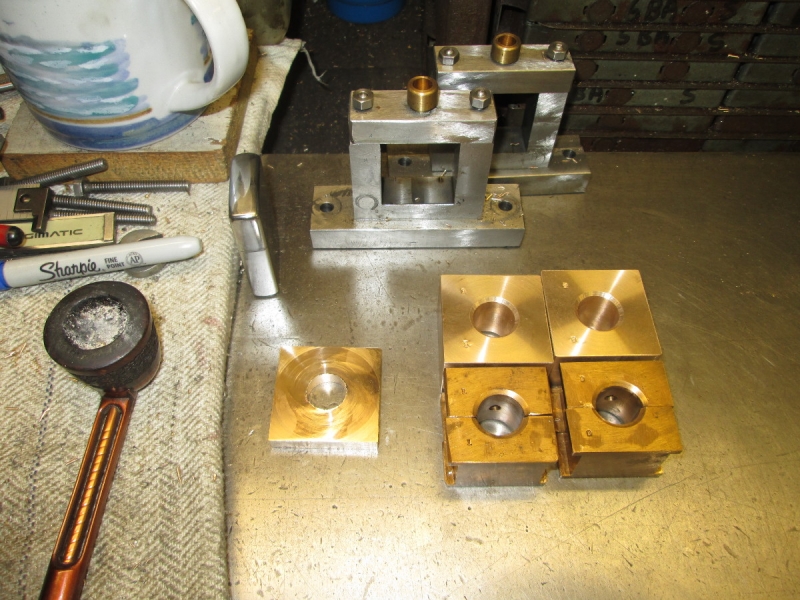
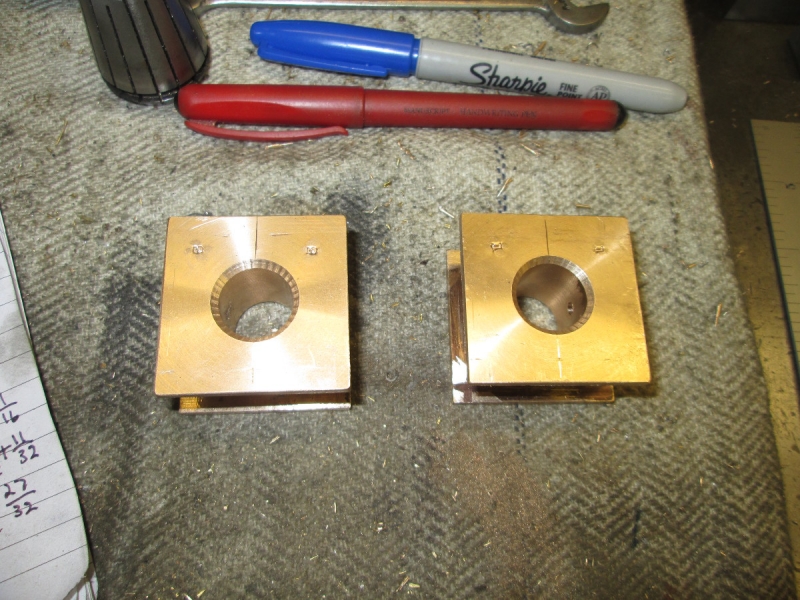
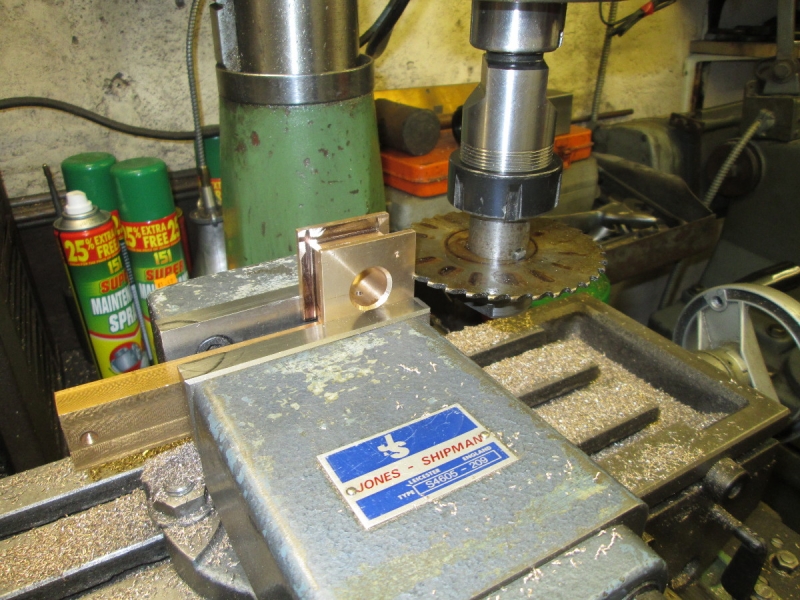
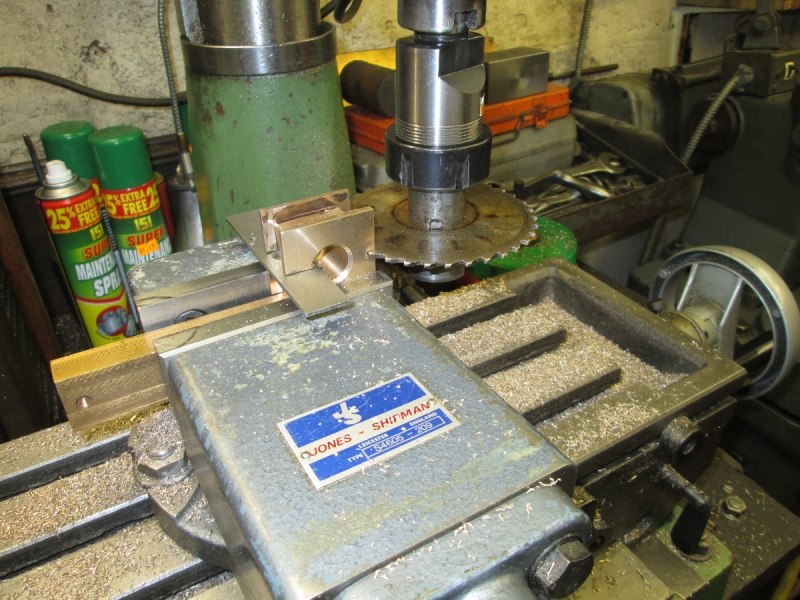
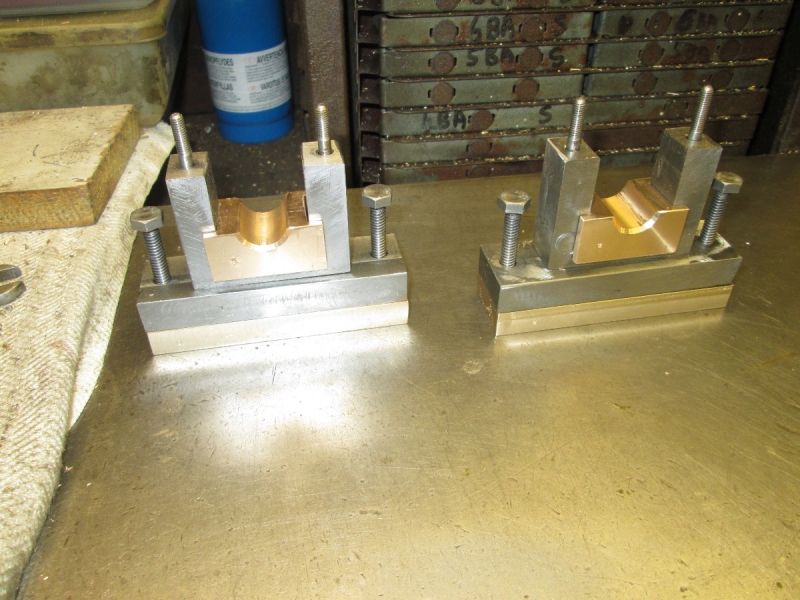
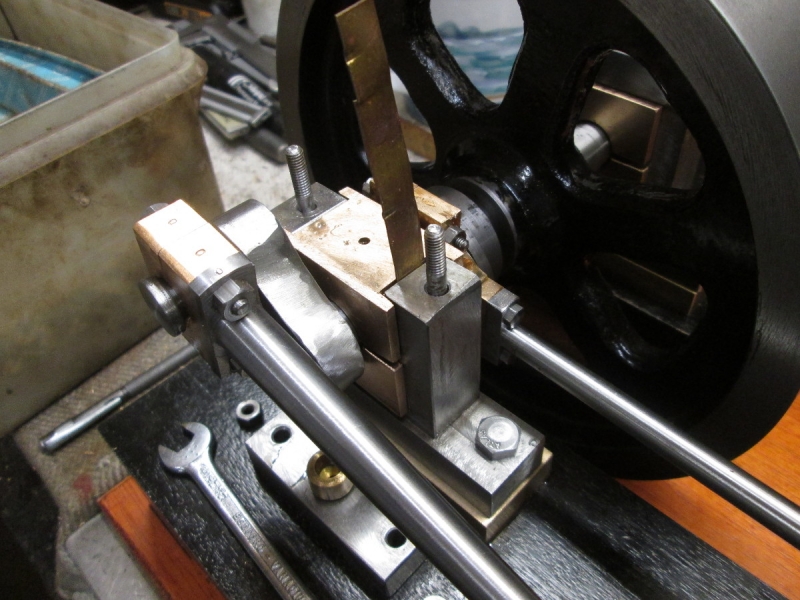
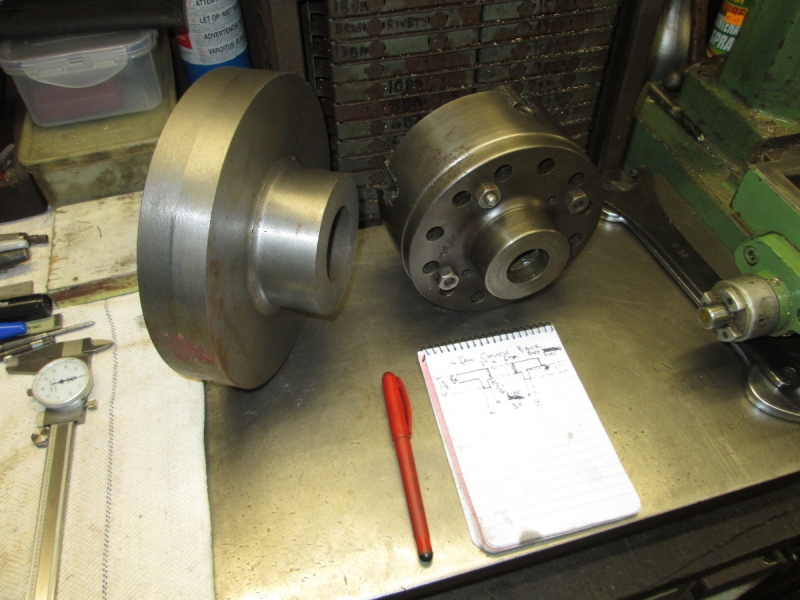
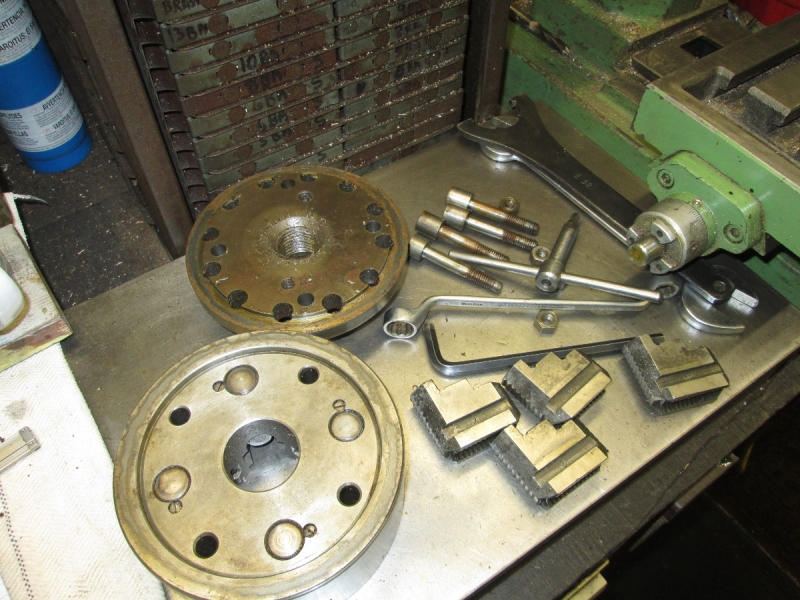
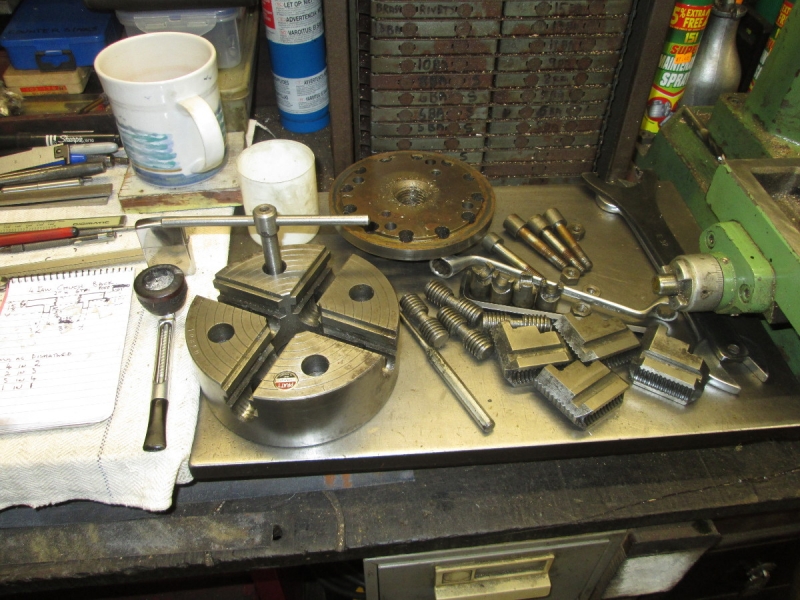
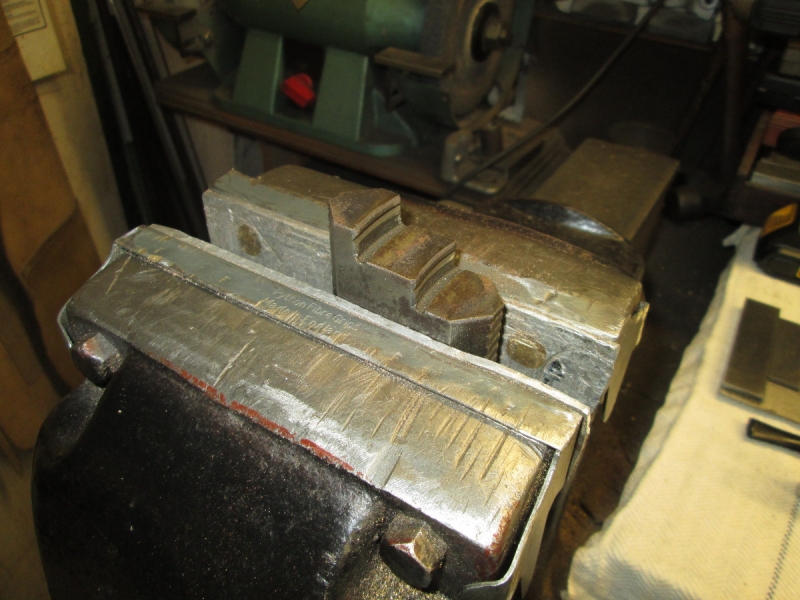
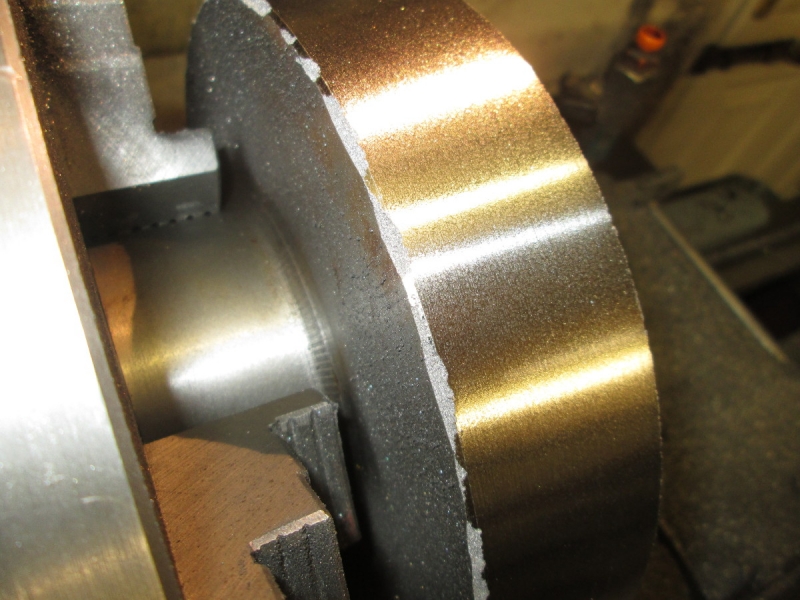
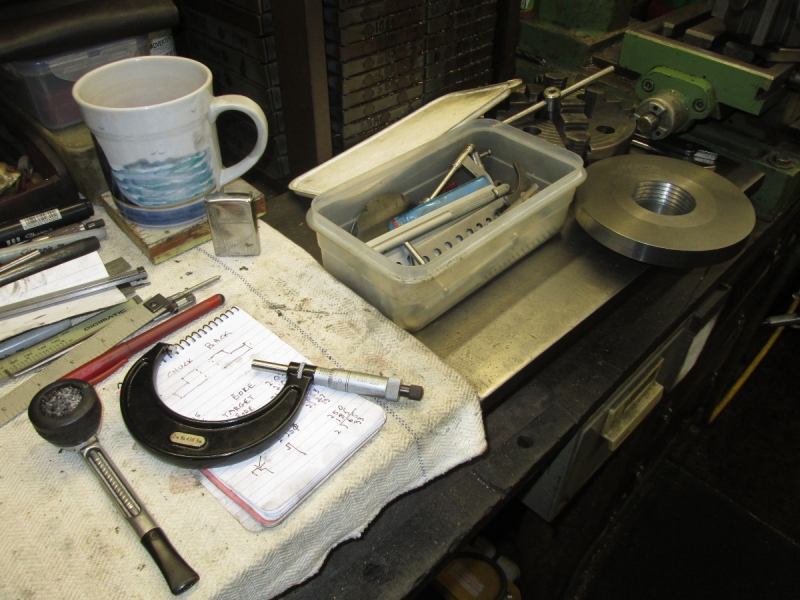
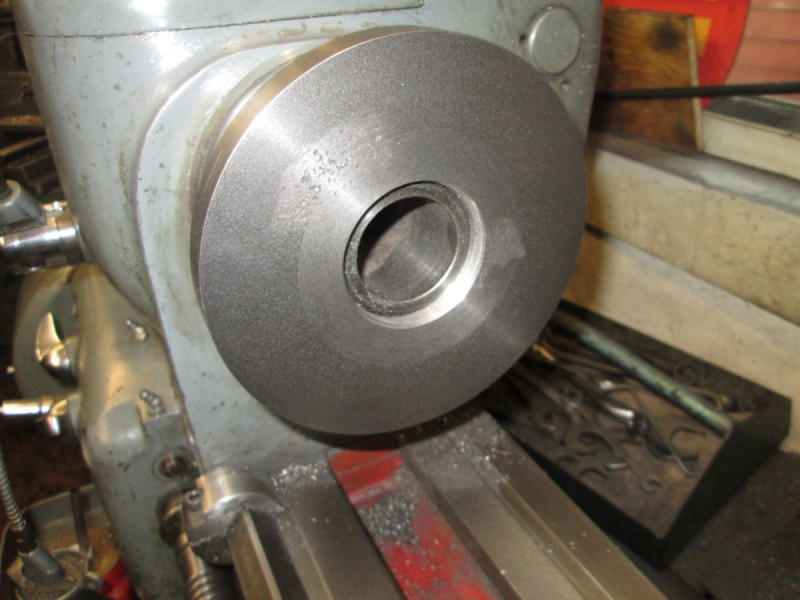
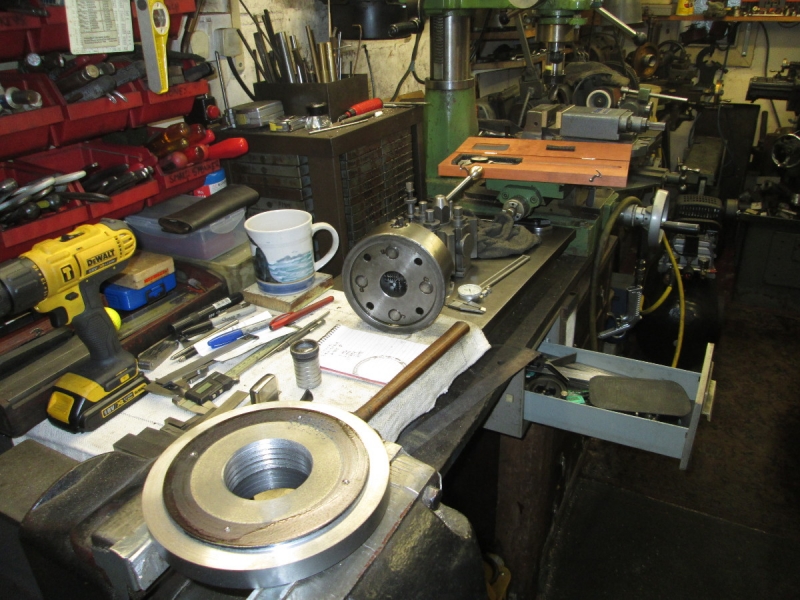
I broke all the edges and stamped each bearing with witness marks. In case you've been wondering, I haven't split the bearings and sweated them back together, I am just going to split them and accept the gap between the two halves which doesn't matter as the two will be stabilised by the housing. In fact the gap with edges chamfered will let oil circulate better in the bearing.

Image

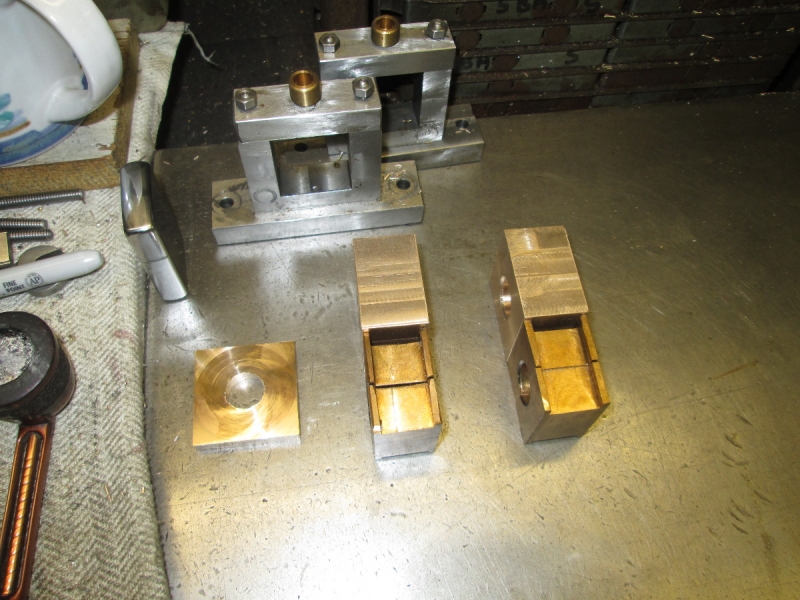
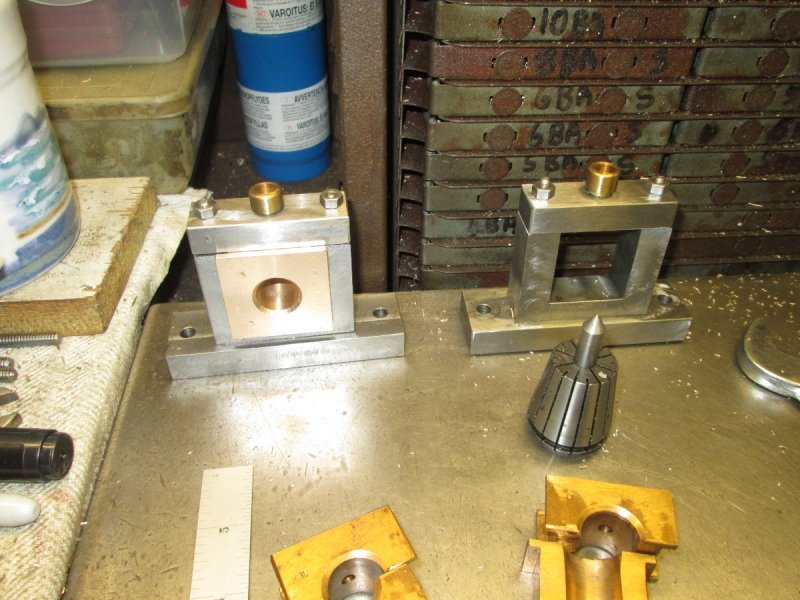
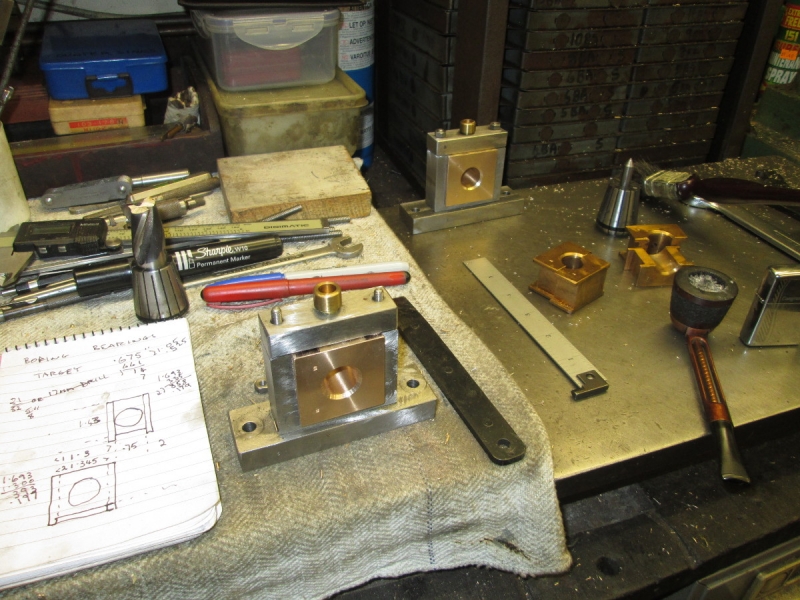
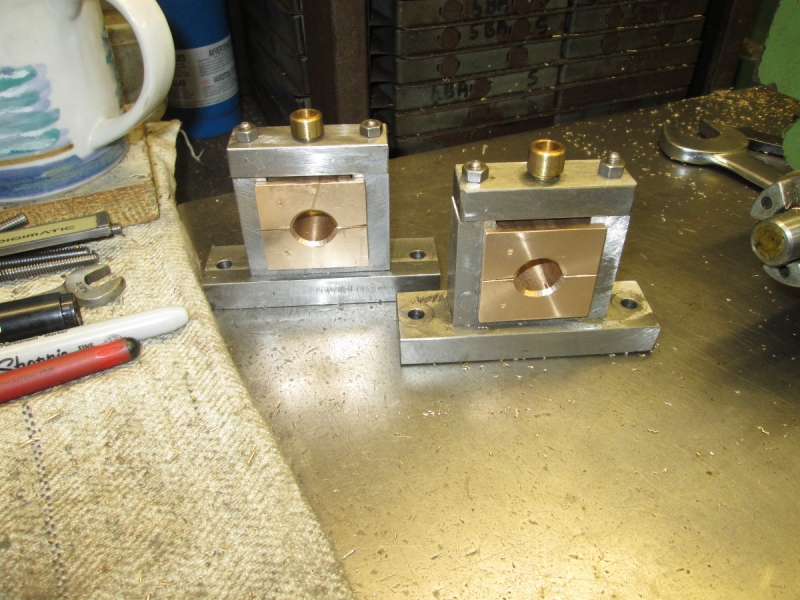
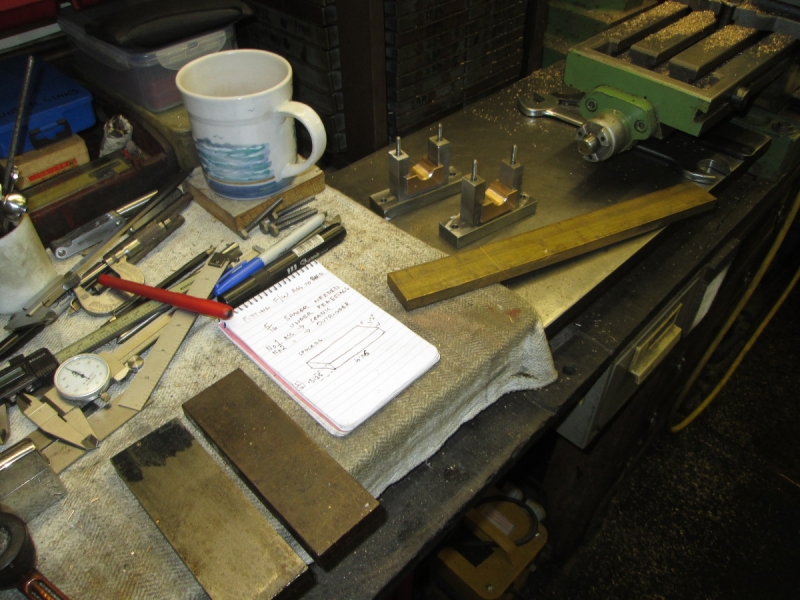
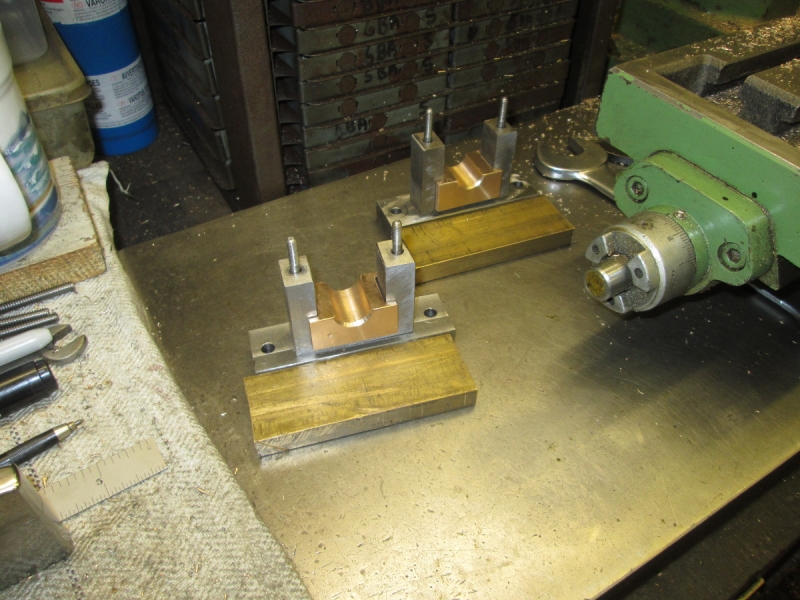
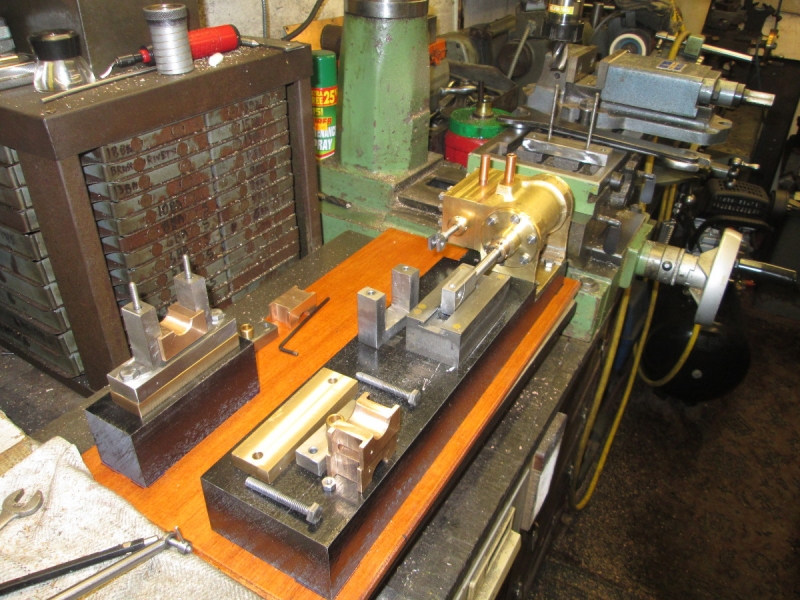
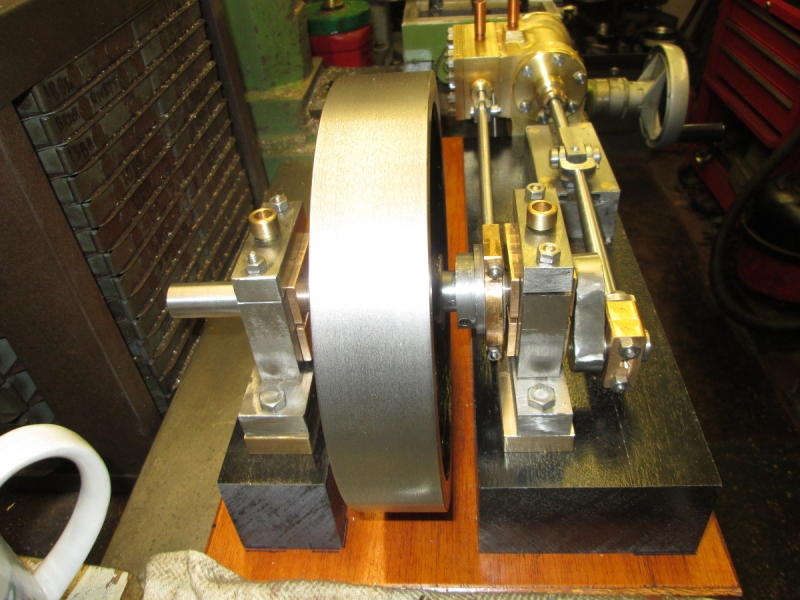
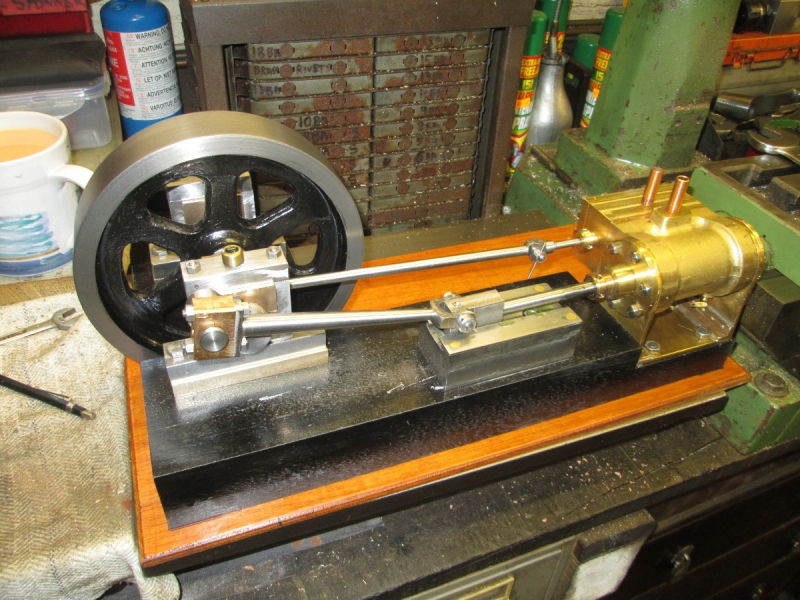
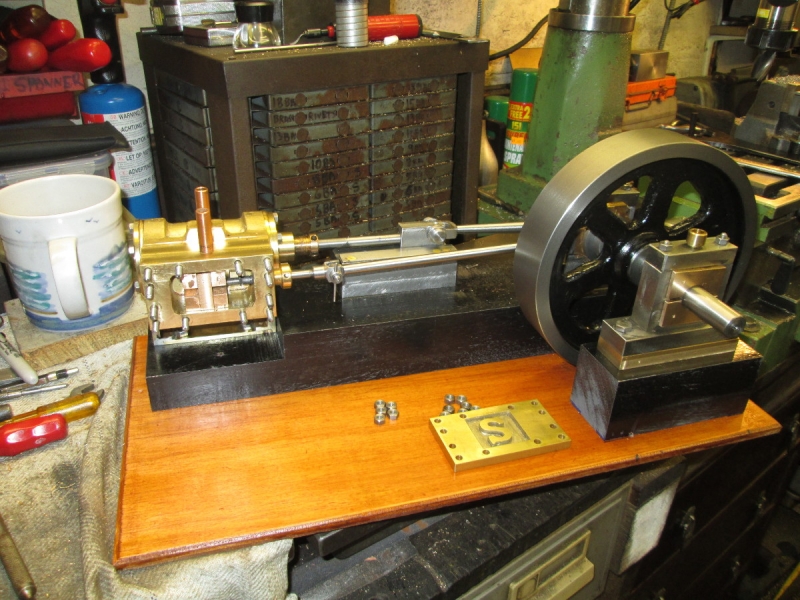
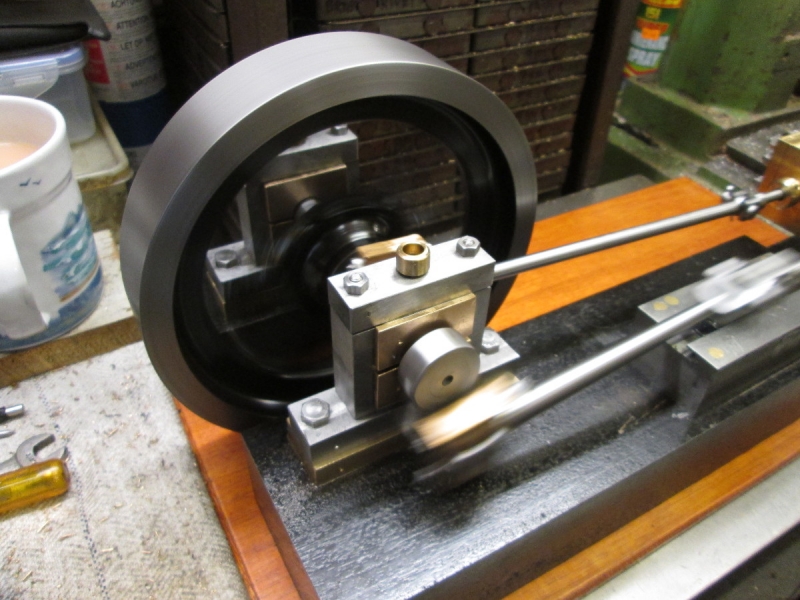
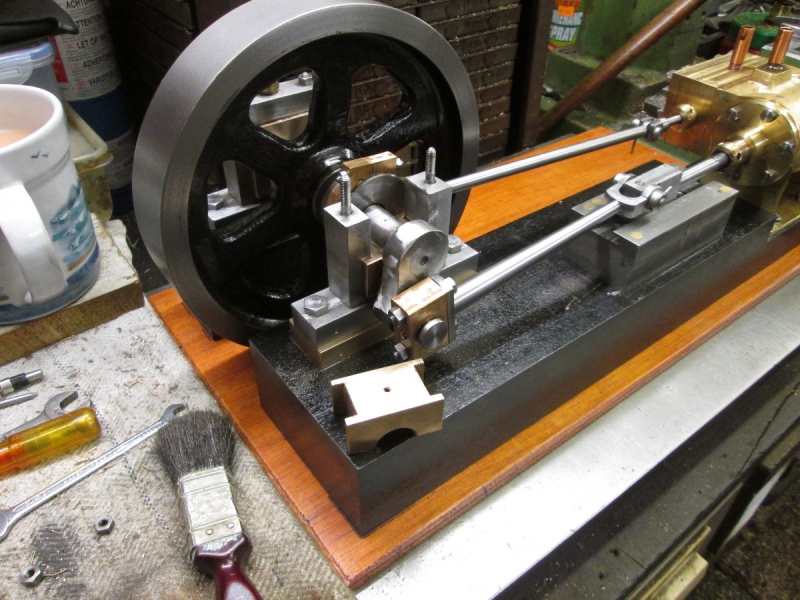
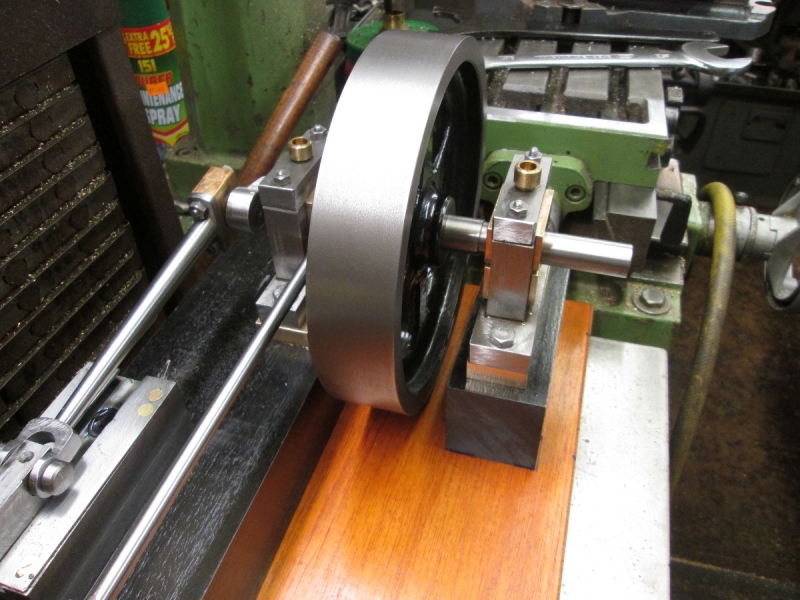
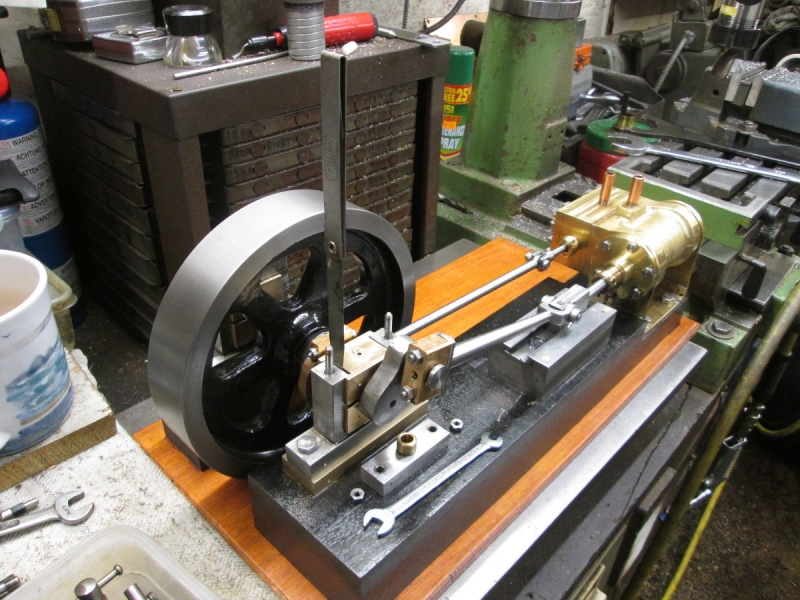
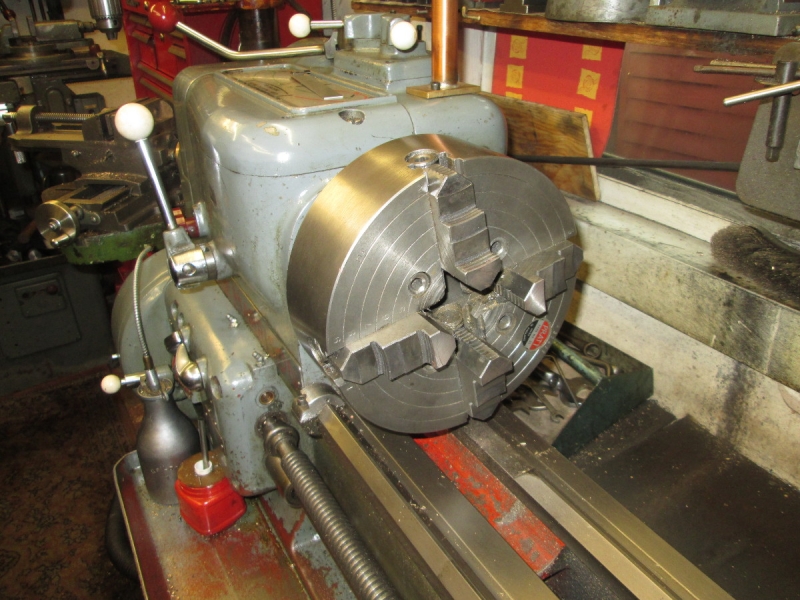
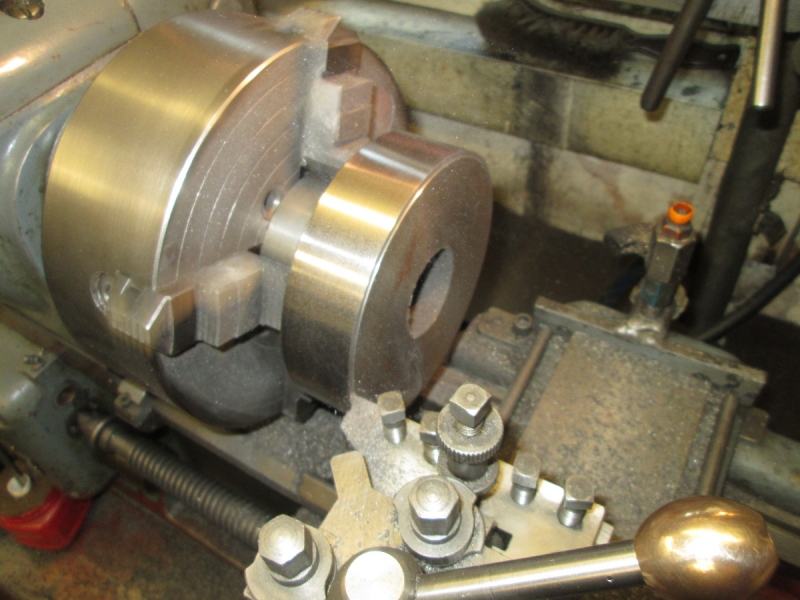
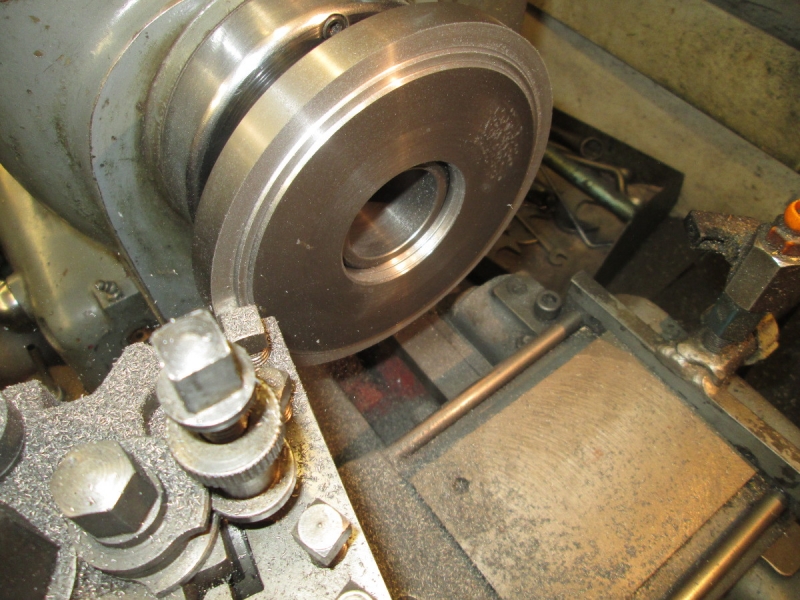
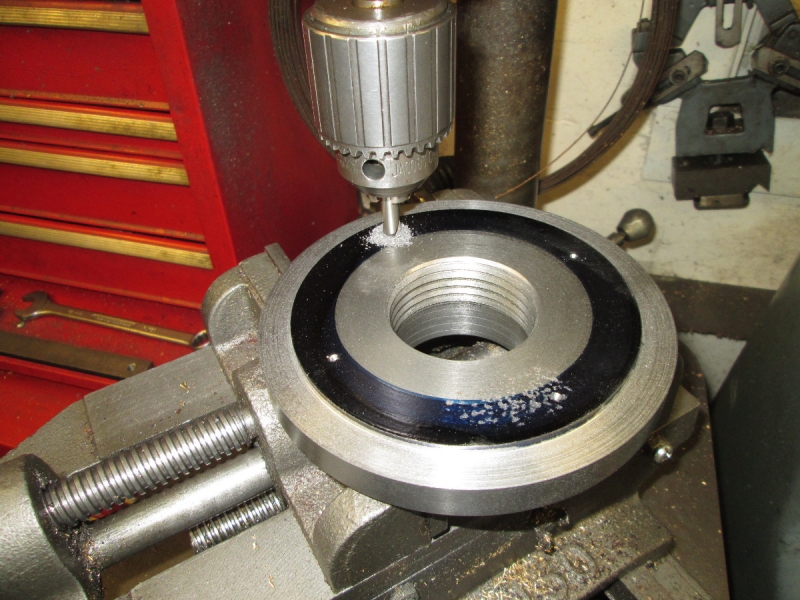
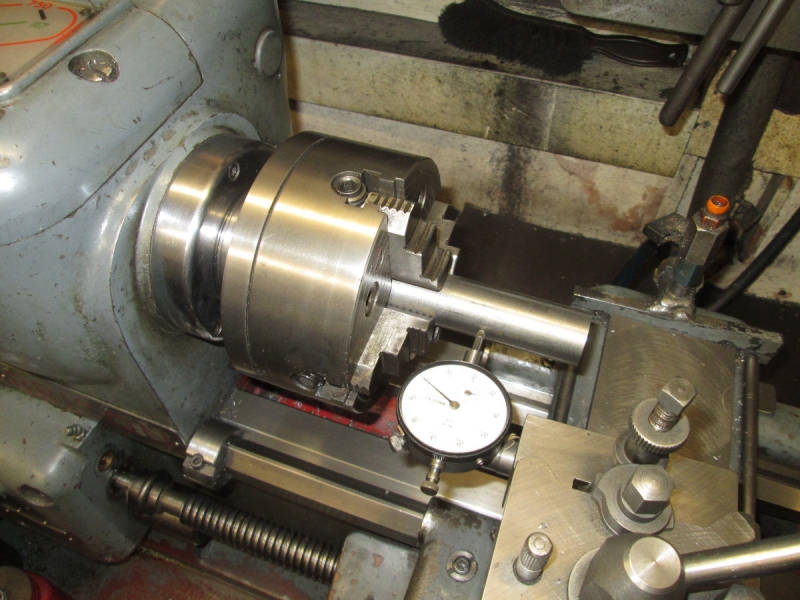
Here we are at knocking off time. Now I have some measuring and marking to do before I mill out the channels in the bearing brasses. But that's for tomorrow. I've made a better job of these I think, I've tried them on the shaft and they are a good fit. They are both identical and will be easy to fit. Re-making them was the right choice, far better than making do with the old ones. A nice hour in the shed!
Stanley Challenger Graham
Stanley's View
scg1936 at talktalk.net

"Beware of certitude" (Jimmy Reid)
The floggings will continue until morale improves!
User avatar
Stanley
Global Moderator
Global Moderator
Posts: 90298
Joined: 23 Jan 2012, 12:01
Location: Barnoldswick. Nearer to Heaven than Gloria.

Re: SHED MATTERS 2

Post by Stanley »

Image

I had to swap my milling cutter so I took the opportunity to sharpen the cutter that has done all the work on the bearings up to now. I gave it the full treatment, dressed the wheel, gulleted it, backed it off and sharpened it.

Image

I did my measuring, marked my bearings for centre line and then found the centre with a pointer and locked the axis before swapping to a cutter I knew would give me the channel I wanted.

Image

Because the blanks are square and exactly the same size and the bottom rebate is the same on both pedestals I was able to gang mill both blocks at once. No big cuts, quietly away.

Image

Then I needed to mill the side rebates but there is a slight difference between the pedestals. I could have enlarged the one that is smaller but decided to make the bearings to fit their own housing. It didn't take long to chop them out and so I decided to fit this one to check I had it right.

Image

Here is the first one fitted nicely but it took me 45 minutes! I had done my usual trick and measured too close so I paid for it in spades. Never mind, the oilway is drilled, all the edges are cleaned and broken and it's ready for splitting.

Image

On with the second after some careful measuring but this time I made sure I gave the cuts some breathing space!

Image

It took 15 minutes to mill this one, drop it in and drill the oilway.... You live and learn. It's still a good fit and all it needs now is to break all the edges and clean it up.
That was three hours in the shed on my feet and I saw a programme on TV the other day where they proved that standing up to work is classed as 'light exercise', two hours a day burns off 120 calories.... I always knew the shed was good for me! Nice morning and we move quietly forwards....
Stanley Challenger Graham
Stanley's View
scg1936 at talktalk.net

"Beware of certitude" (Jimmy Reid)
The floggings will continue until morale improves!
User avatar
Stanley
Global Moderator
Global Moderator
Posts: 90298
Joined: 23 Jan 2012, 12:01
Location: Barnoldswick. Nearer to Heaven than Gloria.

Re: SHED MATTERS 2

Post by Stanley »

Image

I got in the shed for an hour, this morning is busy on other matters as I have to take maximum advantage of the free leccy. My first job was to break the edges on the last blank I milled and then mark the centre line of the bore as my cut to split the bearings for fitting.

Image

I dug out a small sharp slitting saw. It's 1/8" thick and ideally I would have wanted a thinner one but the gap doesn't matter. I got set up and locked the quill at the right height. Both blanks are the same size exactly so I don't need to check it again. Quietly away.....

Image

I popped a spacer in the cut side so that when I break through on the remaining cut the brasses will stay in the same relationship. It worked well and it didn't take long to make all four cuts, the saw was a good choice.

Image

Early closing time but it was a good hour. Both bearings are finished and ready for offering up on the bed to mark for the fixing holes and decisions about locating the shaft longitudinally. It's got to be anchored somewhere. Back to my cooking and washing!
Stanley Challenger Graham
Stanley's View
scg1936 at talktalk.net

"Beware of certitude" (Jimmy Reid)
The floggings will continue until morale improves!
User avatar
Stanley
Global Moderator
Global Moderator
Posts: 90298
Joined: 23 Jan 2012, 12:01
Location: Barnoldswick. Nearer to Heaven than Gloria.

Re: SHED MATTERS 2

Post by Stanley »

Image

It's been a mixed morning, a bit disjointed because domestic matters intruded, someone has to cook the next three days grub! The aim now is to marry the flywheel assembly to the bed. I started by offering the pedestals and the new bearings up and the bearings are a lovely fit which is a good start. However I was quite surprised to find out how much the whole assembly needs to be raised to allow the flywheel to clear the bed. It needs a minimum of 3/8" and I shall probably end up giving it more. So, the first job is to make raising blocks to go under the pedestals.

Image

The treasure chests are usually a good solution but whilst I have plenty of round stock I'm a bit short of flat stock and all that I could find was the two lumps on the left and they will need a lot of cutting down and waste so I went to plan 'B'. I looked in the non ferocious box and found this brass bar which is a lot nearer the size so I settled on that.

Image

You know what I am going to say now.... Thank you Mick and John and god bless Mrs McMaster!

Image

This was knocking off time, I have my blanks and I'm tending towards taking very little of the thickness. Another thing that has occurred to me is that I want to paint the spokes of the flywheel black and it needs to be done sooner rather than later. I'll think about this.....
Stanley Challenger Graham
Stanley's View
scg1936 at talktalk.net

"Beware of certitude" (Jimmy Reid)
The floggings will continue until morale improves!
User avatar
Stanley
Global Moderator
Global Moderator
Posts: 90298
Joined: 23 Jan 2012, 12:01
Location: Barnoldswick. Nearer to Heaven than Gloria.

Re: SHED MATTERS 2

Post by Stanley »

Image

Image

Quietly away..... Cut the blanks down to match the pedestals. Small cuts and lots of patience. Look on the bright side, with no power feed and stood on my feet this counts as light exercise.....

Image

Here we are, the two raising blocks cut, registered and drilled for the foundation bolts.

Image

Then a lot of thinking and fiddling to decide on the correct positioning of the bearings. Lots of things to consider, apart from the stroke of the cylinder there is allowing the crank to clear the pedestal. In the end I bit the bullet, had one last check and marked the beds for the foundation bolts. I won't know for sure until I have drilled and threaded the holes and bolted the pedestals down to the bed. I have a plan 'B' but I really don't want to go there. I think I am OK. By the way, I took very little off the thickness and it's worked out OK.
By the way, I didn't get a visit from the Hammerite fairy in the night. I did a bit of overtime after my sleep yesterday and bit the bullet, I gave it a coat of paint.
Stanley Challenger Graham
Stanley's View
scg1936 at talktalk.net

"Beware of certitude" (Jimmy Reid)
The floggings will continue until morale improves!
User avatar
Stanley
Global Moderator
Global Moderator
Posts: 90298
Joined: 23 Jan 2012, 12:01
Location: Barnoldswick. Nearer to Heaven than Gloria.

Re: SHED MATTERS 2

Post by Stanley »

Image

Image

Here's where I started this morning. I have the hole positions for the foundation bolts marked, now they need drilling and tapping.

Image

Image

I was lucky in that I just had enough height over the compound vice to get the bed in once I had pushed the 3/16" drill as far up the chuck as possible. In case anyone is shaking their head about tapping wood, try it, when you tighten the bolts down you get a dead tight point. If you put a drop of wood glue in the hole the bolts will never shift.

Image

Then a satisfying bit. The flywheel assembly back on the bed and connected to the crosshead and the valve rod. The first thing I found out was that I had got the position of the foundation bolt holes just right, the con-rod and piston rod are just right, one revolution gives me a full stroke of the piston with the right clearance at each end. But! and it's a big but, there was a point in the cycle where I had a tight shop. At first I thought this was to do with the throw of the valve rod but soon realised that it was something else. It took me a few minutes to identify what it was. It was the bottom side of the eccentric fouling on the edge of the pedestal base. I had missed this because I had never tried it with the eccentric tight up against the bearing face where it has to run in order to line up with the valve rod.

Image

The cure is simple. Take the pedestal base off and mill 3/16" off the inside edge. This doesn't interfere with anything and will be OK.

Image

Some simple milling soon solved the problem and while I was doing it I remembered that the crank was running very close to the outside edge of the pedestal so I took 3/32" off that side as well.

Image

If you look carefully you can see how tidy the solution is. Look at how the crank-side pedestal sits on the foundation block. It's not been damaged, it has plenty of support.

Image

This is closing time. This morning's problems solved but I have another matter I have to address which is the tightness of the valve rod in the chest. At the moment it is not restrained enough and is moving in the gland but I think all this needs is some more packing and tightening down properly. We shall see tomorrow morning!
Stanley Challenger Graham
Stanley's View
scg1936 at talktalk.net

"Beware of certitude" (Jimmy Reid)
The floggings will continue until morale improves!
User avatar
Stanley
Global Moderator
Global Moderator
Posts: 90298
Joined: 23 Jan 2012, 12:01
Location: Barnoldswick. Nearer to Heaven than Gloria.

Re: SHED MATTERS 2

Post by Stanley »

Image

One thing I forgot to mention. The raising blocks solved another problem I hadn't realised I had. They gave me enough clearance for the crank bearing over the bed! Just goes to show what you can miss when you are concentrating on other matters. My fairy godmother was on top of it thank god.
Stanley Challenger Graham
Stanley's View
scg1936 at talktalk.net

"Beware of certitude" (Jimmy Reid)
The floggings will continue until morale improves!
User avatar
Stanley
Global Moderator
Global Moderator
Posts: 90298
Joined: 23 Jan 2012, 12:01
Location: Barnoldswick. Nearer to Heaven than Gloria.

Re: SHED MATTERS 2

Post by Stanley »

Image

First job this morning was to pack the valve rod gland properly, I made sure it was a good seal and stabilised the play in the rod.

Image

Next I addressed the piston rod gland. It was entirely by accident but I was delighted when I found that the gland nut clears the crosshead slide so you can get it well out of the way. I rammed the gland full of packing and tightened it down to the point where the piston rod was almost immovable! No leakage here!

Image

Next job was to take the valve chest lid off, it's such a good fit that you need a sharp blade to get a start then two screwdrivers to lever it off. It's a lovely fit....

Image

This stage took a while, I had to make sure the valve had an even throw and then make the actual adjustment of the eccentric for timing. This was a bit hair-raising because I re-used this eccentric and built the valve to suit the throw of the eccentric when of course it's usually the other way round. It turned out to be just right so I shifted the eccentric until I was convinced I had it right and laced the valve chest up again but this time with a bit of Loctite plastic gasket.

Image

Then the moment of truth, I put some air on it and it runs but at the moment it's very tight, my usual fault, I fit too close! I've given the valve a bit too much lead and therefore compression at the end of the stroke but that's OK, not a bad fault, indeed when you're running fast it make the motion smoother. The pedestal bearing in particular was not right, I couldn't tighten it down without seizing the engine up so I had to address that.

Image

It was a fairly simple matter, I just had to keep taking a bit off the top of the top bearing shell and trying it until I had it just right. You could tighten the bearing down hard and it still ran, still a bit tight but that will cure itself.

Image

The outrigger bearing was OK. I tightened it down hard and it is just a nice fit. I oiled up and gave it a good run. It was still a bit too tight but then I remembered how hard I had packed the piston rod gland, I put a bit of oil on the rod (It's not getting any from the cylinder because it is too tight) and that completely changed it. It's running at about 300rpm here..... I noticed that the piston rod was actually getting warm as the packing is so tight but that's OK it will soon slacken off.

Image

Knocking off time after an interesting and rewarding morning. There's one more job left to do. At the moment the flywheel shaft is floating entirely free, there's nothing to contain any end float. I wanted to run it hard first before I do anything about this as I wanted the shaft to find its own position as the engine slackened up. I need to make a collar to fit on the inside of the bearing and fit something on the outrigger end to locate it that way. I'm considering either a pulley or a gear, that's why I left the shaft this long. I'll decide that tomorrow after I have made and fitted the inside collar. Whatever I do I shall leave the flywheel shaft with a bit of float, all engines need that, they run more happily when they can float a bit. A lot of people think that this is wear when they look at a full size engine running but it's not, it's intentional. A very good morning!
Stanley Challenger Graham
Stanley's View
scg1936 at talktalk.net

"Beware of certitude" (Jimmy Reid)
The floggings will continue until morale improves!
User avatar
Stanley
Global Moderator
Global Moderator
Posts: 90298
Joined: 23 Jan 2012, 12:01
Location: Barnoldswick. Nearer to Heaven than Gloria.

Re: SHED MATTERS 2

Post by Stanley »

Image

One thing that I remembered since yesterday was the way the bearings had slackened in their housings as I ran the engine hard. I suspect that the compression has something to do with it. I decided that what I had to do was shim the bearing. So first thing I did this morning was get some feeler gauges out and find out what I needed, it was 15thou.

Image

The shim and feeler stock treasure chest came out to play, it doesn't often get an airing. As it happened there was a small piece of brass shim stock laid loose in the box. It was a shade too thick but a bit of hammering and polishing soon cured that.

Image

I cut it off level with the top of the bearing and refitted the cap. Play gone and the engine still turns freely so that's a result.

Image

Then I addressed the job in hand, the thrust washer that will go behind the bearing and something for the end of the shaft. I did my measurements and made a fag packet drawing. I found this brass end that will do nicely for the washer and a spare gear wheel that will do perfectly. It's one of the cast-offs that Newton occasionally chucked out of the shed and I snapped them up! The shaft is .0675" and I found a 21/32" drill that I sharpened and backed off for drilling brass.

Image

It didn't take long to knock the thrust washer out. The drill was just right, after a light calibration cut all I needed was another 10thou taking out. By the way, I got serious and used my bore callipers and the micrometer. At the moment I'm using a very old Brown and Sharpe micrometer that's well used but accurate and one thing I noted was that it was easier to read the worn scales on it and I reckon it's because the new LED tube is a more searching light.

Image

Before I fitted the gear I did the same measuring and shimming on this bearing as on the other. This needed slightly less but better to do it now than wait while the gear is in the way. Again, it made no difference to the free running but the shaft is more stable now.

Image

I want to clean the gear up and bore it so I started on what will be the back side. As the register is the periphery of the gear it will run true on the shaft.

Image

It looks a bit better now it's cleaned up and I gave the spokes a good wire brushing as well before I poked the 21/32" drill through. I'm ready for boring to final size but it was knocking off time, so I'll leave that for tomorrow. A nice morning of tweaking and adjusting and everything is working out nicely.
A stray thought came into my head, Mrs Harrison is getting on for 70 years old. I wonder how long it will last? It's as good now as the day it was made, wonderful.....
Stanley Challenger Graham
Stanley's View
scg1936 at talktalk.net

"Beware of certitude" (Jimmy Reid)
The floggings will continue until morale improves!
User avatar
Stanley
Global Moderator
Global Moderator
Posts: 90298
Joined: 23 Jan 2012, 12:01
Location: Barnoldswick. Nearer to Heaven than Gloria.

Re: SHED MATTERS 2

Post by Stanley »

Image

It looks quite splendid but you're actually looking at a minor disaster. I started the morning by boring the gear wheel out to fit the shaft. Nowt to it, exactly what I did yesterday with the thrust washer. I got a funny measurement after I had done a light calibration cut. I didn't trust it and measured it three times. Than I made my first cut but had a bad feeling about it so I took it out of the chuck and threw it at the shaft, it's something over 6thou too big! I've gone over what I did but can't for the life of me explain it. Question is what can I do? The obvious answer is bore it, sleeve it and rebore to the right size. Then I thought about tinning the bore. I had nothing to lose so I tried it.

Image

It worked. Just to make sure I drilled it for a 1/4" grub screw, gave it a good clean and a coat of Loctite 638 and put it on. It was tight, I had to drive it on so that's OK and it runs concentric as well.

Image

I did a few more tidying up jobs, checked all the nuts and fastenings and gave it a good wipe down. It's sat in the kitchen now, declared a runner and finished.

Image

Then I had a good tidy up. I put all my tools away, had a good chip chase and finished up with a clean bench and lathe. I got the vacuum out and hoovered the carpet and even emptied the shop vac. A fresh brew and box on....

Image

You might wonder what's happening.... One of the disadvantages about having a well-populated shop is that if you want to get at something that's at the back of the shed you have to shift the compressor and Mrs McMaster out of the way.

Image

Here's the reason..... I've always felt the need for a slightly smaller 4 jaw chuck for Mrs Harrison. I have a big one and it's OK of course but a bit numb for some smaller jobs. Johnny's big lathe has a 6" Pratt type 55 steel chuck (some cheaper ones have CI bodies) and it never gets used. It's a bit time worn and at some time has been stored on a wet surface but it's tight and has had very little use. I've decided to make a back for it and fit it to Mrs Harrison. I needed a chuck back of course and it just so happened I had a big cast iron blank I have had for years. That's why I had to shift everything to get to the back of the stockpile! They still make this chuck and so with a bit of effort I can make Mrs Harrison even more complete. You can never have too many chucks!
Stanley Challenger Graham
Stanley's View
scg1936 at talktalk.net

"Beware of certitude" (Jimmy Reid)
The floggings will continue until morale improves!
User avatar
chinatyke
Donor
Posts: 3831
Joined: 21 Apr 2012, 13:14
Location: Pingguo, Guangxi, China

Re: SHED MATTERS 2

Post by chinatyke »

Stanley wrote: 14 Oct 2017, 10:38 I needed a chuck back of course and it just so happened I had a big cast iron blank I have had for years.
Why doesn't that surprise me? Doesn't everyone have one or two big cast iron blanks laying about? It's like watching Paul Daniels pulling white rabbits out of a hat! :biggrin2:

Another wonderful engine model. Well done. You should get some nice labels saying "Craftsman made in Barnoldswick by Stanley Graham" or something similar.
User avatar
Big Kev
Site Administrator
Site Administrator
Posts: 10952
Joined: 23 Jan 2012, 20:15
Location: Foulridge

Re: SHED MATTERS 2

Post by Big Kev »

The finished engine looks grand, having seen it 'in the flesh' I can say the pictures don't do it justice.
Kev

Stylish Fashion Icon.
🍹
User avatar
Stanley
Global Moderator
Global Moderator
Posts: 90298
Joined: 23 Jan 2012, 12:01
Location: Barnoldswick. Nearer to Heaven than Gloria.

Re: SHED MATTERS 2

Post by Stanley »

"Why doesn't that surprise me?"
China, in the days when I had money and could afford it I never walked past anything and sometimes I used to wonder whether I was just one of these sad individuals who collects the stuff and never does anything but it all turned out OK.
I looked the 4 jaw chuck up on the Pratt Burnerd site, they are still in business. They still make the same chuck and it's £250. You can get an El Cheapo import for £100. This will be a good addition to Mrs Harrison!
I always wonder about a nameplate but then never get round to it...... Besides, I never claim to be an 'expert' or a 'craftsman', just a bum fitter who has picked up a few useful tricks in a long and varied life.
Kev, it looks even better when it's running!
Thanks to both of you for taking notice and commenting. Keep watching the shed!
Stanley Challenger Graham
Stanley's View
scg1936 at talktalk.net

"Beware of certitude" (Jimmy Reid)
The floggings will continue until morale improves!
User avatar
Stanley
Global Moderator
Global Moderator
Posts: 90298
Joined: 23 Jan 2012, 12:01
Location: Barnoldswick. Nearer to Heaven than Gloria.

Re: SHED MATTERS 2

Post by Stanley »

Image

It was well after 8AM when I got in the shed, cooking and washing duties! I've had a good measure up to remind myself of the particulars and I am ready to start making some muck.

Image

I need the big four jaw for this lump so I got it out and swapped it into the lathe. The next job is to get the blank chucked up accurately, there isn't a lot of meat in the bore but it looks as though I did a good job when I roughed the casting out, the core looks to be central. But before I start actually cutting I want to strip Johnny's chuck down and make sure there are no surprises! But that's for tomorrow, I am still up to my knees in housework!
Stanley Challenger Graham
Stanley's View
scg1936 at talktalk.net

"Beware of certitude" (Jimmy Reid)
The floggings will continue until morale improves!
User avatar
Stanley
Global Moderator
Global Moderator
Posts: 90298
Joined: 23 Jan 2012, 12:01
Location: Barnoldswick. Nearer to Heaven than Gloria.

Re: SHED MATTERS 2

Post by Stanley »

Image

Sorry but I was late in the shed again this morning. Domestic matters including my least favourite job, changing duvet covers! But I got in and set the blank up in the 4 jaw chuck. I worked on the assumption that I had got it right when I roughed it out and had got the body concentric with the bore because I have very little meat in there.

Image

As a final check I tried a light cut on the rim of the bore and it's OK, almost perfect in fact. That could have been a biggie!

Image

Image

Then I stripped the chuck down prior to cleaning and rebuilding. It's also a good way of inspecting it. I don't think it has done a lot of work and apart from some surface rust on the jaws and one part of the body it's OK. However, I did find a couple of oddities. The first was that only one of the numbered jaws, number 1, was in it's correct slot. Theoretically of course it makes no difference but the jaws were fitted individually when it was made as that long ago there wasn't the sophisticated measuring and grinding tackle that's used today. The other fault I found was that one of the socket head bolts that holds the back on the body is an odd one, stripped at the end and the nut was stripped as well. Not sure what I do about that, I might have to make a new one.
Apart from those things, no surprises beyond the fact that the original back is obviously made out of an old one for another chuck. I think we can do better than that but by this time it was closing time.
Stanley Challenger Graham
Stanley's View
scg1936 at talktalk.net

"Beware of certitude" (Jimmy Reid)
The floggings will continue until morale improves!
User avatar
Stanley
Global Moderator
Global Moderator
Posts: 90298
Joined: 23 Jan 2012, 12:01
Location: Barnoldswick. Nearer to Heaven than Gloria.

Re: SHED MATTERS 2

Post by Stanley »

Image

My first job was to go through the chuck, clean it and reassemble it. At some time this chuck has suffered being kept in wet conditions and there is an issue of rust. Some of it is heavily pitted and there is no way it can be made 'new' again. The best I could do was to wipe the patches over with a flapper wheel in the angle grinder. Then I cleaned all the fitting faces in the chuck body and the jaws.

Image

It's amazing how many faces there are to clean! Quietly away I worked my way through and got them all as clean as I could.

Image

The thing that took the time was fitting the jaws in their correct slots. It took quite a while but in the end I had them all sliding freely, the adjusting screws are all snug and clean and every jaw moves easily in its slot. However, there is no wear, they are all just tight enough to reassure me that this chuck is basically sound and in terms of overall suitability for the job is as good as the day it came out of the Halifax works. One other thing, remember that I found a problem with one of the set screws that holds the back on the body? When I started roughing the blank I found it is very tough cast iron and I have decided to do away with the nuts, make the back plate slightly thicker and thread the holes to take the set screws direct. It will solve the problem and be a much tidier back on the chuck.

Image

I have all my rough measurements sorted so I started muck shifting. There's a lot of metal to take off. I started off using a tipped tool but found it was tough iron and to be quite honest, Mrs Harrison isn't strong enough to take the heavy roughing cuts especially as the ones I have are all negative rake. Note the callipers, we're roughing out here and this is all we need. By the way, you might be thinking these are light cuts. You're right but you have to be aware of your limitations, we're getting close to the limits with this size of workpiece.....

Image

I changed cutters to a carbide tipped Wimet that is positive rake and sharp. I could take twice the weight of cut with this. I might change to another one tomorrow because I am still not getting anywhere near a finish. I know it doesn't matter at the moment as I'm roughing but if I can get a better cut there will be less heat generated. A nice morning and progress. Oh and one more thing, I have identified something else that needs doing when I have this job finished.
Stanley Challenger Graham
Stanley's View
scg1936 at talktalk.net

"Beware of certitude" (Jimmy Reid)
The floggings will continue until morale improves!
User avatar
Stanley
Global Moderator
Global Moderator
Posts: 90298
Joined: 23 Jan 2012, 12:01
Location: Barnoldswick. Nearer to Heaven than Gloria.

Re: SHED MATTERS 2

Post by Stanley »

Image

I know it's a bit sad and I should get out more but my last thoughts as I dropped off to sleep last night were about the puzzling problem of why it was I was making such a cock-up of some simple CI turning. My first thought was it was the cutter. I got one of the small carbide tipped tools out that John gave me and had a go with that. It cut OK across the face but there was a crunch at the end of the cut and when I went back for another cut it was no good at all. A quick whip out and inspection and the reason was clear, the carbide tip had broken down.

Image

I went back to the toughest tools I have and you can see the result, a decent start but half way across the cut broke down and if I reversed the feed it cut on the back spring cut. It was at this point that the light dawned! (I know, I'm a bit slow....)

Image

I turned the tip over so I had a fresh edge and took another cut at lower speed and again it was OK until it got to the end of the cut. Here's the reason why.

Image

If you remember I commented earlier that this was tough iron. CI can be like butter but occasionally you get a batch that's a bit cold short. That's not too bad but when you have a section that has taken a chill in the casting process you get one of the hardest and most brittle metals there is. Look up Austenite in your reference books. Chilled Iron is good in certain applications like ploughshares where you want incredible resistance to abrasion but it terms of cutting qualities it's death. That's what we have here, notice how when the cutter got into the unsupported bit it has shattered like glass. In the process it becomes an edge destroyer! This is what has been happening, the last pass is buggering my tool edge. I changed to a left hand tool and dug straight into it in the hope that it was only local and I could cut it out.

Image

I rotated the tip again to give a fresh edge, slowed the lathe down and started cutting again. No problem and I could take a 40thou cut with no spring cut on the return pass, a sure sign that tool pressures aren't excessive. I tried 50thou but the tool sprung a bit, I was at the limit of rigidity in the saddle.

Image

Now I had the cutting cracked I could relax a bit. I vacuumed the CI chips off the carpet and fixed a card shield up to keep them on the lathe.

Image

From then on it was plain sailing. I decided to go down to the finished diameter plus 5thou to allow for the fact that the workpiece was hot with all this cutting.

Image

It was close to closing time. I had a clean up and got set up for cutting the face. I took one cut and the face is good, it was an even cut. Tomorrow I'll cut the face back to the rough finished size before reversing it and attending to the boss on the other side. Three hours of honest endeavour! It took me a while but I beat it into submission. Resistance is useless!
Stanley Challenger Graham
Stanley's View
scg1936 at talktalk.net

"Beware of certitude" (Jimmy Reid)
The floggings will continue until morale improves!
User avatar
Stanley
Global Moderator
Global Moderator
Posts: 90298
Joined: 23 Jan 2012, 12:01
Location: Barnoldswick. Nearer to Heaven than Gloria.

Re: SHED MATTERS 2

Post by Stanley »

Image

It's nice to sit down! I was in the shed early and so I've done over 3 hours of 'light exercise' but it's been worth it.... I was straight into muck shifting again. You can take it as read that throughout the morning I had the occasional vacuum up to keep the levels down!

Image

In case you're wondering no time was lost because a cut was going on while I got my indexing head down so I could take the nose off it. This is a replica of the nose on the lathe so that I can mount chucks on it. This will be my test piece when I am threading, if this screws into the chuck back it will fit on the nose of the lathe.

Image

I was near the end of this cut when I ran into some dodgy iron in the heart of the casting. It's no big deal because it won't interfere with anything but it's always a good thing to remember that there can be surprises when you are digging into a casting!

Image

The final cut on the face for the time being. This face will get finished when I have threaded the back and it's mounted on the nose of the lathe, the whole point of making your own back..... All right, bleeding obvious but there may be someone following this who didn't realise that this is the case.

Image

Time for a clean up, swap the jaws round in a clean chuck and indicate the back in it's new orientation. I got it within less that .0005" so I think that will do.....

Image

I cut the end down to length and faced it then took the outside down to 3" diameter.

Image

Knocking off time. The back is down to size and the edges chamfered. I'm ready for boring now and then threading 2 1/4" BSF but that's for tomorrow..... Oh, and I had a good vacuum up before I left Mrs Harrison.
Stanley Challenger Graham
Stanley's View
scg1936 at talktalk.net

"Beware of certitude" (Jimmy Reid)
The floggings will continue until morale improves!
User avatar
Stanley
Global Moderator
Global Moderator
Posts: 90298
Joined: 23 Jan 2012, 12:01
Location: Barnoldswick. Nearer to Heaven than Gloria.

Re: SHED MATTERS 2

Post by Stanley »

Image

Friday morning is always a busy morning and it was after 8AM when I got in the shed. I sorted out a right hand carbide cutter that would do for a boring bar. I wasn't sure how far the cold short or the chill had penetrated but as it turned out no problem in the bore, it's tough but not a disaster. I looked up the tapping drill size for 2 1/4" BSF in my reference books and got various answers ranging from 2.054" to 2.086" and settled on 2.08" for a target. I wasn't absolutely certain I had enough meat, I knew it was close, but as it turned out it was fine and I bored it to spot on 2.08" and put a chamfer on the end.

Image

You can see I got serious and you wouldn't believe the number of times I checked my measurements! Total disaster at this point would be getting the bore too large! In case you're wondering about the big nasty side cut tool that's laid on the bench.... I'll come to that in a minute!

Image

Here we are ready for cutting the thread.

Image

Now we get to the big side cut tool. It's a Stag brand super-welded tip tool that I bought a long time ago to solve a problem I had when I was making a big part for the Whitelees engine on my Wilson lathe. I've never used it since, never had a job for it. It will fit this bore and I decided to re-work it as a side cut threading tool, 6tpi is a fairly heavy thread and needs a bigger tool. I had just started modifying it after dressing my grinding wheel when Kathy turned up with half a sheep for me so this is closing time. Threading tomorrow!
Stanley Challenger Graham
Stanley's View
scg1936 at talktalk.net

"Beware of certitude" (Jimmy Reid)
The floggings will continue until morale improves!
User avatar
Stanley
Global Moderator
Global Moderator
Posts: 90298
Joined: 23 Jan 2012, 12:01
Location: Barnoldswick. Nearer to Heaven than Gloria.

Re: SHED MATTERS 2

Post by Stanley »

Image

I spent quite a long time sharpening my cutter and setting up for my cut. The top slide is set to 27.5 degrees as this is a heavy thread in tough metal so I only want to cut on the far side of the thread. I'm set up here and have done a scratch cut and checked to make sure I have the gearing set up right. Ready to start. Turn the wireless off and concentrate Stanley.

Image

Not long afterwards the dummy nose was a good fit in the back. That's the first stage done.

Image

Next I measured the register on my 3 jaw cut and bored my back out to the same size. It can come out of the 4 jaw now. We are ready to take the big chuck off, screw it on the nose and cut the register.

Image

I thought I'd show you how serious I was allowing myself to get! No measurement was spared and I checked and rechecked all the time.

Image

I screwed it on and found I had a bit of a bummer on my hands. The dummy nose is undersize so my thread isn't quite deep enough. A small pause while I beat myself with a rolled up Woman's Weekly.....

Image

Nothing for it. I had to put the 4 jaw back on, dial the chuck back in again and set the cut up exactly where it was for the thread-cutting. This is not easy and if you want to know how to do it find a book and start reading! Far too complicated for me to explain. I took my courage in both hands and cut another 10thou out of it.

Image

A bit later, it is a good fit now, registers nicely and I have chamfered this end of the thread. I am ready now to cut the register but that's for tomorrow..... An eventful but ultimately successful morning.
Stanley Challenger Graham
Stanley's View
scg1936 at talktalk.net

"Beware of certitude" (Jimmy Reid)
The floggings will continue until morale improves!
User avatar
Stanley
Global Moderator
Global Moderator
Posts: 90298
Joined: 23 Jan 2012, 12:01
Location: Barnoldswick. Nearer to Heaven than Gloria.

Re: SHED MATTERS 2

Post by Stanley »

Image

I got in the shed at about 8:30 and got straight into the back plate. I took a light cut across the periphery, it took less than than 2 thou to bring it dead in line. Then I started looking for my register after some vary careful measuring. 1/8" deep is plenty.

Image

I got it just right, blued the plate up, set it up under pressure from the tailstock and marked the plate with a nice fitting transfer punch.

Image

After the Lord Mayor's procession..... Like all good registers it has tightened up on the nose and I haven't got a chuck on it to pop a bar through. I put some insulting tape on the boss and got the Stillsons out. It wasn't over tight but too tight to shift by hand on the smooth casting.

Image

I put the back in the vise to punch the marks and did this pic of the battlefield. The 9" Starrett calliper that John and Mick gave me is a boon! It looks like the bench of a busy bloke.....

Image

I drilled 7.9mm and tapped the holes 3/8" Whitworth under the pillar drill.

Image

Then I fitted the bolts. I had a bit of a problem getting all four to start but then realised that they were all very slightly bent and because they were fitted tight they were a bit of a pain but I persevered and got them all in and tightened up. We have a chuck!

Image

I vacuumed the muck off Mrs Harrison, gave her a quick face wipe and popped the chuck on. This has not been time wasted, I shall be using this chuck a lot and will soon get better at dialling work-pieces in!

Image

One last thing nattered me, the bolts poking out of the back so I sawed them off. I can see me taking a light skim over them at some point but this is enough for now. Johnny would question my speed but I don't think he'd play hell about the result!
Stanley Challenger Graham
Stanley's View
scg1936 at talktalk.net

"Beware of certitude" (Jimmy Reid)
The floggings will continue until morale improves!
User avatar
Stanley
Global Moderator
Global Moderator
Posts: 90298
Joined: 23 Jan 2012, 12:01
Location: Barnoldswick. Nearer to Heaven than Gloria.

Re: SHED MATTERS 2

Post by Stanley »

Image

I like working with cast iron despite the fact it is dirty and gets into every nook and cranny on the lathe. I see turners on Youtube going to great lengths to catch the chips and dust but I can never see the point, it's going to get everywhere no matter what you do. So first thing this morning was to oil everything on Mrs Harrison to flush the muck out of the slides and bearings, then a deep clean using brake cleaner.

Image

Once I had things reasonably clean I set about testing the new chuck. I got a slug of tool steel as it's a ground finish and reasonably accurate and dialled it in. Then I checked it for run out and found there was a couple of thou. I'm not looking for absolute accuracy, that would be silly with a lathe this old and so many things could affect it. One thing I had noted was that the body of the chuck was running out about a thou and that must be in the register of the chuck so no point going into a decline.

Image

Image

However, one thing that could be exacerbating it could be if the bed is slightly twisted so I got a very sensitive level out and checked the bed. All lathes move over time and mine more than most because the concrete floor is very soft and the levelling screws can wear into it over time. I keep thinking I'll make some metal feet for the screws to seat in..... It was slightly twisted so I levelled it until I got a perfect reading at all four corners. Then I checked the run-out again and it was a lot better.

Image

The next thing to check while I am at it is the alignment of the tail stock. I chucked a bit of scrap bar up, dialled it in and cut it to a 60 degree centre.

Image

Then I mounted the test bar that John gave me which is a ground finish and very well made. I ran the dial indicator down it lengthwise and couldn't find any discernible movement. It's as near dead accurate as I could wish, it looks as though my levelling was OK.

Image

I'll bet you're wondering what I am up to here.... One of the things I have noted is that Adam Booth has a small slug of lead that he uses as a dead blow hammer when he is dialling something in and I had decided I wanted one. My first thought was to melt the lead out of this old clock weight but then I wondered if could get it out of the brass case. First thing was to fit the big 3 jaw because it was easier and turn it square on the end.

Image

Then I parted the brass case off and tried to get the lead to move but with no success. I put it under the mill and split the brass case but was surprised to find that underneath there was a split iron tube!

Image

Back into the lathe and I parted that off as well and when I prised it off I found that the lead inside was in sections.

Image

Have you ever noticed how you can have a tool laid in the box for years without getting an airing and then you use it two days on the trot? I put the weight in the chuck and twisted the end part off with the Stillsons. Then I tidied the ends of the slug up in the lathe and hey presto I have my lead bumper! I tidied up, put everything back where it should be, parked the bumper on the end of the lathe bed and took the 3 jaw off and replaced the 4 jaw. I want to force myself to get used to dialling work-pieces in! A very satisfying morning......
Stanley Challenger Graham
Stanley's View
scg1936 at talktalk.net

"Beware of certitude" (Jimmy Reid)
The floggings will continue until morale improves!
User avatar
Stanley
Global Moderator
Global Moderator
Posts: 90298
Joined: 23 Jan 2012, 12:01
Location: Barnoldswick. Nearer to Heaven than Gloria.

Re: SHED MATTERS 2

Post by Stanley »

It's nice to sit down! I have had one of the hardest mornings in the shed I can remember! My plan was simple, make 4 metal pads for the foundation screws on Mrs Harrison so that they don't bite into the concrete and the lathe will be more stable.

Image

First thing was to find some stock. Remember my piece of wrought iron shaft? Even though ideally I'd have chosen something a bit larger in diameter this will do and the fact it's bad iron won't matter for this job. The new regime, first dial it in. Making myself do this is a good thing. I got this dialled in within half a thou a lot faster than yesterday. Then I took a light skim with a very sharp tool to make it look nice, not that it really matters.... Then I went through all the stages, centre drill, put a depression in the centre with a 1" drill, chamfered the edges and parted each slug off 1/2" thick. No point boring you with that.

Image

Here we are, 4 pads and plenty of the morning left even though I have cleaned my chips up and put everything away. This was when I decided to stop buggering about and install them......

Image

The worst one is going to be the back corner under the headstock, not only because of the restricted space (the joys of a small shed!) but the fact that this is the heaviest end of the lathe. So I started here by cleaning up and making some space.

Image

You wouldn't believe the grief I had getting to this stage and I'm not high enough yet! I had to go for raising the front edge and unbalancing the lathe to ease the final lift and I'm only lifting it 1/2" for God's sake!

Image

I eventually got it high enough to get the front pad in under the headstock. Funnily enough the worst part of this stage was to get my wedge out from the front edge. I got there in the end but it wasn't easy.....

Image

Down to the tailstock end and I used my head, moved the saddle and tailstock up to the headstock end to lighten the tail end as much as possible. Enough thinking, I got on with it and it went well for a change, this end was higher than the headstock end because the floor slopes. Easier to get a start with the wedges!

Image

Knocking off time. All the pads installed and ready for levelling. I've even tucked the carpet under the lathe because we have more room now. But that's quite enough for today, I'm knackered but secretly glad that I bit the bullet. All I need now is for the screws to stay in the depressions on the pads.... But perhaps I am just being pessimistic!
Stanley Challenger Graham
Stanley's View
scg1936 at talktalk.net

"Beware of certitude" (Jimmy Reid)
The floggings will continue until morale improves!
User avatar
Stanley
Global Moderator
Global Moderator
Posts: 90298
Joined: 23 Jan 2012, 12:01
Location: Barnoldswick. Nearer to Heaven than Gloria.

Re: SHED MATTERS 2

Post by Stanley »

Later, after my afternoon sleep. I realised how dirty my jeans were after crawling about on the floor in the shed and had to put a clean pair on.....
A bit later still.... I know this is entirely the wrong attitude but I have just had a very satisfying ten minutes watching a Youtube video of very expensive CNC milling cock-ups. So nice to know that the Lords of the Machining Universe also make mistakes!!
Stanley Challenger Graham
Stanley's View
scg1936 at talktalk.net

"Beware of certitude" (Jimmy Reid)
The floggings will continue until morale improves!
User avatar
Stanley
Global Moderator
Global Moderator
Posts: 90298
Joined: 23 Jan 2012, 12:01
Location: Barnoldswick. Nearer to Heaven than Gloria.

Re: SHED MATTERS 2

Post by Stanley »

One or two stray aches and pains in my legs and back from the unaccustomed exercise yesterday but nothing serious. I suppose it's good for me. Should I be following Sue and doing Pilates?
Stanley Challenger Graham
Stanley's View
scg1936 at talktalk.net

"Beware of certitude" (Jimmy Reid)
The floggings will continue until morale improves!
Locked

Return to “Crafts”