SHED MATTERS 2

Re: SHED MATTERS 2
Have I asked you this before? If so, I've forgotten your answer. When I think of machines cutting metal I see lathes with a constant feed of cutting/cooling fluid on the tool. You seem to manage without any lubrication and yet you do some heroic cuts. Is this normal?
-
Stanley

- Global Moderator

- Posts: 90295
- Joined: 23 Jan 2012, 12:01
- Location: Barnoldswick. Nearer to Heaven than Gloria.
Re: SHED MATTERS 2
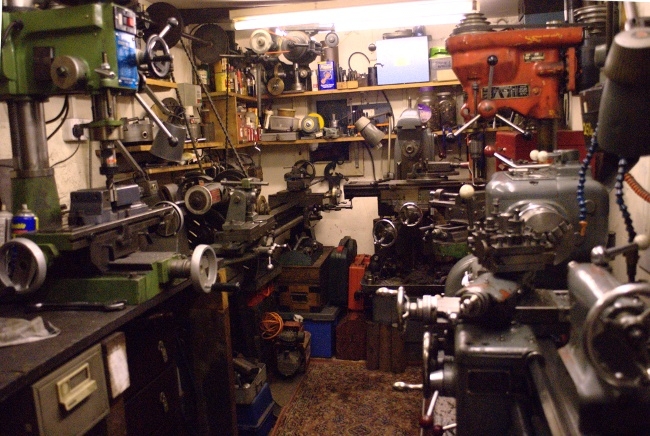
That's flood cooling China and is good for the tools but messy and I am not fit up for it. I have a pot of straight cutting oil on the lathe and if I feel the need I just use a brush to load the cut, always use it when I'm parting off steel. There's a good system made by Noga, mist cooling, and I sometimes fancy that but I manage without..... Quite normal practice.
Stanley Challenger Graham
Stanley's View
scg1936 at talktalk.net
"Beware of certitude" (Jimmy Reid)
The floggings will continue until morale improves!
Stanley's View
scg1936 at talktalk.net
"Beware of certitude" (Jimmy Reid)
The floggings will continue until morale improves!

Re: SHED MATTERS 2
As an apprentice c. 1950s the old lathes were drip can cooling a can that sat on a spigot with a an adjustable pipe and tap, the cutting oil was a thick brown cutting oil that you mixed with water , this turned the mixture a milky colour and was was known as "mystic" because of this magical transformation !, an aside to this, the factory floor was timber with a crawl space below, as the apprentice to the millwright who maintained the shop if we were moving, leveling or installing equipment i was sent into the crawl space to get at the underside end of the holding down bolts, not an enviable job there was, the drainings of the mystic, swarf from the machines and rats that came in for the scraps of food stuffed through hole by workers on their breaks, no canteen facilities,
-
Stanley
- Global Moderator
- Posts: 90295
- Joined: 23 Jan 2012, 12:01
- Location: Barnoldswick. Nearer to Heaven than Gloria.
Re: SHED MATTERS 2
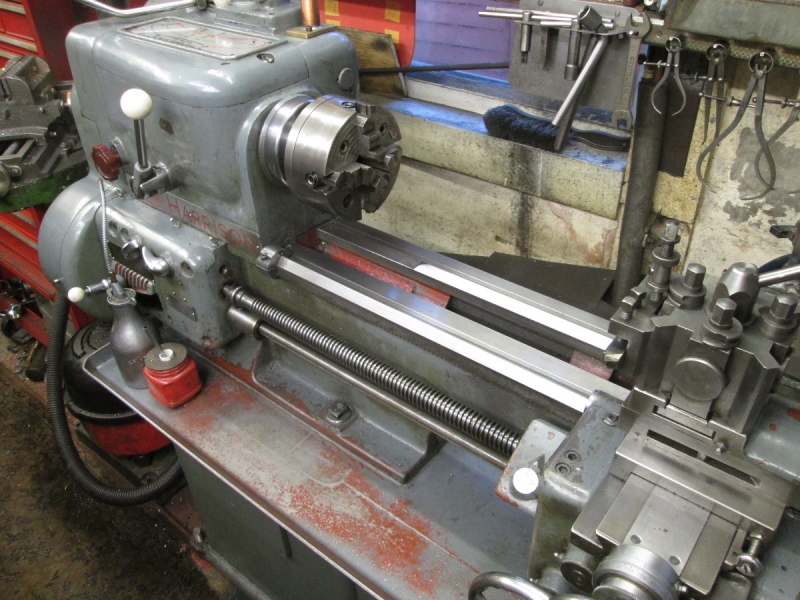
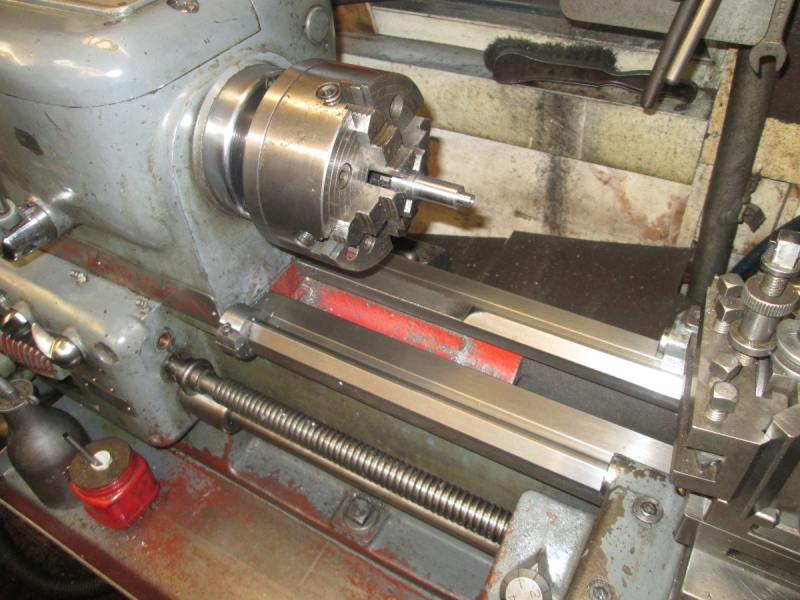
If you look at the pictures of the shed you'll see a black tank on the wall on the right hand side of the lathe. It holds about 10 gallons of neat cutting oil and it's piped down to the end of the cross slide and I have a flexible spout for it so if I need to I can use a stream of neat cutting oil on to the cut. There is a drain in the base tray of the lathe with a small tank underneath. It's designed to be connected to a return pump behind the lathe but I haven't got one. If I have used it I return the oil manually. I haven't used it for a while, and for China's benefit, if you look at the left hand side of the base tray you'll see an oil can and a red pot with a brush handle poking out of the top. That's my source of lubrication if I'm parting or wanting the best finish on a fine cut. Basically flood cooling is for when you're pushing the lathe and the tool and these days it's very rare for me to do that except on cast iron and of course you don't use lubricant on that.
Back to this morning, it's housework morning so I have only had an hour in the shed.
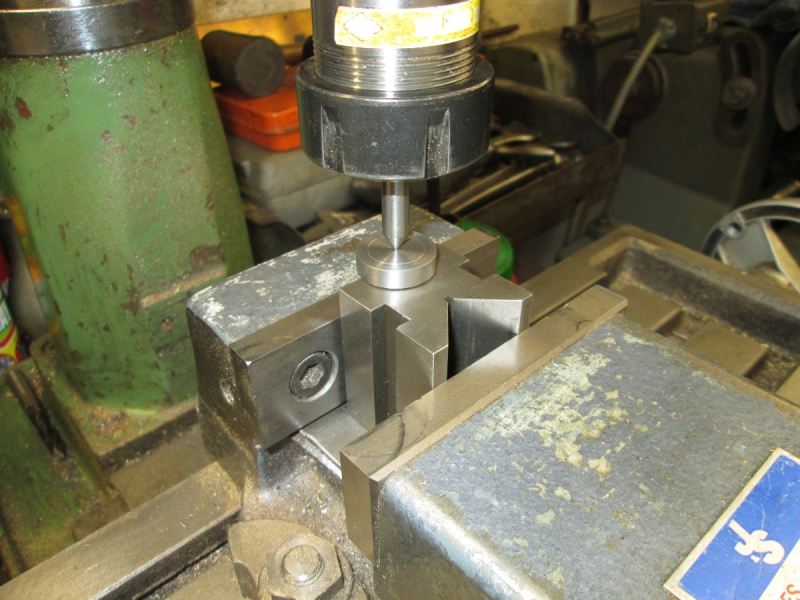
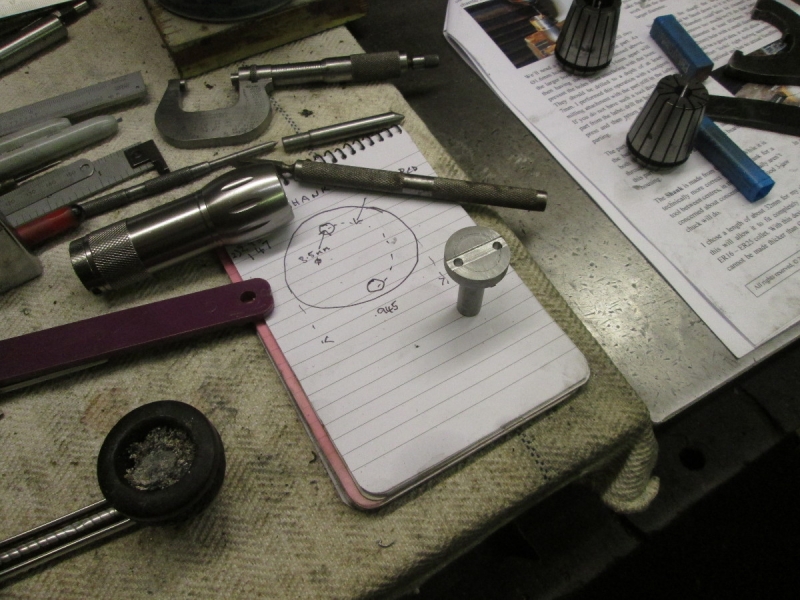
As usual, when I am doing something that is new, I got myself into the mood by cleaning Mrs Harrison and setting her up for the next stage. Then I applied myself to the day's business, drilling the two holes in the locking ring for the peg spanner.
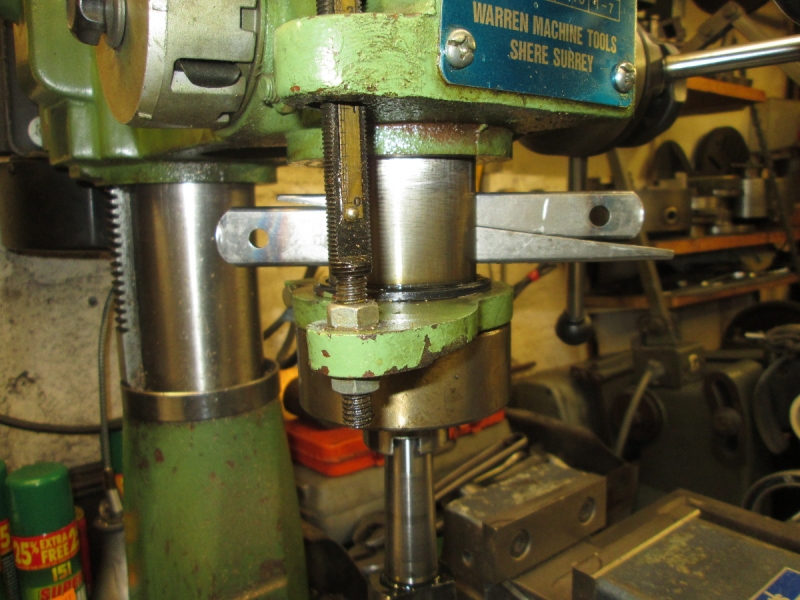
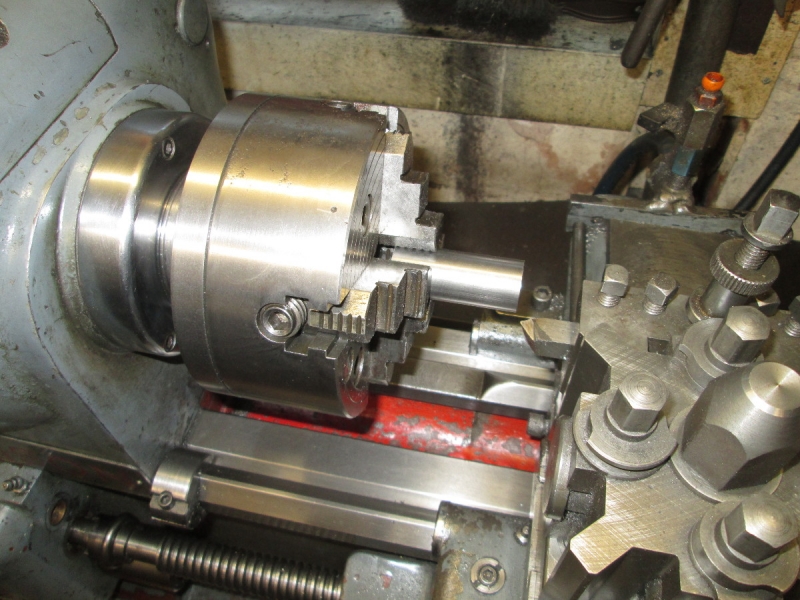
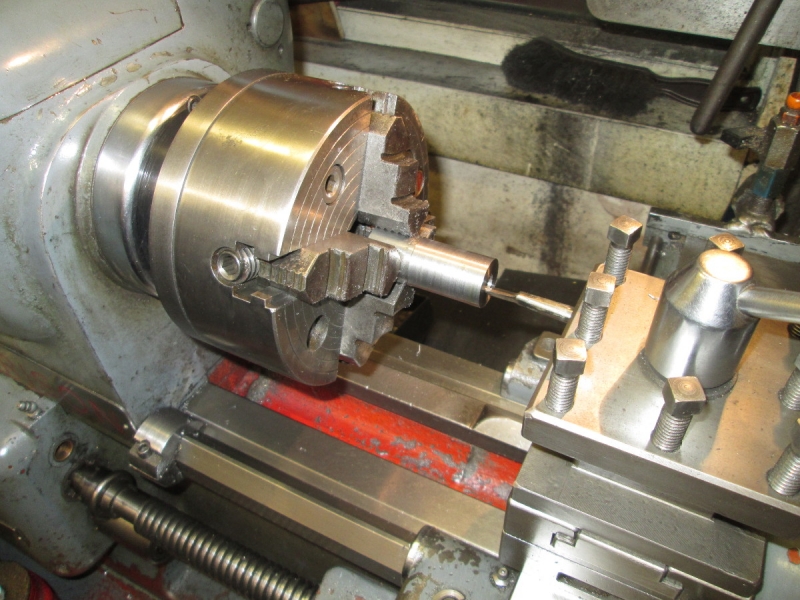
I'm going to have a play with my new toy and decided that since I would be drilling holes with a small drill the collet chuck had to come off. It is held in its 3 Morse taper by a draw-bolt and so is always as fast as a thief. This is a good reason to take it off from time to time because they can 'freeze' in the taper if left too long. All I'm doing here is drawing attention to one of my bleeding obvious tips. Opposing or folding wedges will shift almost anything!
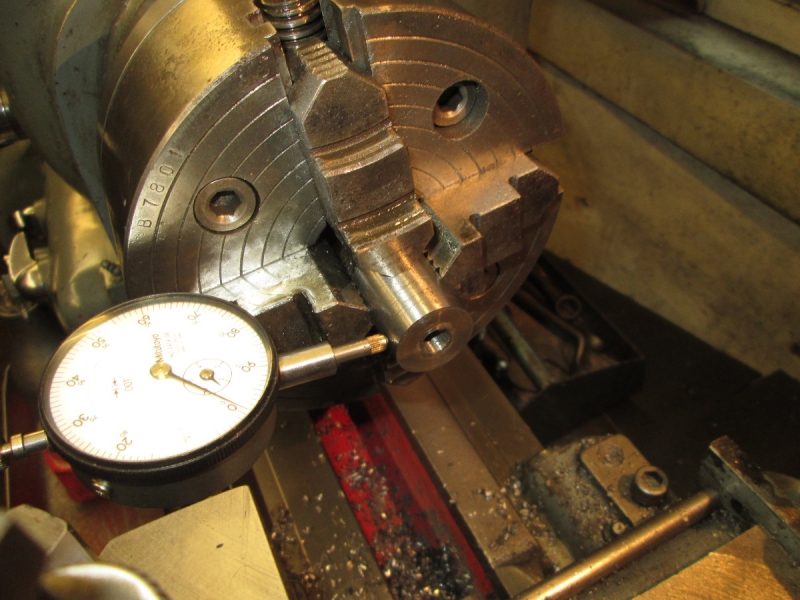
I put my keyless chuck on but when added to the length of the rotating centre finder it was too low even with the head wound right up to the top. In normal use it will be best used in the collet chuck which is very short.
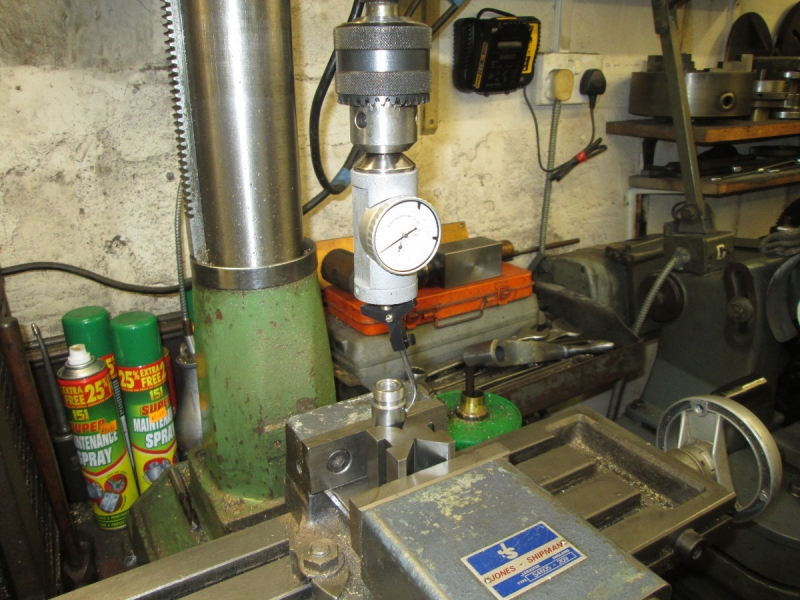
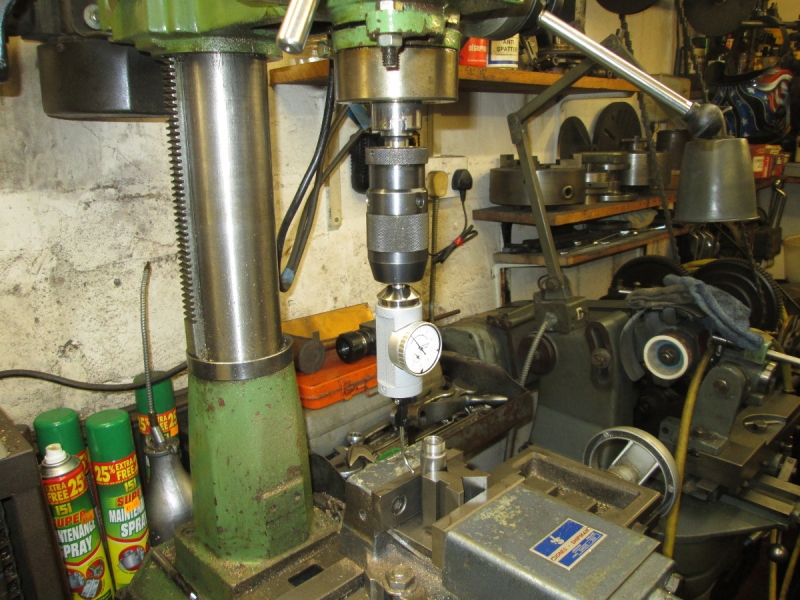
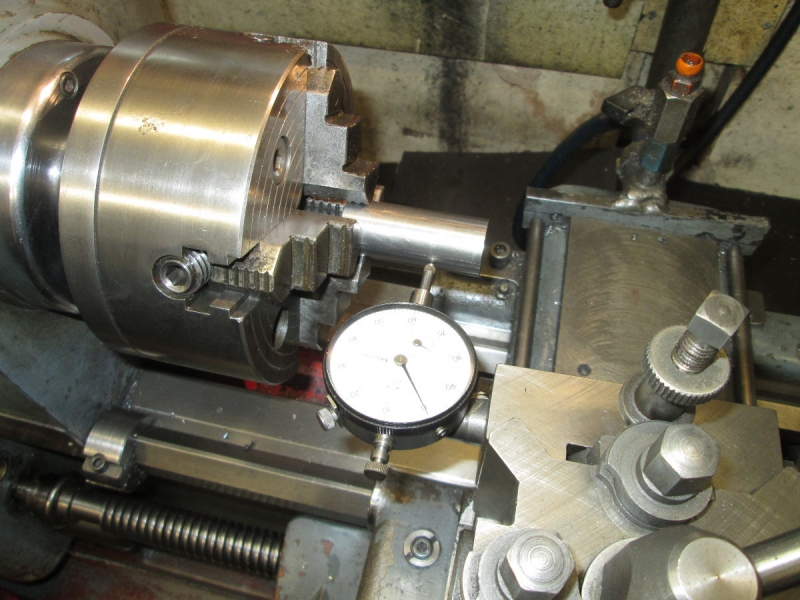
I had to have a rethink and used an ordinary chuck. I have never used one of these indicators before and had to do a lot of thinking. I eventually cracked it but there is still something I have missed about the initial set up as it wouldn't have worked on a larger diameter, I will have to do some searching on Youtube. However, at knocking off time at 9AM when the free leccy kicked in I had the workpiece centred under the spindle within half a thou which was the object of the exercise. An interesting morning and once more I have much to learn. By the way I rotated the spindle by hand as I didn't trust myself to use it on power.
Back to this morning, it's housework morning so I have only had an hour in the shed.
As usual, when I am doing something that is new, I got myself into the mood by cleaning Mrs Harrison and setting her up for the next stage. Then I applied myself to the day's business, drilling the two holes in the locking ring for the peg spanner.
I'm going to have a play with my new toy and decided that since I would be drilling holes with a small drill the collet chuck had to come off. It is held in its 3 Morse taper by a draw-bolt and so is always as fast as a thief. This is a good reason to take it off from time to time because they can 'freeze' in the taper if left too long. All I'm doing here is drawing attention to one of my bleeding obvious tips. Opposing or folding wedges will shift almost anything!
I put my keyless chuck on but when added to the length of the rotating centre finder it was too low even with the head wound right up to the top. In normal use it will be best used in the collet chuck which is very short.
I had to have a rethink and used an ordinary chuck. I have never used one of these indicators before and had to do a lot of thinking. I eventually cracked it but there is still something I have missed about the initial set up as it wouldn't have worked on a larger diameter, I will have to do some searching on Youtube. However, at knocking off time at 9AM when the free leccy kicked in I had the workpiece centred under the spindle within half a thou which was the object of the exercise. An interesting morning and once more I have much to learn. By the way I rotated the spindle by hand as I didn't trust myself to use it on power.
Stanley Challenger Graham
Stanley's View
scg1936 at talktalk.net
"Beware of certitude" (Jimmy Reid)
The floggings will continue until morale improves!
Stanley's View
scg1936 at talktalk.net
"Beware of certitude" (Jimmy Reid)
The floggings will continue until morale improves!
Re: SHED MATTERS 2
Thanks for the info on cutting and cooling fluids. I've ordered a mitre guide block to be used when I cut my aluminium tile-edging strips, that's the nearest I'll come to precision cutting and I won't need any cooling for my hacksaw!
-
PanBiker

- Site Administrator

- Posts: 16447
- Joined: 23 Jan 2012, 13:07
- Location: Barnoldswick - In the West Riding of Yorkshire, always was, always will be.
Re: SHED MATTERS 2
I fitted aluminium edging on my kitchen tiles, just used the set square to scribe a mark, it has a 45 degree offset on the handle.
Ian
Re: SHED MATTERS 2
I don't have many tools, Ian, and I haven't got a set square or scribe! My saw handle has a 45deg side on it. When I moved to China I left all my tools with my eldest stepdaughter in England. I've been gradually re-acquiring tools whenever I need them, mainly power tools.
-
Stanley
- Global Moderator
- Posts: 90295
- Joined: 23 Jan 2012, 12:01
- Location: Barnoldswick. Nearer to Heaven than Gloria.
Re: SHED MATTERS 2
I found some good info on what I now know is the Blake indicator on Youtube including some interesting facts like you can't 'measure' with it, only get relative positions. Also that half a thou accuracy with an El Cheapo Chinese one is very acceptable!
Gradual building up is the right way China but be careful, look where I ended up!
Gradual building up is the right way China but be careful, look where I ended up!
Stanley Challenger Graham
Stanley's View
scg1936 at talktalk.net
"Beware of certitude" (Jimmy Reid)
The floggings will continue until morale improves!
Stanley's View
scg1936 at talktalk.net
"Beware of certitude" (Jimmy Reid)
The floggings will continue until morale improves!
-
Stanley
- Global Moderator
- Posts: 90295
- Joined: 23 Jan 2012, 12:01
- Location: Barnoldswick. Nearer to Heaven than Gloria.
Re: SHED MATTERS 2
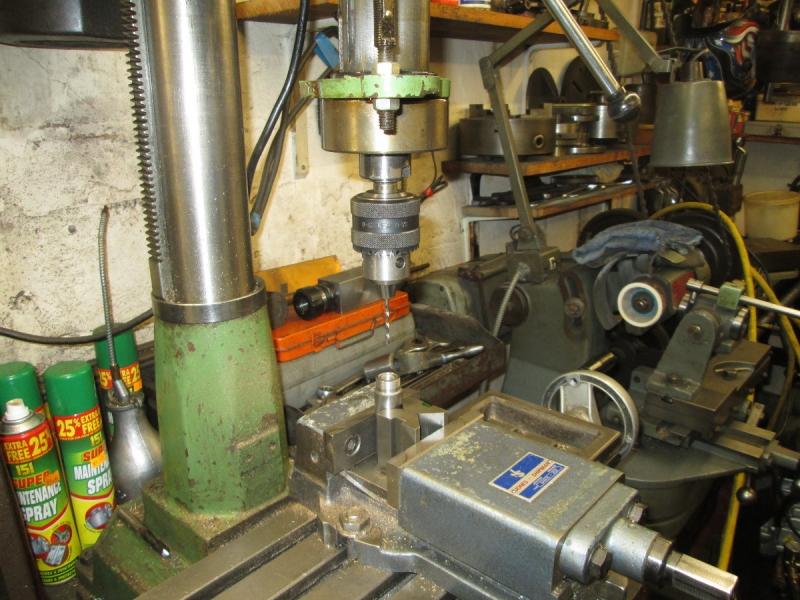
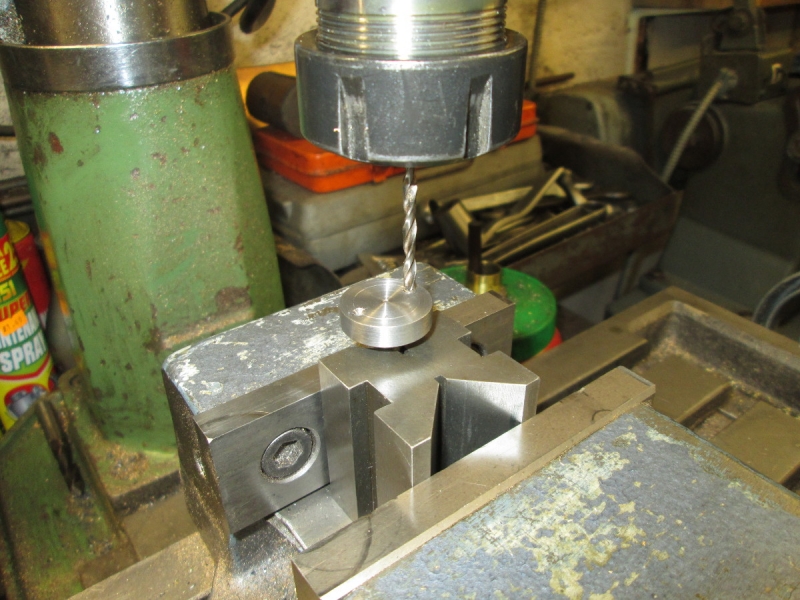
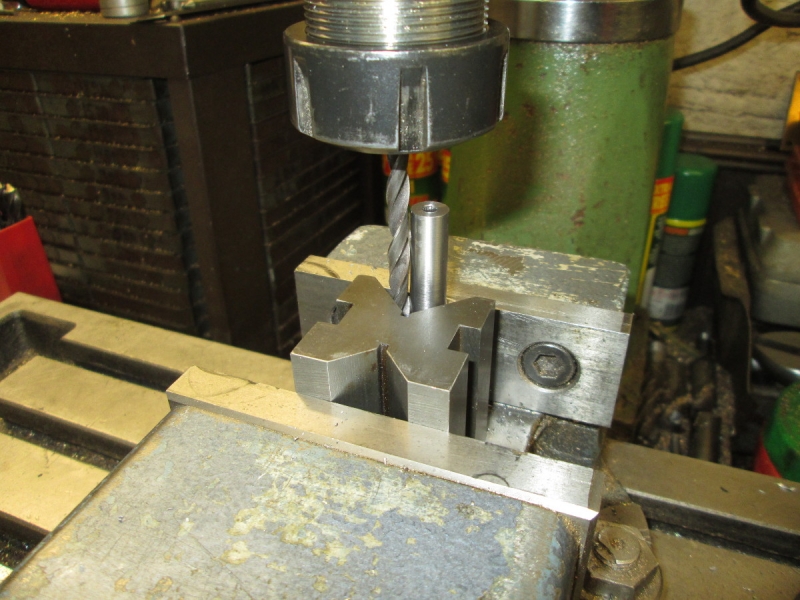
I was in the shed in good time and the first job was to put the Blake indicator away in its fitted box. I have the centre now and so it was dead easy, pop a drill in and drill two holes in the locking ring just shy of the border of the recess. Wrong! The head of the mill is too high for the drill to reach. So why not drop it? Simple, I'd lose the accuracy of my centre so I had to have a rethink.
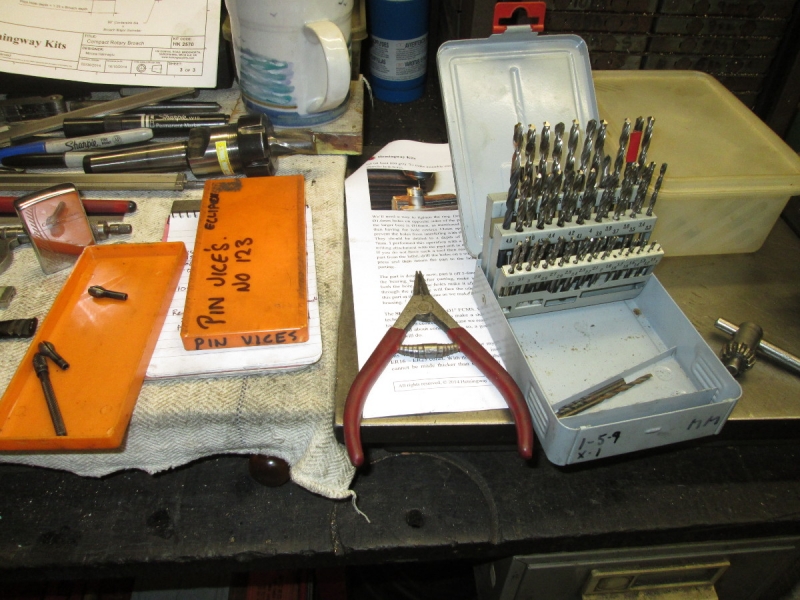
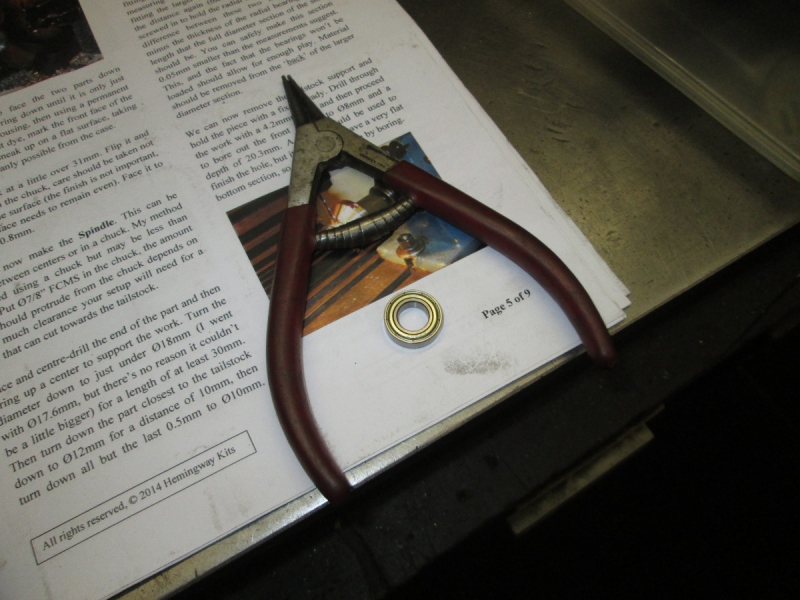
There was another small matter. The design calls for holes 1.6mm diameter but that's too small for the circlip pliers which will be just the ticket for tightening the locking ring so a bit of measuring and a slightly larger drill.
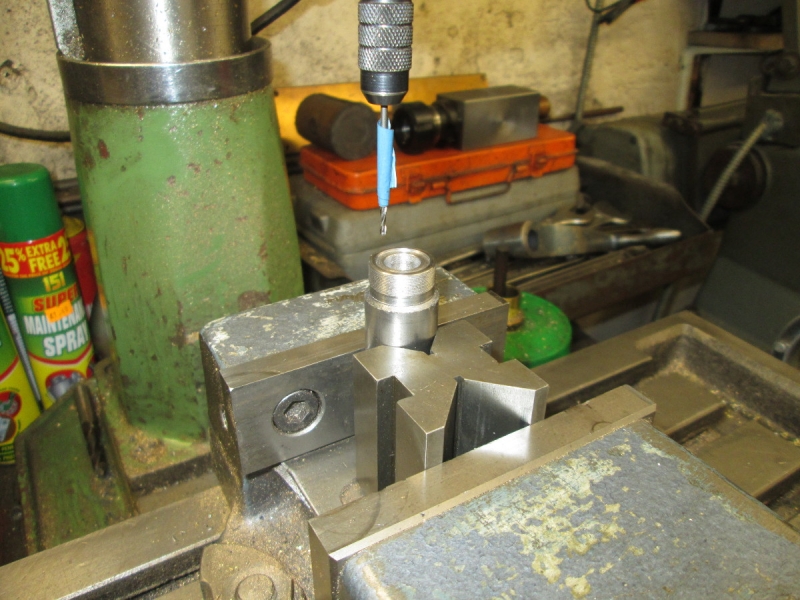
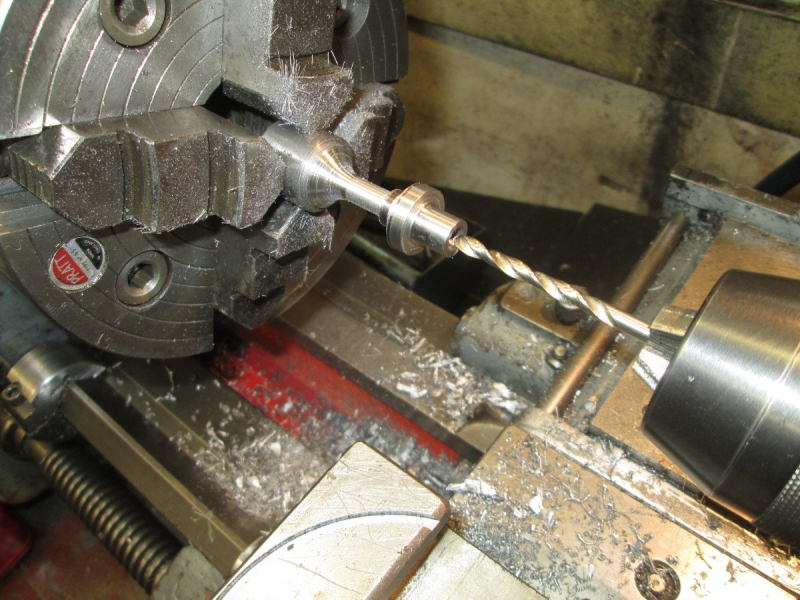
Then make my drill 6" long with a pin vice. This sacrificed some rigidity but with care and a lot of pecking I drilled a hole. Note the sophisticated depth gauge.....
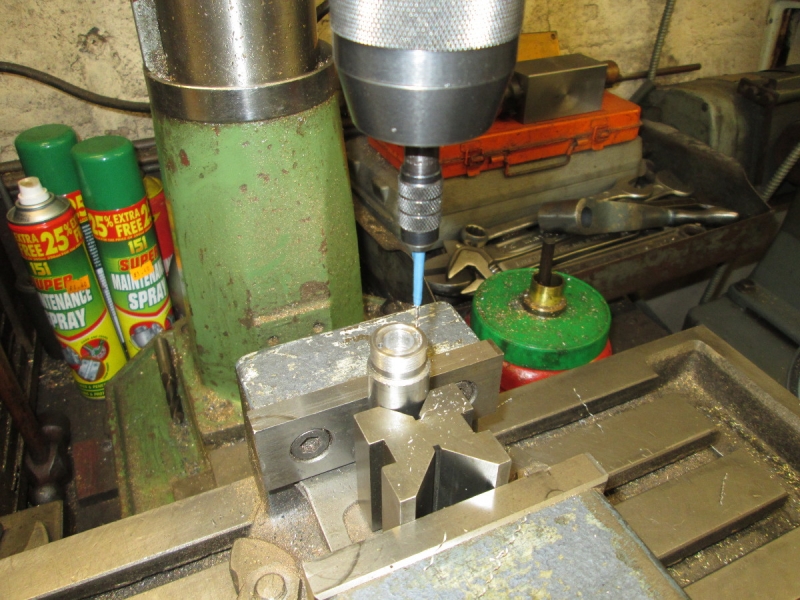
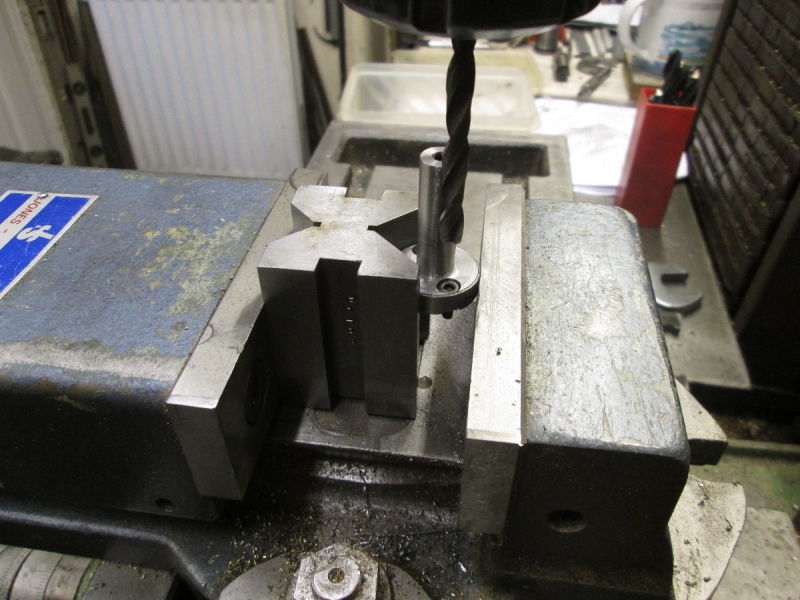
Then a simple move across the X axis and drill the second with even more care! The last thing I want at the moment is a drill broken in the hole and don't forget there's a 2hp motor driving it.....
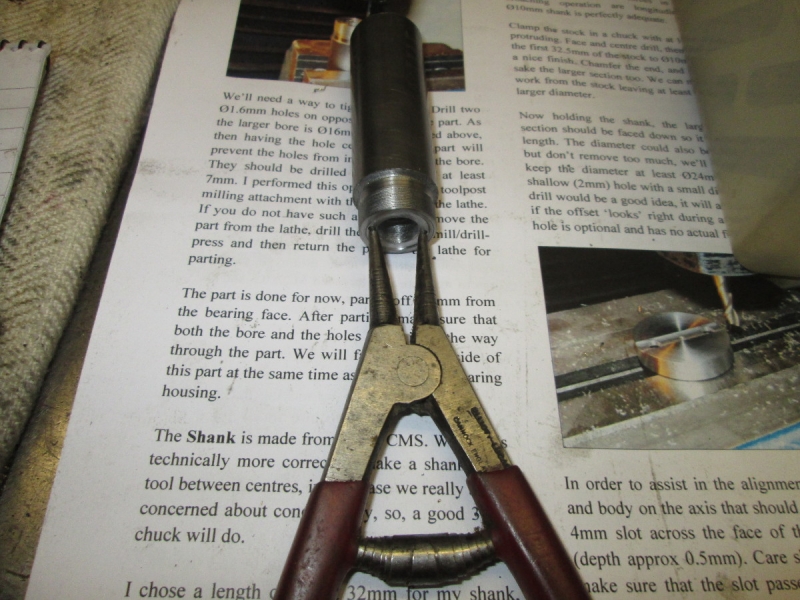
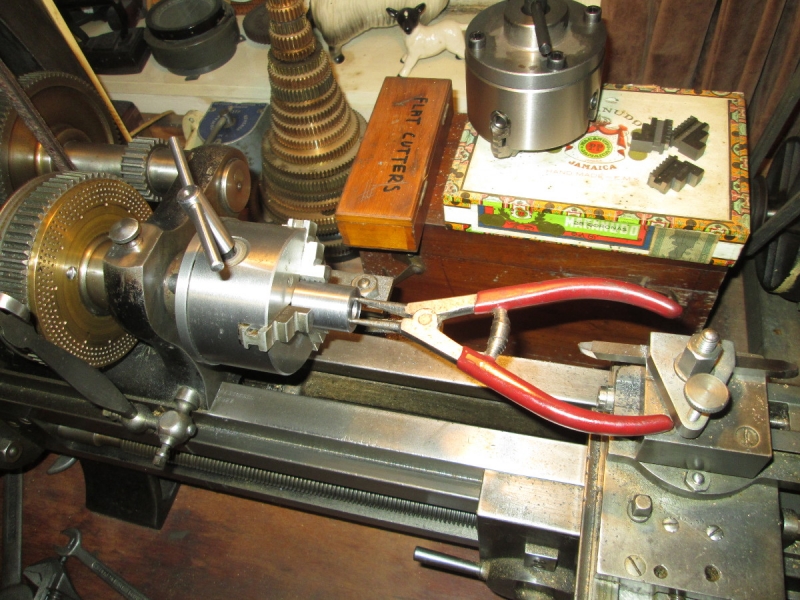
A quick check with the circlip pliers. That'll do nicely.
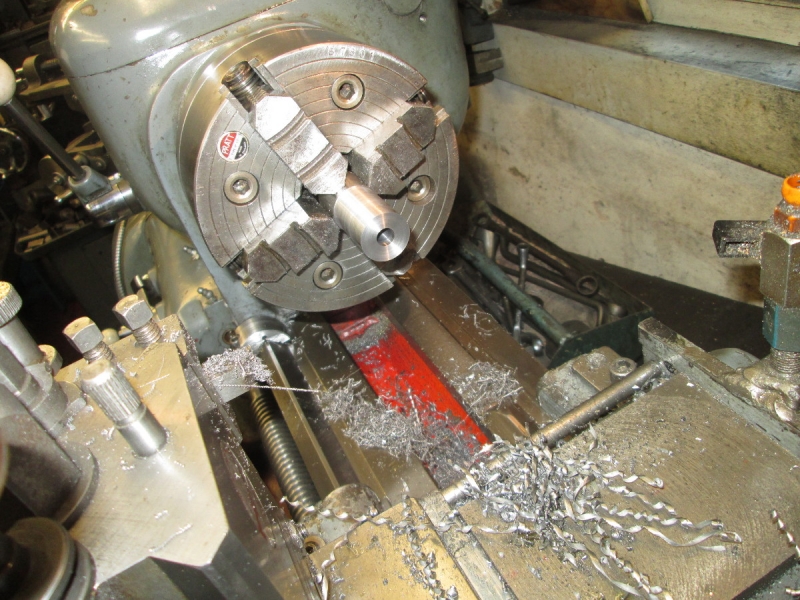
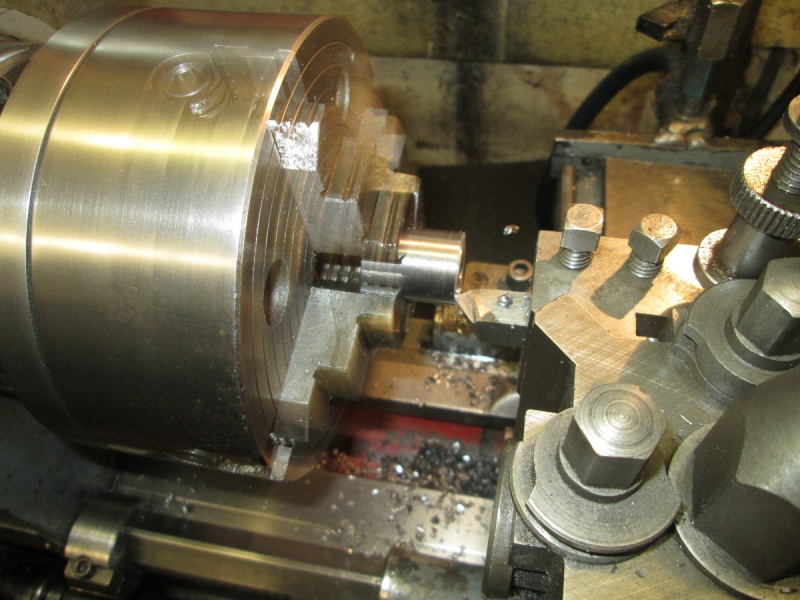
Back in the 4 jaw and part it off.
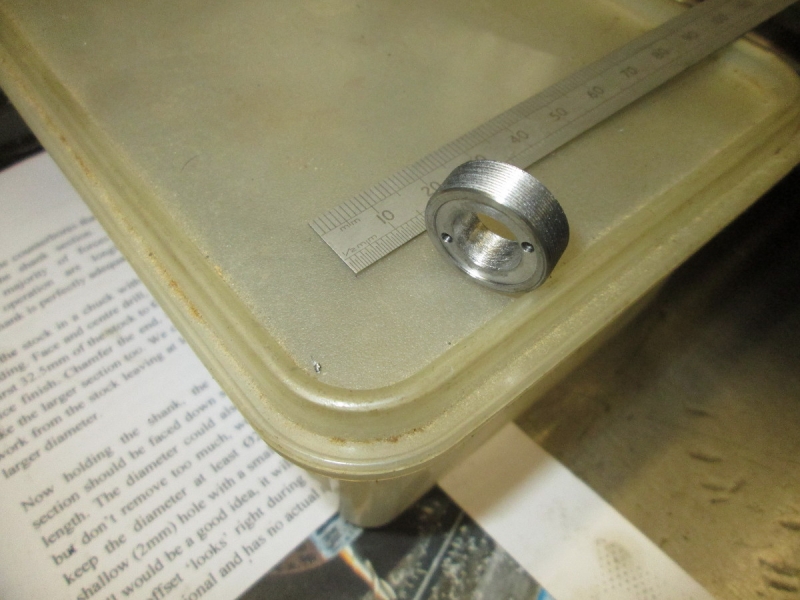
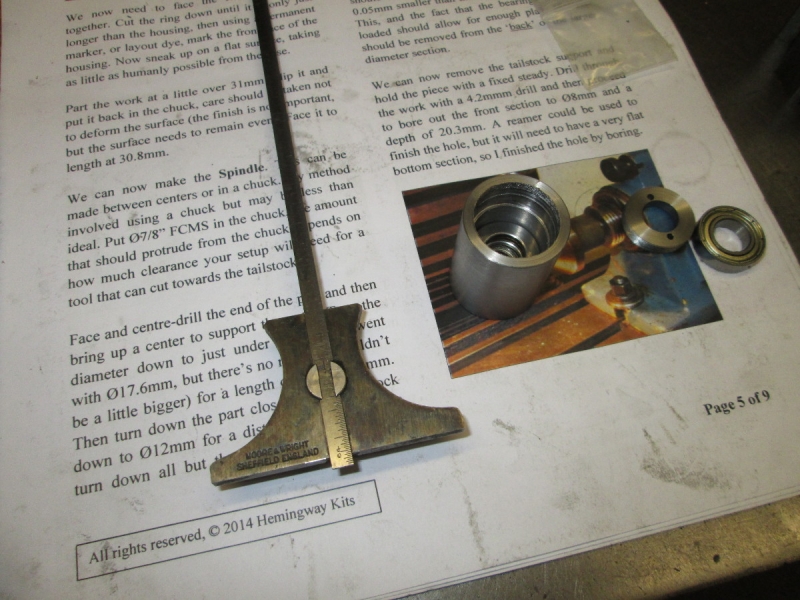
We're into watchmaking again..... But that's OK. No need to face the parted off surface, that gets done on final assembly into the body. No problem with it being a slightly rough surface.
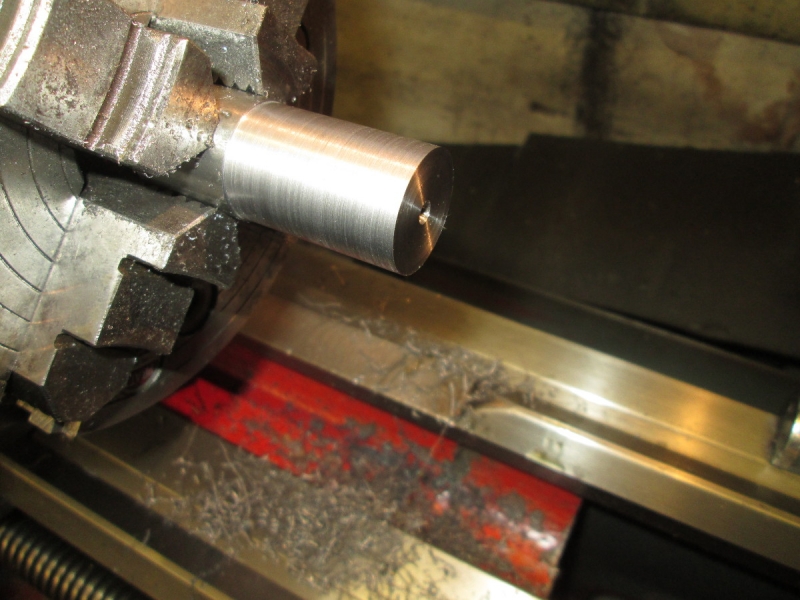
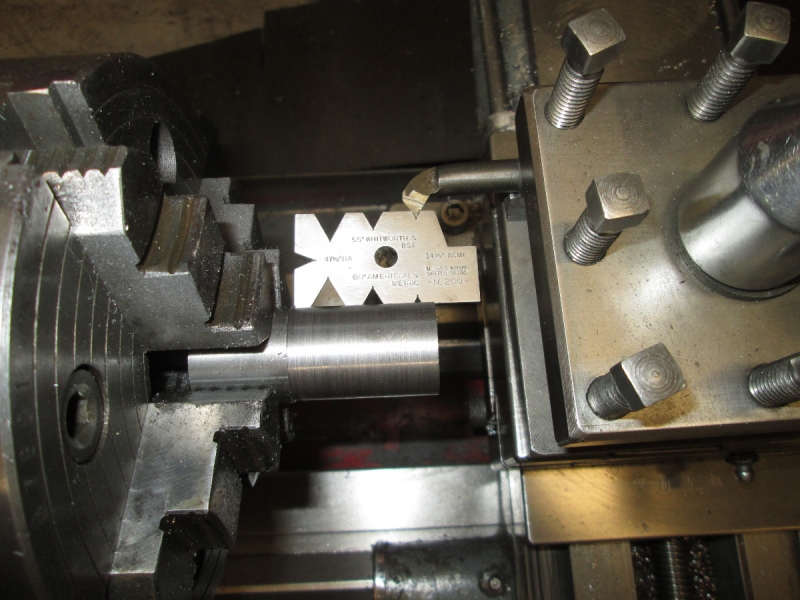
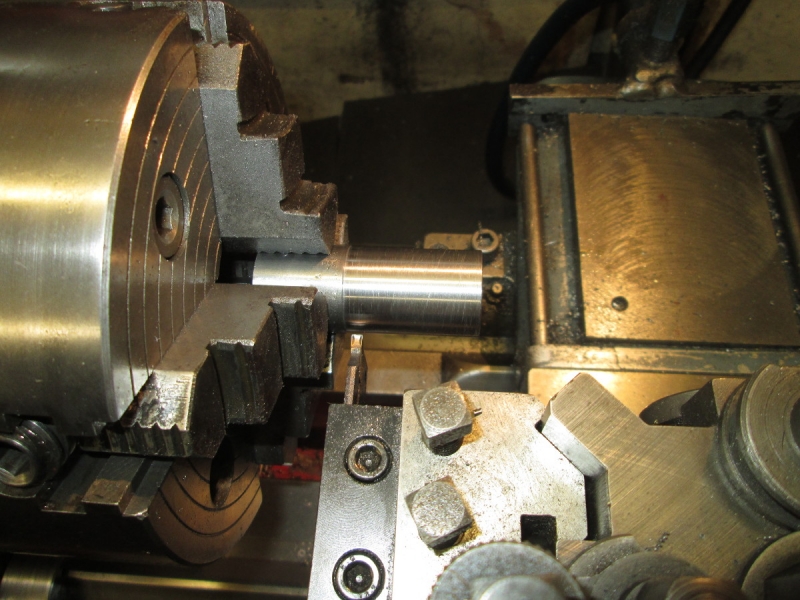
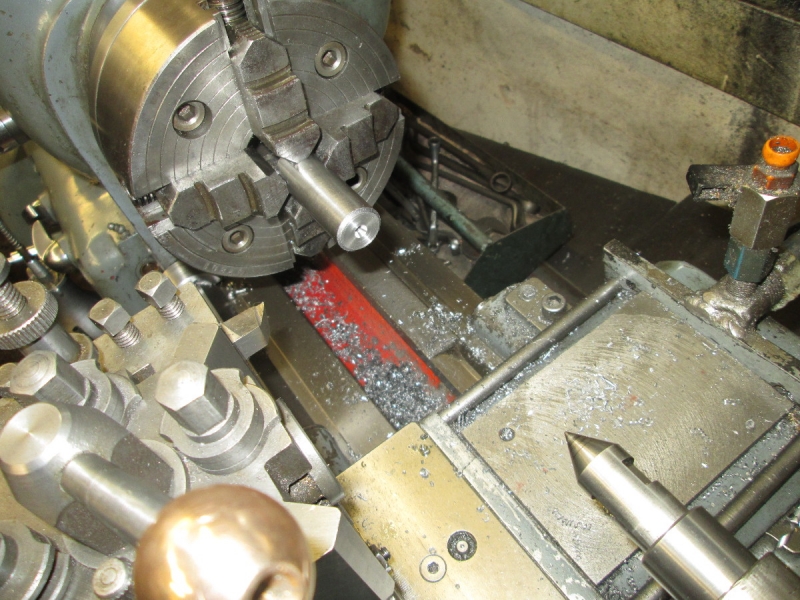
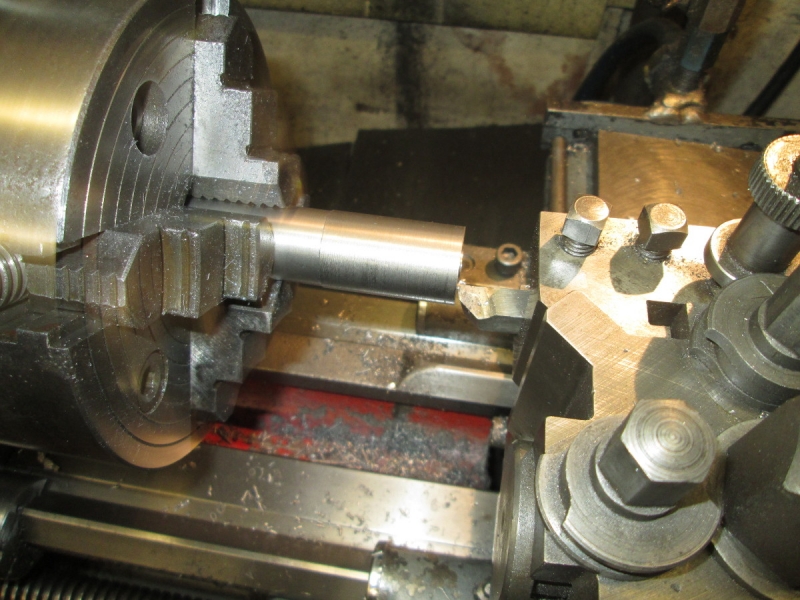
I popped the locking ring in the box with the other parts and got the slug of 1" free cutting mild steel out. We are going to make the shank now. Comfortingly, the destructions say that concentricity isn't a problem and a 3 jaw SC chuck can be used but I am being a masochist and making myself use the 4 jaw and dial everything in to half a thou.
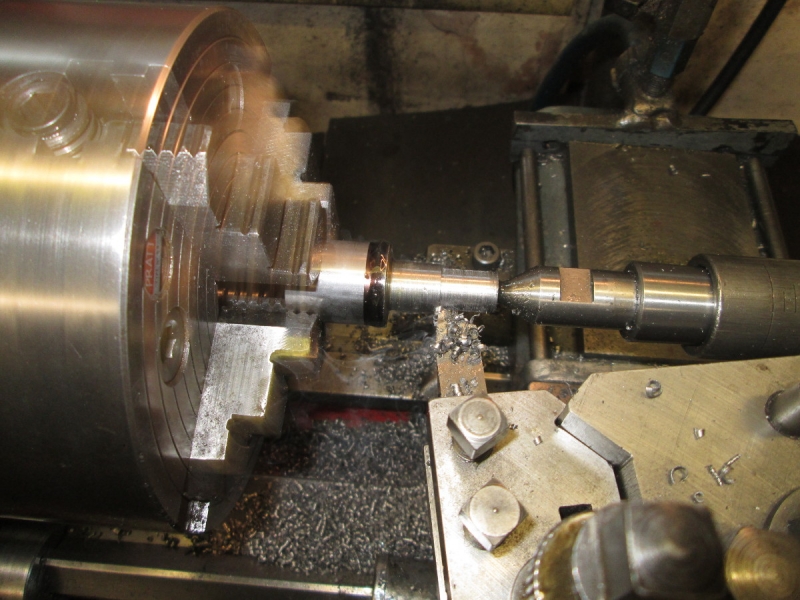
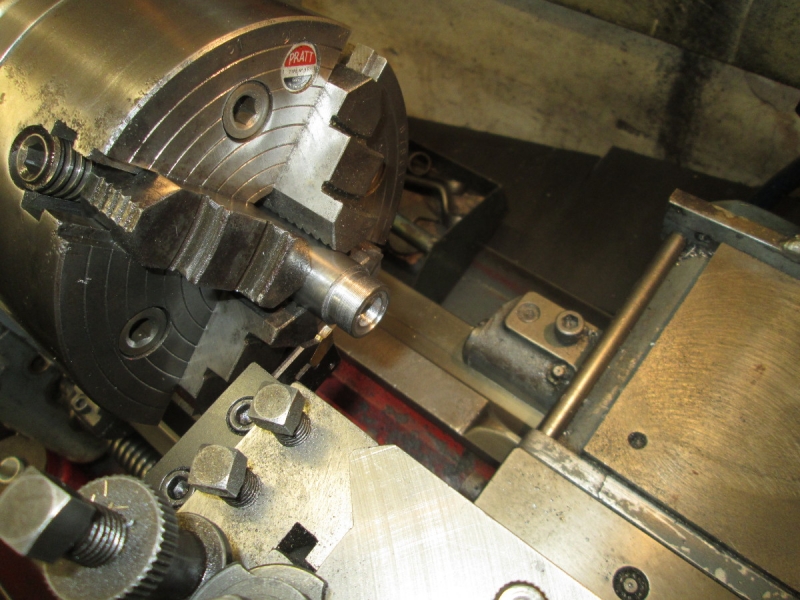
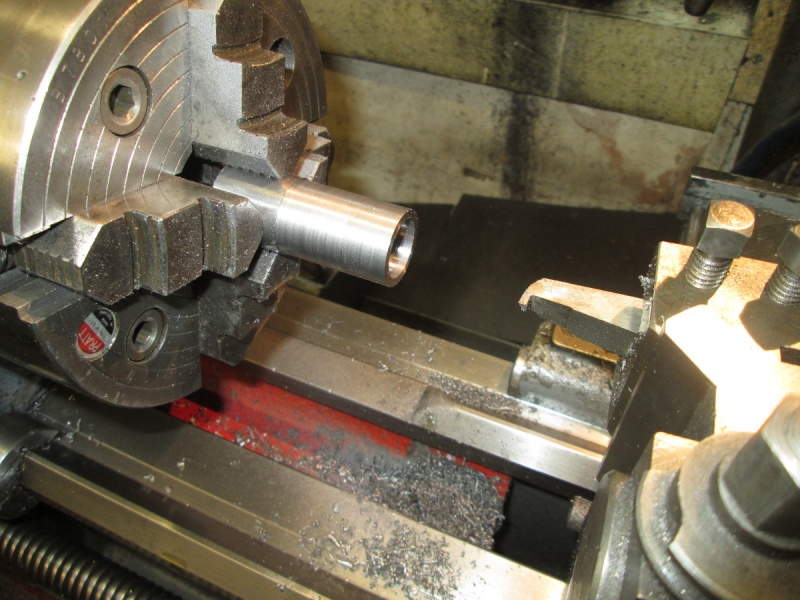
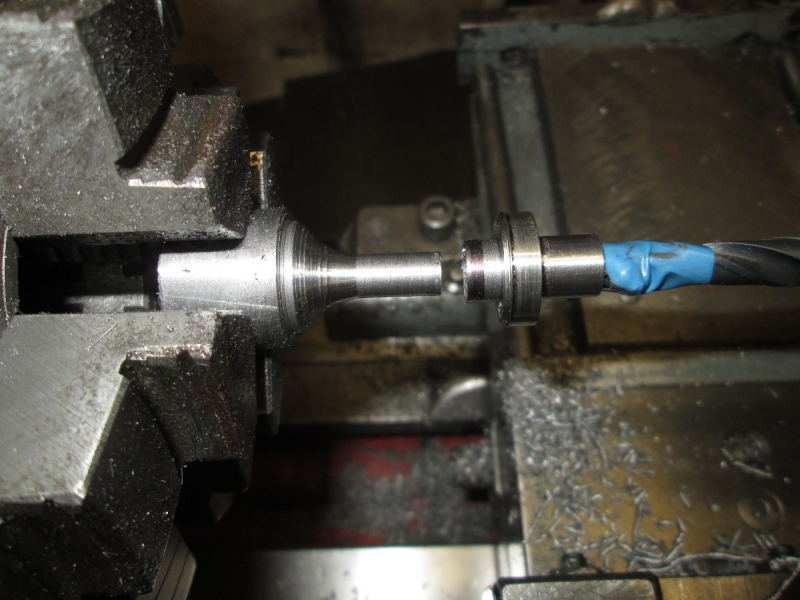
This one's for China. Turning the shank down to 10mm and I'm using a drop of cutting oil for the 50 thou cut to look after the edge of the HSS tool and the finish.
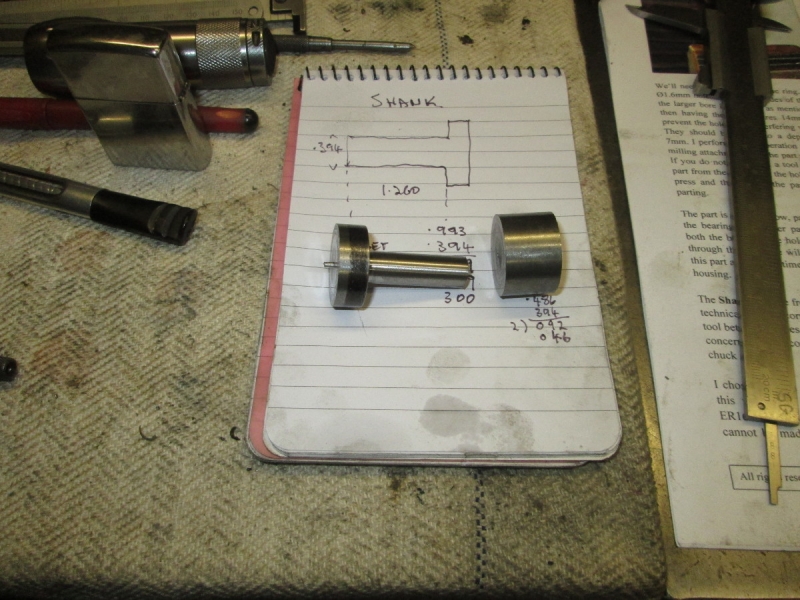
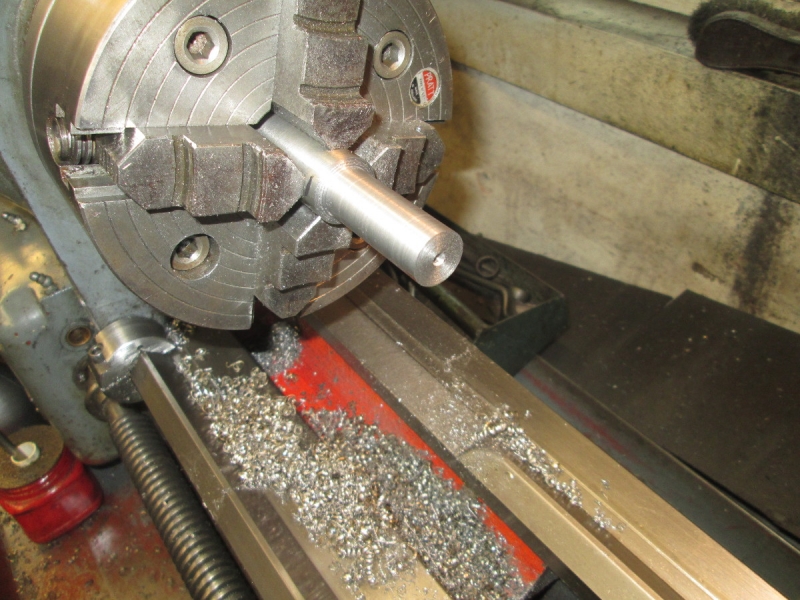
Knocking off time. The shank is finished and the body parted off from the stock. All ready for the next stages tomorrow. Again I am slow but everything is right and no cock-ups. Speed is not the object!
Stanley Challenger Graham
Stanley's View
scg1936 at talktalk.net
"Beware of certitude" (Jimmy Reid)
The floggings will continue until morale improves!
Stanley's View
scg1936 at talktalk.net
"Beware of certitude" (Jimmy Reid)
The floggings will continue until morale improves!
-
Stanley
- Global Moderator
- Posts: 90295
- Joined: 23 Jan 2012, 12:01
- Location: Barnoldswick. Nearer to Heaven than Gloria.
Re: SHED MATTERS 2
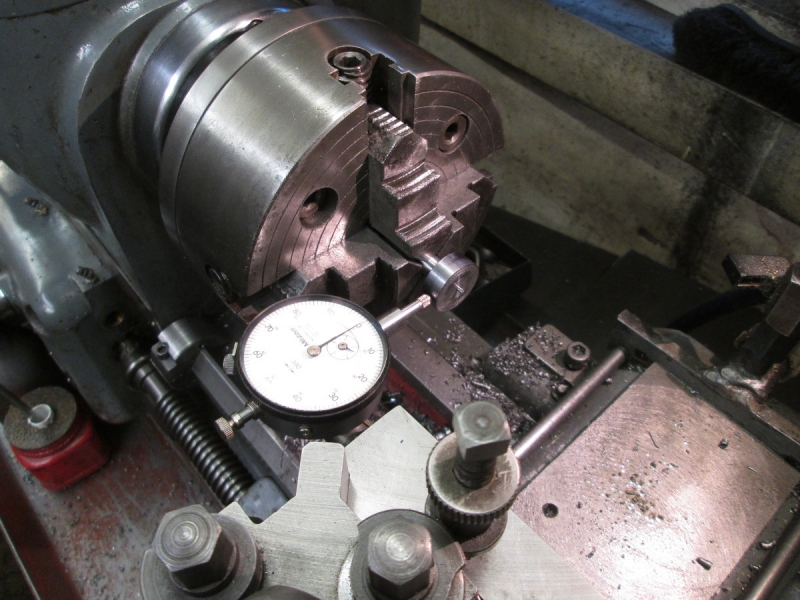
I have to finish the other end of the shank, so I reversed it and popped it into the 4 jaw. I dialled it in to about two tenths of a thou, practice is making me better at this and I don't mind the extra time it takes. I turned it to exactly the dimensions on the drawing, put a little mark in the centre and scribed a PCD for the 3.5mm holes, then into the mill.
I was tempted to get the Blake indicator out for more practice but reflected that enough was enough and found the centre with a point in the chuck. Then I locked the Y axis.
I scribed two marks across the PCD with the pointer while I had it in and then drilled the holes.
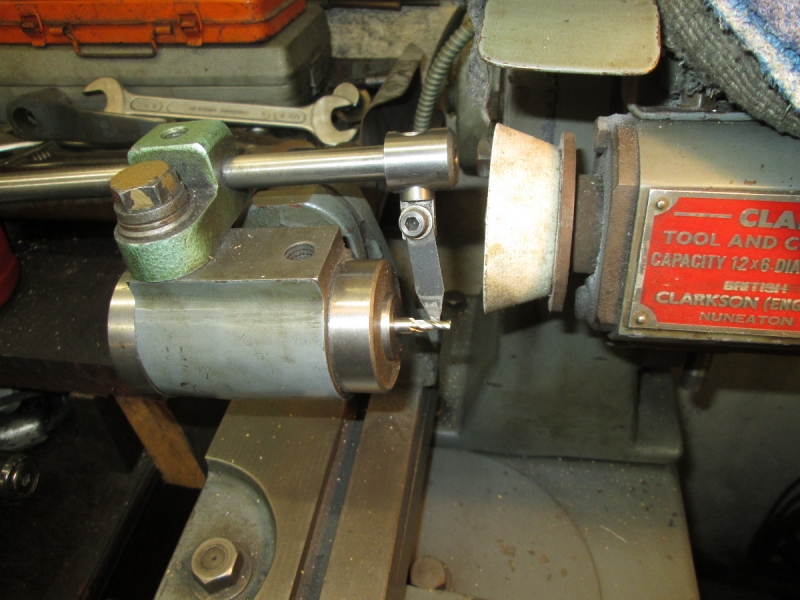
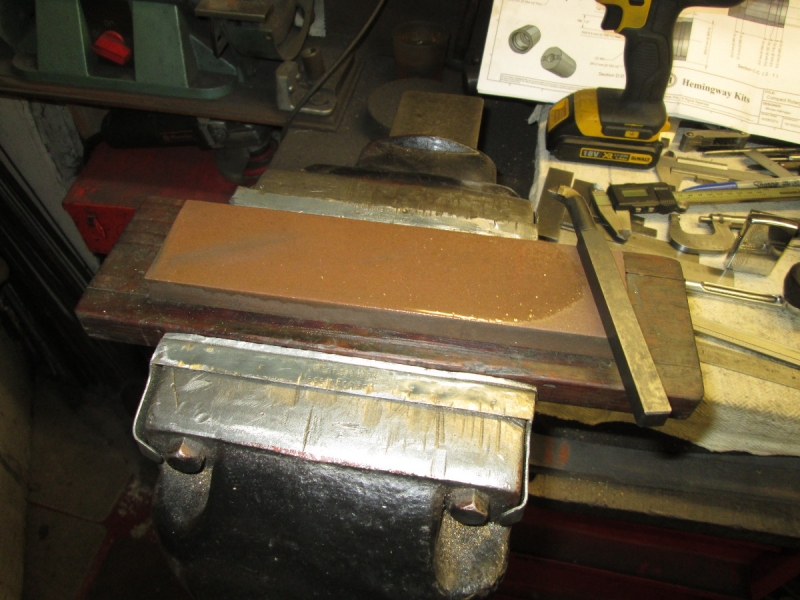
Next I have to mill a 4mm slot .5mm deep across the centre line. I hadn't got an end mill that size but had a 3/16" slot drill which will have to do. I dressed the stone and gave the drill a touch up. My biggest problem is seeing the flutes!
Three very slow and careful passes across the face and then a good clean up of the edges.
Here we are at closing time. Once more, very slow but sure, no cock-ups! Then I put a few tools away and took Jack for his mid morning crap. I took the watch crystals back to Fred Huppach's and the dud battery from the digital gauge. A new one was £4! I got a shock when young Fred told me the price of the plastic 'crystal'.... I think they must be hand-crafted by virgins on the lower slopes of the Himalayas because it was £8!! That's quite enough for this morning! Tomorrow is counterboring the back side of the holes for the heads of the cap screws.....
Stanley Challenger Graham
Stanley's View
scg1936 at talktalk.net
"Beware of certitude" (Jimmy Reid)
The floggings will continue until morale improves!
Stanley's View
scg1936 at talktalk.net
"Beware of certitude" (Jimmy Reid)
The floggings will continue until morale improves!
-
Stanley
- Global Moderator
- Posts: 90295
- Joined: 23 Jan 2012, 12:01
- Location: Barnoldswick. Nearer to Heaven than Gloria.
Re: SHED MATTERS 2
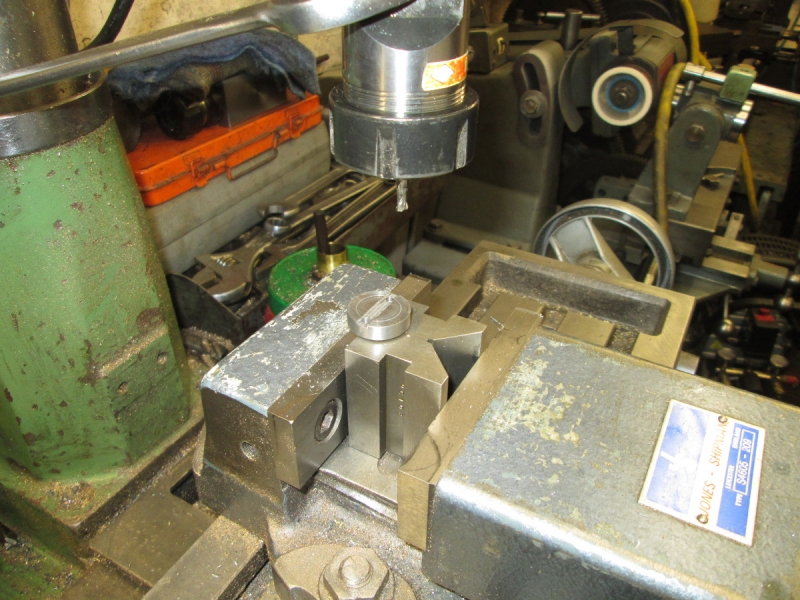
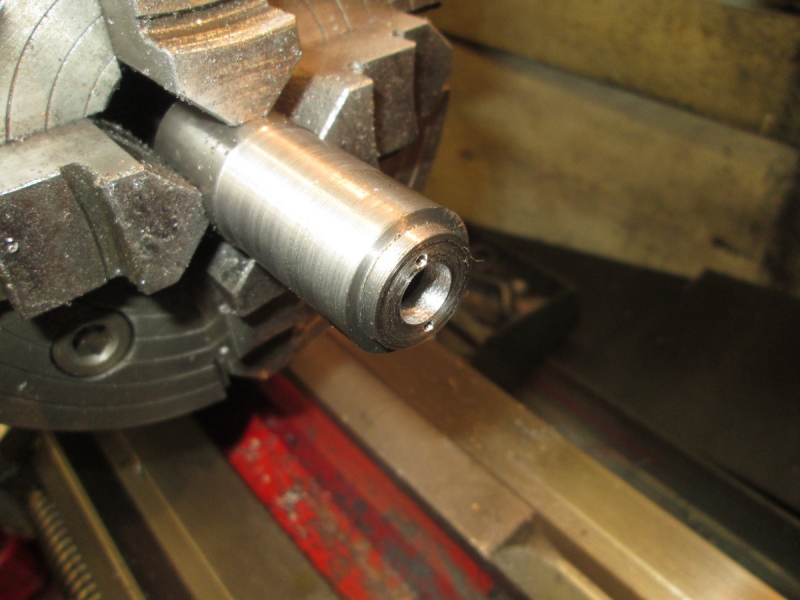
This morning it's dead simple, counterbore the face of the shank to accept the heads of the cap screws. Nowt to it! But....I haven't got a 6mm end mill or counterbore so I had a look in the spare metric drill box in the treasure chest, found a 6mm drill and converted it into a crude slot drill. Then I had to set the shank up and line up the counterbore by eye! (That's a joke isn't it..) Anyway I pressed on, as you can see I didn't have any spare metal to play with.
Here's the second one....
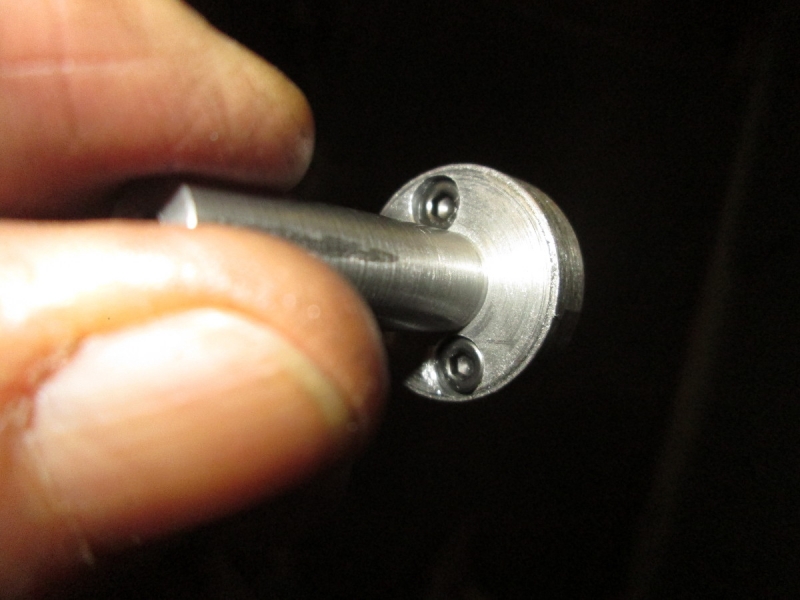
I think I got away with it! You can see there's no spare metal!
Now we move on to the body. The first thing to do was set the blank up in the 4 jaw. I have it within less than half a thou, practice maketh perfect.
Faced, centred and the exterior turned down to exactly 24.5mm. Now I have to bore it exactly 9mm so I got some new metric drills out, sharpened them because I don't trust new drills. I crept up on the 9mm, next to the last drill was 8.8mm, I need the best finish I can get.
Knocking off time and not a bad finish at all. This working to less than half a thou has brought home to me the fact that the most accurate measuring tools I have are my micrometers. None of my callipers agree with the old Brown and Sharpe which despite its age is still accurate, or as accurate as I can determine. Now I have a succession of borings to varying depths. It's going to be interesting!
Stanley Challenger Graham
Stanley's View
scg1936 at talktalk.net
"Beware of certitude" (Jimmy Reid)
The floggings will continue until morale improves!
Stanley's View
scg1936 at talktalk.net
"Beware of certitude" (Jimmy Reid)
The floggings will continue until morale improves!
-
Stanley
- Global Moderator
- Posts: 90295
- Joined: 23 Jan 2012, 12:01
- Location: Barnoldswick. Nearer to Heaven than Gloria.
Re: SHED MATTERS 2

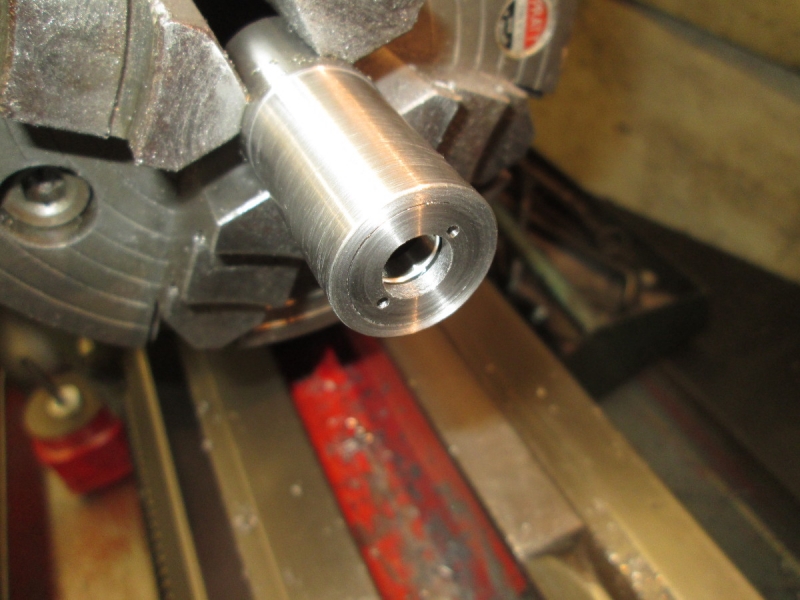
Today is, in essence, a series of very accurate stepped bores in the body of the tool. I already have a 9mm bore right through the stock, now I need to enlarge a series of bores to different depths, smallest first of course. Small boring bars are always a bit of a problem, I have a variety of half-cocked ones but it struck me that one of the set of cutters that came with my boring head might do so I got them out. They are well made with ceramic tips. I don't trust their sharpening, it's non existent, so I picked one out and sharpened it properly on the green grit stone in the grinder. It only needed a touch.
The next job was to fix the bar on centre and then I tried it in the 9mm bore. As usual, it's not whether it will fit in the bore but whether the body of the tool clears the bottom of the bore. The boring bar I sharpened fouled the bottom and because it's a brazed tip I can't take anything off the body without damaging the joint. I could have ground the thickness of the tip down of course but that would be a waste of valuable ceramic so I put this set-up on one side and went on to plan 'B'. A very small boring bar I already had.
I had to grind quite a lot off the bottom of even this tiny bar but eventually got it cutting somewhere near but as I went on it was obvious I wasn't getting a clean parallel bore. After several abortive attempts to improve things I went back to a very old boring bar of johnny's and got a clean, well cut bore. Once I had that done, the tipped tool would fit for the next bore so I went on and finished them all with that. There was no way I could measure accurately in the bore so I relied on the graduated feeds on the cross and top slide and I think I am somewhere near....
The last stage was an undercut in the end behind the bore that will be threaded. I ground a tool to do this and cut it but I think I've only made it half the depth it should be on reflection. I can rectify that later if necessary. This is ready for threading now. Just to check I got the locking ring out and tried it in the bore. It won't go in so I have got it the the right size for threading.
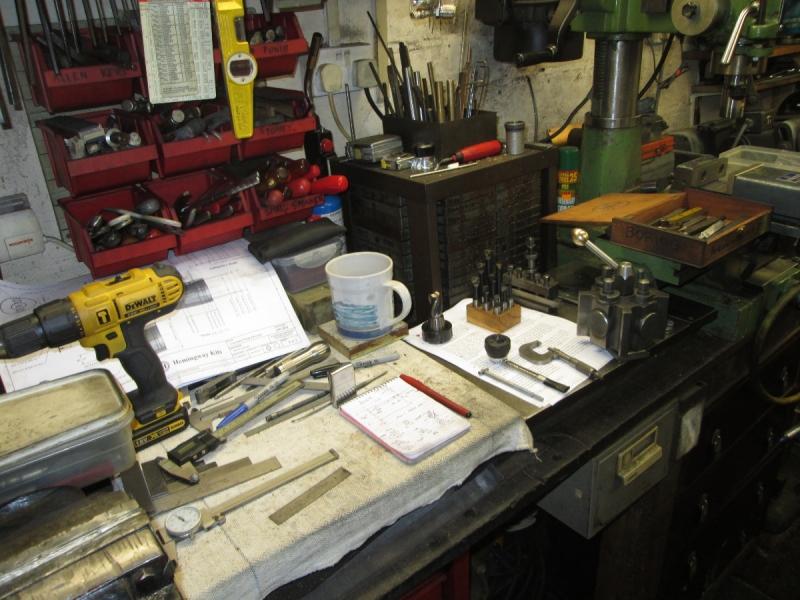
I did this pic before I tidied up a bit and put some of the tools away. To be honest I'm not over confident about my sizes, truth will out when I came to fitting.... For the moment, all that's on my mind is getting the thread in the end and fitting the locking ring. That's the first job tomorrow....
Stanley Challenger Graham
Stanley's View
scg1936 at talktalk.net
"Beware of certitude" (Jimmy Reid)
The floggings will continue until morale improves!
Stanley's View
scg1936 at talktalk.net
"Beware of certitude" (Jimmy Reid)
The floggings will continue until morale improves!
-
Stanley
- Global Moderator
- Posts: 90295
- Joined: 23 Jan 2012, 12:01
- Location: Barnoldswick. Nearer to Heaven than Gloria.
Re: SHED MATTERS 2
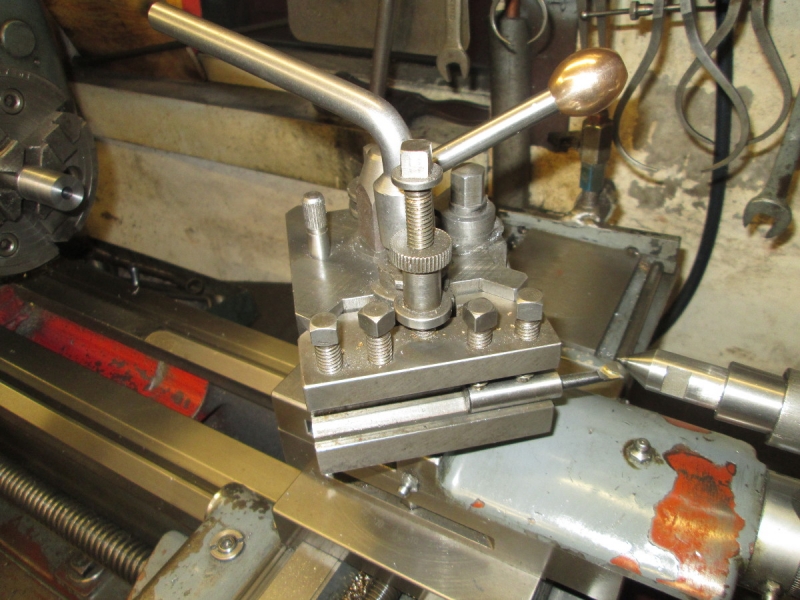
Today's task is cutting the matching internal thread for my locking ring, 52tpi, the finest thread I have ever cut and I don't mind telling you I am full of trepidation! Preparation is all, I started by selecting a tool ground to 55degrees and honed it on an India Stone until it was as perfect as I could make it. Then I mounted it in the tool post and made sure it was exactly on centre. Everything checked at least three times!! Notice that the locking ring is there to check the thread, that's the criterion, does it fit!
Then I set up for the cut making sure that it was set up at exactly 90 degrees to the workpiece. After a cup of tea, a smoke and a good think about what I was doing I switched the radio off, got my brain in gear and after checking one last time that my Norton box was set on 52tpi (can't be too careful) i cut the thread. No pics, no diversions, total concentration.

I forgot, there is one pic. The thread is only just over 3mm deep so I could keep the cutter short and rigid. The specification calls for a thread depth of almost 16 thou. I cut twice at 5thou and then halved that, checking with the locking ring with every cut in case I had made a mistake with the locking ring. My final cut took me to 17.5 thou deep.
Here's the result. Never mind all the fear and stress! I must have done something right somewhere, it is as near a perfect fit as anyone could wish, not tight, no shake and easy to screw in with my fingers. I have a lot to do this morning and so at this point I knocked off after an hour in the shed for this tiny thread but who cares? it is a good job, tomorrow is another day!
Stanley Challenger Graham
Stanley's View
scg1936 at talktalk.net
"Beware of certitude" (Jimmy Reid)
The floggings will continue until morale improves!
Stanley's View
scg1936 at talktalk.net
"Beware of certitude" (Jimmy Reid)
The floggings will continue until morale improves!
-
Stanley
- Global Moderator
- Posts: 90295
- Joined: 23 Jan 2012, 12:01
- Location: Barnoldswick. Nearer to Heaven than Gloria.
Re: SHED MATTERS 2
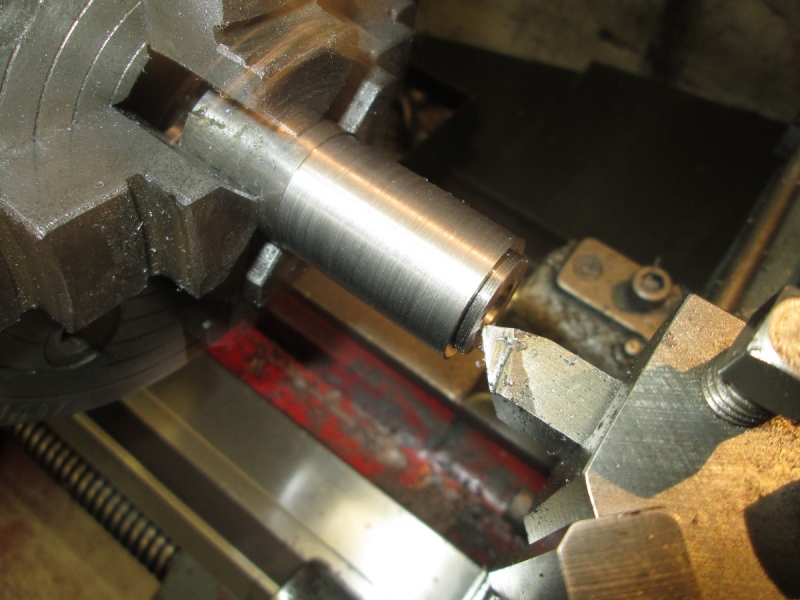
Today I am instructed to install the large ball bearing, screw the locking ring as tight as possible and then face the locking ring off to exactly the length of the body, so I tried the bearing and the recess is nowhere near the depth! I don't know how that happened but it can be rectified by boring the housing to the right depth. As you can imagine I want into a frenzy of measuring and checking!

I've put my small boring bar in, centred it, set the cut up so that I am just clearing the thread and I need a smoke and a bit of tea.....

A bit later.... I got it right first time and the bearing is installed, the locking ring has a good hold to the depth of the threads, it's tightened up with the circlip spanners and I am ready to face it.
Facing in small cuts! I crept up on it and when I got close blued the face so that I could tell as soon as I hit the face, the last cut was 2 thou.
Faced. edge broken and a bit of polish. It looks something like!
Parting off.
Reversed, dialled in again and ready for finishing this end.
Cut down to the finished length of 30.8mm. I got it slightly undersize but I don't think this is a biggie.
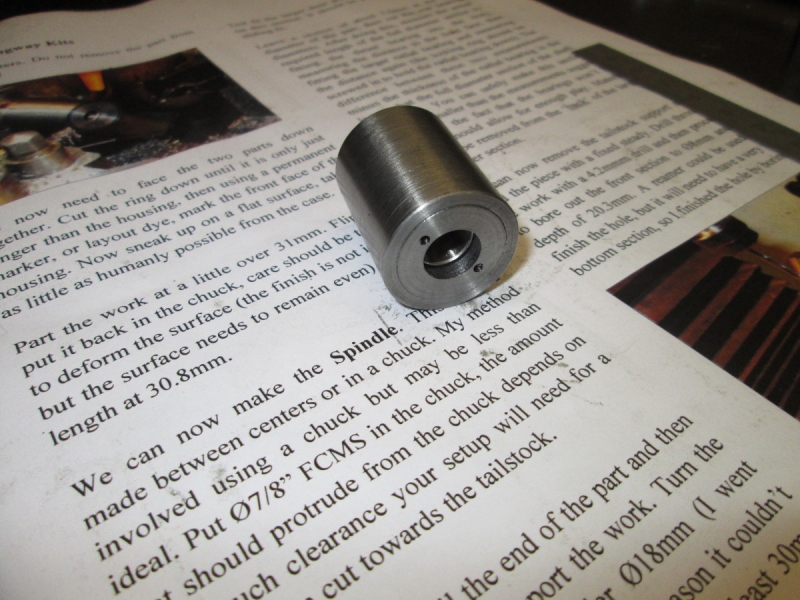
Here's the finished body. I'm reasonably pleased with it.
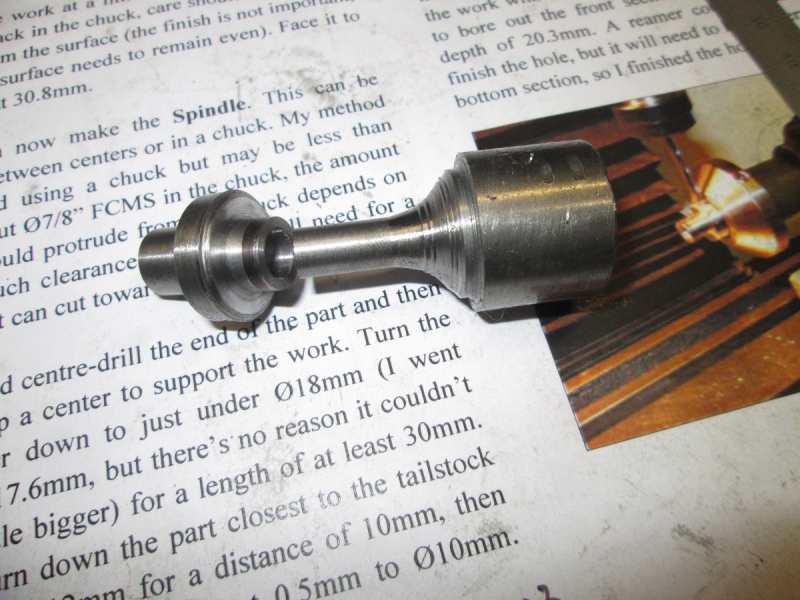
The next stage is to make the spindle. I dialled the stock in, faced it, put a centre in and got set up for cutting tomorrow. Right now I need a sit down! A good morning and I think everything is OK.
Stanley Challenger Graham
Stanley's View
scg1936 at talktalk.net
"Beware of certitude" (Jimmy Reid)
The floggings will continue until morale improves!
Stanley's View
scg1936 at talktalk.net
"Beware of certitude" (Jimmy Reid)
The floggings will continue until morale improves!
-
Stanley
- Global Moderator
- Posts: 90295
- Joined: 23 Jan 2012, 12:01
- Location: Barnoldswick. Nearer to Heaven than Gloria.
Re: SHED MATTERS 2
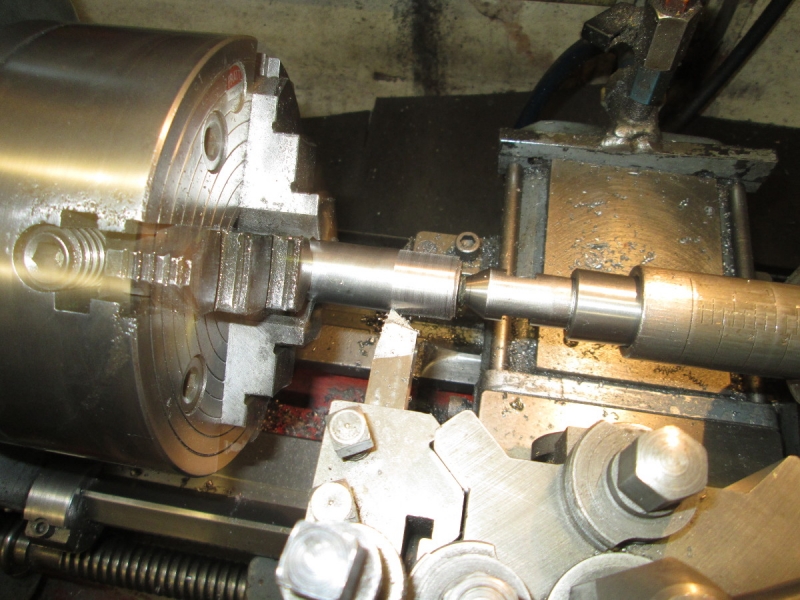
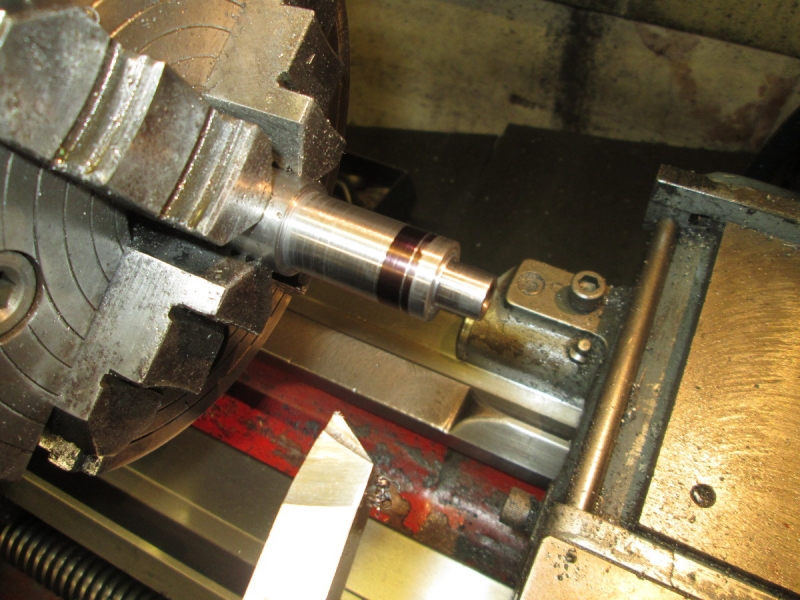
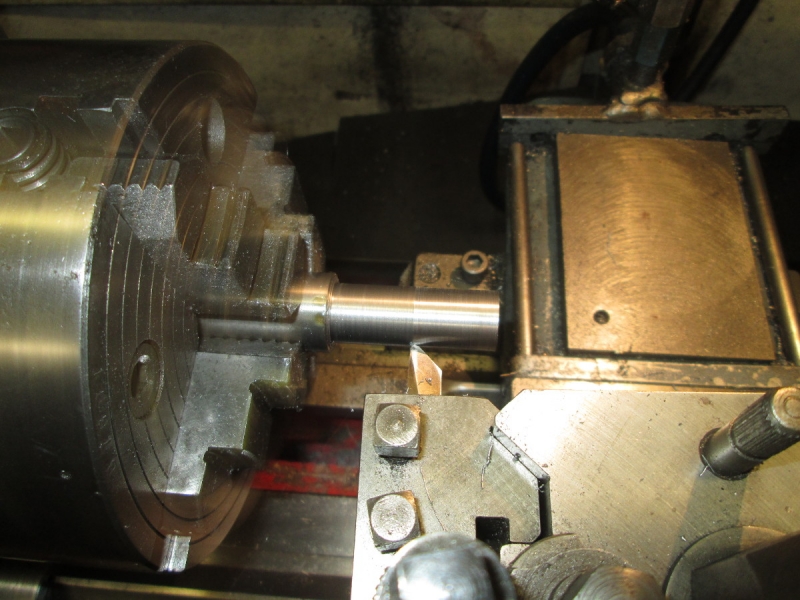
Today we are pressing forward, with great care, on the spindle. The aim is to convert the metric measurements accurately and transfer them to the workpiece.
A while later. I have done three of the diameters and here I'm checking (as instructed) that the end diameter is a reasonably tight but sliding fit in the large bearing in the body. As far as I can tell it's perfect. It was coming up to 9AM and my cooking and I have reached a stage where it gets a bit complicated so I decided to stop and come to that tomorrow. One of the things I am instructed to do, in the interests of accuracy, is to turn the back diameters next to the chuck without reversing the workpiece so I shall have to make a special HSS cutter as well as doing a lot of careful measuring. In addition I have to check fits inside the body which gets a bit complicated. Better to come to that fresh. So I cleaned Mrs Harrison and came out of the shed.....
Stanley Challenger Graham
Stanley's View
scg1936 at talktalk.net
"Beware of certitude" (Jimmy Reid)
The floggings will continue until morale improves!
Stanley's View
scg1936 at talktalk.net
"Beware of certitude" (Jimmy Reid)
The floggings will continue until morale improves!
Re: SHED MATTERS 2
I've thought of what you could make next: a Fidget. They're all the rage at the moment. They act as a gyroscope. Toy or stress reliever? The wife left me one before she left. They've got to be well balanced and nicely made.
https://uk.images.search.yahoo.com/yhs/ ... mp=yhs-102
https://uk.images.search.yahoo.com/yhs/ ... mp=yhs-102
-
Stanley
- Global Moderator
- Posts: 90295
- Joined: 23 Jan 2012, 12:01
- Location: Barnoldswick. Nearer to Heaven than Gloria.
Re: SHED MATTERS 2
I have a spare ball bearing exactly the right size......
Stanley Challenger Graham
Stanley's View
scg1936 at talktalk.net
"Beware of certitude" (Jimmy Reid)
The floggings will continue until morale improves!
Stanley's View
scg1936 at talktalk.net
"Beware of certitude" (Jimmy Reid)
The floggings will continue until morale improves!
-
Stanley
- Global Moderator
- Posts: 90295
- Joined: 23 Jan 2012, 12:01
- Location: Barnoldswick. Nearer to Heaven than Gloria.
Re: SHED MATTERS 2
I started off in the front room on the 1927 lathe. The only reason was that I have to screw the locking ring out and it's reasonably tight. Putting it in this little 3 jaw was a good way to grip it without marking it. No problem, it was snug but hadn't jammed, a sign that the thread and the faces are good. By the way something I have noticed is that the new 4 jaw on Mrs Harrison is magnetised and collects fine swarf and metal dust and it's bugging me a bit. I used to have an AC demagnetising coil but I think I must have given it away to someone. Ah well.....
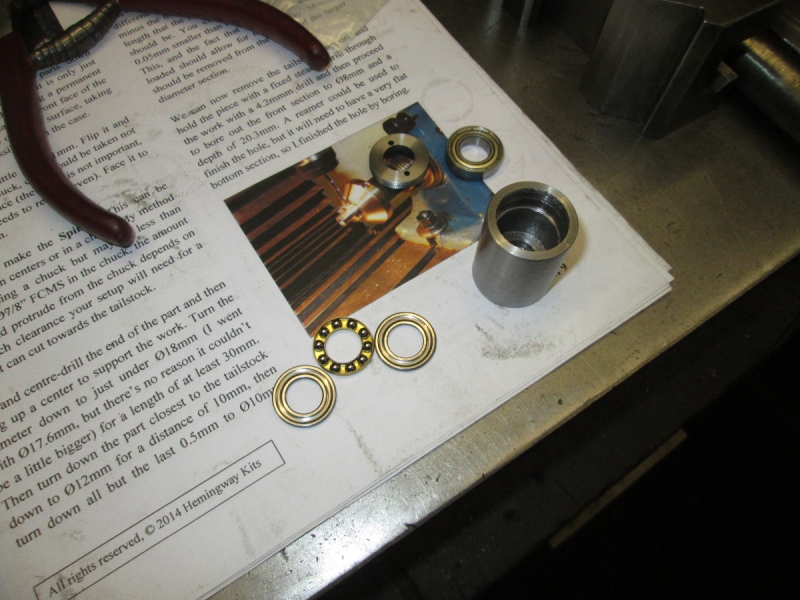
The first thing I had to do this morning was check that my internal diameters in the body are accurate and that the small bearing and the thrust race fit. I checked the large bearing earlier if you remember. They were fine, just right in fact.
Here they are sat in place.
The destructions have a very complicated way of determining the exact length of the largest diameter on the spindle and I don't like it so I'm doing it my way with a depth gauge. Ideally this is a job for a depth micrometer but I haven't got one so my old Moore and Wright gauge came out of the box. Perfectly adequate but I had to read the scale using a loupe.
I measured the length of the section using the cutter I already have mounted and the scale on the top slide. I blued it and touched a mark.
I made a left hand cutter and mounted it on centre but soon found I hadn't got it quite right as it raised a burr on the cut and this meant I lost sight of my mark and cut a bit too far. Not a disaster but I took it out and modified the cutter.
It was OK and this is when I was almost finished. You can see a slight imperfection on the large diameter but the important thing is the faces and they are OK. Have you noticed the whiskers on the chuck?
I have the diameters turned and the right length so now I have to start boring. I needed a 4.2mm hole right through the workpiece, full depth of the drill and needless to say I pecked my way through, the last thing I need at this stage is a drill broken in the hole!
I declared it closing time and before I put some tackle away I did this pic. You can always tell when I've been busy! Tomorrow is a tickle little job opening the front of the bore with a flat bottom. I'm thinking about that, at the moment I'm thinking of sacrificing a drill to make a long end mill. Decisions tomorrow! Nice morning, I'm getting there and no big mistakes....
Stanley Challenger Graham
Stanley's View
scg1936 at talktalk.net
"Beware of certitude" (Jimmy Reid)
The floggings will continue until morale improves!
Stanley's View
scg1936 at talktalk.net
"Beware of certitude" (Jimmy Reid)
The floggings will continue until morale improves!

Re: SHED MATTERS 2
Stanley wrote: ↑13 Nov 2017, 10:53
By the way something I have noticed is that the new 4 jaw on Mrs Harrison is magnetised and collects fine swarf and metal dust and it's bugging me a bit. I used to have an AC demagnetising coil but I think I must have given it away to someone. Ah well.....
I have a vague memory of someone demagnetising a big lump of metal with an arc welder lead, I'll have a Google later and see if anything comes up.
Kev
Stylish Fashion Icon.

Stylish Fashion Icon.

-
Stanley
- Global Moderator
- Posts: 90295
- Joined: 23 Jan 2012, 12:01
- Location: Barnoldswick. Nearer to Heaven than Gloria.
Re: SHED MATTERS 2
Lovely! I have the welder..... but of course you know that. I look forward to your suggestions....
I'm really pleased!
I'm really pleased!
Stanley Challenger Graham
Stanley's View
scg1936 at talktalk.net
"Beware of certitude" (Jimmy Reid)
The floggings will continue until morale improves!
Stanley's View
scg1936 at talktalk.net
"Beware of certitude" (Jimmy Reid)
The floggings will continue until morale improves!
-
Stanley
- Global Moderator
- Posts: 90295
- Joined: 23 Jan 2012, 12:01
- Location: Barnoldswick. Nearer to Heaven than Gloria.
Re: SHED MATTERS 2
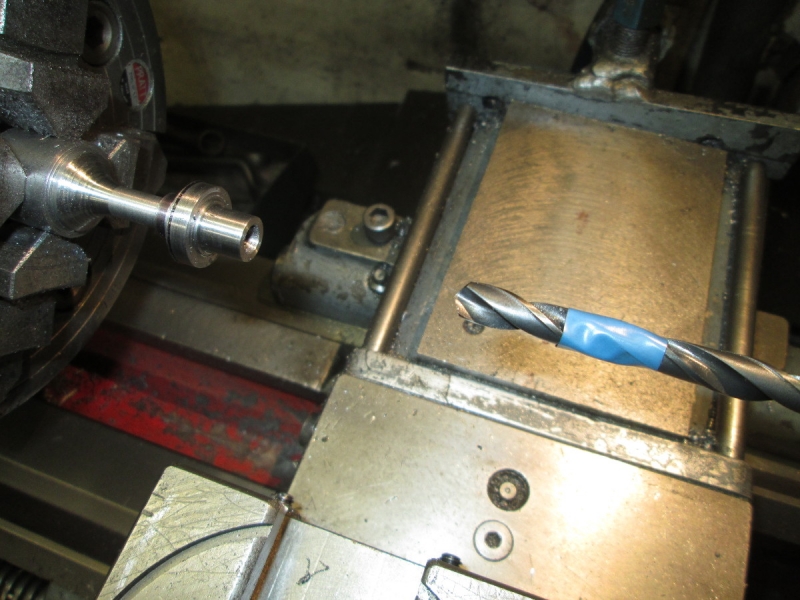
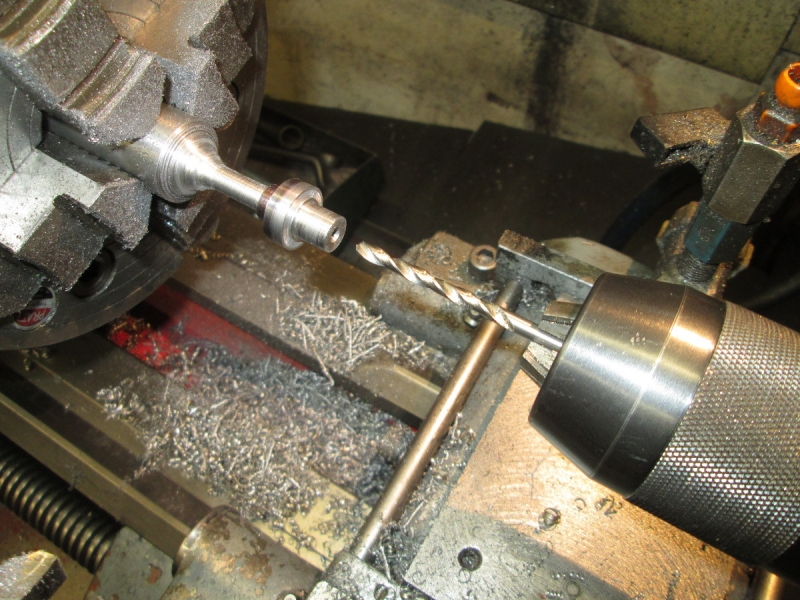
Apart from parting off, only one cut to make, drill the spindle 20.3mm deep and 8mm diameter. No problem. The destructions call for a flat bottom in the hole so I turned another 8mm drill into an end mill and took the bottom out of the hole. You remember what I always say? The last cut is the most dangerous and the penalty then is greatest.
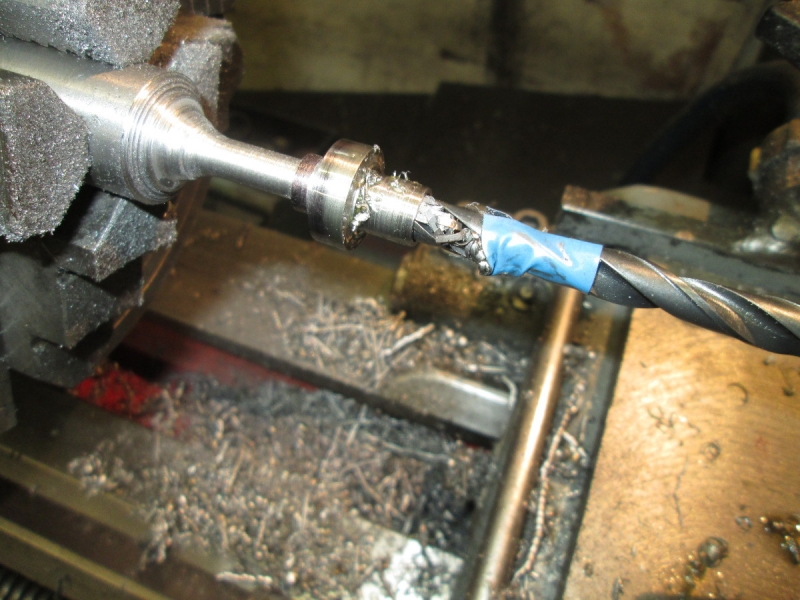
I made such a good job of making the end mill.... Too good, it cut so easily I went a bit too far! This is what happened.... You've got to admit that it was a tidy cock-up! So what do you do? Go berserk or sigh and start all over again? I took the latter course....

One thing I have learned is that it's best to take a step back before you plunge in again. That way you tend to be mistake prone because you're still smarting. So I made a new HSS tool, my current favourite is OK but after a while you lose sight of the principles and over a few re-sharpenings the shape changes. This involved dressing my grinding wheel so part of the displacement activity was vacuuming up the chips and grinding dust. Then I found a piece of stock and dialled it in to within half a thou. No need for this of course but it's good practice. I put my new tool in and centred it and started cutting.
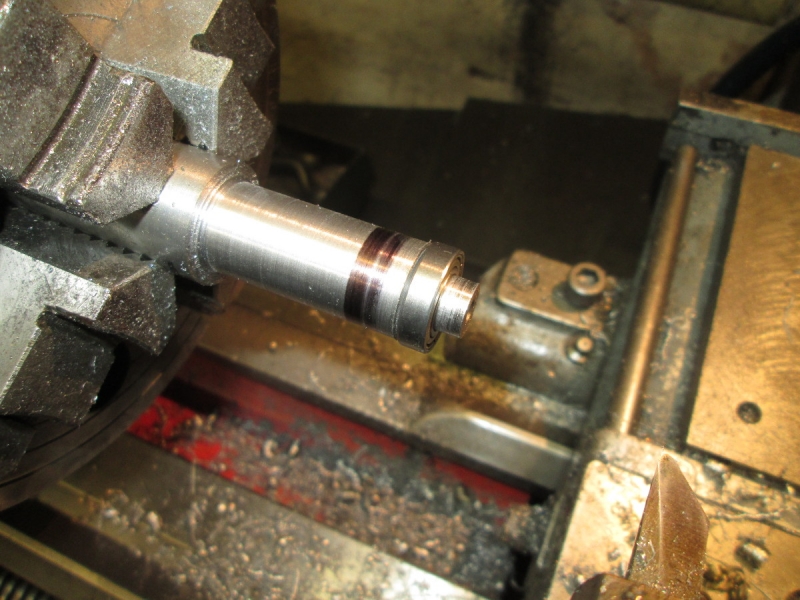
I faced it and turned the major diameter down to the finish size, .709", I hit .710" and left it at that until tomorrow when I'll measure it again when everything has cooled down. Then I centred it and cleaned Mrs Harrison. I'm ready for spindle number two tomorrow. One thing is certain, I will not be going to the depth on the design, it's too near the junction of the other cuts. I'm not making excuses, I just think it's a bad design fault.
Knocking off time........
Stanley Challenger Graham
Stanley's View
scg1936 at talktalk.net
"Beware of certitude" (Jimmy Reid)
The floggings will continue until morale improves!
Stanley's View
scg1936 at talktalk.net
"Beware of certitude" (Jimmy Reid)
The floggings will continue until morale improves!
Re: SHED MATTERS 2
A furtle (I love that word) around Google and apparently it can be done with an AC welder. 3 or 4 loops of the cable around the chuck, now the difficult part, strike an arc on a bit of scrap metal and slowly slide the loops off of the chuck while keeping the arc going. Possibly a 2 person job.
Another option that has been mentioned is to give the chuck a few good clumps with a 3lb hammer...
Kev
Stylish Fashion Icon.
Stylish Fashion Icon.
-
Stanley
- Global Moderator
- Posts: 90295
- Joined: 23 Jan 2012, 12:01
- Location: Barnoldswick. Nearer to Heaven than Gloria.
Re: SHED MATTERS 2
That's how I imagined it Kev when you mentioned it. I shall give it some thought..... Whoever recommended the hammer doesn't know a lot about chuck accuracy!
Stanley Challenger Graham
Stanley's View
scg1936 at talktalk.net
"Beware of certitude" (Jimmy Reid)
The floggings will continue until morale improves!
Stanley's View
scg1936 at talktalk.net
"Beware of certitude" (Jimmy Reid)
The floggings will continue until morale improves!
-
PanBiker
- Site Administrator
- Posts: 16447
- Joined: 23 Jan 2012, 13:07
- Location: Barnoldswick - In the West Riding of Yorkshire, always was, always will be.
Re: SHED MATTERS 2
Easiest way may be to see if Gary or Garlicks have a degaussing coil you can borrow. Used to be stock kit for colour shadow mask CRT's, every good service department had one. I used to carry one in my service kit in the van. It's redundant kit now for the LED and plasma TV's but they may well still have one kicking around. A lot more convenient and a whole load safer than the arc welding set up, worth an ask?
Ian
-
Stanley
- Global Moderator
- Posts: 90295
- Joined: 23 Jan 2012, 12:01
- Location: Barnoldswick. Nearer to Heaven than Gloria.
Re: SHED MATTERS 2
Definitely Ian! I'll pursue that one.
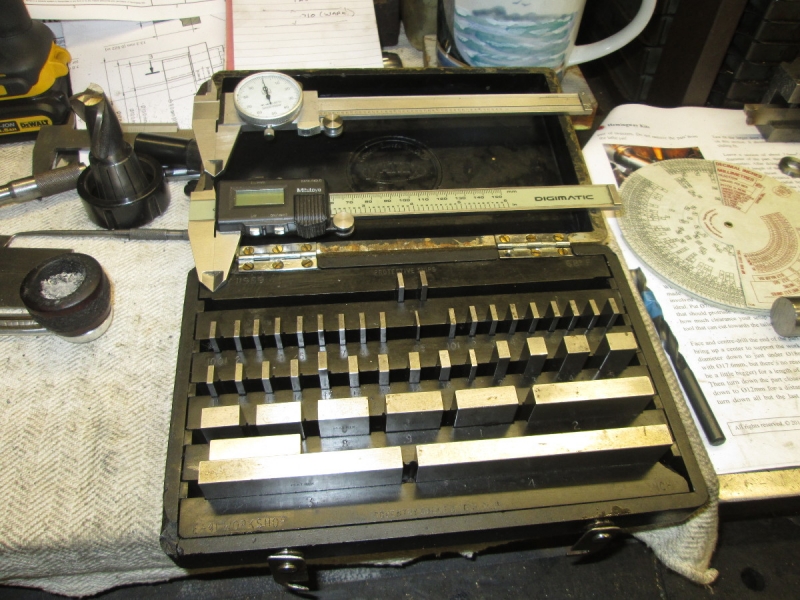
And now for something entirely different. I know I should be getting on with the spindle but yesterday's cock-up was bugging me. I need to identify exactly what caused it so I can avoid doing the same thing again. My first thought was to blame it on the tackle of course, I'm only human! You may remember that the digital calliper was left in its box for a long time until I found the cure for its unreliability, since then I've been using it. The dial calliper is the one I dropped and I rescued that. So this morning I got the Matrix slip gauges out and did some checking. The old Brown and Sharpe 1" micrometer is dead accurate, no surprise there. Then I tested the callipers on sizes from 4" down to ten thou, not as accurate as the mike but even so, I was surprised to find they were both accurate to less than half a thou so this makes it my fault. I was satisfied with that, I shall give it more thought. Then for good measure I got the India stone out and did a good job of honing the HSS cutter I ground yesterday. Displacement activity over!
First thing I did was recheck my sizes from the drawing and adjusted the major diameter to exactly what it says in the destructions. Take it as read that I checked all the measurements again with the drawing.
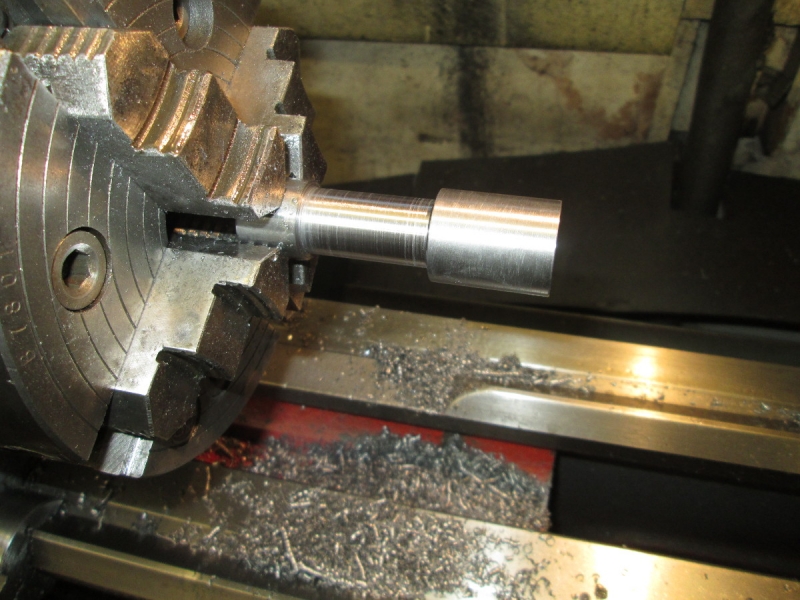
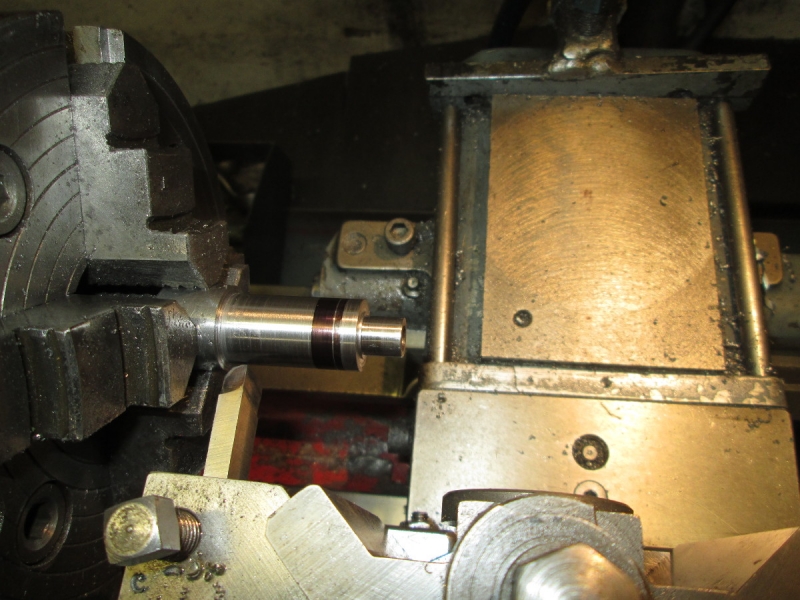
I cut the first diameter to size and checked that the large bearing was a tight sliding fit. At the same time I measured for the next diameter on this side using the scale on the top slide and marked it.
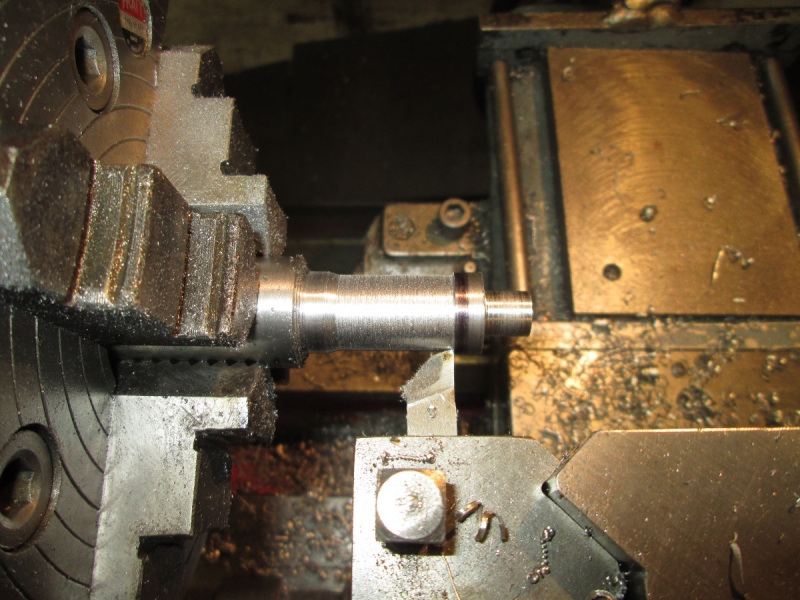
Hard to see I know but that second cut was only 0.5mm deep. Then I shifted over to the chuck side and started cutting the back diameters.
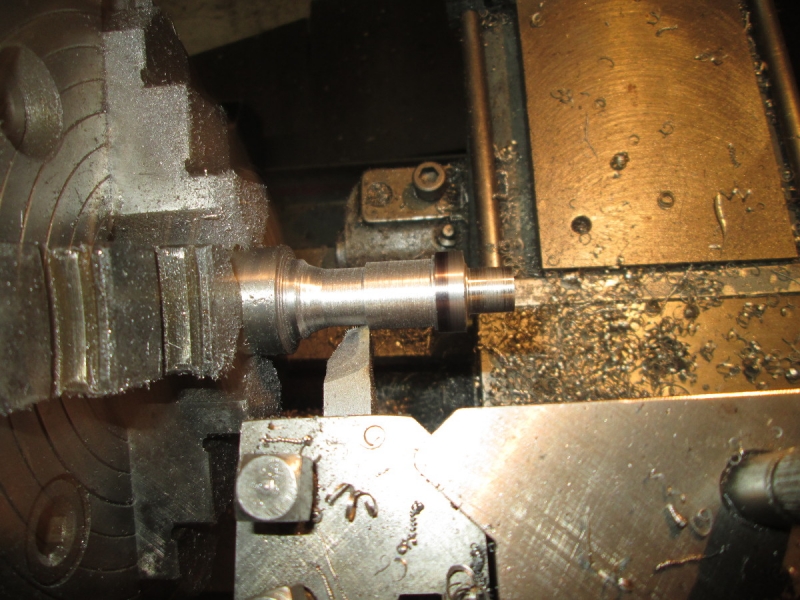
A short while afterwards I had them all cut exactly to size and did the 4.2mm bore right through the piece. Lots of pecking and clearing....
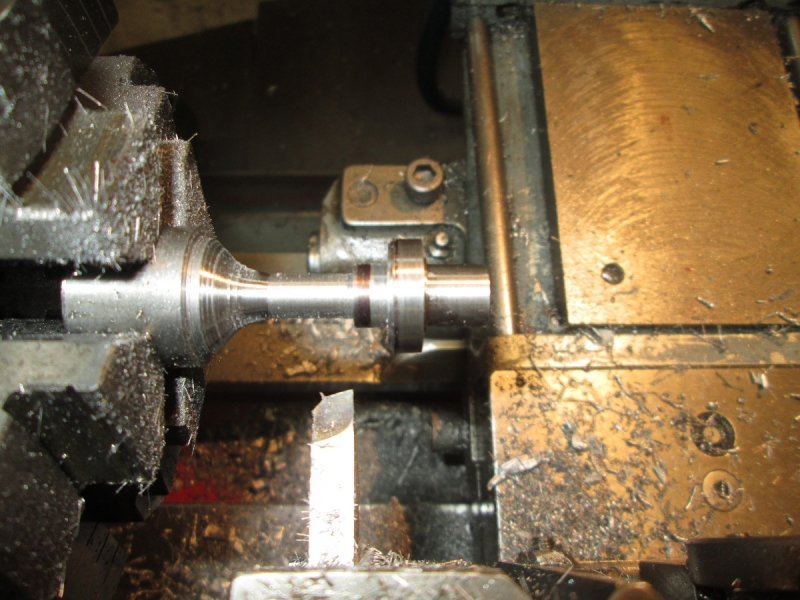
Next was the 8mm bore and here is the flat bottom going into the hole, this is of course where I slipped up yesterday but no worries this morning because I identified what had happened yesterday. When I was cutting the first diameter the cutter raised a burr because it wasn't sharpened correctly but I ignored it. That was where I cut 2mm too deep into the major diameter and ensured that when I drilled the 8mm hole correctly I broke out into the smaller diameter. No mistakes today!

Then I parted the spindle off at 30mm.
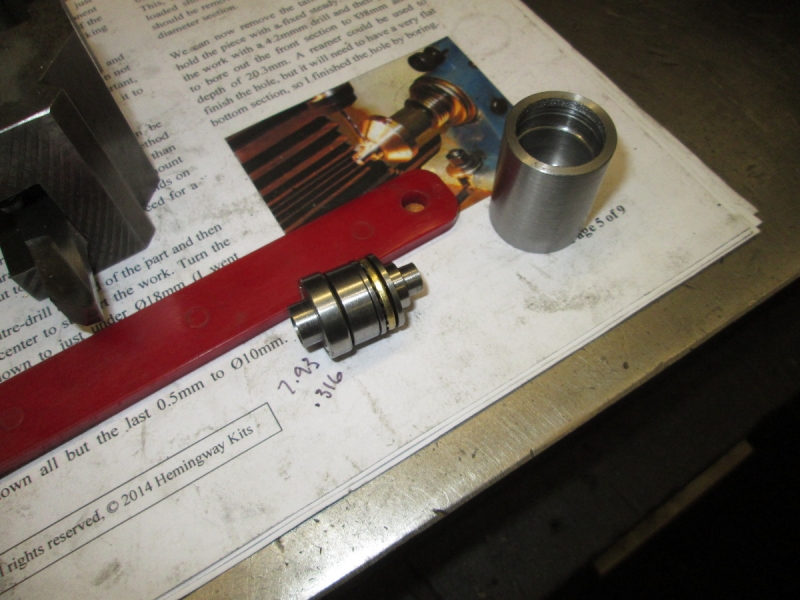
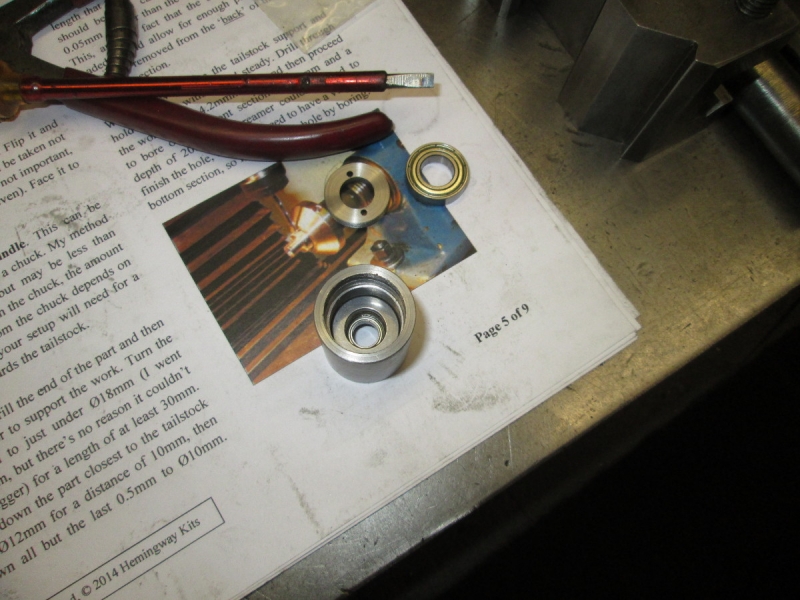
A bit of hand work cleaning, polishing and breaking edges and here I have loaded the spindle with the three bearings and they all fit correctly.
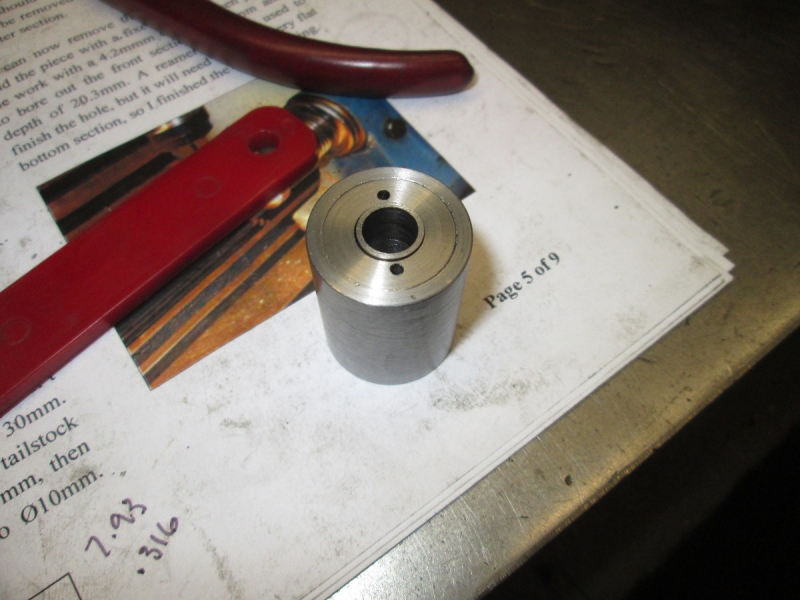
Then I put the spindle and bearings in the body, tightened the locking ring and the spindle turns freely. I think this is a result! A lot better morning...... I finished off by cleaning Mrs Harrison.
And now for something entirely different. I know I should be getting on with the spindle but yesterday's cock-up was bugging me. I need to identify exactly what caused it so I can avoid doing the same thing again. My first thought was to blame it on the tackle of course, I'm only human! You may remember that the digital calliper was left in its box for a long time until I found the cure for its unreliability, since then I've been using it. The dial calliper is the one I dropped and I rescued that. So this morning I got the Matrix slip gauges out and did some checking. The old Brown and Sharpe 1" micrometer is dead accurate, no surprise there. Then I tested the callipers on sizes from 4" down to ten thou, not as accurate as the mike but even so, I was surprised to find they were both accurate to less than half a thou so this makes it my fault. I was satisfied with that, I shall give it more thought. Then for good measure I got the India stone out and did a good job of honing the HSS cutter I ground yesterday. Displacement activity over!
First thing I did was recheck my sizes from the drawing and adjusted the major diameter to exactly what it says in the destructions. Take it as read that I checked all the measurements again with the drawing.
I cut the first diameter to size and checked that the large bearing was a tight sliding fit. At the same time I measured for the next diameter on this side using the scale on the top slide and marked it.
Hard to see I know but that second cut was only 0.5mm deep. Then I shifted over to the chuck side and started cutting the back diameters.
A short while afterwards I had them all cut exactly to size and did the 4.2mm bore right through the piece. Lots of pecking and clearing....
Next was the 8mm bore and here is the flat bottom going into the hole, this is of course where I slipped up yesterday but no worries this morning because I identified what had happened yesterday. When I was cutting the first diameter the cutter raised a burr because it wasn't sharpened correctly but I ignored it. That was where I cut 2mm too deep into the major diameter and ensured that when I drilled the 8mm hole correctly I broke out into the smaller diameter. No mistakes today!
Then I parted the spindle off at 30mm.
A bit of hand work cleaning, polishing and breaking edges and here I have loaded the spindle with the three bearings and they all fit correctly.
Then I put the spindle and bearings in the body, tightened the locking ring and the spindle turns freely. I think this is a result! A lot better morning...... I finished off by cleaning Mrs Harrison.
Stanley Challenger Graham
Stanley's View
scg1936 at talktalk.net
"Beware of certitude" (Jimmy Reid)
The floggings will continue until morale improves!
Stanley's View
scg1936 at talktalk.net
"Beware of certitude" (Jimmy Reid)
The floggings will continue until morale improves!