Shed Matters 3

Post Reply
User avatar
Stanley
Global Moderator
Global Moderator
Posts: 90301
Joined: 23 Jan 2012, 12:01
Location: Barnoldswick. Nearer to Heaven than Gloria.

Re: Shed Matters 3

Post by Stanley »

Image

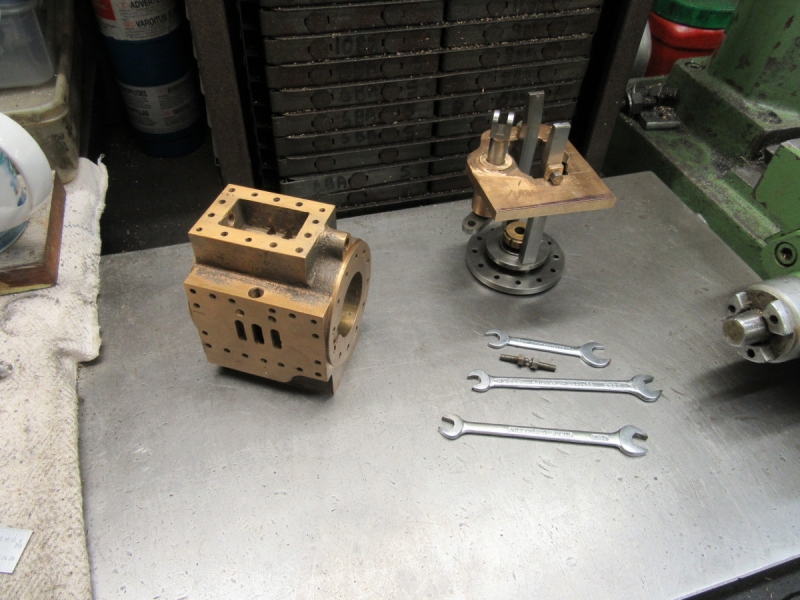
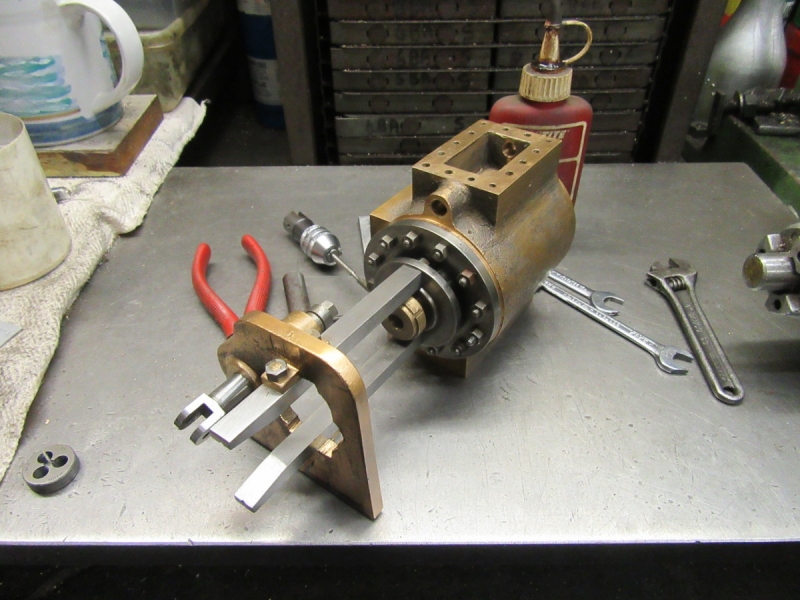
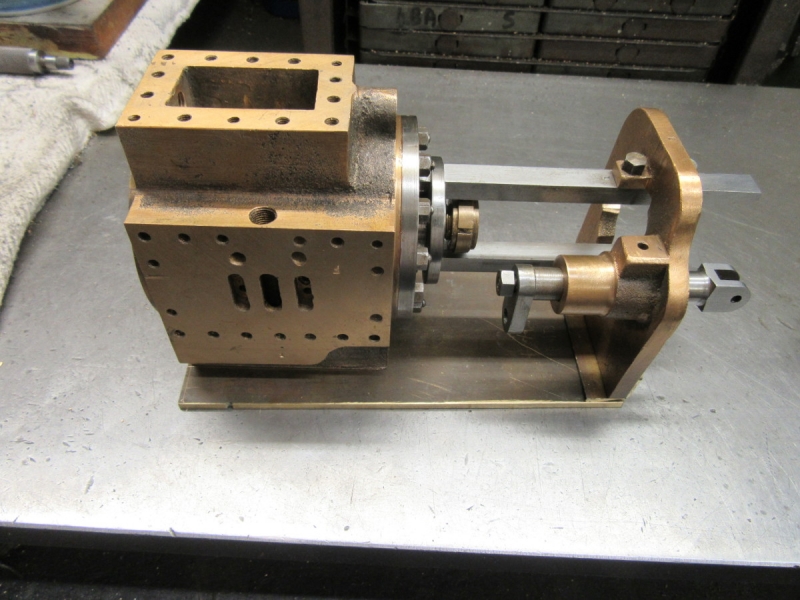
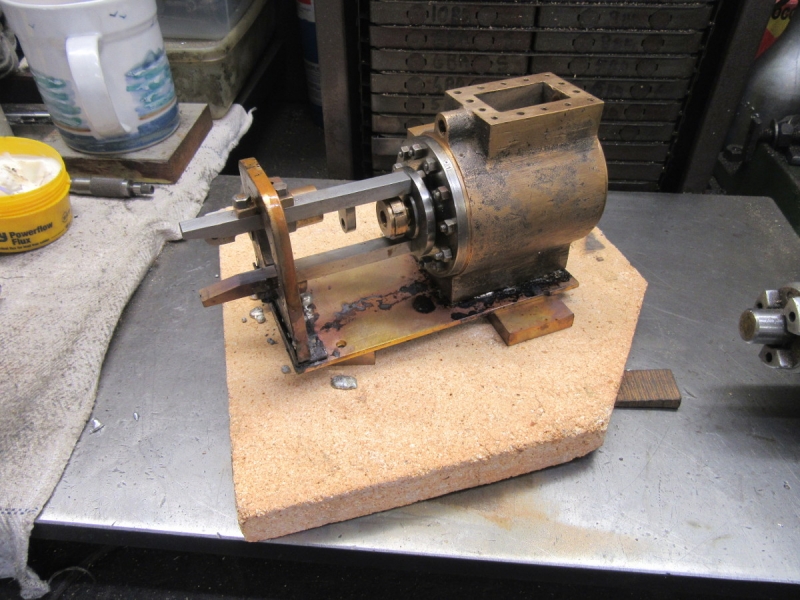
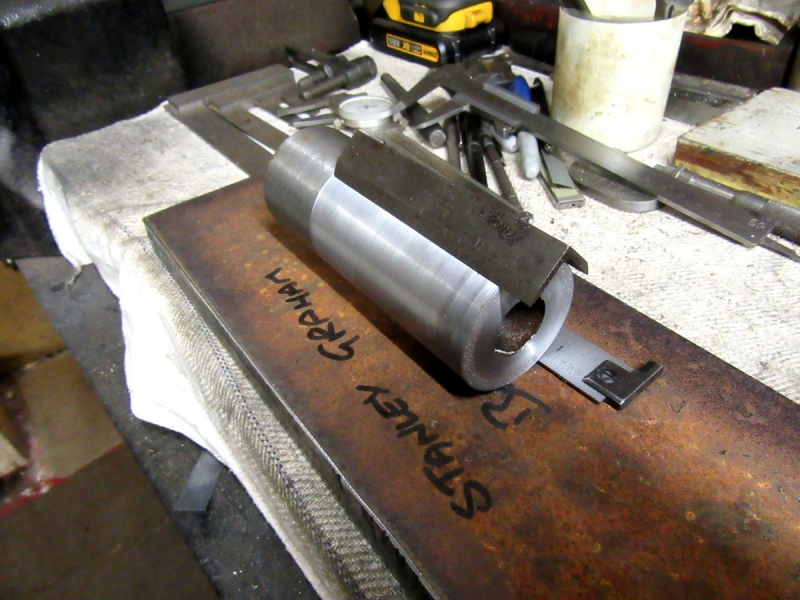
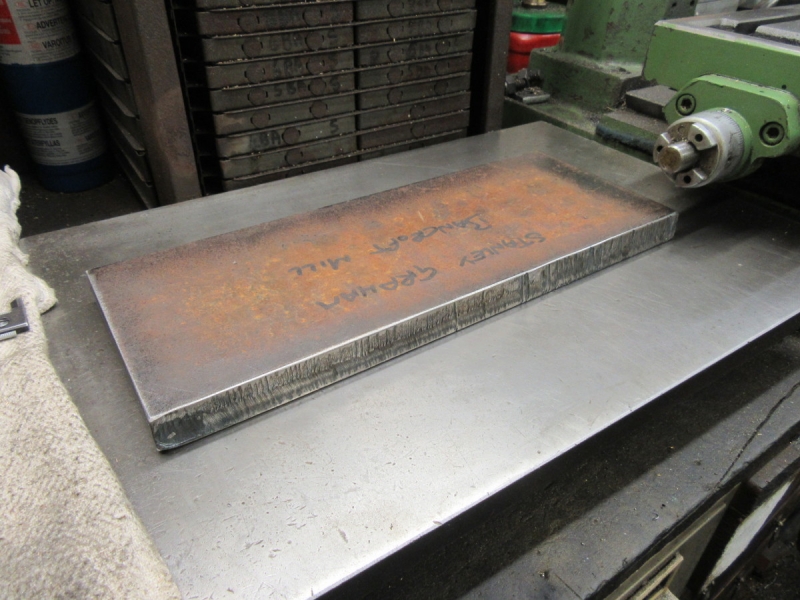
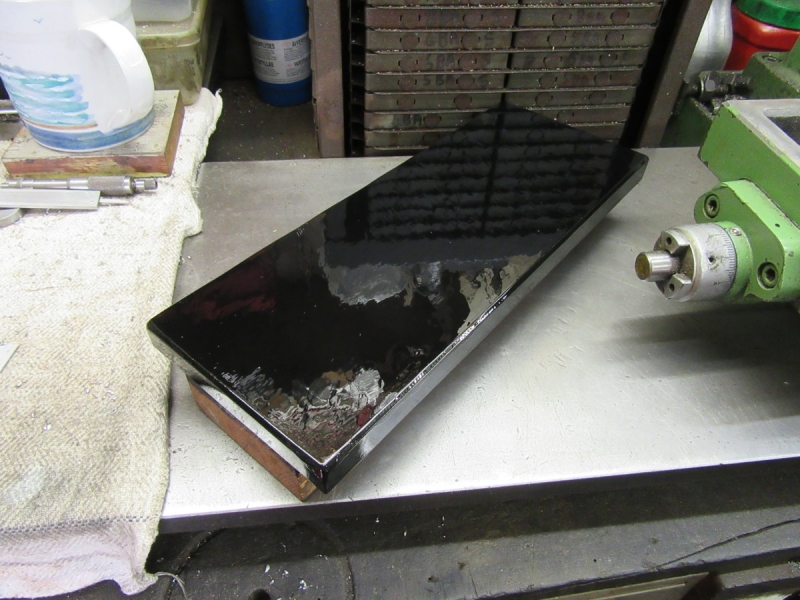
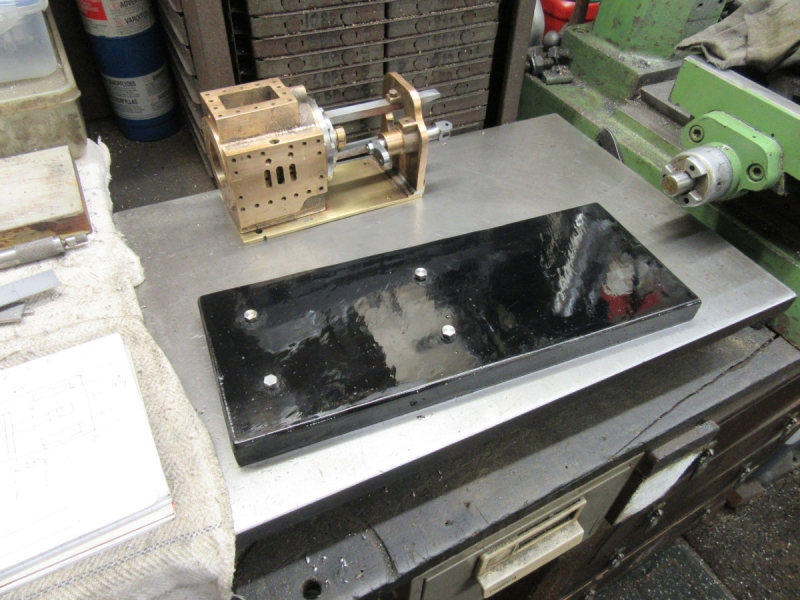
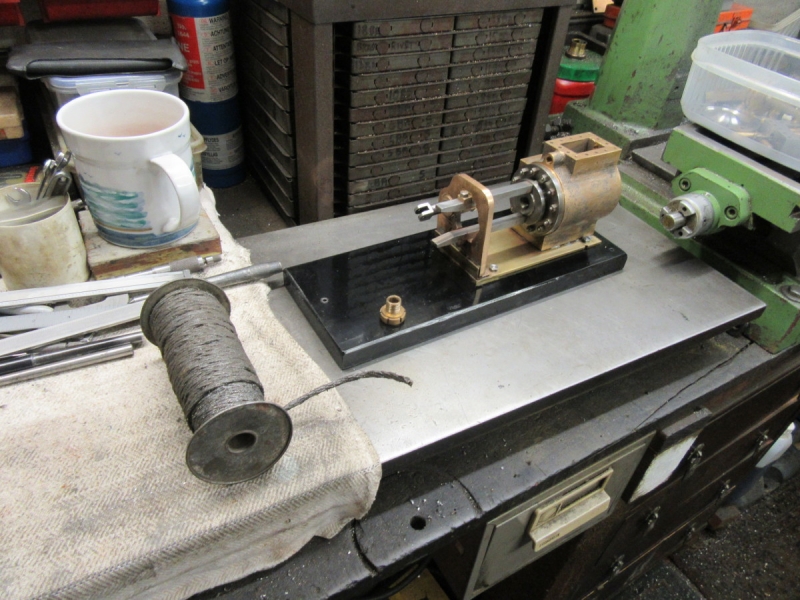
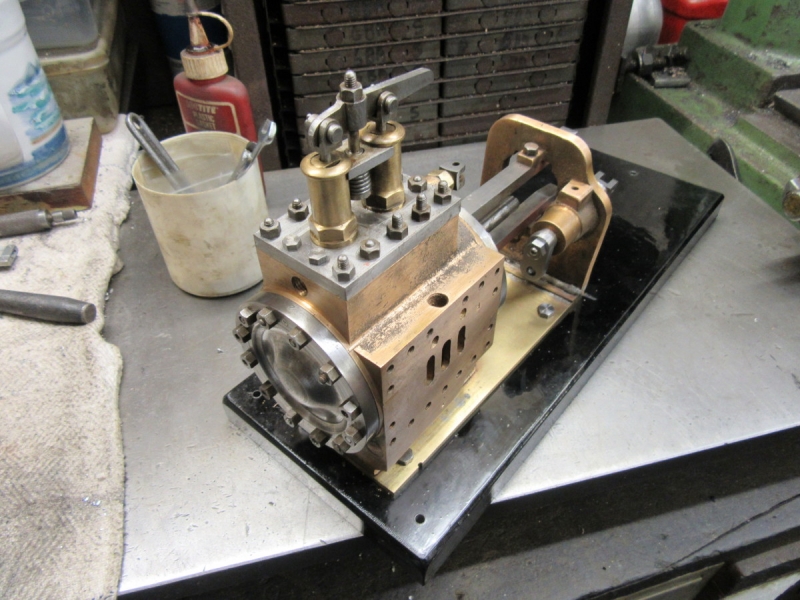
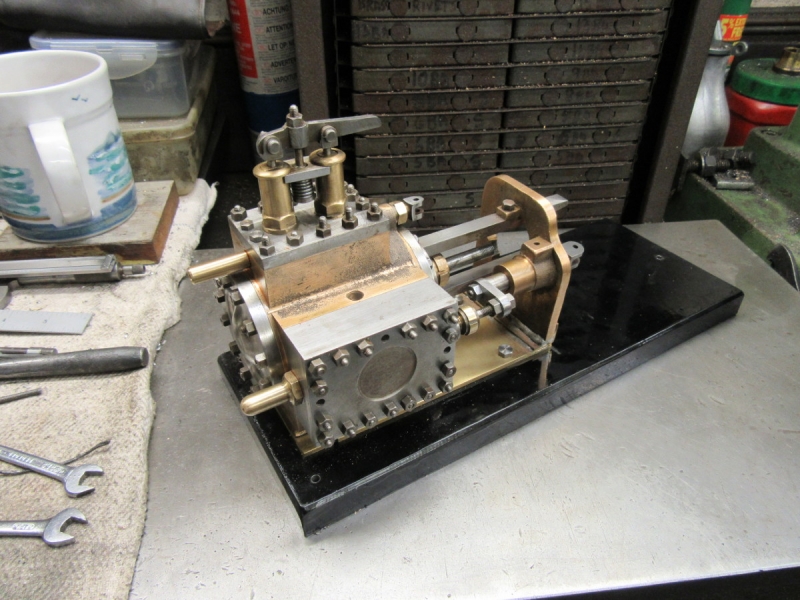
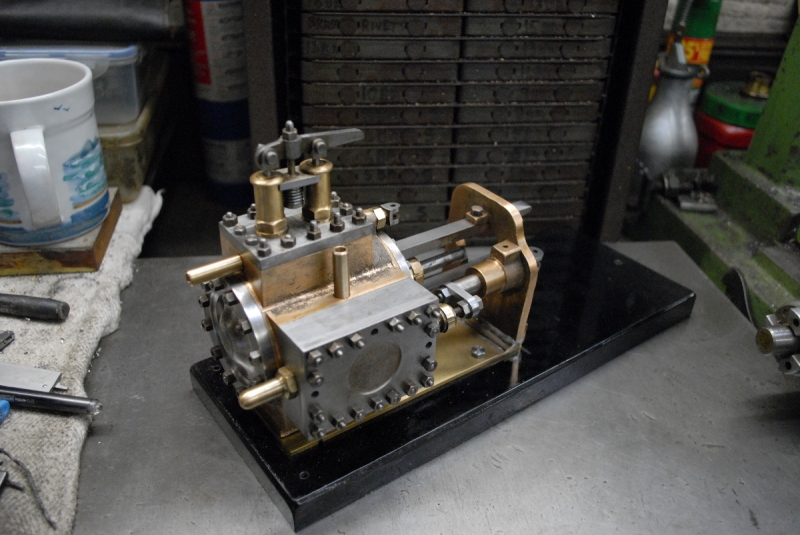
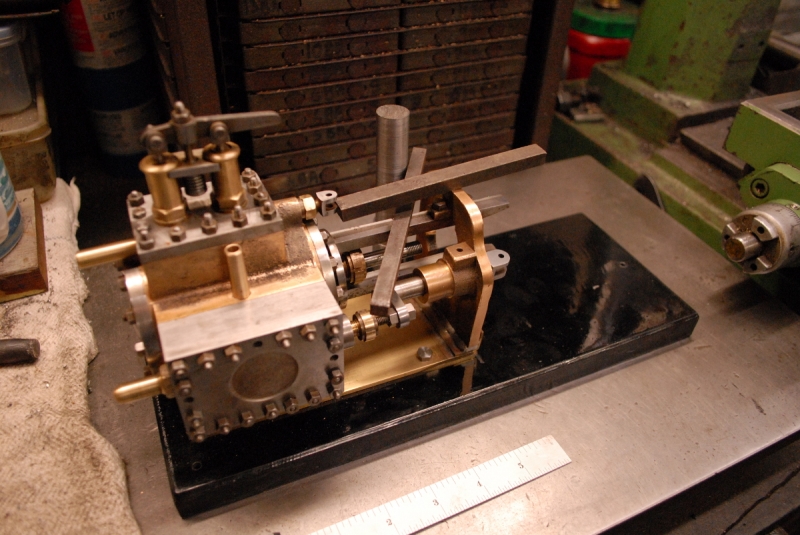
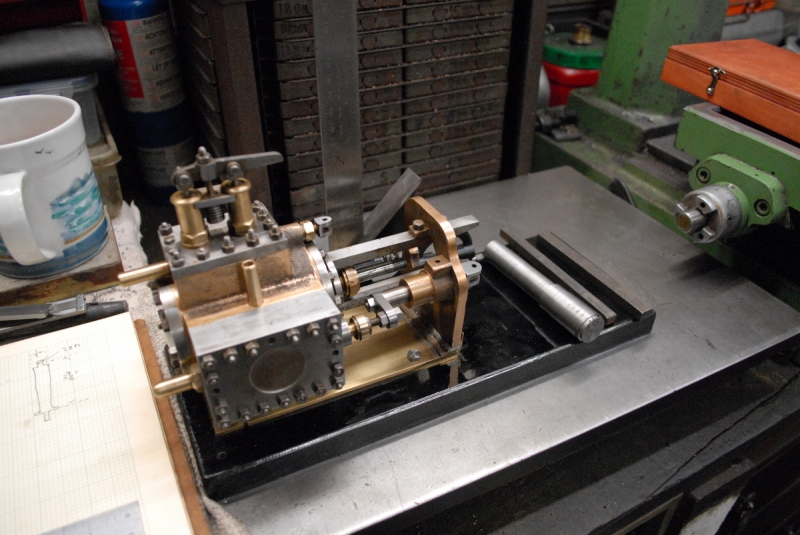
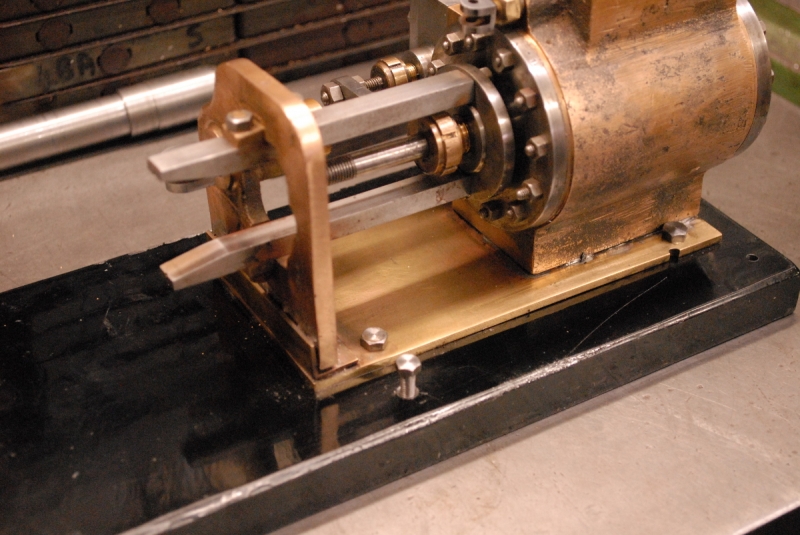
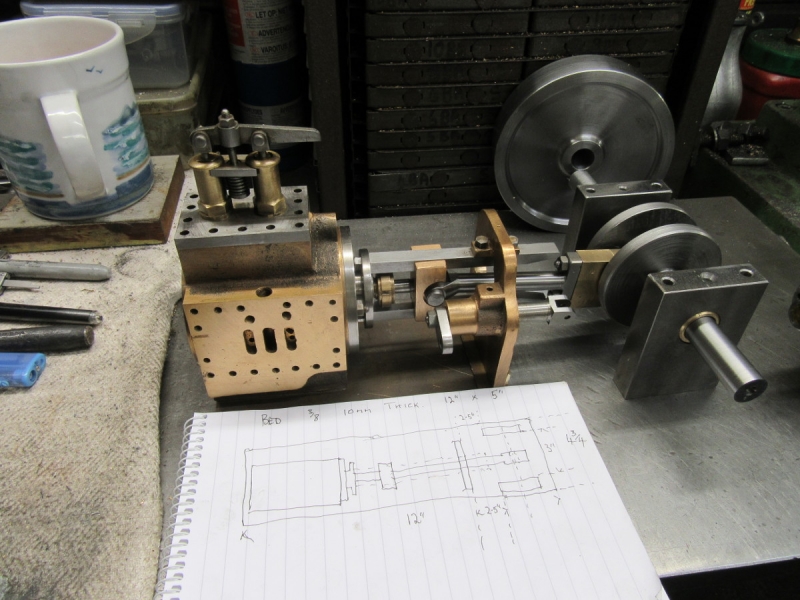
Only one pic this morning and no machining. What I wanted to do this morning is have a look at the rabbit and I function best when I have the evidence in front of me! As you can see I fitted the crankshaft and pedestals and laid the engine out after adjusting the piston on the back dead centre. Then I installed the brass base plate in its position and got some basic measurements. The main ones are the size of the large bedplate I need under the whole engine and the distance between the pedestals and the supporting bracket for the crosshead guides. I've got the size and thickness of the bed plate so I can now put the arm on my friend Terry Gissing.
Then I stood back and started to have a bit of deep thought. I say started because there are a lot of decisions to make. Remember that originally this cylinder was designed to fit directly on the boiler of a traction engine and get its steam directly through what was the curved base. It is going to be fed directly into the regulator box on top of the engine, the one that carries the safety valve. This means that eventually I will have to make a throttle linkage for it but at the moment that's not pressing. I can address that later when I come to it.
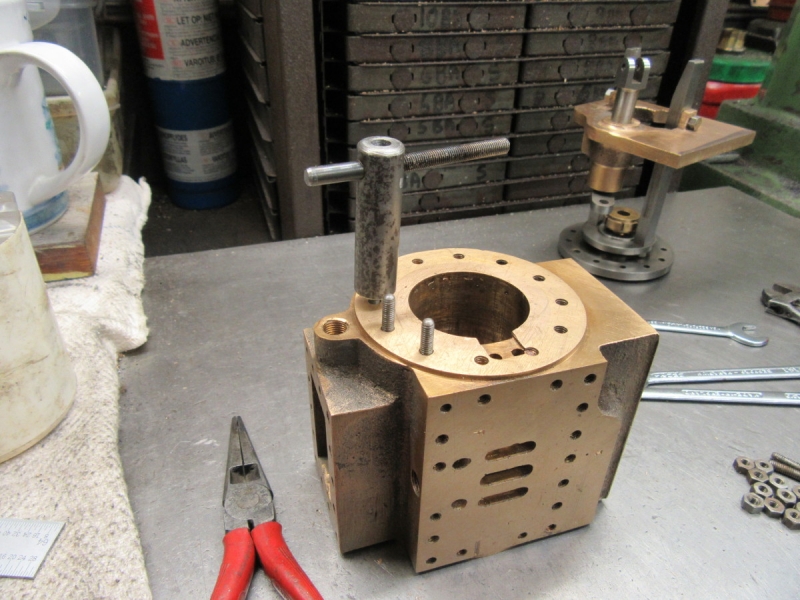
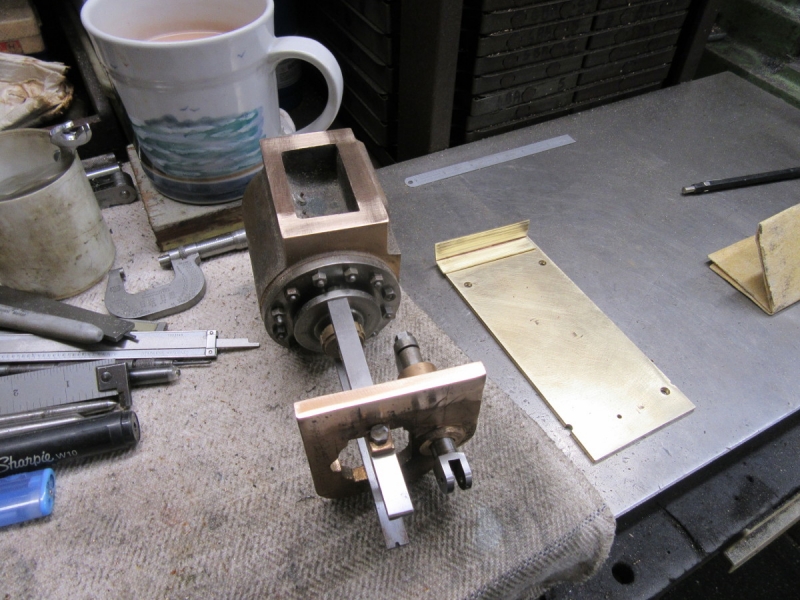
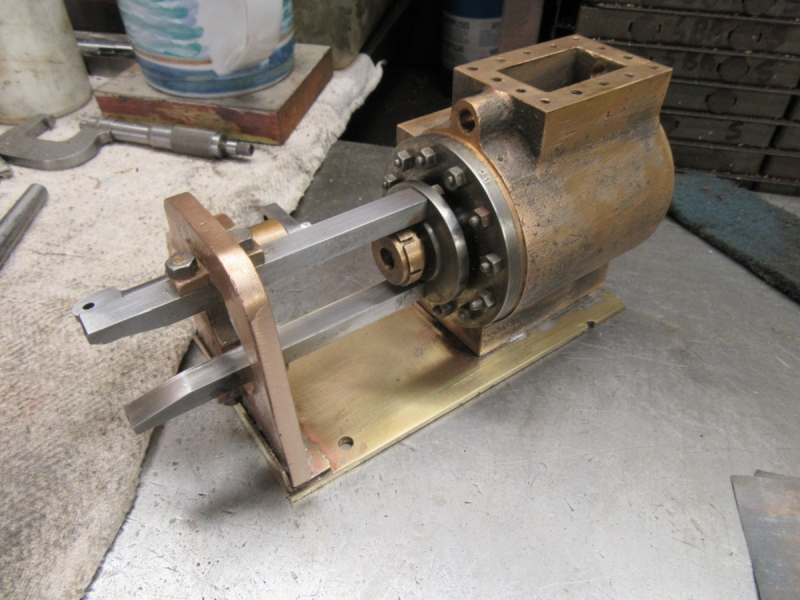
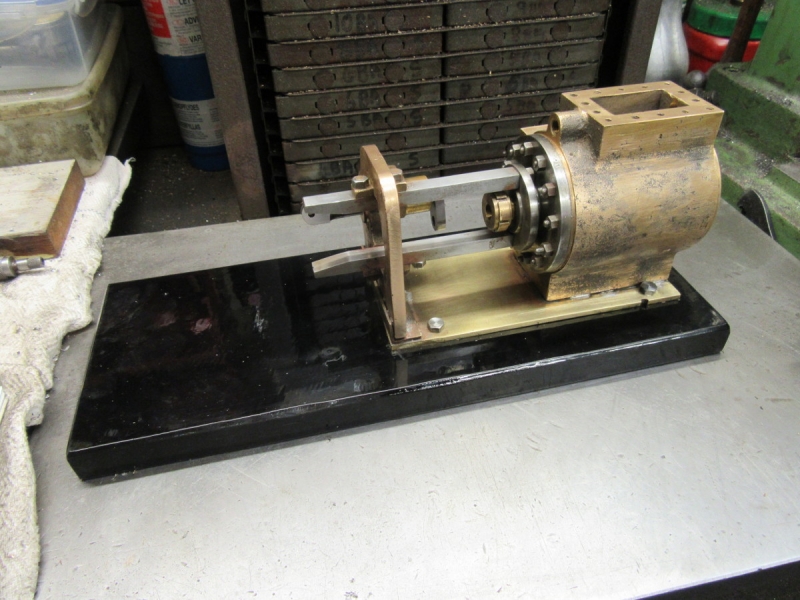
No, what needs to be addressed first is how I fix the brass sub-base to the cylinder and crosshead guide support and while I am doing that think about how I attach the whole assembly to the bed. Incidentally the flywheel isn't going to be a problem because the main bed will be mounted on a wooden plinth and that will give me clearance at the bottom of the wheel.
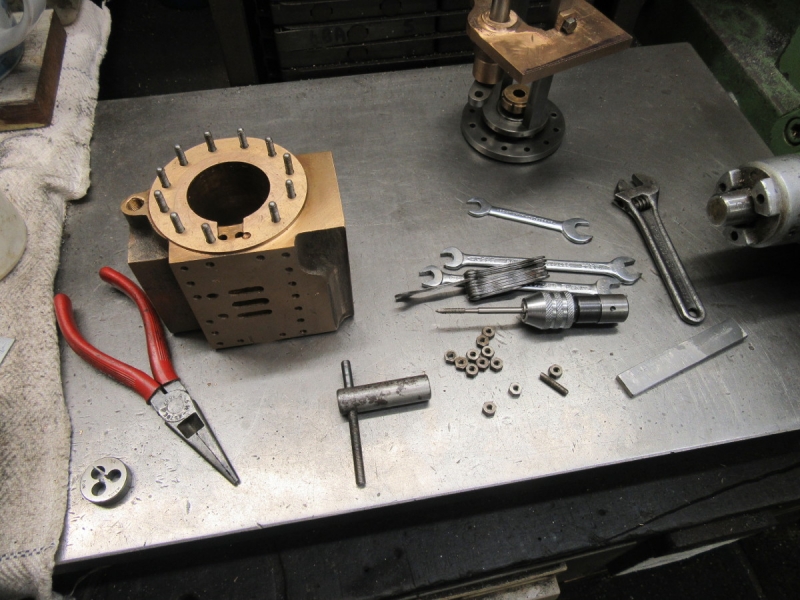
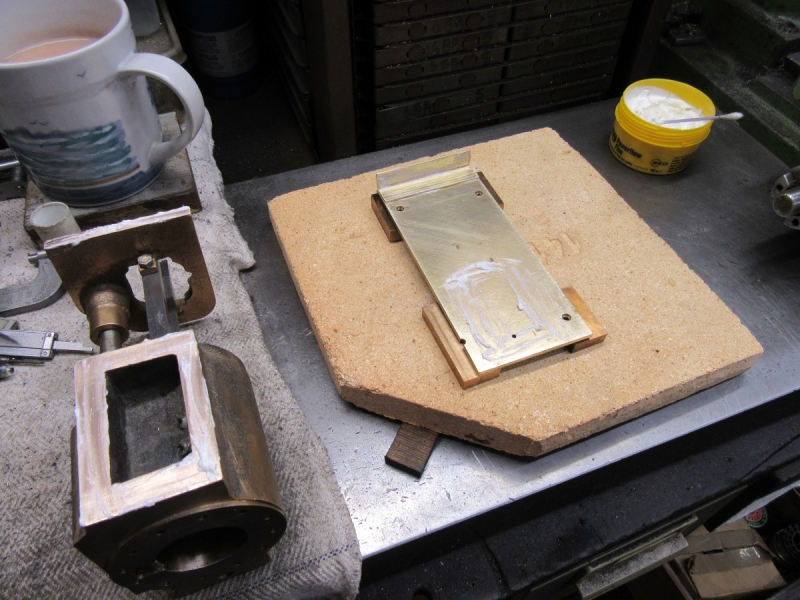
At the moment I am favouring 4 studs, one at each corner of the cylinder base, mounted on the brass base plate and taking care of the front support by sweating it on to the base plate and front angle. I might fit a couple of studs through the final assembly as well.
I don't see any problem in fixing the whole to the base plate, I have room under the guides to install 4 mounting bolts. What I really want now is to be able to slip the base plate under it all and see the full picture.
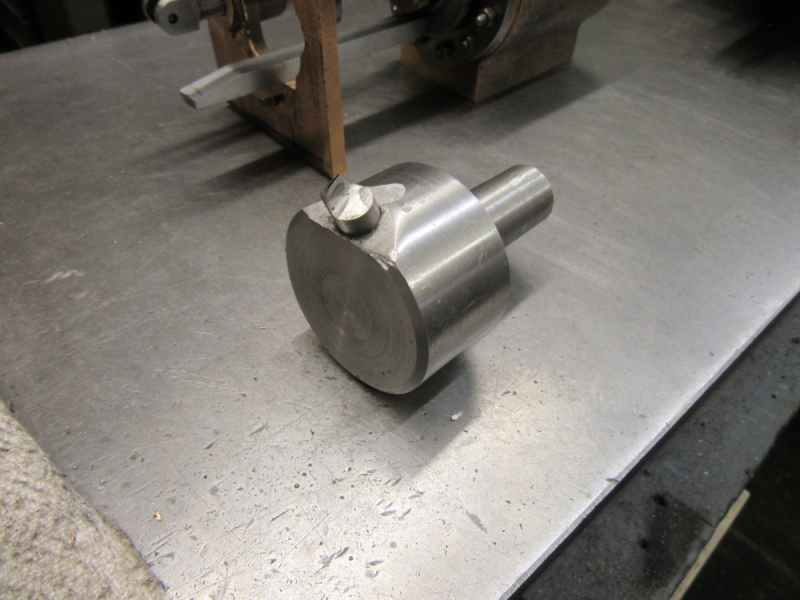
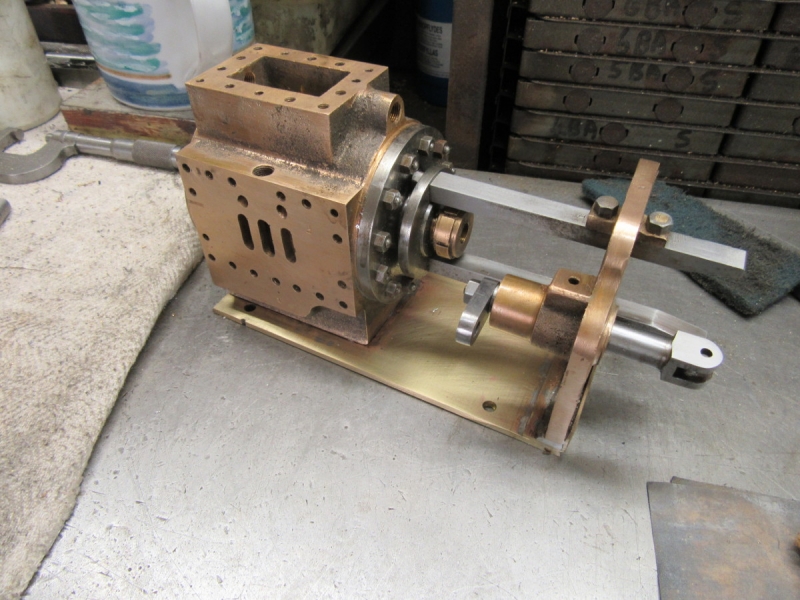
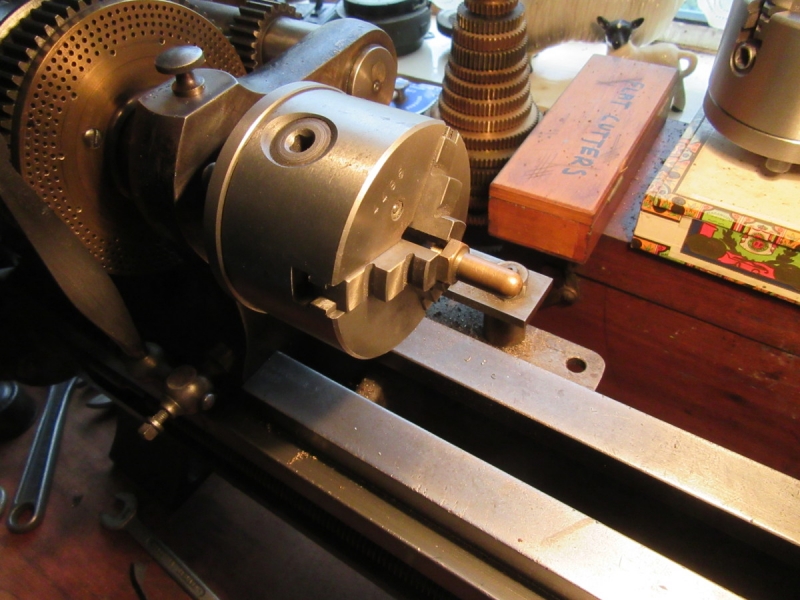
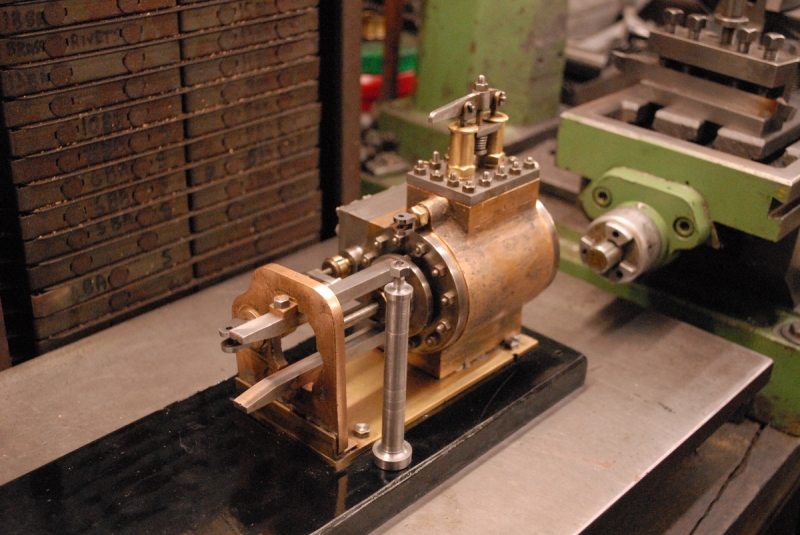
There is another small matter, the eccentric and rod. Because I have put the main bearings sufficiently far from the crank webs the Eccentric lines up well with the line of the original intended rod.
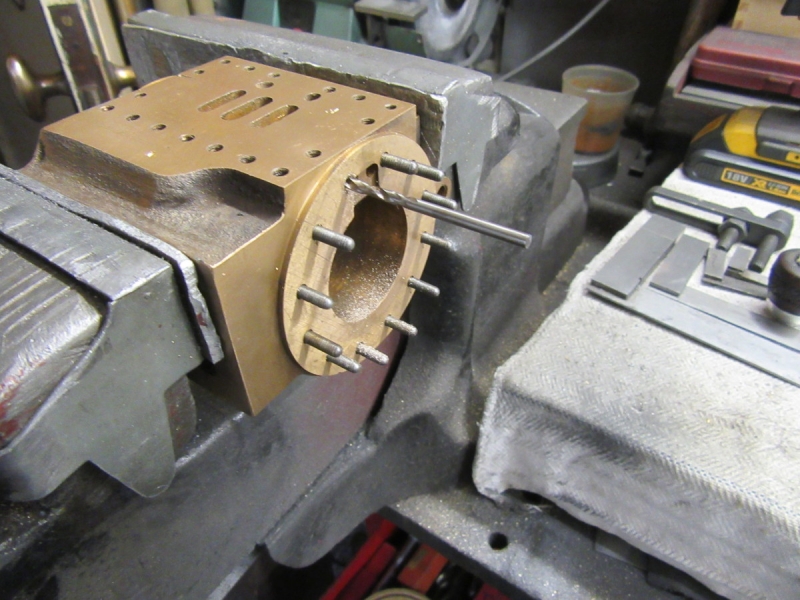
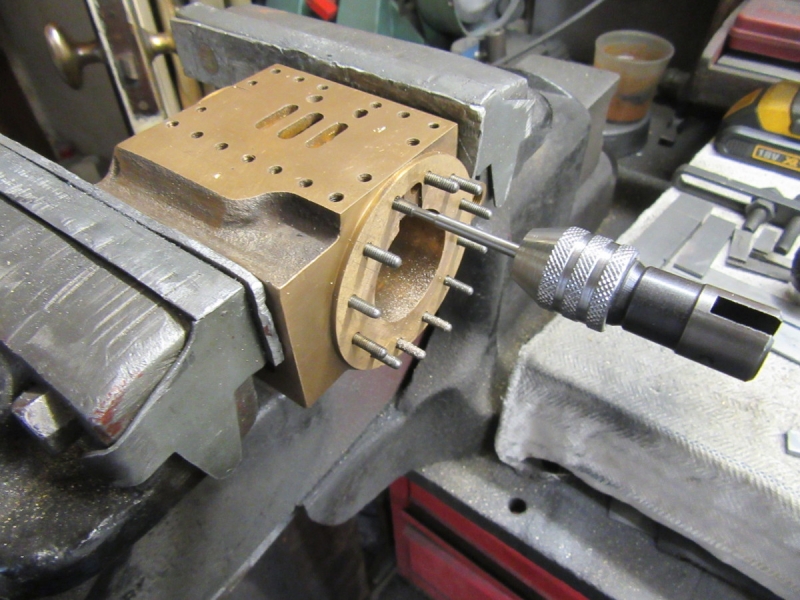
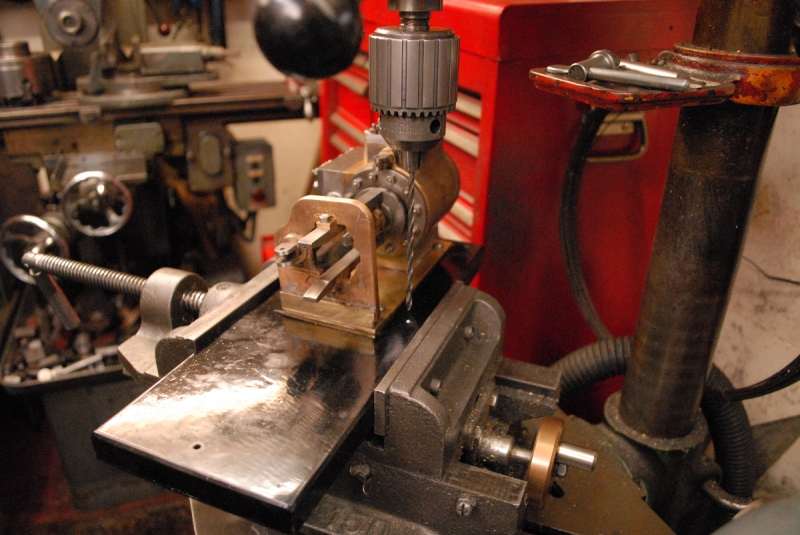
There is something that needs attention before I go any further. Because of the way the engine is designed I have to do the final fit on the front cylinder cover and the crosshead guides. It would be possible to do it later after the base plate is installed but would necessitate stripping it all down and I can avoid that.
So you can see I have a lot to think about. I always find that I do this best by running over the various points in my mind before I sleep and when I waken up everything is neatly sorted out. So I'll let the whole matter simmer away for a few hours. This is the bit I love about scratch-building without drawings. The design just grows as you go along. It's always worked up to now!
Stanley Challenger Graham
Stanley's View
scg1936 at talktalk.net

"Beware of certitude" (Jimmy Reid)
The floggings will continue until morale improves!
User avatar
Stanley
Global Moderator
Global Moderator
Posts: 90301
Joined: 23 Jan 2012, 12:01
Location: Barnoldswick. Nearer to Heaven than Gloria.

Re: Shed Matters 3

Post by Stanley »

Image

I've just called at Gissing and Lonsdale's and Terry and Ann are on holiday. But I've left a fag packet drawing of the piece of steel I want and have no doubt I shall hear from the nice lady in the office. The other task this morning was to do the final fit on the front cylinder cover and crosshead guide assembly because when I fix the cylinder down to the intermediate brass base the only way I can deal with it is a complete strip down so it's easier this way. So the first job was to remove the crosshead and connecting rod assembly and the piston and rod.

Image

Next I went through all the studs and sorted them out into the sets for the cylinder covers and the regulator and valve chest lids. All the nuts are the same so they're easier. This will save time later.

Image

The next job was to install the studs in the cylinder face. They are all nominally 4BA, I say nominally because almost 100 years ago when Newton made this I don't think he had a very accurate set of taps and dies. I used this little tool I made for this job, it makes things a lot easier.

Image

Next I made absolutely sure that I was dealing with 4BA. I did this because there was so much difference between some of the studs I was questioning my original assumption. There is another reason, if you look carefully you'll see that there is a stud missing. Newton bottled out of this one as it was so close to a steam passage and also interfered with a neighbouring stud hole for the valve chest.

Image

I felt brave so I poked a 3mm drill into the casting with the De Walt drill.

Image

Then I tapped it. It had in fact just interfered with the valve chest stud hole but that's OK, I can deal with that. I installed the stud.

Image

Initially I slipped up, I crashed on with installing the cover and when I had three nuts on I remembered that this was a final fit so I took it off and put some Loctite liquid gasket on the face.

Image

Shortly afterwards after one or two adventures I had the cover fitted and nutted down tight enough. I say tight enough because I don't trust the studs and indeed two of them have no proper hold at all but that will be OK because there are twelve of them! One of the reasons Johnny criticised the build causing Newton to ditch it. The last thing I did was to run the tap down the stud hole I had interfered with to cut the flank of the cylinder head stud and make it possible to install the long stud for the valve chest.
I called that knocking off time and I shall give it some thought but I think the next job is to sweat the brass sub base on the assembly. I'll mull that over and see if I can find any problems with that.
Stanley Challenger Graham
Stanley's View
scg1936 at talktalk.net

"Beware of certitude" (Jimmy Reid)
The floggings will continue until morale improves!
User avatar
Stanley
Global Moderator
Global Moderator
Posts: 90301
Joined: 23 Jan 2012, 12:01
Location: Barnoldswick. Nearer to Heaven than Gloria.

Re: Shed Matters 3

Post by Stanley »

Image

You can always tell when I have been thronged, a populated bench. So first thing this morning I had a tidy up putting stuff away.

Image

Remember when I was milling the CI for my pedestals using the fly cutter and hit some chilled metal that took the edge off the cutter? It's been laid on the bench since so I did something about it. I Had a fresh start and re-sharpened the cutting bit, honed it and put the cutter away. That's that one tidied up!

Image

This is what we are aiming for but with the bedplate soldered to the cylinder and guide support.

Image

I always remember the maxim that successful soldering depends on the maximum amount of cleanliness and the minimum amount of solder so I spent about half an hour preparing the brass plate, angle and mating surfaces of the cylinder. I drilled it for the three 2BA fastenings that will fix this assembly to the bed plate. I think everything is clean now.

Image

I fluxed everything and tinned all the mating surfaces. Then I set the assembly up on a firebrick using spacers to make a gap so that the flame of the blow lamp can get under the plate as that is the easiest part to get up to temperature. From then on it should have been easy, lit the blow lamp and applied the heat. Watching for the magic moment when the solder suddenly flow like water. Forget it! It never happened!

Image

God knows what it was I did wrong but the result is a right pig's ear. I am thoroughly disheartened and will survey the piste tomorrow. I am not going to guess what the result will be, all I am certain is that it will involve a lot of extra work! Sufficient unto the day is the evil thereof!
Stanley Challenger Graham
Stanley's View
scg1936 at talktalk.net

"Beware of certitude" (Jimmy Reid)
The floggings will continue until morale improves!
User avatar
PanBiker
Site Administrator
Site Administrator
Posts: 16447
Joined: 23 Jan 2012, 13:07
Location: Barnoldswick - In the West Riding of Yorkshire, always was, always will be.

Re: Shed Matters 3

Post by PanBiker »

Never had to solder big lumps like this Stanley but I know all about the laws of soldering and have served a 40 year apprenticeship doing it. It certainly looks like you have not got it up to temperature, it's a big chunk of metal. Or it's the solder mix you are using.

A few questions:

Are you using a normal 60/40 solder?

High temperature solder alloys can be problematic hence this first question.

Is it rosin or acid cored or just plain bar?

Are you just relying on the separate flux from the tin?

The amount of heat required may be burning off the flux before it gets to temperature for solder flow.

You say you tinned both surfaces before trying to mate the surfaces.

Did your solder flow OK on those surfaces before mating?

You may need more than one heat source, i.e heat the plate from below and the work from above then feed with a flux cored solder mix which may be a better bet if the painted flux is contaminating the joint.

Daft question can't you just bolt it to the plate or is the solder for aesthetics?
Ian
User avatar
Stanley
Global Moderator
Global Moderator
Posts: 90301
Joined: 23 Jan 2012, 12:01
Location: Barnoldswick. Nearer to Heaven than Gloria.

Re: Shed Matters 3

Post by Stanley »

"The amount of heat required may be burning off the flux before it gets to temperature for solder flow." I suspect that's the culprit Ian. Uneven heat, not enough to soak the mass and too much for the areas where the solder was needed. With hindsight, what I should have done was heat the cylinder via the bore and wait for the heat to soak through to the surfaces where the solder was. I'll take a view tomorrow and decide what to do.
Stanley Challenger Graham
Stanley's View
scg1936 at talktalk.net

"Beware of certitude" (Jimmy Reid)
The floggings will continue until morale improves!
User avatar
Stanley
Global Moderator
Global Moderator
Posts: 90301
Joined: 23 Jan 2012, 12:01
Location: Barnoldswick. Nearer to Heaven than Gloria.

Re: Shed Matters 3

Post by Stanley »

Image

I went in this morning and looked at the shambles with a jaundiced eye. I had more or less made up my mind to go about this in an entirely different way. But then I noticed that despite the horrible job I did, the cylinder and crosshead guide are solid on the brass plate. I decided that before I took the nuclear option of going down an entirely different path I would clean up what I had and take a final decision when I could see exactly what I have.

Image

Image

I spent over an hour and a half on it. I used scrapers, abrasive paper and Scotch pad and went over it time and time again. The more I did the better it looked of course and this is where I ended up. All right, it's not a perfect job, far from being one of my best efforts but it's viable. I can make this work how it is and they'll never see it off the Ribble. Yes, it's a cop out in a way but life is too short! I can make it work! And yes, when I got to this stage I knocked off early......
Stanley Challenger Graham
Stanley's View
scg1936 at talktalk.net

"Beware of certitude" (Jimmy Reid)
The floggings will continue until morale improves!
User avatar
Stanley
Global Moderator
Global Moderator
Posts: 90301
Joined: 23 Jan 2012, 12:01
Location: Barnoldswick. Nearer to Heaven than Gloria.

Re: Shed Matters 3

Post by Stanley »

Sorry about the hiatus lads, life is competing with the shed!
One piece of good news, the piece of steel for the bad is ready for me at Gissing's and I shall pick it up this morning.

Image

We have a bed plate. If you're thinking it's thick enough you're right! I got my metric measurement wrong and ordered 20mm instead of 10mm. Never mind, it will have advantages!
Stanley Challenger Graham
Stanley's View
scg1936 at talktalk.net

"Beware of certitude" (Jimmy Reid)
The floggings will continue until morale improves!
User avatar
Stanley
Global Moderator
Global Moderator
Posts: 90301
Joined: 23 Jan 2012, 12:01
Location: Barnoldswick. Nearer to Heaven than Gloria.

Re: Shed Matters 3

Post by Stanley »

I've let you down again, cooking and writing has got in the way of the shed. However.... Here's a consolation prize for logging in.
We have a topic on the site called 'Mystery Object'. We put obscure things up and ask people to identify them. The other day I put this one up....

Image

Would you know what they are?

Image

Would this pic have helped you? Nobody got it so I had to post this.....

Image

This is a Starrett key seat rule, it makes it easy to scribe a line on any regular cylinder that is central to the diameter. The three little clamps enable you to mark a longer line accurately when needed. Old school these days but I love stuff like this.
Stanley Challenger Graham
Stanley's View
scg1936 at talktalk.net

"Beware of certitude" (Jimmy Reid)
The floggings will continue until morale improves!
User avatar
Stanley
Global Moderator
Global Moderator
Posts: 90301
Joined: 23 Jan 2012, 12:01
Location: Barnoldswick. Nearer to Heaven than Gloria.

Re: Shed Matters 3

Post by Stanley »

Image

I know you think I have been avoiding this and you may be right. I have thought of all sorts of ways to mount it and get some finish on the flame cut edges.

Image

In the end I stopped thinking and did the obvious, just mounted it in the vice and started a light cut. Far outside the capabilities of my El Cheapo Rong-Fu mill/drill of course but we're used to that. But as usual it coped well, the cut was dead accurate but I couldn't do the whole length in one cut, 13", I got 10".

Image

This was the result on the first side, acceptable but I felt the cutter could do better.

Image

So I sharpened it, unusually I didn't back it off on the T&C grinder, I did it by hand on the grinding wheel just for a laugh. Then I put a new edge on it.

Image

It cut well but at the end of this cut I hit what is so often a problem with flame cut steel, a really hard shop. It was hard enough to take the edge of the cutter immediately.

Image

I didn't bother trying again, I ground the hard shop off. I know when I am beat!

Image

I resharpened the cutter, I had to take quite a lot off, the edges were completely trashed. Then I had a chip chase and knocked off. Quite enough for this morning!
Stanley Challenger Graham
Stanley's View
scg1936 at talktalk.net

"Beware of certitude" (Jimmy Reid)
The floggings will continue until morale improves!
User avatar
Stanley
Global Moderator
Global Moderator
Posts: 90301
Joined: 23 Jan 2012, 12:01
Location: Barnoldswick. Nearer to Heaven than Gloria.

Re: Shed Matters 3

Post by Stanley »

Yesterday was housework......

Image

It had stopped raining so outside this morning and get set up for some serious grinding.....

Image

A bit later..... I ground it all with a grinding wheel, put a bevel on the edges and corners and then finished it off with the flapper wheel.... It's looking a bit better!

Image

I spent far too long trying to revive a partially used can of black spray paint. I don't know why bothered, it never works! So I slung it and went back to old fashioned paint and a clean brush. I painted it outside and brought it into the shed, I shall leave it to dry properly. The finish will get distressed as I do my fitting but I quite like that, it always looks OK when you have finished. I don't like the 'freshly painted do not scratch me' look! That's my excuse for not being a perfectionist!
Stanley Challenger Graham
Stanley's View
scg1936 at talktalk.net

"Beware of certitude" (Jimmy Reid)
The floggings will continue until morale improves!
User avatar
Stanley
Global Moderator
Global Moderator
Posts: 90301
Joined: 23 Jan 2012, 12:01
Location: Barnoldswick. Nearer to Heaven than Gloria.

Re: Shed Matters 3

Post by Stanley »

The paint dried well. I bought that little tin of Humbroil about 30 years ago and it's a miracle that it's as good as it is. My first pic should have been a pic of the cylinder assembly sat on the bedplate but I forgot to do it. You'll have to take my word for it but the brass of the assembly sat on the bed plate is lovely. I got it in the correct position and marked the bedplate for the threaded holes I need for the holding down bolts or studs, whichever I decide on.

Image

Then I did my measuring for stud length etc and sorted out the 4mm tapping drill and a good tap.

Image

Then under the pillar drill and the usual routine of drill, tap with the drill at the same setting and pop a set-screw into the hole to keep it clean. One tip, 4mm is only a small drill and when you are drilling through 3/4" of steel it's a good idea to look to drill sharpening and geometry and frequently clear the tapping hole as you are working. If you don't you could end up with a drill broken in the hole. Another tip, drill the holes right the way through, a lot less chance of breaking a tap if the cuttings can drop out of the bottom. I hate tapping blind holes!

Image

Here's where I finished. I can get away with using set screws I think which will be tidier. I'll have a trial fit tomorrow and then start building the cylinder block up. Marking for the pedestals can wait until I have the cylinder finished, no problem drilling and tapping for the holding down bolts for that with the cylinder mounted.
Stanley Challenger Graham
Stanley's View
scg1936 at talktalk.net

"Beware of certitude" (Jimmy Reid)
The floggings will continue until morale improves!
User avatar
Stanley
Global Moderator
Global Moderator
Posts: 90301
Joined: 23 Jan 2012, 12:01
Location: Barnoldswick. Nearer to Heaven than Gloria.

Re: Shed Matters 3

Post by Stanley »

This morning was gobbled up by shopping and writing a piece for the Steam Engine and Waterwheel topic on boilers. However I managed half an hour in the shed.....

Image

All I did was address the matter of fastening the assembly down to the bed plate. I told you it looked OK! I can build the cylinder back up on the bed. One thing that did strike me was that I should have drilled the bed plate for the screws that will hold it down on a wooden plinth eventually. I shall do that before I do anything else! Not a lot done but still a small and satisfying step forwards. By the way, I managed to make the set screws do with a bit of fiddling, saves the trouble of making studs and looks tidy.
Stanley Challenger Graham
Stanley's View
scg1936 at talktalk.net

"Beware of certitude" (Jimmy Reid)
The floggings will continue until morale improves!
User avatar
Stanley
Global Moderator
Global Moderator
Posts: 90301
Joined: 23 Jan 2012, 12:01
Location: Barnoldswick. Nearer to Heaven than Gloria.

Re: Shed Matters 3

Post by Stanley »

Image

As promised yesterday I started by drilling the holes in the bed for the screws that will eventually hold it on the wooden plinth.

Image

I love my shed but occasionally I need my chest of packings and it lives under Johnny's big lathe and had the Dumore grinder on top of it which is a heavy box with no handles (just to make it worse!) I had to move the compressor and the saw. I put the grinder back on the floor and the packing box on top. I usually need the same reel of packing string and so I shall not put it back in again. This guarantees that the next tine I need some it will be different packing!

Image

The first packing I did was the piston rod gland. These are a bit of a pain even if not hampered by guides. This one was a bugger! That's why there are no pics..... I eventually managed and had put just the right amount in. I tightened it down hard and then slacked it back a touch. About half the threads left outside, just right, that means that taking it up will be OK if that is needed. It usually is after running a bit.

Image

Next I did the piston. I had made this with two grooves and in this pic I have done the first and I'm ready to start on the second. I usually put as much in as I can and end up with a piston that isn't easy to move but I held off a bit with these because I want to be able to move the piston and rod easily when I am doing the rest of the fitting of the motion and crankshaft. I think I got it just about right, after a drop of oil went in the bore it moves smoothly and easily but I think is a good seal. In case you're wondering, these soft packings stay steam tight for a surprisingly long time even when they are subject to live steam and hard work as in steam locomotives.

Image

Knocking off time. My next move will be to fit the Cylinder cover. Remember that all this is a final fitting unless something goes badly wrong. Nice fiddly morning!
Stanley Challenger Graham
Stanley's View
scg1936 at talktalk.net

"Beware of certitude" (Jimmy Reid)
The floggings will continue until morale improves!
User avatar
Stanley
Global Moderator
Global Moderator
Posts: 90301
Joined: 23 Jan 2012, 12:01
Location: Barnoldswick. Nearer to Heaven than Gloria.

Re: Shed Matters 3

Post by Stanley »

Image

On with a bit of quiet fitting. Sorting the studs out was a good move, saved time!

Image

I popped the lid on the end of the cylinder and then tackled the regulator box, first thing was to fit the valve and that includes packing the rod gland. The rod is a tad short actually but it will work and I'm not into redoing what Newton did all those years ago.

Image

Then the final fit on the regulator box lid, I've adjusted the valve and so it doesn't need to be opened again. I have to admit that Newton's studs are a moveable feast but remember he was only 13 or 14 at the oldest when he made this. I have got them all tight and will file the tops off them tomorrow to tidy them up before I move on to the valve chest. Nice quiet morning, I like fitting.....
Stanley Challenger Graham
Stanley's View
scg1936 at talktalk.net

"Beware of certitude" (Jimmy Reid)
The floggings will continue until morale improves!
User avatar
Stanley
Global Moderator
Global Moderator
Posts: 90301
Joined: 23 Jan 2012, 12:01
Location: Barnoldswick. Nearer to Heaven than Gloria.

Re: Shed Matters 3

Post by Stanley »

Image

Today I want to fit the valve chest. One of the things that has to be done first is to pack the valve rod gland. The gland nut is not an easy fit in the wall of the chest so I had to identify the thread and run a die down it tightening it up until it was a good fit. I am convinced that 90 years ago when Newton made this his taps and dies were quite worn. It was 5/16" and 32tpi and I had to search my tables until I found it, it didn't immediately ring a bell. It turned out to be Model Engineer's thread. I don't think it's widely used these days. Of course I had a complete set of taps and dies..... (For any newbies reading this, don't despair, just spend your pocket money on building up your tool collection, you will never regret it!)

Image

It was quite frightening how much the die cut off it, I tried it in the gland and it's OK, a good fit.

Image

Not a lot of room in the gland but after a bit of fiddling I got a single thread of packing into it. I tightened it down hard and slacked back a bit and it's just right.

Image

Always a treat to used Johnny's copy of the Birch lathe. Nothing serious, it was just that it was exactly the right tool to hold the cover guide for the end of the valve rod while I polished it.

Image

Here it is ready for fitting. Then I addressed the long studs that hold the chest and lid on the valve face..... This was a bit of a fiddle. Newton's studs are a bit individual! As I say I suspect his threading tackle was a bit worn and to be quite truthful I am not absolutely certain whether they are 4BA or 5BA. Quietly away and big does and little does I got it done. I have put Loctite plastic gasket on the mating face of the valve chest to the cylinder because it doesn't have to come off again. Nothing under the lid because it will have to come off again to time the engine. There are three redundant holes in the lid because Newton forgot that if he put those studs in they would interfere with drillings in the cylinder block. I was considering filling them in but decided not to, they are part of the story of a young lad making his first cylinder and I have made that mistake myself! Notice that the connection of the valve rod to the fixture on the guide fits perfectly.

Image

Knocking off time. 2 hours on my feet concentrating and that's enough for one morning. I was ready for a sit down. You've got to admit it's beginning to look like the business end of a steam engine!
Don't worry about the stick out on some of the studs, I will address that eventually and make them look pretty!
Stanley Challenger Graham
Stanley's View
scg1936 at talktalk.net

"Beware of certitude" (Jimmy Reid)
The floggings will continue until morale improves!
User avatar
Stanley
Global Moderator
Global Moderator
Posts: 90301
Joined: 23 Jan 2012, 12:01
Location: Barnoldswick. Nearer to Heaven than Gloria.

Re: Shed Matters 3

Post by Stanley »

As is so often the case, life got in the way of the shed! I started by swapping the 4 jaw independent out and replacing it with the 4 jaw SC because I am going to need it.

Image

The first thing I want to address is that I need an exhaust pipe. I did a bit of investigating because Newton drilled and tapped the hole for it. I know he had Model Engineer taps and dies so I tried that first and sure enough it was 5/16" 32tpi so I looked up the die for that. I don't have any 5/16" pipe so I dug in the treasure chests and found some 3/8" brass rod which must be over 100 years old and spent a lot of its life in a bucket half full of water in a garden. It's still good material. It didn't take long to turn it down to size finish it and bore it 13/64".

Image

We have an exhaust pipe. The next thing is that the design Committee have come up with a good idea for the regulator linkage. Remember that this engine, being of traction engine origin has a steam chest and a regulator and we need an operating lever that looks authentic. The solution I am playing with starts with square rod so that's why I went straight to the 4 jaw self centring chuck. Basically it's a pillar on the bed, a lever and a link to cope with the parallelism. It will look good and I am working on the design......
Short but nice morning. A bit further forwards.... What more could a bloke want!
Stanley Challenger Graham
Stanley's View
scg1936 at talktalk.net

"Beware of certitude" (Jimmy Reid)
The floggings will continue until morale improves!
User avatar
chinatyke
Donor
Posts: 3831
Joined: 21 Apr 2012, 13:14
Location: Pingguo, Guangxi, China

Re: Shed Matters 3

Post by chinatyke »

Stanley wrote: 17 Sep 2018, 09:41 There are three redundant holes in the lid because Newton forgot that if he put those studs in they would interfere with drillings in the cylinder block. I was considering filling them in but decided not to, they are part of the story of a young lad making his first cylinder and I have made that mistake myself!
Don't you think it would be better to hide the errant holes with dummy studs? Or remove the central stud at the bottom for symmetry?
User avatar
Stanley
Global Moderator
Global Moderator
Posts: 90301
Joined: 23 Jan 2012, 12:01
Location: Barnoldswick. Nearer to Heaven than Gloria.

Re: Shed Matters 3

Post by Stanley »

No, they aren't bothering me and as I say they are part of the story. They don't affect the running.
Stanley Challenger Graham
Stanley's View
scg1936 at talktalk.net

"Beware of certitude" (Jimmy Reid)
The floggings will continue until morale improves!
User avatar
Stanley
Global Moderator
Global Moderator
Posts: 90301
Joined: 23 Jan 2012, 12:01
Location: Barnoldswick. Nearer to Heaven than Gloria.

Re: Shed Matters 3

Post by Stanley »

I want to make the regulator linkage. I have it clear in my head but need to draw it, decide the geometry and sizes and get it all down on paper. As soon as I had an idea I got some stock out of the treasure chests.

Image

I used the stock to set things out and decide angles and sizes.

Image

Then I had to decide another dimension, the height of the pillar on the bed which will carry the linkage and act as the fulcrum point.

Image

I picked 2BA for the thread in the bed because I had a long series drill that was almost the right size. That was a mistake.....

Image

I missed a few pics because I was busy! What happened was that because the tapping drill I used was slightly undersize and this boiler plate is good stuff I started tapping and broke the bloody tap! It wasn't in very deep and as you can see I chose the brutal way out. I took a dowel of 4mm silver steel and simply drove it out. Then I poked a 4.1mm drill through the hole, a tenth of a millimetre bigger than the recommended size and tapped the hole from the back as it was sat in the vice. Lots of cleaning the hole and the tap and I managed it without breaking another tap! All this took some time....

Image

Here we have the result, a 2BA set screw that is an easy but good fit in the bed.

Image

I needed a bit of straightforward work after all those difficulties so I put the stock in Mrs Harrison and set about making the pillar.

Image

Knocking off time. Here's the pillar blank in place on the bed, it has 3/8" of 2BA thread on the bottom of it. Tomorrow I'll re-chuck it and finish it off. An interesting two hours, It ain't easy!
If you have noticed a different colour balance it's because I am using the big Nikon, I have neglected it for too long.
Stanley Challenger Graham
Stanley's View
scg1936 at talktalk.net

"Beware of certitude" (Jimmy Reid)
The floggings will continue until morale improves!
User avatar
chinatyke
Donor
Posts: 3831
Joined: 21 Apr 2012, 13:14
Location: Pingguo, Guangxi, China

Re: Shed Matters 3

Post by chinatyke »

Stanley wrote: 20 Sep 2018, 02:40 No, they aren't bothering me and as I say they are part of the story. They don't affect the running.
:good: Agreed, it is looking good. :extrawink:
User avatar
Stanley
Global Moderator
Global Moderator
Posts: 90301
Joined: 23 Jan 2012, 12:01
Location: Barnoldswick. Nearer to Heaven than Gloria.

Re: Shed Matters 3

Post by Stanley »

Glad you agree China. In my early days I made the same mistake myself and it's nice to be able to see Newton finding his way to making good engines the way he did. Mind you, a bit ambitious to start making a traction engine at that age and with his simple equipment.
Stanley Challenger Graham
Stanley's View
scg1936 at talktalk.net

"Beware of certitude" (Jimmy Reid)
The floggings will continue until morale improves!
User avatar
Stanley
Global Moderator
Global Moderator
Posts: 90301
Joined: 23 Jan 2012, 12:01
Location: Barnoldswick. Nearer to Heaven than Gloria.

Re: Shed Matters 3

Post by Stanley »

Image

I used my head yesterday after nearly being run over, it shook me up... This morning I had just over an hour in the shed with one goal, getting a bit of shape into the pillar for the regulator handle. This included threading a spigot on the top to mount the lever. Not quite as easy as it looks, I had slipped up, I should have slimmed it down before I put the thread on the top end. This meant that I couldn't hold it with a centre.

Image

Here we are at knocking off time. I'm ready to make the lever and the link. I haven't quite decided how to do this yet, no doubt something will come to me once I start cutting metal. That's how it usually works......
Stanley Challenger Graham
Stanley's View
scg1936 at talktalk.net

"Beware of certitude" (Jimmy Reid)
The floggings will continue until morale improves!
User avatar
Stanley
Global Moderator
Global Moderator
Posts: 90301
Joined: 23 Jan 2012, 12:01
Location: Barnoldswick. Nearer to Heaven than Gloria.

Re: Shed Matters 3

Post by Stanley »

Sorry lads, I had to do some cooking and washing. Remember I have to look after myself!
Stanley Challenger Graham
Stanley's View
scg1936 at talktalk.net

"Beware of certitude" (Jimmy Reid)
The floggings will continue until morale improves!
User avatar
Big Kev
Site Administrator
Site Administrator
Posts: 10956
Joined: 23 Jan 2012, 20:15
Location: Foulridge

Re: Shed Matters 3

Post by Big Kev »

I'm back in the office tomorrow so hopefully there'll be something to see just before lunch :good:
Kev

Stylish Fashion Icon.
🍹
User avatar
Stanley
Global Moderator
Global Moderator
Posts: 90301
Joined: 23 Jan 2012, 12:01
Location: Barnoldswick. Nearer to Heaven than Gloria.

Re: Shed Matters 3

Post by Stanley »

I'm a bit baffled Kev.... Were you on the right topic?
Stanley Challenger Graham
Stanley's View
scg1936 at talktalk.net

"Beware of certitude" (Jimmy Reid)
The floggings will continue until morale improves!
Post Reply

Return to “Crafts”