SHED MATTERS 2

Locked
User avatar
Stanley
Global Moderator
Global Moderator
Posts: 91510
Joined: 23 Jan 2012, 12:01
Location: Barnoldswick. Nearer to Heaven than Gloria.

Re: SHED MATTERS 2

Post by Stanley »

Image

With the valve bodies as far forward as I want to go at the moment I had to start thinking about the lids and the headgear. The latter can wait for a while but I had it in mind as I started to think about the design. The lids have to be made to suit each body as they all vary a little in the OS diameter so the first job was to stamp a number on each body so I don't get mixed up. Then into the drawing office and a few initial thoughts drawn out. Note I say initial because as I was making the first lid I had a rethink. I can make the spigot in the body deeper which will give more room in the stuffing box of the gland and instead of a boss on top for the gland it will be better if the whole lid is flat. Done with a boss there would be interference with the holding down nuts. Another plus point is that being thicker it will be a better foundation for the columns that have to be screwed into it to carry the saddle in which the threaded part of the spindle runs. I decided on a 3/16" diameter spindle and that set the size for the gland nut, 3/8" X 26tpi. Then a quick check in the treasure boxes and the right tap, die and tapping drill sorted out and got ready.
I'll admit I then got a bot anal about the job, I resharpened an HSS cutter and stoned it to a good finish. The number two valve has a slightly larger bonnet diameter so I started with that one. I went to quite ridiculous lengths to ensure accuracy and freedom from mistakes but it's good practice because I get into watch-making very soon and the sooner I get my head in gear the better!

Image

Close of play. The body diameter matches the lid and the spigot is a nice fit. I shall get on faster now I have got started!
Stanley Challenger Graham
Stanley's View
scg1936 at talktalk.net

"Beware of certitude" (Jimmy Reid)
The floggings will continue until morale improves!
User avatar
Stanley
Global Moderator
Global Moderator
Posts: 91510
Joined: 23 Jan 2012, 12:01
Location: Barnoldswick. Nearer to Heaven than Gloria.

Re: SHED MATTERS 2

Post by Stanley »

I was right when I said I'd get on quicker with the lids now I had started but I didn't factor in The other items that were demanding attention.
The first part of the morning was spent completing the final stages of the Skunk Project. I say final, there is one more small matter to attend to but I'm waiting for the items to be ready for the last blow. Probably tomorrow morning.
Once that was out of the way I went back into the drawing office and figured out the details of the changes to the lids I mentioned yesterday. Some careful thought, then some measuring and drawing and I think I have t6he design right now. I haven't bothered about how it will look because if it's fit for purpose it always looks right....

Image

One of the changes I had made was to decide on 7/32" as the clearance hole in the bottom of the gland for the 3/16" valve rod so the first job was to poke a drill though the lid. Then I parted it off.

Image

The blank lid on the valve body. This was where I made the first mistake of the morning.... I misread the number on the valve body and stamped the lid number 3 instead of 2! So that had to be put right. Box on.....

Image

The next body needs a lid .95" diameter, so the first step was to get the outside diameter down to this, spot on so I started to turn the spigot that goes into the valve.

Image

I cracked on with reducing the bar using 100thou cuts and suddenly realised it was too small. I'd made the classic mistake of not dividing the amount I needed to take off by two! This was nothing to do with my sight but a senior moment because I had been using the cross slide to get the .25" depth I needed, a beginner's mistake. Ah well.... I faced the end and quickly put the right diameter spigot on. This turned out to be close of play.
Stanley Challenger Graham
Stanley's View
scg1936 at talktalk.net

"Beware of certitude" (Jimmy Reid)
The floggings will continue until morale improves!
User avatar
Super_7b
Newbie
Posts: 30
Joined: 24 Jan 2012, 08:59
Location: Hoyland

Re: SHED MATTERS 2

Post by Super_7b »

Hi Stanley,

Getting ready to go back into the shed again after a few days down with 'flu and I need some advice.

I received some dial gauges from Arc Euro Trade and want to give them good, flat, steel backs (they come with lugged backs, attached by small screws) so I can attach magnets as used by John Doubleboost and Adam Booth. This means I need four discs of just over 52mm diameter in something like 1.5mm plate. I can source the raw material easily, but how to cut neat circles without a centre hole?

I thought about hacking them roughly to shape by whatever means and then trapping them as the filling in a sandwich made from a faced wooden block held in the chuck and another wooden block with a centre-drilled hole trapped by my rotating tailstock centre. If I made the blocks about 50mm diameter, I could spin the steel with the friction afforded by tightening the sandwich with the tailstock and gently persuade the discs to size one at a time.

I'd love to trepan them, but the work involved in sorting out the tooling seems more trouble than it's worth.

What do you reckon? Or is there a better method?

BR

Mick
User avatar
Stanley
Global Moderator
Global Moderator
Posts: 91510
Joined: 23 Jan 2012, 12:01
Location: Barnoldswick. Nearer to Heaven than Gloria.

Re: SHED MATTERS 2

Post by Stanley »

Morning Osset Mick.... (More Micks in my life than I can poke a stick at!)
The better hole saws cut metal cleanly. You don't say what thickness the magnetic material is. First thing that comes to mind is why it matters if there is a hole in the disc. The sandwich idea is a good one but I'd use metal rather than wood. When I went round Budenberg's at Sale I was interested to see how they milled the teeth in the small brass quadrants that are part of the linkage in pressure gauges. They milled them as a sandwich between two sacrificial plates and did six at a time, the end ones cut into the sacrificial plates were discarded because they didn't cut as cleanly as the ones in the middle of the sandwich.
One of the tricks the old turners, especially the Ornamental Turning men, used was to have a brass/bronze faceplate.

Image

Here's the one that came with Johnny's big lathe. You can see traces of solder on the face. They sweated thin material onto it for turning and of course reheated afterwards to get the finished part off. You could use shaftlock or similar glue on your faceplate. Moderate heat will break the joint after you have finished. With care you won't damage the magnetic properties.
Trepanning of quite thick material is easy if you use a sharp screw cutting tool and go carefully at it. I've done it for larger gear blanks.
Mick the Shed tells me that ready cut magnetic disks are easily available on the web.... Could be the easiest route!

Image

While I was snapping the faceplate I did a pic of this. It puzzled me for a long time but I have been told it's a support for the ends of pieces of tubing when working on them. I've never used it and am not sure how you'd mount it on the tailstock, no doubt a small offset plate on a centre. Could be a good get-out once every Preston Guild.... (Not easy to see on the pic but the holes are conical so you have all the sizes catered for)
Stanley Challenger Graham
Stanley's View
scg1936 at talktalk.net

"Beware of certitude" (Jimmy Reid)
The floggings will continue until morale improves!
User avatar
plaques
Donor
Posts: 8094
Joined: 23 May 2013, 22:09

Re: SHED MATTERS 2

Post by plaques »

Super_7b wrote: but how to cut neat circles without a centre hole?
Mick, I once saw a neat little trick where a boss was glue on with 'Locktight' . After turning he simply warmed it up and removed the service boss.
User avatar
Stanley
Global Moderator
Global Moderator
Posts: 91510
Joined: 23 Jan 2012, 12:01
Location: Barnoldswick. Nearer to Heaven than Gloria.

Re: SHED MATTERS 2

Post by Stanley »

That's a handy tip P. I'd forgotten that one!

Image

To paraphrase the Immortal Bard.... 'things go aft aglay...'. Friday morning is always busy, things to do but I eventually got in the shed at 09:00. I noticed two brown stains on the tablecloth and when I lifted it up, this was what I found! I realised straight away what had caused it, I had been using Evo Stick wood glue yesterday and knew that the cloth felt damp afterwards so as a precaution I'd sprayed the surface plate with WD40 but it was evidently not enough. I should have known because I've seen what it does to a steel woodscrew used as a stopper on the spout. So 15 minutes with penetrating oil and very fine emery and we had it clean again but with a slight stain.

Image

Then a good spray with WD40 again and a clean tablecloth....

Image

I finished the lid I was on with yesterday...

Image

And straight into the last one.

Image

No slip ups this time and I soon had this one bored for the spindle and finished.

Image

Close of play after a short morning... All three bodies with matching lids and ready for drilling and tapping for the gland nut.... All of them numbered.

Image

Slow I know but we are moving quietly forward with no mistakes.... (Apart from the Evo stick of course!)
Stanley Challenger Graham
Stanley's View
scg1936 at talktalk.net

"Beware of certitude" (Jimmy Reid)
The floggings will continue until morale improves!
User avatar
Super_7b
Newbie
Posts: 30
Joined: 24 Jan 2012, 08:59
Location: Hoyland

Re: SHED MATTERS 2

Post by Super_7b »

Hi Stanley,

The material is not the magnetic thing. I want to make discs of mild steel 52mm diameter from 1.5mm sheet. This will act as a backing plate to mount two sector shaped magnets recovered from dead hard drives. As John Doubleboost did, I intend to mount the magnets onto the discs with Araldite to both bind them and cover them so that I can wipe swarf and particles off easily. I want the discs to be "whole" so there is no centre hole for muck to get into.

I can chop rough circles out with a bandsaw, but getting a nice neat fnal finish was my concern. The fixing to a faceplate with Loctite (or even soft solder) might be a possibility, but with 4 to do, it might take some time. The idea of the sandwich was speed of working.

I could go with metal as the sandwich, since it would be slightly smaller than the finished diameter of the discs and thus would not get touched by the turning tool. My concern was the mutual friction compared to what I thought I'd get if I sandwiched my steel discs with wood.

I had considered holesaws, but decent ones are not cheap and work better with a drill up the middle. If I can do it by turning, my only investment is a bit of scrap wood. Yorkshiremen traditionally have short arms and deep pockets :grin: but then again Barlick is still in the West Riding anyway, so you know these things.

BR

Mick
User avatar
Stanley
Global Moderator
Global Moderator
Posts: 91510
Joined: 23 Jan 2012, 12:01
Location: Barnoldswick. Nearer to Heaven than Gloria.

Re: SHED MATTERS 2

Post by Stanley »

Mick, with light cuts the sandwich will be fine. I tried mounting dial indicator with a magnet but my available magnets were too strong! No problems with affecting to clock as it had a heavy steel back but it picked up all the swarf! I might try again with some commercial magnetic disks.... On the back burner at the moment as I work slowly through my valves..... The design committee came up with some ideas last night, all aimed at compensating for my eyes....
Stanley Challenger Graham
Stanley's View
scg1936 at talktalk.net

"Beware of certitude" (Jimmy Reid)
The floggings will continue until morale improves!
User avatar
Stanley
Global Moderator
Global Moderator
Posts: 91510
Joined: 23 Jan 2012, 12:01
Location: Barnoldswick. Nearer to Heaven than Gloria.

Re: SHED MATTERS 2

Post by Stanley »

Image

Back to the lids. First job was to put a sharp screw-cutting tool in and use the tip to scribe a pitch diameter circle on the lids as a location for the drillings. Then using the same tool, put a chamfer on the edge of each lid.

Image

The next stage was to thread the lids 3/8" X 26tpi for the gland nuts.

Image

All three bonnets at the same stage, ready for the gland buts but first I had to do a bit of digging in the treasure chest to find a piece of 1/2" diameter non ferocious. Then a trip into the drawing office and some decisions about sizes.

Image

I decided on 3BA for the studs and nuts that will hold the lid down, 6 for each of the three lids so I did another trawl of the treasures and made sure I had plenty of 3BA threaded rod and 18 nuts.

Image

Then some repetition work. Make the gland nuts, drill them 7/32 for the valve rod, thread them 3/8" X 26tpi and part them off the bar. I wanted to get them finished this morning.

Image

A few minutes overtime and I got there. The reason I wanted this straight edge is because the next stage, dividing the lids into eight equidistant holes (6 for the studs and 2 for the standards...) This will be on the 1927 lathe in the front room and the first job will be to set up the overhead gear.... I'd like to start that with clean hands!

Image

One last pic in the drawing office after I'd put a few tools away. I wanted you to see the double sided circular scale I use a lot. It has all the equivalents on for imperial to metric and a lot of other useful references. It saves me looking them up in books and is far easier. Even if I can remember a tapping size or an equivalent for fractions I always look them up. Better safe than sorry!
Stanley Challenger Graham
Stanley's View
scg1936 at talktalk.net

"Beware of certitude" (Jimmy Reid)
The floggings will continue until morale improves!
User avatar
Stanley
Global Moderator
Global Moderator
Posts: 91510
Joined: 23 Jan 2012, 12:01
Location: Barnoldswick. Nearer to Heaven than Gloria.

Re: SHED MATTERS 2

Post by Stanley »

Slight correction. The design committee has revised the stud size for the lid, it's now 4BA. I have the c screwed rod and nuts sorted.....
Stanley Challenger Graham
Stanley's View
scg1936 at talktalk.net

"Beware of certitude" (Jimmy Reid)
The floggings will continue until morale improves!
User avatar
Stanley
Global Moderator
Global Moderator
Posts: 91510
Joined: 23 Jan 2012, 12:01
Location: Barnoldswick. Nearer to Heaven than Gloria.

Re: SHED MATTERS 2

Post by Stanley »

Image

The first job this morning was one of my mother's old tricks. Every now and again she moved the furniture around to make the room look different. I usually have the sofa along the wall covered with bookshelves and have my armchair facing the TV. I've swapped them round and this means I have easy access to the 1927 lathe.... So far so good!

Then I fitted the overhead gear up. I threw the main drive out of gear and got out the special plastic driving band that I use for the overhead gear. I keep it in a box in the dark because I have found through experience that it deteriorates in daylight. It has another big fault, it has tiny little push in couplings which are a bugger to hook up. I think it took me twenty minutes to get the connection made. I started the motor up to run the setup light and the driving band broke.... I tried again a couple of times but with the same result and in the end I decided that despite keeping it in the dark it had perished. Time for Plan 'B'!

Image

In the treasure chest I have a stock of new round leather belting so I fitted the drive up with an old-fashioned belt. This was fine until I tried to run it and it threw itself off the pulleys each time. This is partly due to it being stiff and new but also because it's really to thick for the job. S, time for Plan 'C'...

Image

I remembered that at the back of the cupboard I had a 30 metre coil of thinner, 1/4", leather belting. So I got it out, cut off the right length and fitted it up, looking much better. I pressed button 'B' but got the shock of my life when the heavy counterweight on the overhead drive that tensions the setup crashed down! It's a serious lump of CI as you can see, it's there in front of the lathe.

Image

Luckily there was no damage done, just some stuff knocked over. Here's the reason.... For some reason the coupling I made to hang the weight had split. Only one thing to do, abandon all hope of doing my lids and get in the shed to make a new coupling.

Image

As there was now no rush I took the new thinner belt off and put it in a plastic bag immersed in neat's foot oil. This will make it more flexible and more likely to be successful tomorrow. So, tidy up in the front room and a move into the shed. I found a suitable piece of steel and chucked it up ready, changed to the right cutter and swept the brass chips off the bed to add to the John Mills Memorial scrap box in the yard. There's getting to be a useful quantity in there now.... That was quite enough for this morning. In case you hadn't noticed, no progress on the lids! The best laid schemes.....
Stanley Challenger Graham
Stanley's View
scg1936 at talktalk.net

"Beware of certitude" (Jimmy Reid)
The floggings will continue until morale improves!
User avatar
Super_7b
Newbie
Posts: 30
Joined: 24 Jan 2012, 08:59
Location: Hoyland

Re: SHED MATTERS 2

Post by Super_7b »

Hi Stanley,

I can report success with the disc making. I cut a 12" length of 3"x1/16" mild steel sheet into 4 square(ish) pieces and chucked them up one at a time in the 4-jaw with the jaws reversed and pushing the plate firmly onto the outer step. I then attacked them with the bit from a single-cutter hole saw I remembered that I had hidden away and sort-of trepanned 56mm circles. I stopped just as the leading edge was marking the far side and then broke the waste material away with a pair of pliers.

I chucked a couple of 1" long slices off an old 3" fence post in the 4-jaw and made them into circular blocks 50mm in diameter. With one block chucked in the 4-jaw and the other with a centre drilled hole in it mounted on my rotating centre I was able to sandwich the roughed out steel discs one at a time and gently trim them down to 53mm.

Nice and slow, just 10 thou cuts to rough them out and 5 thou finish cuts got me there. Mind, we're not doing production work here, all that matters is a good result.

Well pleased now and just need to copy the 4 mounting holes from the exisiting back plates and we're done. There is something very theraputic about a bit of gentle machining and making something successfully when you were not confident of the result is very satisfying. Certainly much better than the day job (fixing telephone exchanges for a mobile phone service provider).

BR

Mick
User avatar
Stanley
Global Moderator
Global Moderator
Posts: 91510
Joined: 23 Jan 2012, 12:01
Location: Barnoldswick. Nearer to Heaven than Gloria.

Re: SHED MATTERS 2

Post by Stanley »

Good Mick! You're right, it's solving the problems that makes shed work so interesting and we often do jobs that even professionals would jib at. I once had a job at REW where I had to drill 3" holes (a lot of them!) in 1" boiler plate on a big radial drill. I did them using a commercial trepanning cutter and finished up with a lot of tidy discs which we had no use for so they were all scrapped. In the end I broke the cutter and finished the last few with a 3" twist drill. I still have the broken cutter. One of these days it will come in handy....

Image

Image

The management committee dragged me out of my chair in front of the telly last night and made me hang the new 1/4" round leather driving belt over the neat's foot oil jug and cut the bottom of the bag so it could drain overnight.... Must get some more of that oil, I'm running low and it's wonderful stuff for leather....
Stanley Challenger Graham
Stanley's View
scg1936 at talktalk.net

"Beware of certitude" (Jimmy Reid)
The floggings will continue until morale improves!
User avatar
chinatyke
Donor
Posts: 3831
Joined: 21 Apr 2012, 13:14
Location: Pingguo, Guangxi, China

Re: SHED MATTERS 2

Post by chinatyke »

Stanley wrote:I remembered that at the back of the cupboard I had a 30 metre coil of thinner, 1/4", leather belting.
You never cease to amaze me with what you pull from your treasure chest. It's like a magician pulling rabbits from a hat!
Stanley wrote:... and finished up with a lot of tidy discs which we had no use for so they were all scrapped. In the end I broke the cutter and finished the last few with a 3" twist drill. I still have the broken cutter...
Wouldn't you have been better keeping the discs rather than a broken cutter?
User avatar
Stanley
Global Moderator
Global Moderator
Posts: 91510
Joined: 23 Jan 2012, 12:01
Location: Barnoldswick. Nearer to Heaven than Gloria.

Re: SHED MATTERS 2

Post by Stanley »

A few might have been handy but the cutter will still work and I've used it a couple of times in the VM. My dad always said I was a pack rat, always picking stuff up as I walked past it. I remember Newton asking me one day why I had bought a weft tin full of HSS steel for £25 at Dixons at Worston. I told him to stop arguing and get hold of the other end of it. Neither of us would ever need to buy any HSS again!

Image

The same applies to the gauge steel and the silver steel in here. Job lots at El Cheapo prices. Stuff like this always holds its value and always 'comes in' at some point. Now I'm retired and poor my treasure chests are a godsend, I always have an answer somewhere!

A good example is the pair of Sony speakers I have just taken down and polished for Big Kev. What a good job I didn't bin them! I have got my act together now, all my cooking is done for the day. As soon as I've dealt with a couple of emails I can get going in the shed!

Image
Stanley Challenger Graham
Stanley's View
scg1936 at talktalk.net

"Beware of certitude" (Jimmy Reid)
The floggings will continue until morale improves!
User avatar
Stanley
Global Moderator
Global Moderator
Posts: 91510
Joined: 23 Jan 2012, 12:01
Location: Barnoldswick. Nearer to Heaven than Gloria.

Re: SHED MATTERS 2

Post by Stanley »

Image

When I finally got in the shed this morning the first job was to get the 1/4" driving band out of its plastic bag, wile the excess oil off it and hang it on the lathe in the front room to dry and for the oil to soak in further. It's much more pliable now, leather loves neat's foot oil!
I started on making the new connector for the counterweight on the tension arm of the overhead gear. I was interrupted by the lad delivering my new warehouse coat, I put it on straight away and put the dirty one in a hot wash. Back to the connector... Then Kev came for his speakers and was delighted, he'd looked the spec up and it was just what he wanted. Back to the connecor again! Finally I got it finished and ready to go back on the lathe.... That'll do for today!

Image
Stanley Challenger Graham
Stanley's View
scg1936 at talktalk.net

"Beware of certitude" (Jimmy Reid)
The floggings will continue until morale improves!
User avatar
Stanley
Global Moderator
Global Moderator
Posts: 91510
Joined: 23 Jan 2012, 12:01
Location: Barnoldswick. Nearer to Heaven than Gloria.

Re: SHED MATTERS 2

Post by Stanley »

Image

I took my refurbished counterweight into the front room and re-attached it. My natural inclination was to crack on with the lids but I decided that if I was going to do the job I might as well do it properly. There are several things on the drilling head that Johnny made that needed attention so I decided to put them right. None of them Johnny's fault, just the consequence of it having been unused for so many years.

Image

First thing to do was strip it down and typical of Johnny there was more to it than meets the eye. Fully ball bearing and the back one is a double row thrust bearing. The biggest problem was that Johnny must have been using a very thin driving band and so the groove in the pulley is small and vee shaped.

Image

I set it up in the lathe and made it nearer the shape of my new driving band.

Image

I didn't do too much at it but left the original narrow groove in the bottom in case it is ever needed again.

Image

I turned my attention to the small chuck but before attacking that I shortened the broken Slocombe centre drill I was using. Bit of a tip here, HSS can be broken fairly easily of you weaken it by grinding a nick in it. Fix it firmly in the jaws of the vice, cover with cloth to catch any splinters that might fly and give it a good crack with a hammer! Not exactly precision work but it does the job.

Image

The chuck has always been a bit tight on its threads, a drawback when tightening it because its keyless. As I'm sure you all know, some weird and wonderful threads are used on chucks but when I measured this up and checked it it was 7/16" X 26tpi so I ran a tap up the chuck body and put a die down the spindle. I was quite surprised how much metal I took off it and thought at first I had slipped up but it was OK. A good free fit. All I can thing is that the die that Johnny used was a bit worn and left the spindle slightly oversize.

Image

Oiled up and re-assembled. Definitely in better nick!

Image

Back into the front room. I replaced the drilling spindle in the tool holder threaded the belt up and pressed button B. The flash has frozen the motion but it's running fine. I made a few tweaks to the position of the jockey pulleys and we were ready to start.

Image

All set up and ready to go. I didn't need to use the tangential dividing gear because one of the divisions on the bull wheel is 96. I need eight holes so the gap between each setting is 12 holes. To ease things I marked the relevant holes with my marker after finding them with the dividers set to the right distance, you can see them in the tray. The way my eyes are it would have been a bugger doing it any other way. Just one thing that always catches me out.... No matter how many times you have checked everything you still get a bit of a shock when half the marks doesn't take up half the circle and a momentary panic hits you. Then you realise that of course it doesn't!

Image

15 minutes later I found what I had been looking for.... Not much to ask but I never thought it would take me this long! Never mind, the overhead gear is in the best condition ever. I have left it set up and under tension. Air and light won't affect it, the neat's foot oil will dry back into the core and make it grip better and the constant low tension will set it to the shape and length that best suits it.
I celebrated by knocking off 15 minutes early and enjoying a longer walk in the sun.
Stanley Challenger Graham
Stanley's View
scg1936 at talktalk.net

"Beware of certitude" (Jimmy Reid)
The floggings will continue until morale improves!
micktoon
Regular User
Posts: 366
Joined: 05 Feb 2012, 21:23
Location: Newcastle upon Tyne

Re: SHED MATTERS 2

Post by micktoon »

Hi Stanley, looks like plenty going on in the shed and now the front room :grin: Jonny's 1927 lathe is a work of art, glad its still getting used and repaied where needed. You have done a top job on the valves.
I have been following progress but just been on the tablet I have but it will not let me post for some reason and I do not want to strat messing about with it will am posting on the PC.

Keep up the good work.
Cheers Mick
User avatar
Stanley
Global Moderator
Global Moderator
Posts: 91510
Joined: 23 Jan 2012, 12:01
Location: Barnoldswick. Nearer to Heaven than Gloria.

Re: SHED MATTERS 2

Post by Stanley »

Morning Mick! I wondered where you were, I assumed you were too busy with other matters. What are you doing these days.....

Image

I was sat there minding my own business watching Ronnie working his magic on the TV when the Management Committee interrupted my enjoyment. They pointed out that the only thing I used the overhead gear for at present is marking divided circles. They also pointed out that the 1/4" leather drive will not be affected by leaving it exposed, in fact it will improve it by not putting sharp bends in it by coiling. My usual method is to disconnect the drive and un-thread it from the driving pulley and the drilling spindle. There was no need for this, it could simply be hung on the top rail ready for action. So, in the four frame interval I went into the shed for a piece of soft iron wire to use as a hook to hang the spindle from the top rail and reinstate the drive to the mandrel as I'll be using it shortly to make the tiny standards for the headgear of the valves.
There was a bonus! I have a large coil of what I thought was the soft iron wire used when installing re-bar before concreting. But when I cut a piece off I realised it was copper wire! I already have some in the treasure chest, I now have more copper wire than you can poke a stick at!
The design committee has been at work during the night on the best way forward with the valves. In consequence I shall be in the shed today, the standards have moved down the list in the Critical Path......
Stanley Challenger Graham
Stanley's View
scg1936 at talktalk.net

"Beware of certitude" (Jimmy Reid)
The floggings will continue until morale improves!
User avatar
Stanley
Global Moderator
Global Moderator
Posts: 91510
Joined: 23 Jan 2012, 12:01
Location: Barnoldswick. Nearer to Heaven than Gloria.

Re: SHED MATTERS 2

Post by Stanley »

A busy morning! Lots of decisions to take before I got down to making any muck. The main aim was to get my head round all the sizes and the order of progress. One thing that was obvious after some measuring was that I needed some silver steel rod for the valve spindles.

Image

What a good job this bundle of silver steel was in the treasure chest. Cost me £20 at K Steels when they were having one of their clear-outs. Never walk past anything like this....

Image

The next job wasn't quite as obvious. I want to have the saddle of the headgear at right angles to the flow and because the drillings are different than those for the 4BA studs I had to identify them by marking them and make sure they were oriented properly. If you look closely you'll see that each bonnet is registered with the valve body by a pop mark.

Image

Then I went into drawing mode and after careful thought and measuring produced a road map. I cut the blanks for the standards, found the right nuts for the standards and even sorted out the correct size spanners. It all saves time when I get going. The saddles will start out in life as 1" diameter, 3/16" thick steel disks so I had to find some steel for them.

Image

First the valve spindles. The silver steel is metric, exactly right for the bore through the gland but it needed reducing for the 3'16" 24tpi Wkitworth thread. Very careful cutting with a perfectly sharp tool......

Image

Silver steel is lovely stuff, tough but cuts and threads beautifully with care.

Image

It didn't take long to find three finished rods. They look a bit short because the ball valve isn't in the body yet. They will be plenty long enough.

Image

The next job is to make the saddles. It was almost clocking off time so I cleaned up, put tools away and got set up for a flying start tomorrow.
It doesn't look like much but a lot of good work done this morning and most important I have it all straight in my head.....
Stanley Challenger Graham
Stanley's View
scg1936 at talktalk.net

"Beware of certitude" (Jimmy Reid)
The floggings will continue until morale improves!
micktoon
Regular User
Posts: 366
Joined: 05 Feb 2012, 21:23
Location: Newcastle upon Tyne

Re: SHED MATTERS 2

Post by micktoon »

Hi Stanley , more fine progress , a credit to your shed. This is what I have been up to last week anyway.

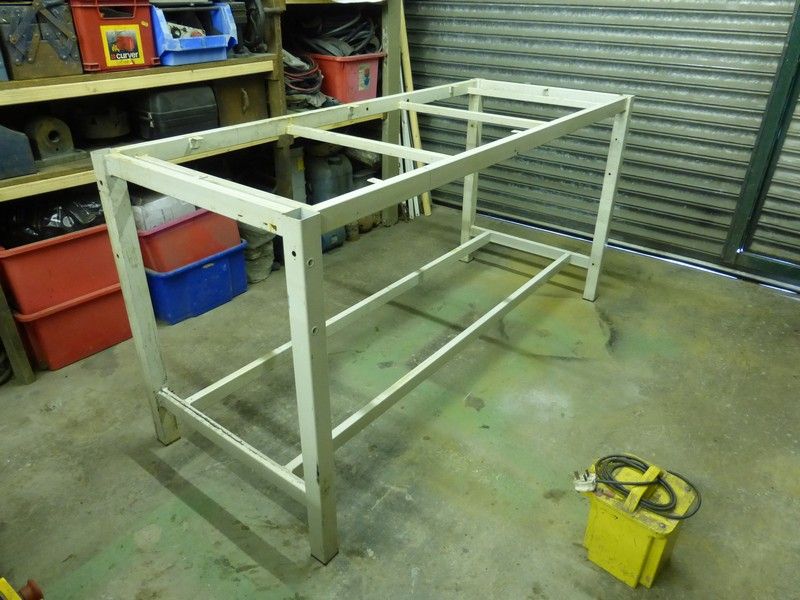
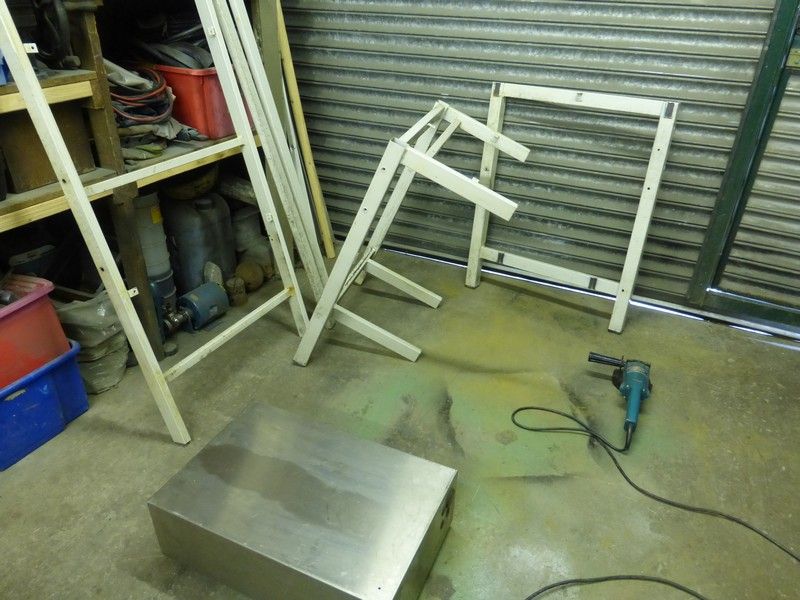
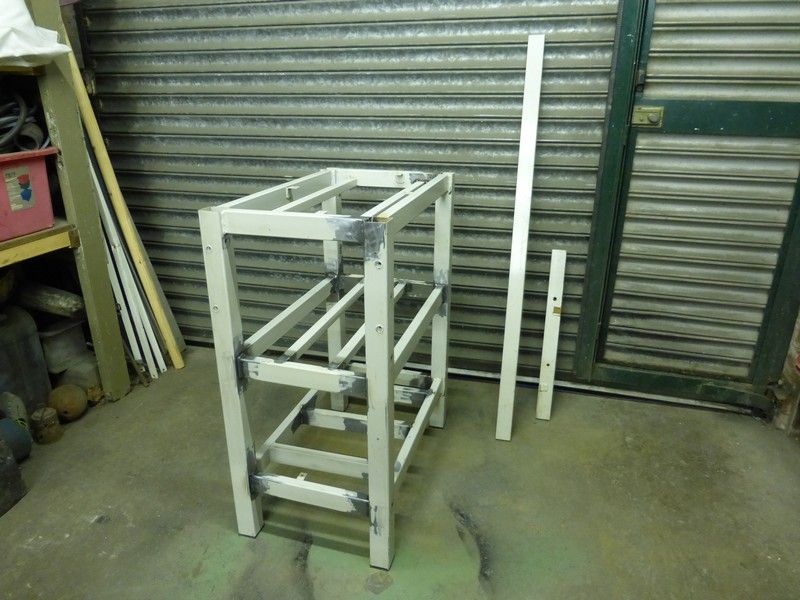
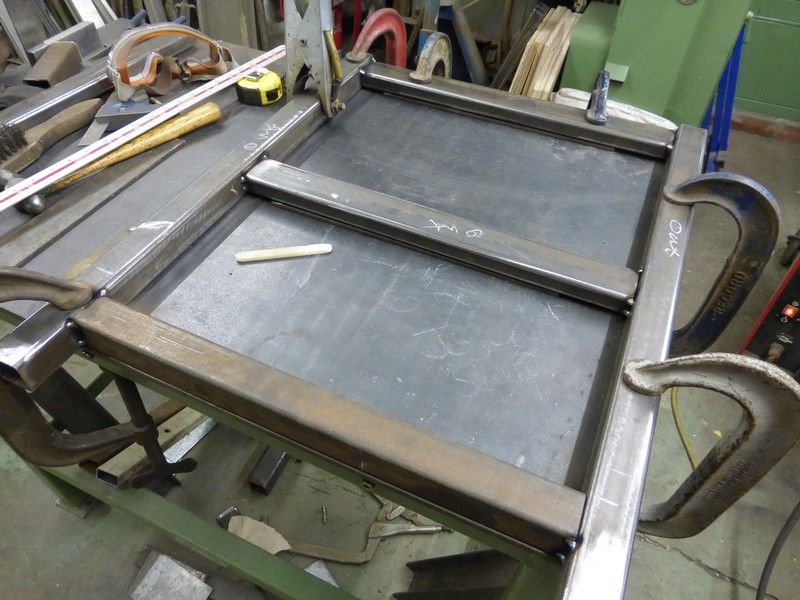
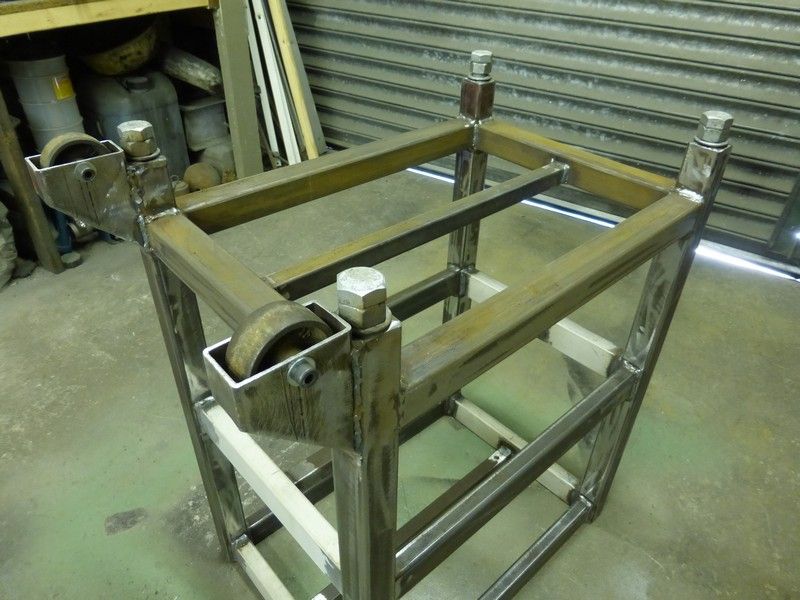
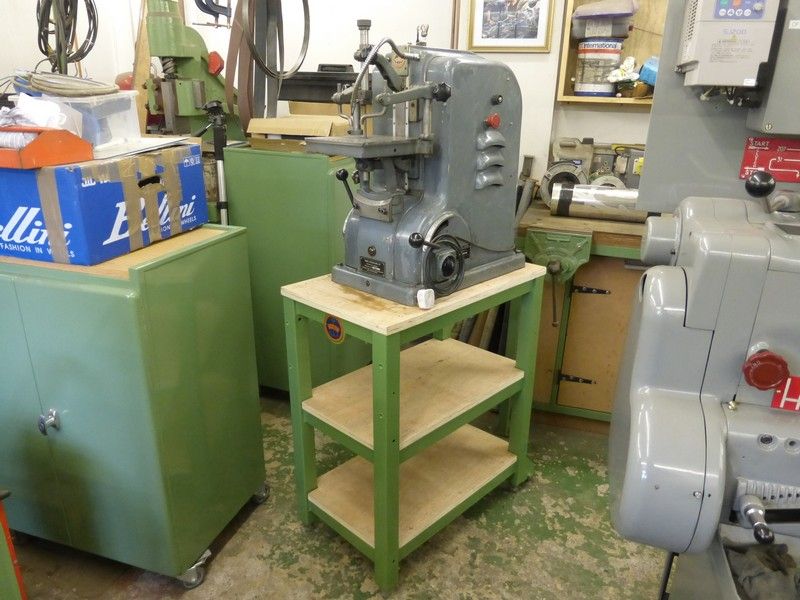
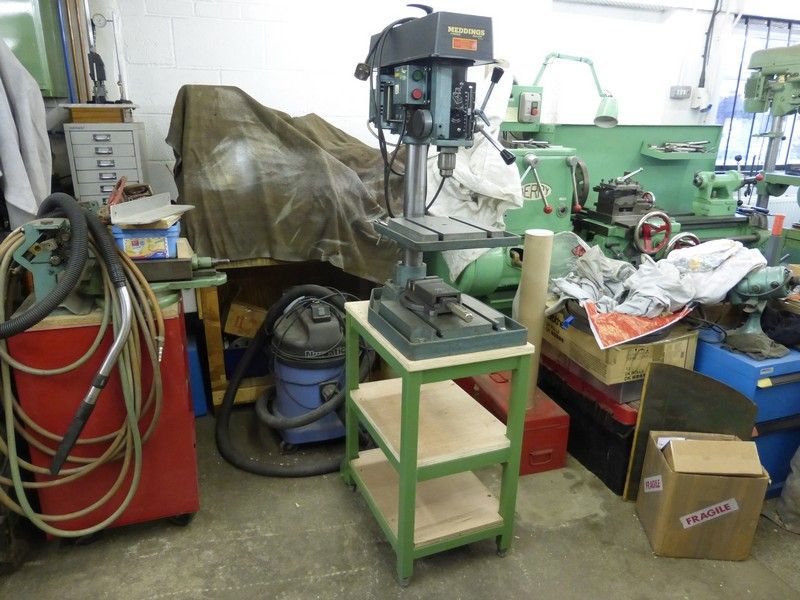
I have been trying to get a few more things sorted out in the workshop, mainly making a stand for a Thiel die filer and a Meddings bench drill, I was about to start from scratch but was given an old metal bench so chopped that up to make the die filer stand and made the drill stand from scratch.
Here are a few photos of the process.
The donated metal bench

Image

Chopped up, then welded up in its new form, the only bits left over are next to the new bench.

Image

Image

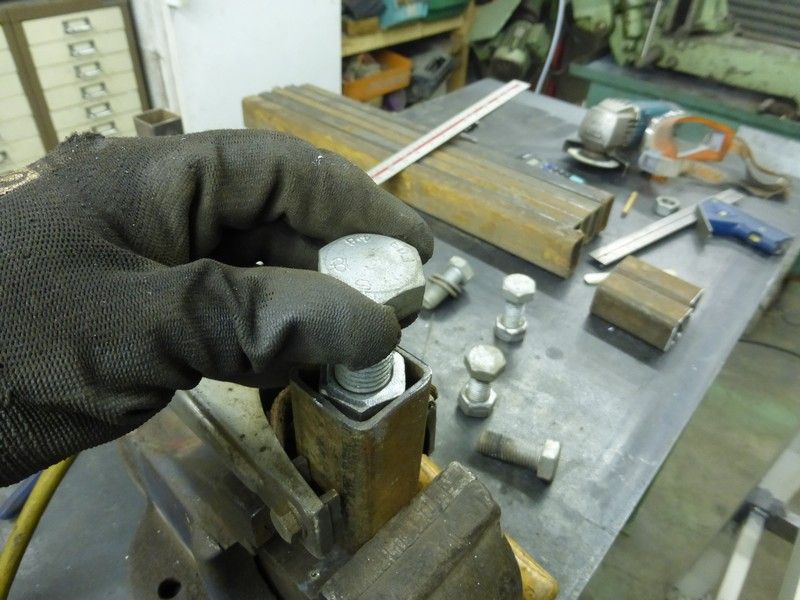
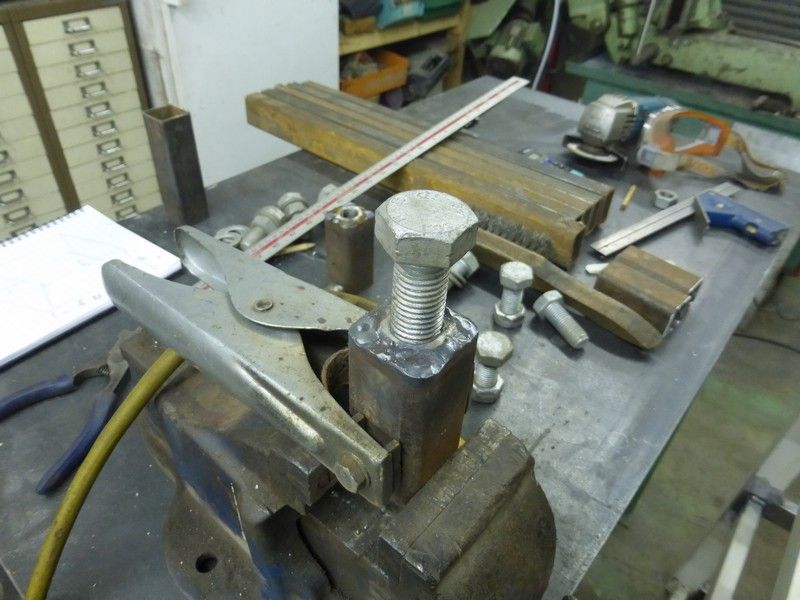
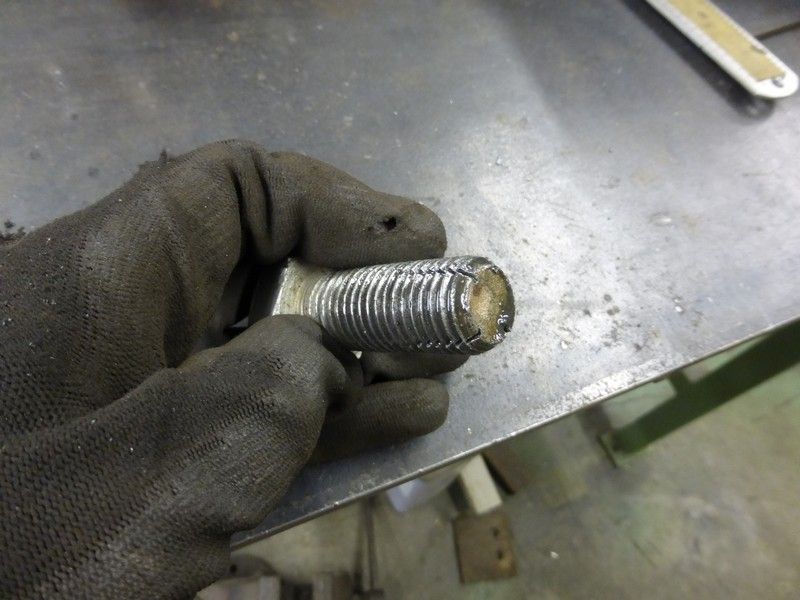
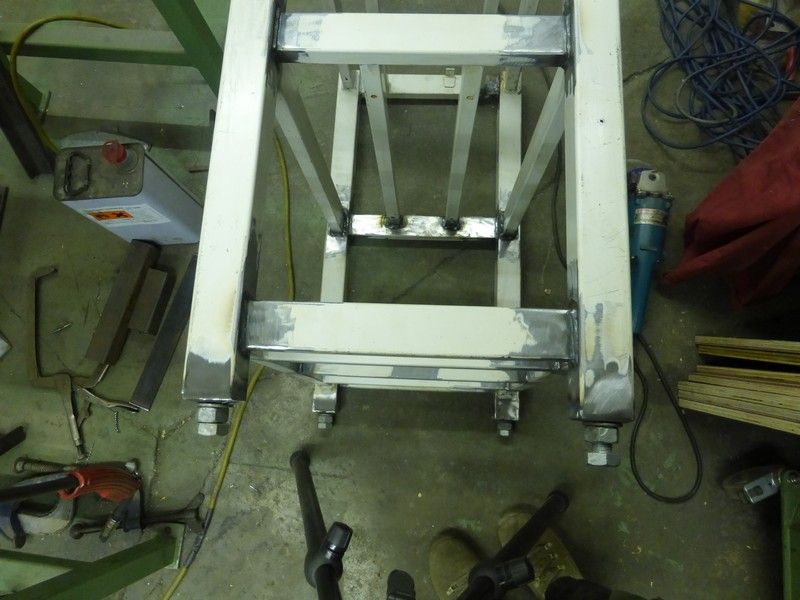
The floor in the workshop is all over the place so I wanted adjustable legs to level things up, I welded big nuts into the legs then used a bolt with lock nut as the levellers. A couple were tight after welding so having no tap the right size I cut some slots into a spare bolt and it cleared the threads.

Image

Image

Image

Image

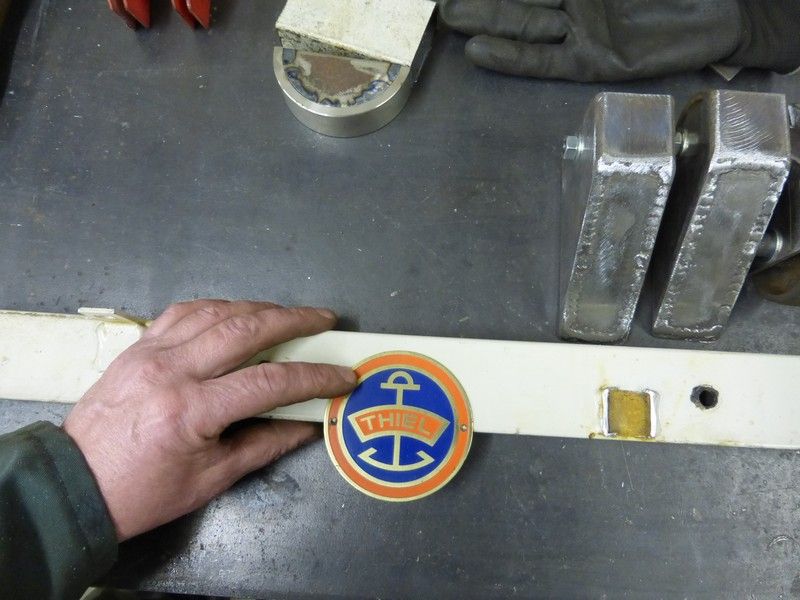
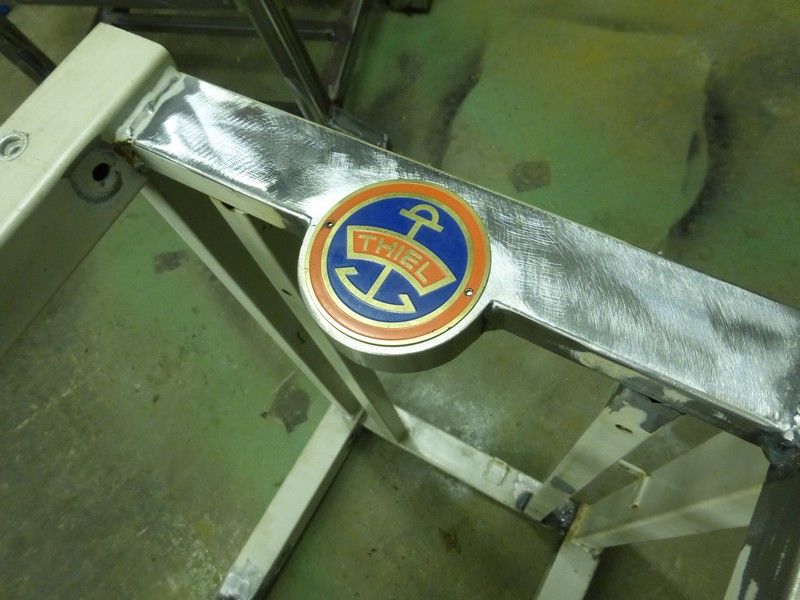
I had a spare Thiel badge so decided to add that to the frame, as a finishing touch lol, I cut a bit of pipe and made a addition the shape of the lowe half of the badge , its on the bench behind the badge

Image

Image


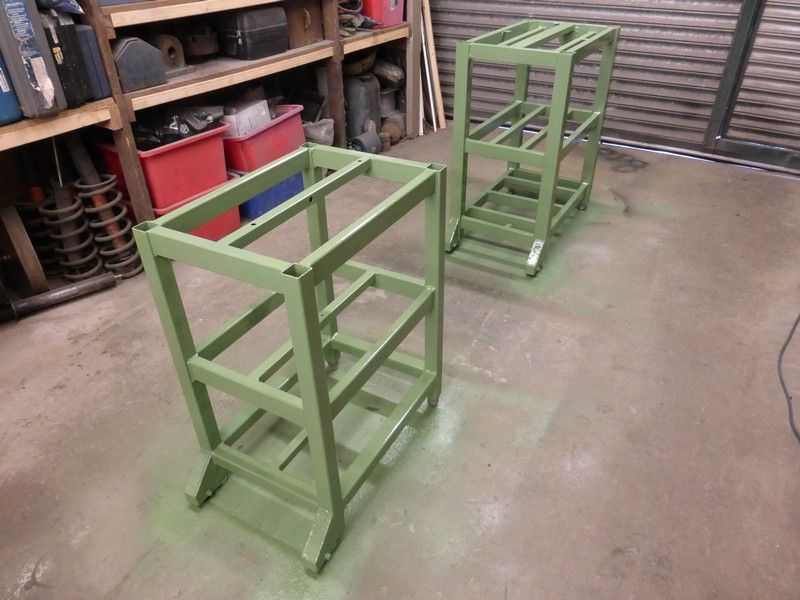
Now onto the drill stand, I wanted it to have a couple of shelves for storage, same sort of thing but made from scratch. Its got the same system for levelling legs.

Image


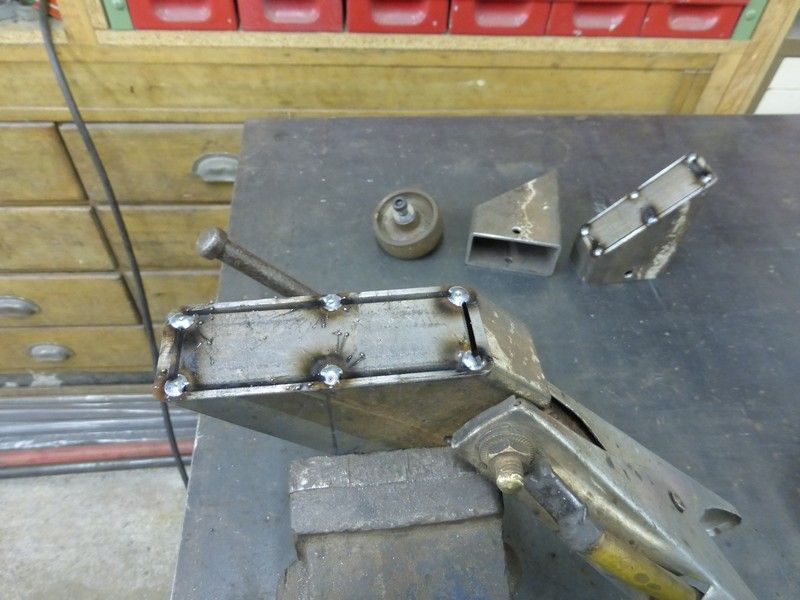
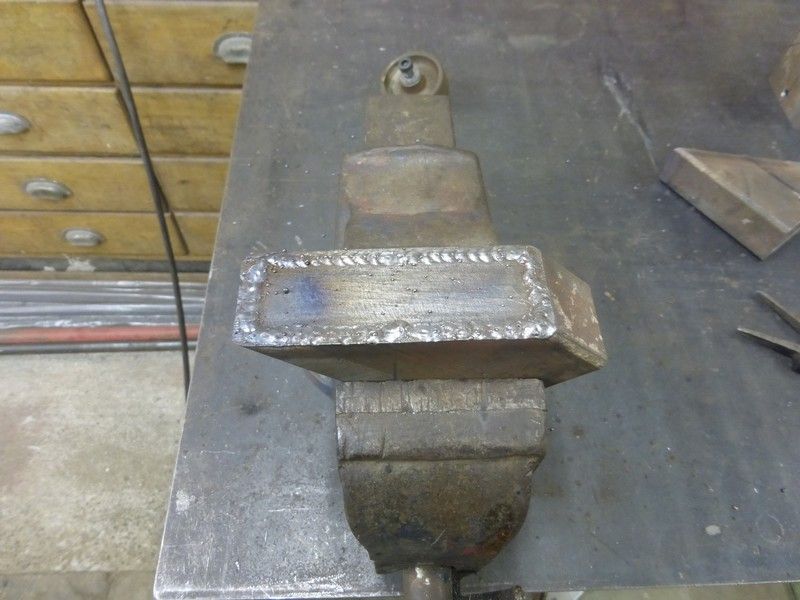
I found 4 old cast iron castor wheels and decided to put two wheels at the rear of each frame just off the ground so if the machine was tilted back a touch it would rest on the castor wheels and be able to be moved about if needed. I cut and plated the ends of some box section to house the wheels then welded these to the frames

Image


Image


Image

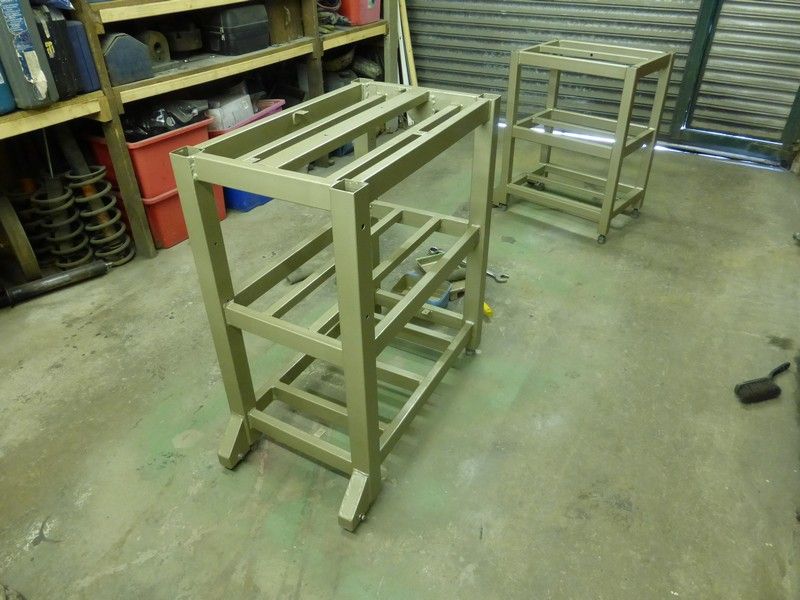
A coat of primer, I started brushing and rollering it on but ended up getting the spray gun out.

Image

Then a coat or two of John Doubleboosts favorite colour Machine Green RAL 6011 lol

Image

Then inch thick ply for the tops and shelves and the machines bolted to the tops

Image

Image

Another job ticked off the list but plenty more to go.
Cheers Mick.
User avatar
Stanley
Global Moderator
Global Moderator
Posts: 91510
Joined: 23 Jan 2012, 12:01
Location: Barnoldswick. Nearer to Heaven than Gloria.

Re: SHED MATTERS 2

Post by Stanley »

Describe the die filer for me. Not sure what it is..... I like that colour......
Stanley Challenger Graham
Stanley's View
scg1936 at talktalk.net

"Beware of certitude" (Jimmy Reid)
The floggings will continue until morale improves!
User avatar
Stanley
Global Moderator
Global Moderator
Posts: 91510
Joined: 23 Jan 2012, 12:01
Location: Barnoldswick. Nearer to Heaven than Gloria.

Re: SHED MATTERS 2

Post by Stanley »

Image

Nice start, everything was ready and I had it all straight in my head. First job was to face the stock and reduce it to exactly one inch diameter for enough length to get three 3/16" saddles out of it.

Image

That done I wanted a 3/4" PCD scribed on the end, same as the bonnets.

Image

Then centre the end, drill for tapping size for 3/16" whit and tap it out deep enough so all the saddles are threaded.

Image

It never hurts to check you have it right! One of the valve spindles screwed in the stock.

Image

Three blanks, marked and threaded, all the holes touched with a countersink by hand to make sure they are clean. As a final check I ran the tap through the holes as well.

Image

Then I had a good clean up of the VM, it's been neglected of late. Off with the usual machine vice and on with this one because it's handy for holding circular work pieces. All three mounted together and a centre line scribed across to give me hole locations for the top end of the standards exactly opposite to each other.

Image

Then pop a 4mm drill through all three. This is clearance for the threaded ends of the standards which are 3BA. I spent no end of time getting my centres right due to my eyes and even so got one slightly out of place but nothing a rat tailed file won't put right!

Image

All the holes bored and touched with the countersink. Ready for reducing to final shape.

Image

One face blued and marked. Two 4mm pegs of silver steel to make sure they are all in line. We are ready for milling the first side down to the finished shape. That was knocking off time, nice clean start for tomorrow.....
It's taken me all morning to get here but everything has been done correctly, no mistakes and as far as possible I've compensated for my eyes by good working methods. Takes longer but I'm slowly getting there!
Stanley Challenger Graham
Stanley's View
scg1936 at talktalk.net

"Beware of certitude" (Jimmy Reid)
The floggings will continue until morale improves!
User avatar
Stanley
Global Moderator
Global Moderator
Posts: 91510
Joined: 23 Jan 2012, 12:01
Location: Barnoldswick. Nearer to Heaven than Gloria.

Re: SHED MATTERS 2

Post by Stanley »

Image

I knew exactly where I was this morning because I'd left this set up. It didn't take long to get this off and it was easy to reverse the blanks on to a parallel in the vice on the first cut so the second was guaranteed to be parallel.

Image

As you can see, my eyes let me down and the sides aren't quite equidistant. Never mind, they won't see it off the Ribble.... All the edges broken, now for the main job this morning.

Image

I have have 18 holes to drill, 6 in each of the three valves. These are 3mm, the tapping drill size for 4BA studs. Ideally I would drill the holes in the bonnet and the valve body at the same time but I couldn't see a foolproof way of doing it so I decided to do the bonnets first. I set the first one up in the big vice and started to work. I know I whinge a lot but getting set up on the pop marks is a bit of a bugger.... Never mind, lots of time and a strong Loupe and do the best I can.

Image

By the time I'd got the first six holes drilled it was knocking off time and I was ready to stop! As I was doing this one I decided that I was going to do the other two in the vice I used the other day. I've asked the design committee to come up with a foolproof way of drilling the stud holes in the bodies using the bonnets as a jig. By the way, this means that any small discrepancies in the holes I have done will not matter as they will be perfectly lined up during the drilling.... I told you this was watch-making!
Stanley Challenger Graham
Stanley's View
scg1936 at talktalk.net

"Beware of certitude" (Jimmy Reid)
The floggings will continue until morale improves!
User avatar
Stanley
Global Moderator
Global Moderator
Posts: 91510
Joined: 23 Jan 2012, 12:01
Location: Barnoldswick. Nearer to Heaven than Gloria.

Re: SHED MATTERS 2

Post by Stanley »

The Design Committee has been active overnight. I shall put their suggestions into effect this morning.
Stanley Challenger Graham
Stanley's View
scg1936 at talktalk.net

"Beware of certitude" (Jimmy Reid)
The floggings will continue until morale improves!
Locked

Return to “Crafts”