Page 67 of 98
Re: Shed Matters 3
Posted: 24 May 2022, 07:21
by Stanley

Only two pics needed. I fitted both glands and drilled and tapped for the studs, then fitted them. Then I adjusted the front lid and gland so that it fits the hole on the target plate of the bed. A good two hours with no cock-ups. I shall have a well earned breakfast now.....
Re: Shed Matters 3
Posted: 25 May 2022, 07:00
by Stanley
Re: Shed Matters 3
Posted: 26 May 2022, 06:40
by Stanley
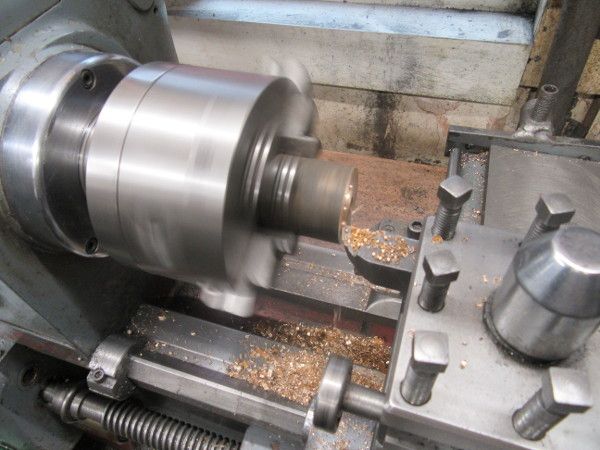
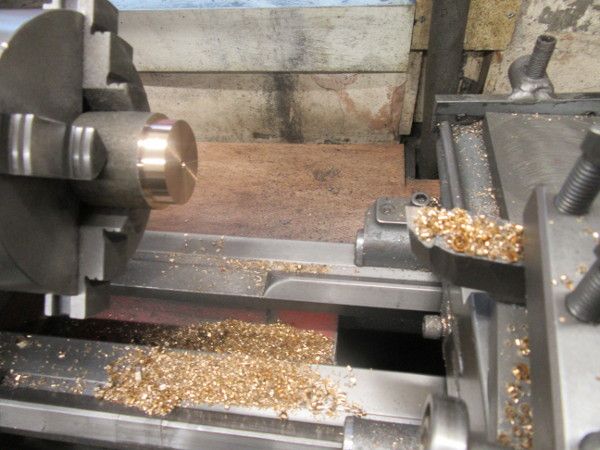
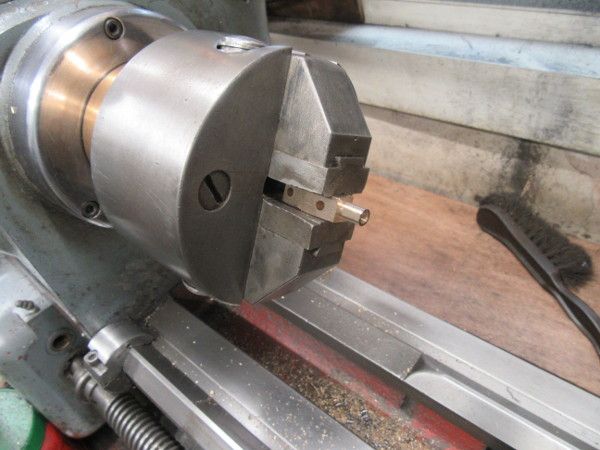
Here I'm cutting the groove in the piston for the soft packing. I think it's a big mistake putting a cast iron piston with rings in a small engine like this. The least bit of rust after running on compressed air and you have a seized engine.
Then cut the 1/4" piston rod down to 3/16" and thread each end 2BA. Finish the piston and attach it.
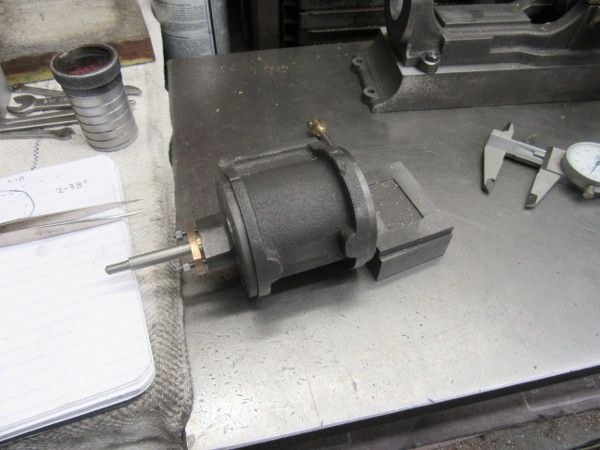
Here we are at knocking off time. We have a piston and rod installed in the cylinder and have checked that the gland is in line and the rod fits. Ready to move on now.... I have an idea it might be the main bearings and installation of the crankshaft.
Re: Shed Matters 3
Posted: 27 May 2022, 06:59
by Stanley
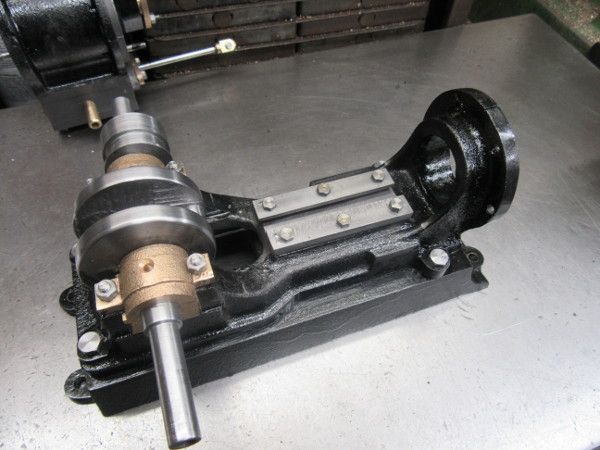
Just one image. I spent an hour drilling the holes in the lugs on the casting that, on the box base take the holding down screws and on the bed the 2BA bolts that hold the bed on the base. Then I marked, drilled and tapped the holes in the base for the 2BA bolts that fasten the bed down. Here we are at knocking off time ready to go shopping. Main bearings tomorrow?
Then I went and did the shopping. Busy morning and I am ready for breakfast and bed.
Re: Shed Matters 3
Posted: 28 May 2022, 06:42
by Stanley
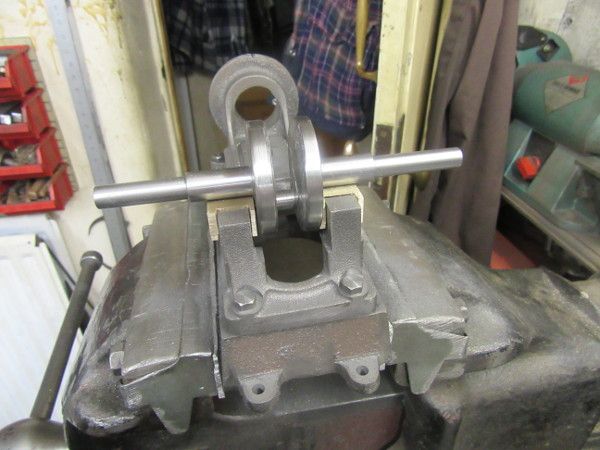
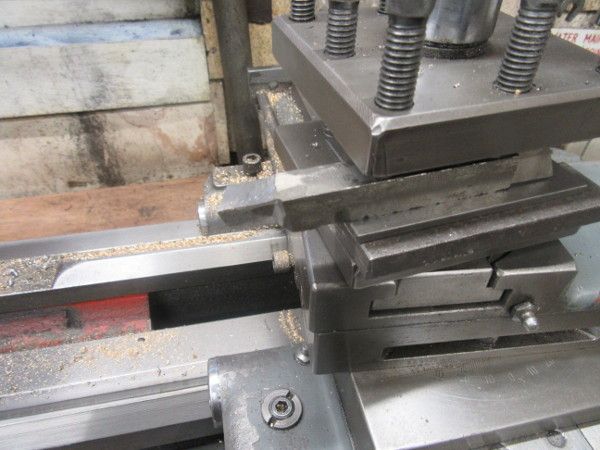
Before we start cutting stock for the main bearings we need to adjust the horns on the casting that will carry the bearings and the shaft.
Once the sizes are correct I marked the casting with witness marks to differentiate between the Flywheel side and the eccentric.
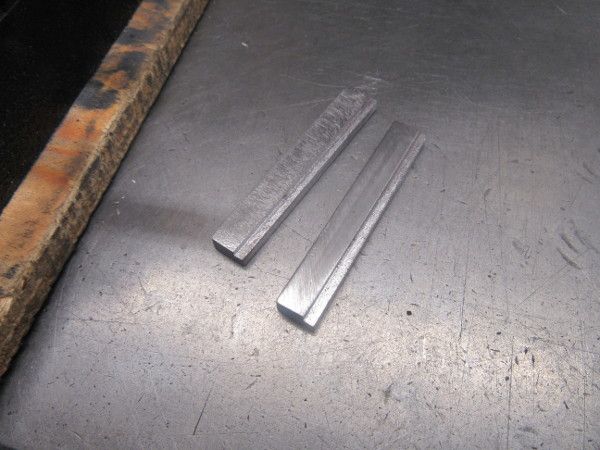
At closing time I was beginning to get my head round the main bearings. I have squared the stock and adjusted its size. Nice morning, more good progress!
Re: Shed Matters 3
Posted: 29 May 2022, 06:47
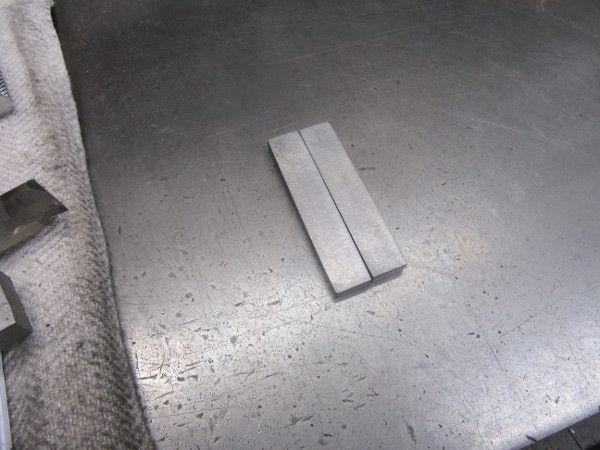
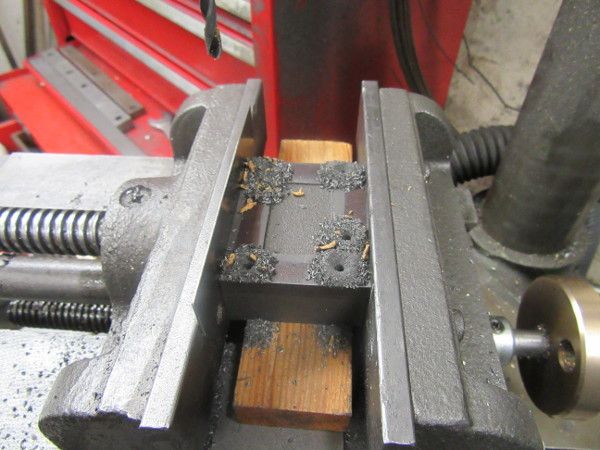
by Stanley
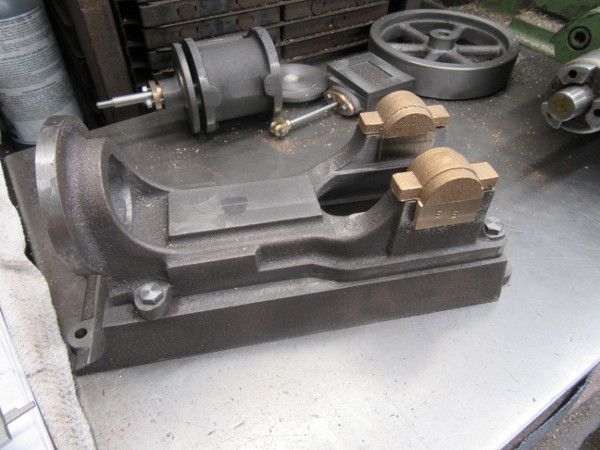
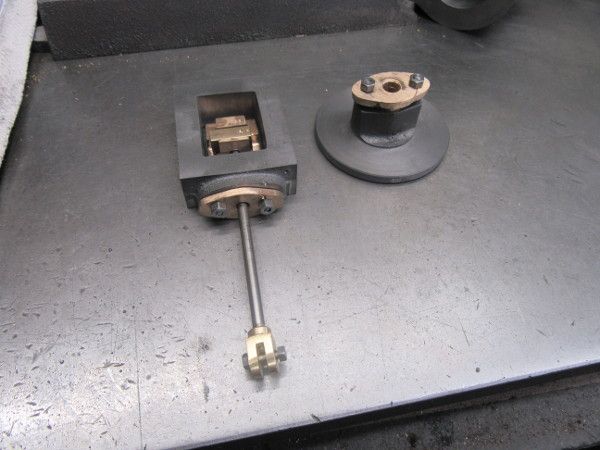
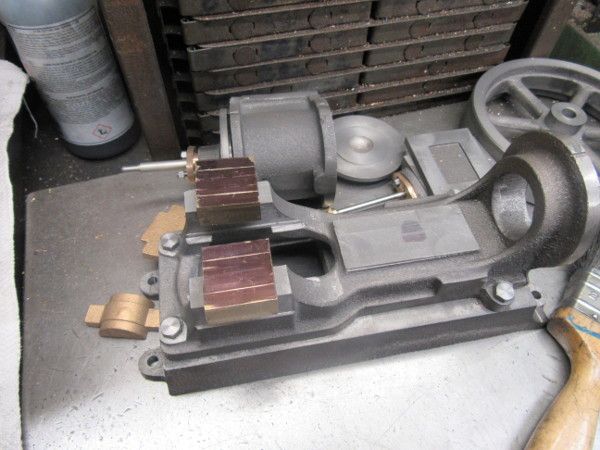
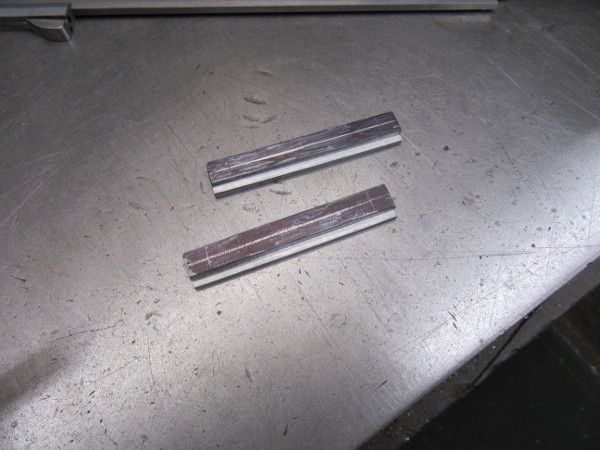
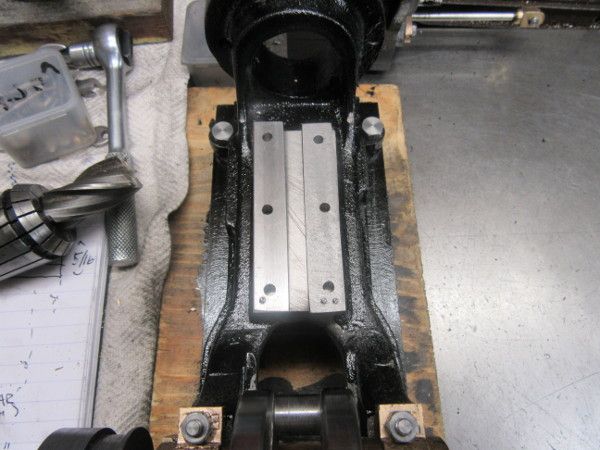
One pic tells the story. I spent the morning measuring, marking and milling these two pieces of bronze to make the bottom elements of the main bearings. This is knocking off time. The bronzes are fresh out of the mill and need finishing to a perfect fit. That will be the first task tomorrow morning. Quiet careful work and no mistakes. That makes for a good morning.
Re: Shed Matters 3
Posted: 30 May 2022, 06:40
by Stanley
Re: Shed Matters 3
Posted: 31 May 2022, 06:58
by Stanley

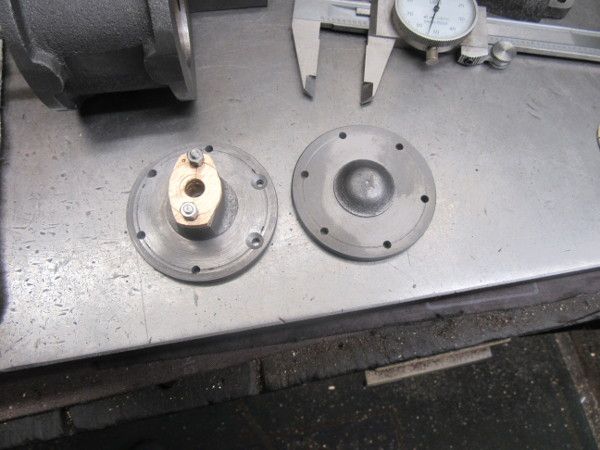
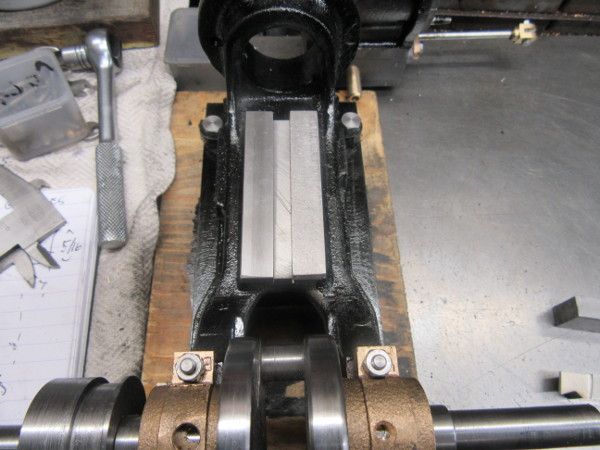
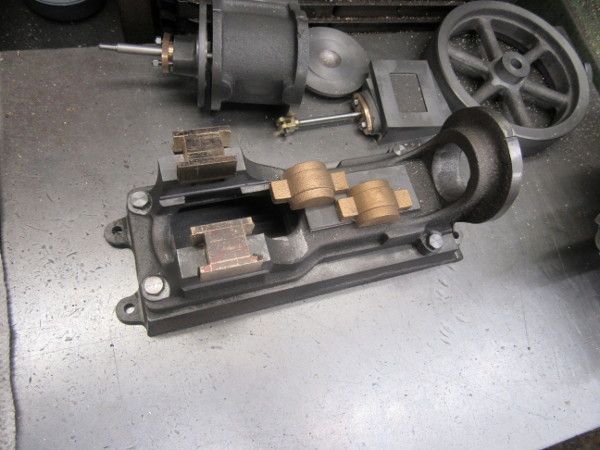
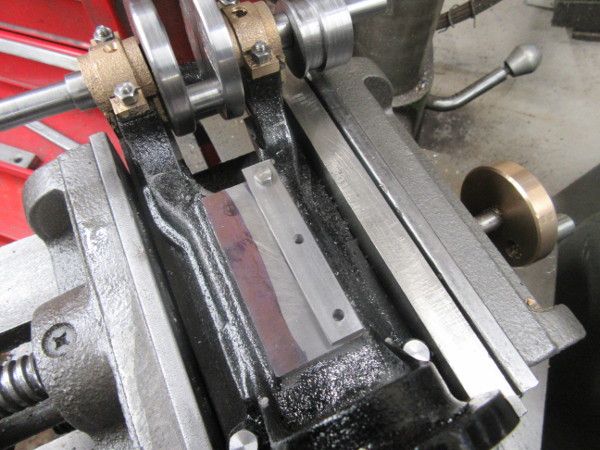
Only one pic, the bed at knocking off time with the top brasses finished to size, drilled for the 4BA holding down studs and the bed drilled and tapped for the studs and the studs fitted. Ready for final tightening and boring for the crankshaft but that can wait until tomorrow. A nice couple of hours.....
Re: Shed Matters 3
Posted: 01 Jun 2022, 06:45
by Stanley
Re: Shed Matters 3
Posted: 03 Jun 2022, 05:51
by Stanley
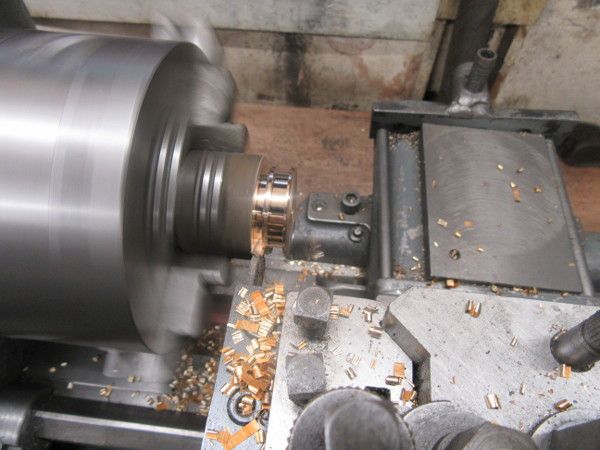
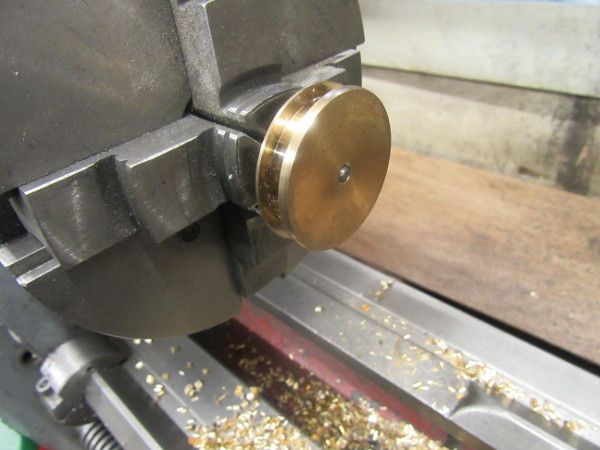
Only an hour this morning so I made the eccentric. These two pics tell the story, it is finished except for the drill and tap for the set screw that fastens it to the shaft.
Re: Shed Matters 3
Posted: 04 Jun 2022, 06:24
by Stanley
Re: Shed Matters 3
Posted: 05 Jun 2022, 06:37
by Stanley
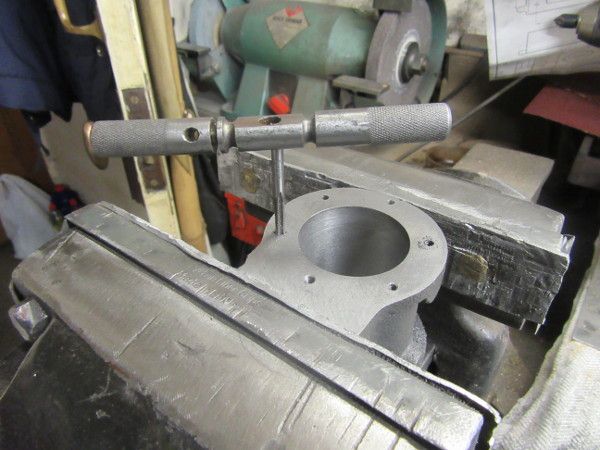
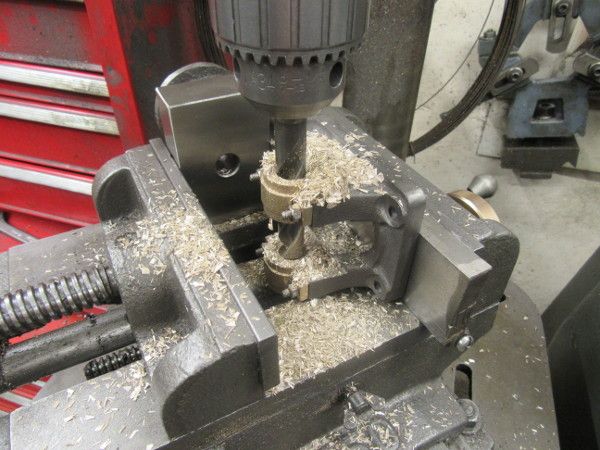
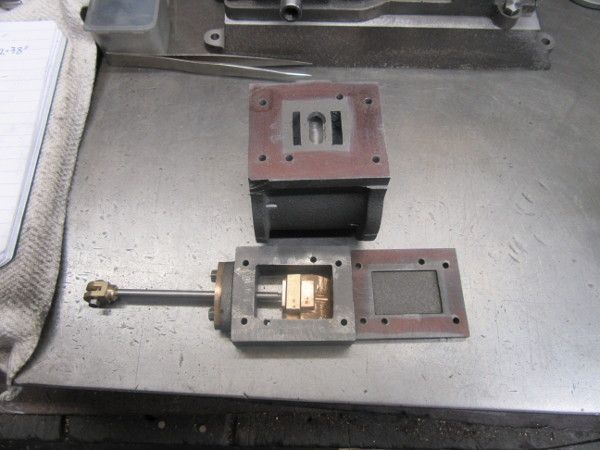
One of the things about making engines is that you spend a lot of time drilling holes and tapping them. The Cylinder is where most are concentrated. These two pics tell the story, I have spent the two hours in the shed drilling and tapping the holes associated with fitting the lids on the cylinder. There are plenty left do do but that's for tomorrow.
Re: Shed Matters 3
Posted: 06 Jun 2022, 07:00
by Stanley
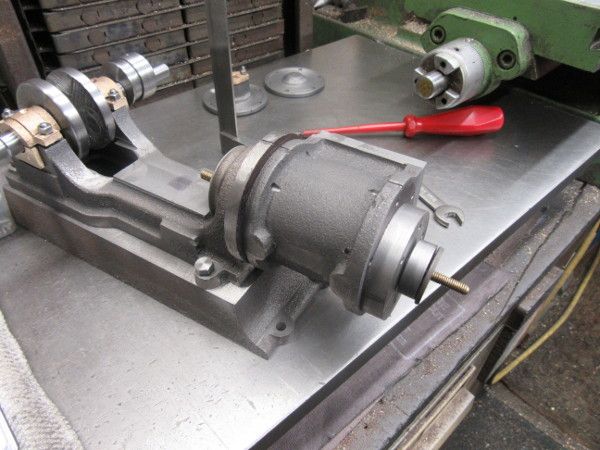
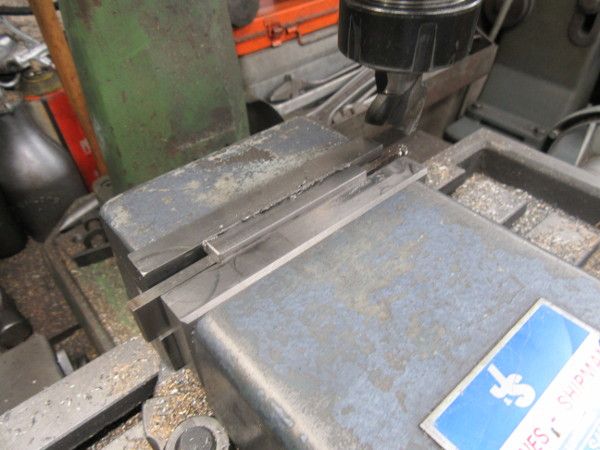
It took me half an hour to get the bed and cylinder set up to my satisfaction.
Here is the result.
Then I marked the lid and transferred that hole pattern to the steam chest and the cylinder. The steam chest has been drilled as has the cylinder. I have left the tapping of the holes for the studs until tomorrow. This took longer than you might expect because the hole pattern had to be adjusted so as not to interfere with the steam and exhaust passages. I think I have got it right!
Re: Shed Matters 3
Posted: 07 Jun 2022, 06:42
by Stanley
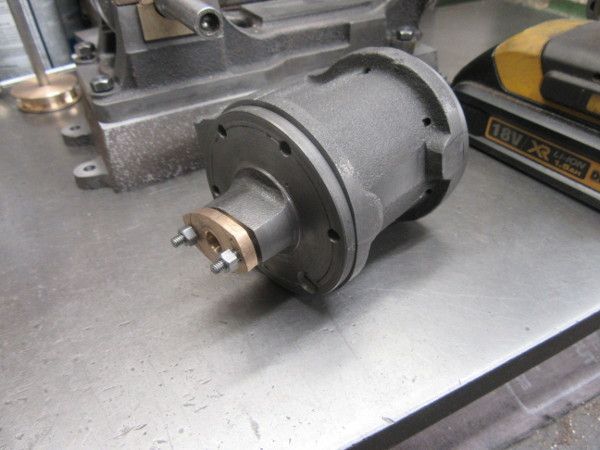
This morning I fitted the steam chest and lid to the cylinder and then made and fitted the steam and exhaust connections.
Re: Shed Matters 3
Posted: 08 Jun 2022, 06:01
by Stanley

Only one pic this morning and only an hour and a half in the shed. I realised that I had to get some paint on the castings and as it was raining I did it with a small brush on the bench. Once I had done that I more or less cancelled out any more work as I don't want chips sticking to the paint. (That's my excuse and I am sticking to it!)

Re: Shed Matters 3
Posted: 09 Jun 2022, 06:39
by Stanley
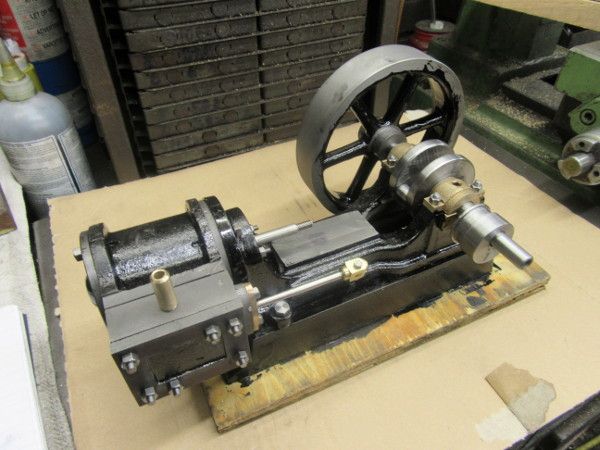
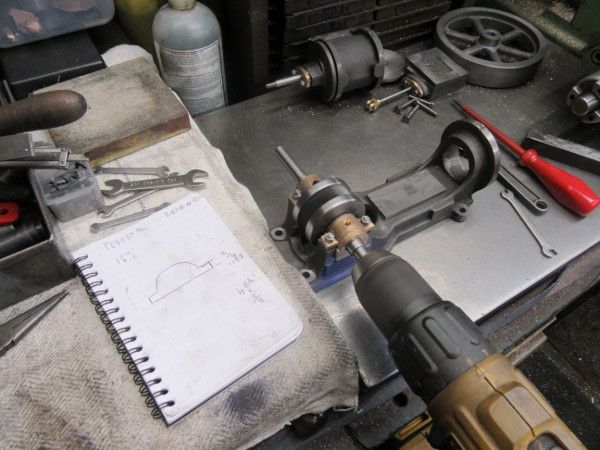
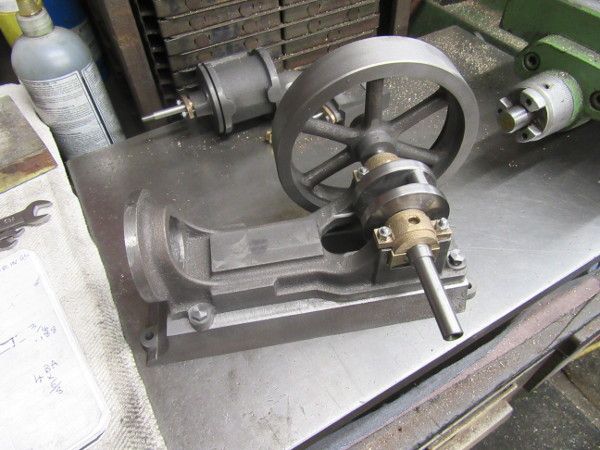
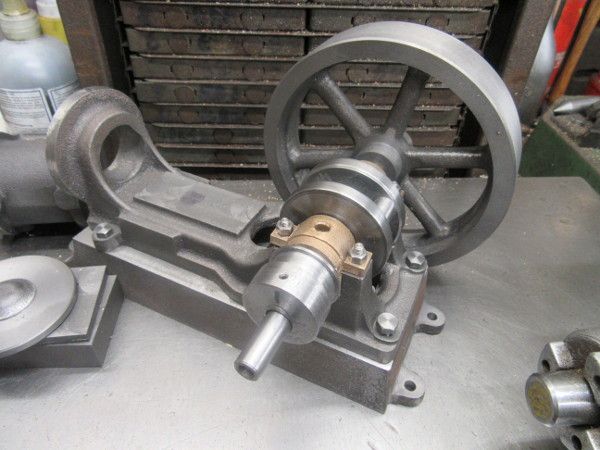
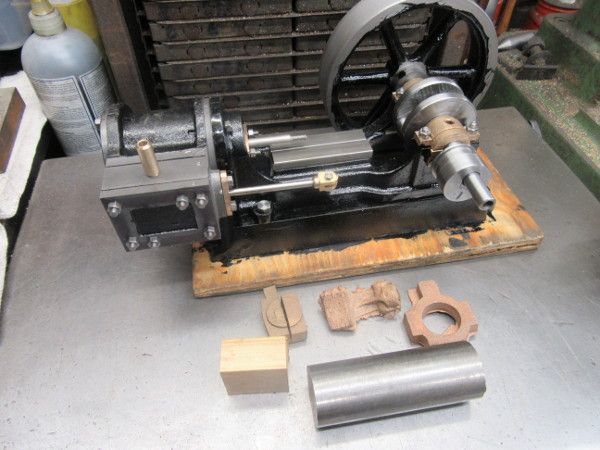
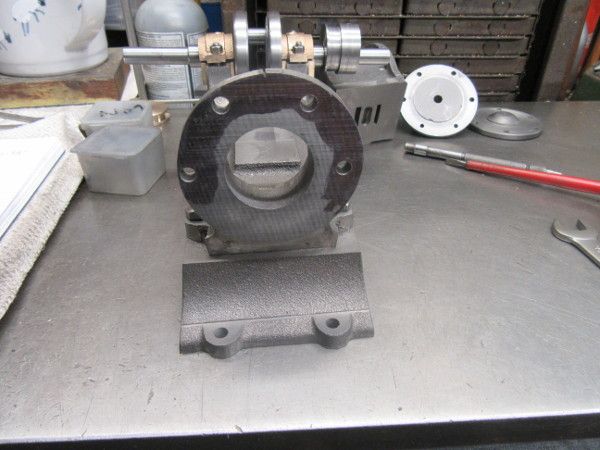
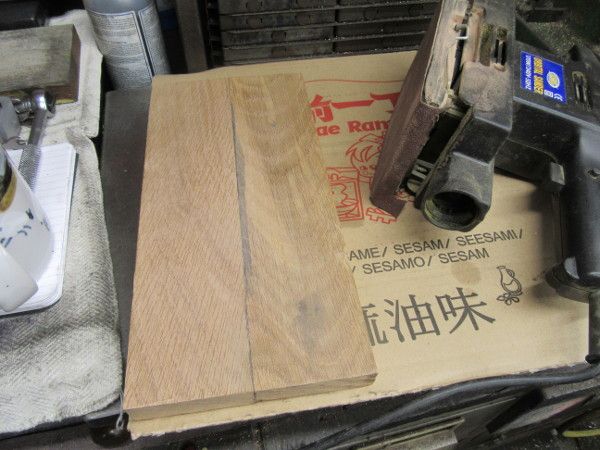
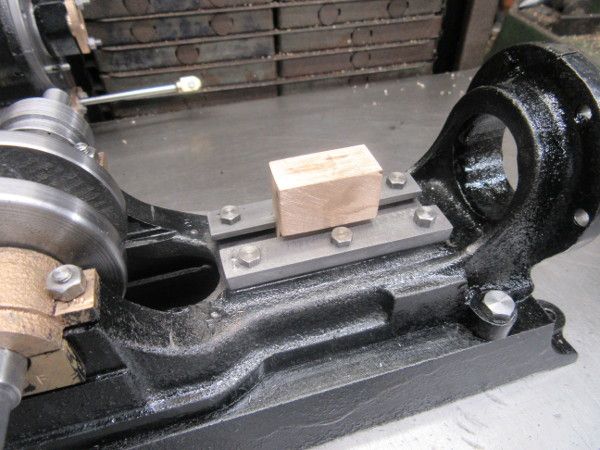
The first move this morning was to do a loose fit up of the engine. The paint that is on places where it shouldn't be will vanish when the final clean up of the castings is done. You can see where I have to go next, the crosshead, con rod and valve motion. That is set on one side because we have to address another matter before it becomes a bottle neck, the piece of wood for the bed. To do this I need to glue two pieces of oak together to make one piece 11" X 5".
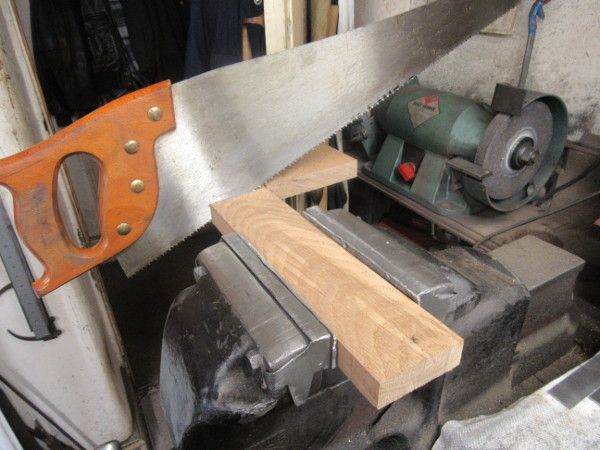
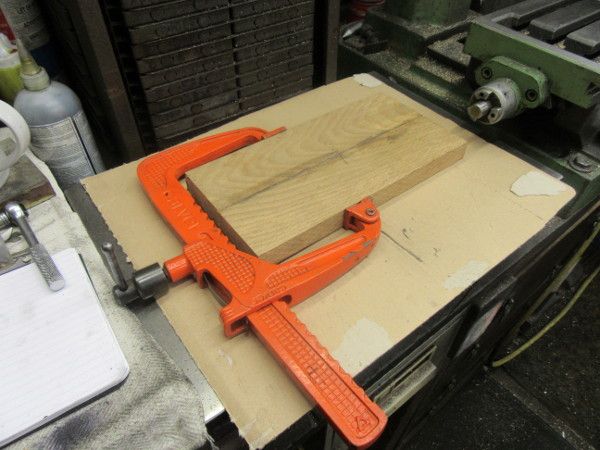
That's knocking off time, cramped up and left to cure overnight. Tomorrow I shall have a piece of oak that can be finished and put on one side until it is needed. A good hour and a quarter with a positive result.
Re: Shed Matters 3
Posted: 10 Jun 2022, 06:53
by Stanley
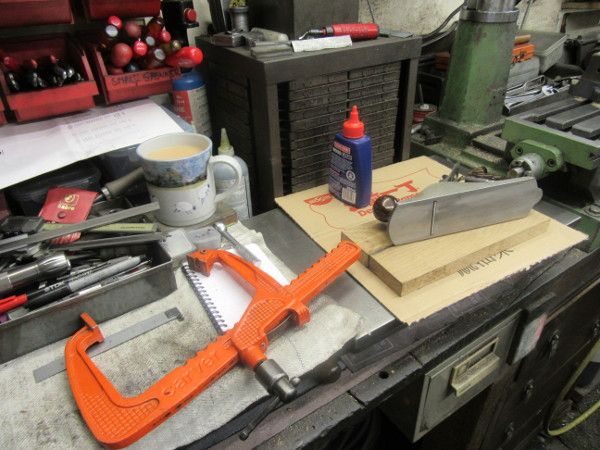
Not your usual morning. I want to get this base ready for use. I started by sharpening my smoothing plane iron and then cleaned the base board up using the sander. Later this morning I shall clean up and put the moulding on the base. But at the moment I'm recovering from early doors shopping and need my breakfast!
Re: Shed Matters 3
Posted: 10 Jun 2022, 10:37
by Stanley

I cleaned the base up as regards squareness and dimensions, than put the moulding round the edges, then sanded it all down before giving it a coat of raw linseed oil. Tomorrow it will have soaked in and the base can come into the kitchen to dry completely. Now I shall have a breather, then vacuum up in both the house and the shed. I have already swept the yard. That feels better!
Re: Shed Matters 3
Posted: 12 Jun 2022, 06:48
by Stanley
Re: Shed Matters 3
Posted: 13 Jun 2022, 06:52
by Stanley
Re: Shed Matters 3
Posted: 14 Jun 2022, 06:29
by Stanley
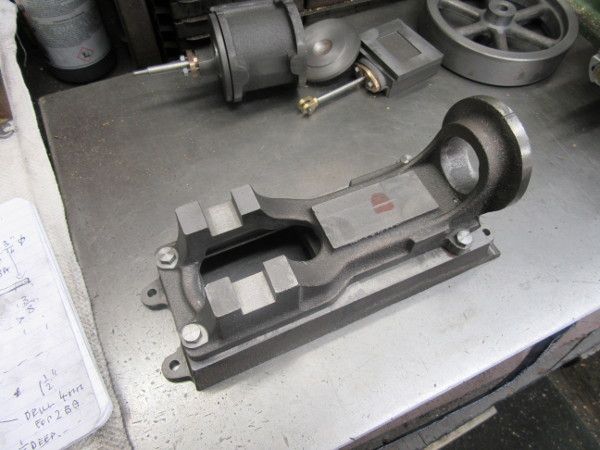
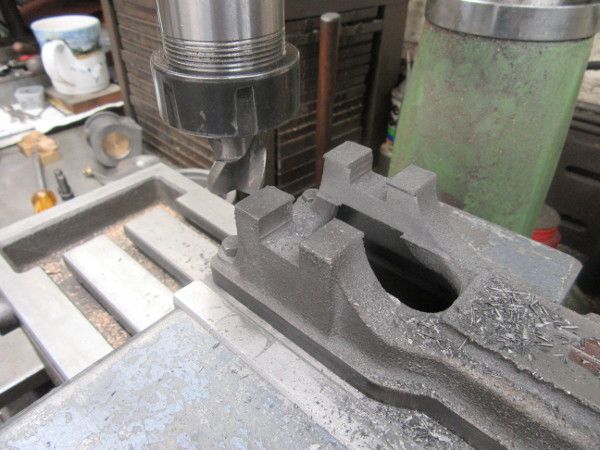
I started by adjusting the rebate on the guides, I wasn't satisfied I had taken enough.
Once I had the size right I marked the guides for drilling for the holding down bolts.
At closing time I had the guides drilled for 5BA clearance and marked with witness marks to help getting the fitting right. Quiet and careful work again. Tomorrow I shall fit the guides to the bed.
Re: Shed Matters 3
Posted: 15 Jun 2022, 06:47
by Stanley

Today was a good time to mark and drill for the holding down bolts in the final wooden base so that was the first thing I did.
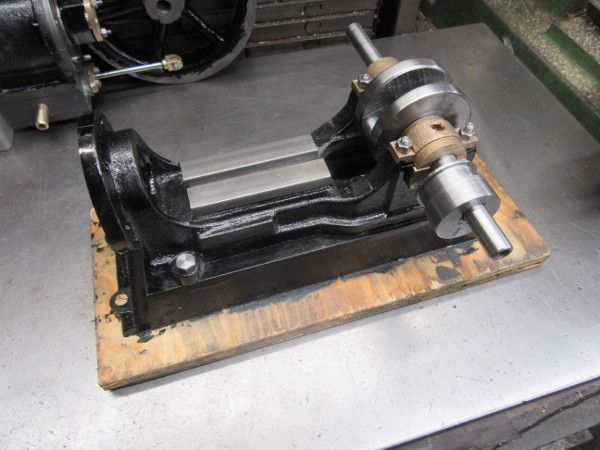
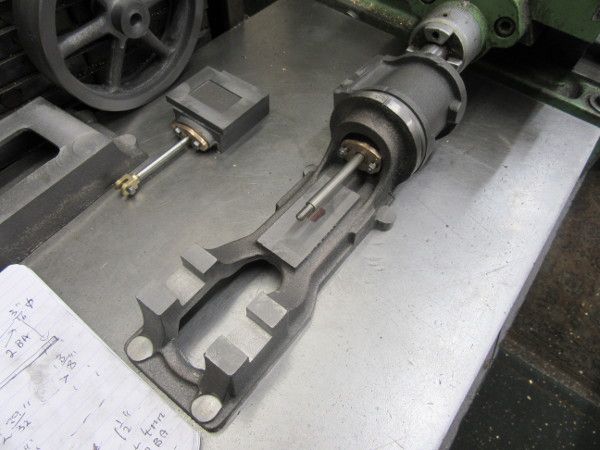
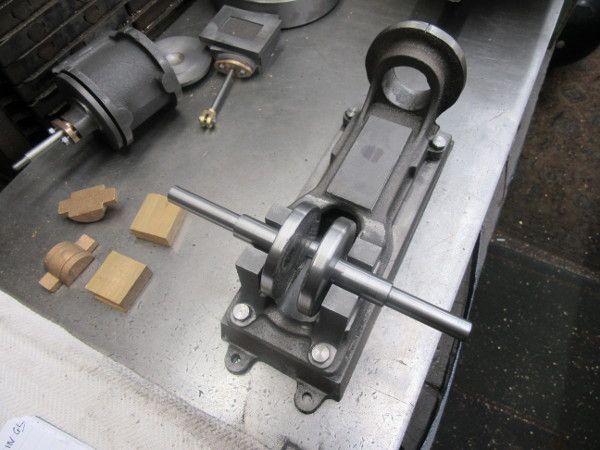
Then I concentrated on fitting the crosshead guides so the rest of the morning was quietly working towards that and here is where I was at closing time.
Re: Shed Matters 3
Posted: 16 Jun 2022, 06:24
by Stanley
One pic says it all. I have spent my time measuring carefully and getting the basics of the crosshead milled out of a solid block of bronze. Ready to move on to the next stages tomorrow.
Re: Shed Matters 3
Posted: 18 Jun 2022, 06:38
by Stanley
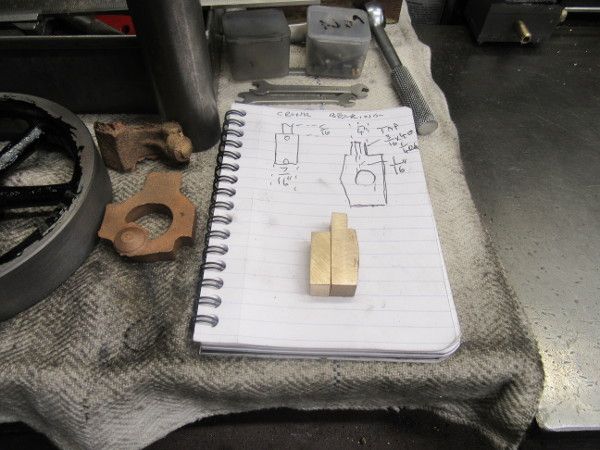
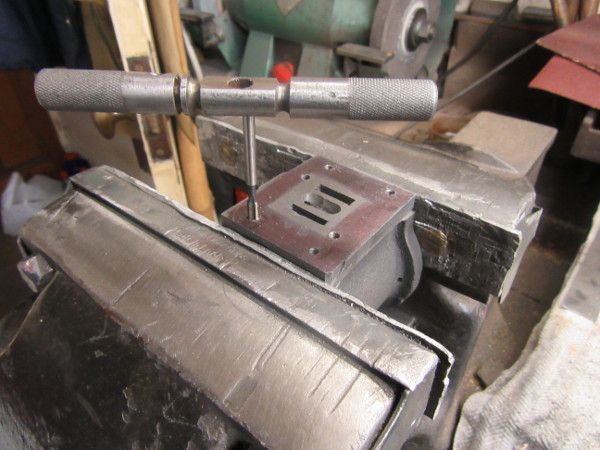
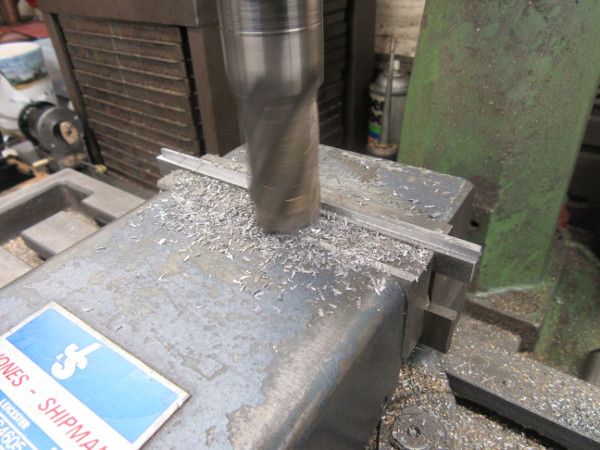
I realised that I couldn't go any further with the crosshead until I have a con rod and before I can have that I need a crank bearing. so that's what this morning's picture is about, getting the bearing castings to size and then actually making the bearing. Nothing like the measurements in the drawing so some very careful measurement and cutting to get to this stage.
Re: Shed Matters 3
Posted: 19 Jun 2022, 06:47
by Stanley

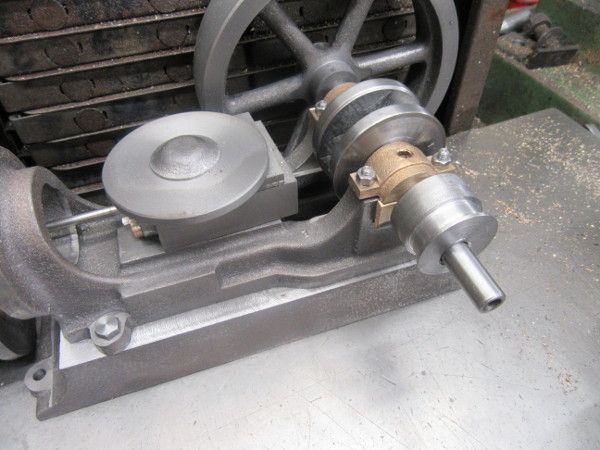
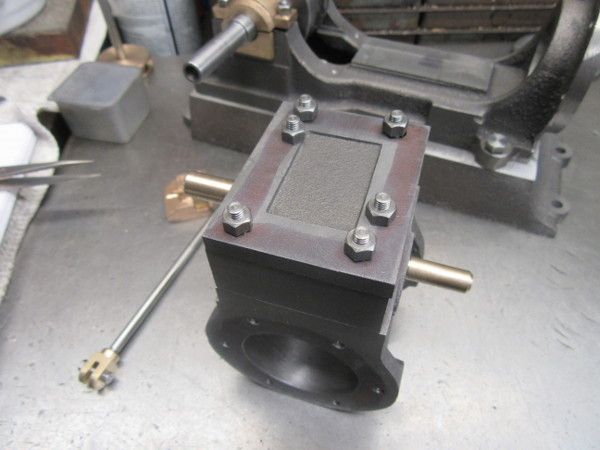
Two pics tell the story of this morning. I have fitted the bolts and then mounted that rare visitor the brass finisher's chuck and put the housing on the top of the bearing for the lubricator. Then I drilled the housing and tapped it 3/16" X 40tpi and tomorrow I shall make the plug for that and bore the bearing for the crank pin.
Once again, quietly away and no mistakes. That makes it a very good morning in the shed.