Page 40 of 99
Re: Shed Matters 3
Posted: 23 Jan 2021, 08:32
by Stanley
The solution to my tap problem was this easy, an 8BA open ended spanner.
I wish all my problems were as easily solved!
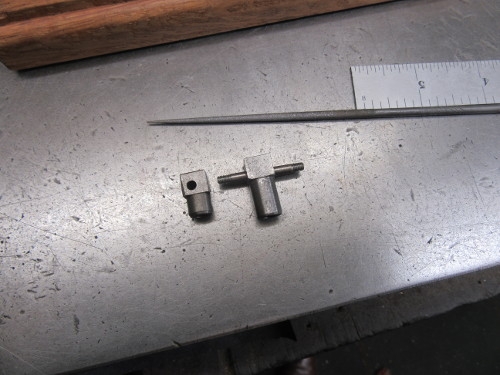
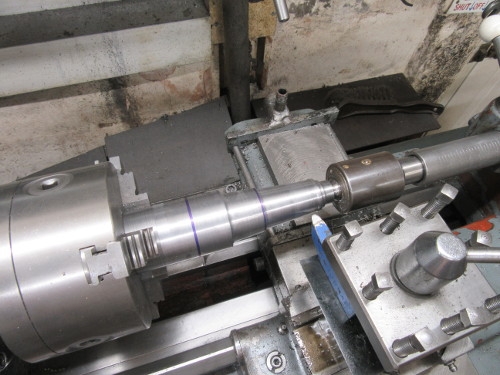
Then change the chuck on Mrs Harrison to a 4 jaw SC and make the crosshead.

I fitted the crosshead and I have got it right, we now have a piston that moves the full length of the cylinder.
Once I had done that I addressed the problem of the anchor links that were too short. I got a nice surprise, they are fine, exactly the right length and the Parallel motion is fine.
Knocking off time. Tomorrow I'll populate the crankshaft and think about valve setting. All the linkage and gearing needs checking for tightness. It's been a good morning.

Re: Shed Matters 3
Posted: 23 Jan 2021, 18:19
by Big Kev
Stanley wrote: ↑23 Jan 2021, 02:59
Kev, it's a 3/16" Whitworth tap and the square head is 9/64"....
Ah!

Re: Shed Matters 3
Posted: 23 Jan 2021, 18:55
by plaques
Kev, it's a 3/16" Whitworth tap and the square head is 9/64"....
And in english ... 9/64 = 8/64 + 1/64, which in turn = 1/8 + 1/64, which everybody knows = .125 + .0156 giving a total of
.1406 easy-peazy
Bloody fractions....must find a more suitable fronted adverbial.for it.

Re: Shed Matters 3
Posted: 24 Jan 2021, 03:32
by Stanley
Leave my Imperial System alone! Which is simpler, 4 decimal places or a perfect accurate fraction? Try looking for .1406 on a ruler! 3/16" is easy.
Re: Shed Matters 3
Posted: 24 Jan 2021, 07:53
by Stanley
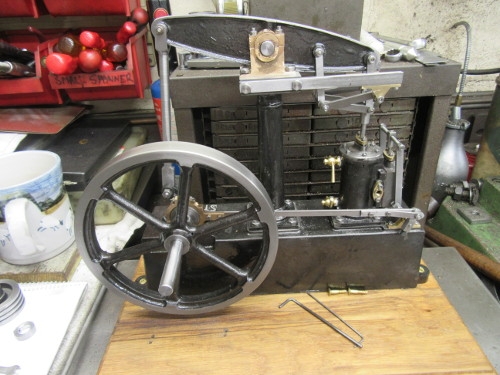
It's been a nice morning. I did a rebuild of the crankshaft and checked the Parallel motion and the valve gear. I set the gear and the valve timing by guess without taking the lid off the steam chest and just for a laugh put steam onto it.
Sorry this pic is blurred but it caught me by surprise and I was doing three things at once. The bloody engine sprang into life and went like hell! This is the pic I have been looking for. (How about that China....)
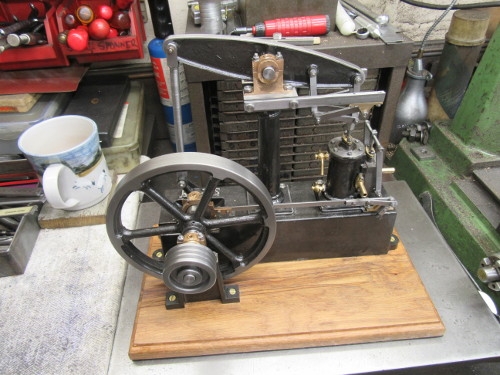
I almost started doing a check of all the fastenings and joints but then decided to leave that until tomorrow. Instead I cut a thin piece of rubber mat and glued it to the bottom of the base. That will be set by tomorrow when I will give it a clean, a check of all the nuts and joints and put it on the sideboard to wait for the day sometime in the future when I have died and Margaret and Susan are divvying up the loot!
One thing I have decided is that the next engine will not be a beam engine. It will be something different and larger. I shall have to go and do a search.....
Re: Shed Matters 3
Posted: 24 Jan 2021, 10:39
by BobH
A cracking job Stanley, it was a good thing you didn’t have that rag any closer. I assume, of course, that even though you didn’t expect it to run that well that your fingers were well out of the way

. That it where the university of life pays off.
There are a lot of very pretty engines out there to model, I am a great believer in machines ‘looking’ right. Though the Victorians made some quite good looking catastrophes. The problem with larger engines is the weight when you assemble them. The duchess that I am working on is 3 1/2” gauge which means I should just about be able to move it round the workshop. To work on it I would prefer 5” gauge but we are getting into the realms of heavy weights there. I have considered putting a hoist and rail into the workshop, it may come to that yet, the roof structure can certainly take it.
A bit more painted yesterday and I finally got a colour match for the red. It turns out to be LMS maroon not crimson lake as I had been led to believe. So that is now on order and one coat should do.
Re: Shed Matters 3
Posted: 24 Jan 2021, 13:12
by Stanley
I wasn't expecting it to go Bob. I only set the valve by guess. It was on over 100psi and was doing well over 1000rpm, far too fast! I've spoken to Margaret and told her it's finished. Mick has put in a request for a cannon so that's the next one for shaving.
I know what you mean about big engines, I can't lift my big compound.....
Re: Shed Matters 3
Posted: 25 Jan 2021, 02:38
by chinatyke
Another fine looking working model, Stanley. Well done.
Re: Shed Matters 3
Posted: 25 Jan 2021, 05:32
by Stanley
Thanks China. I am thinking hard about the next one. It won't be a beam engine!
Re: Shed Matters 3
Posted: 25 Jan 2021, 08:18
by Stanley
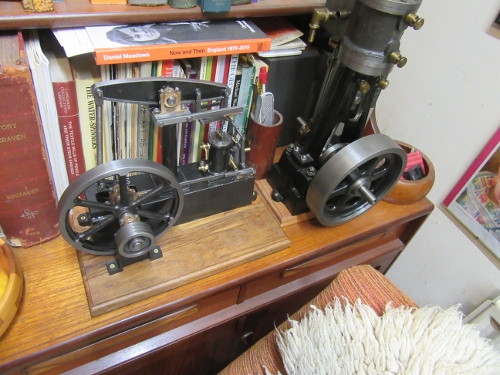
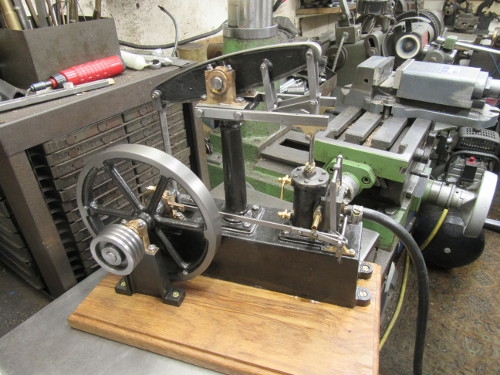
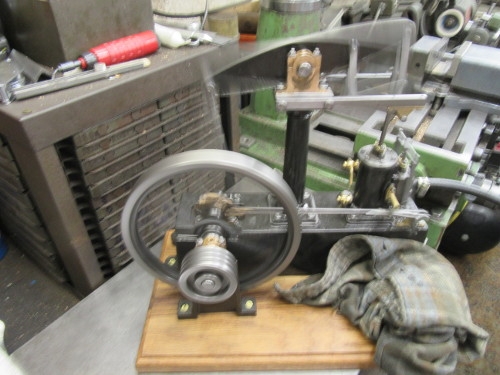
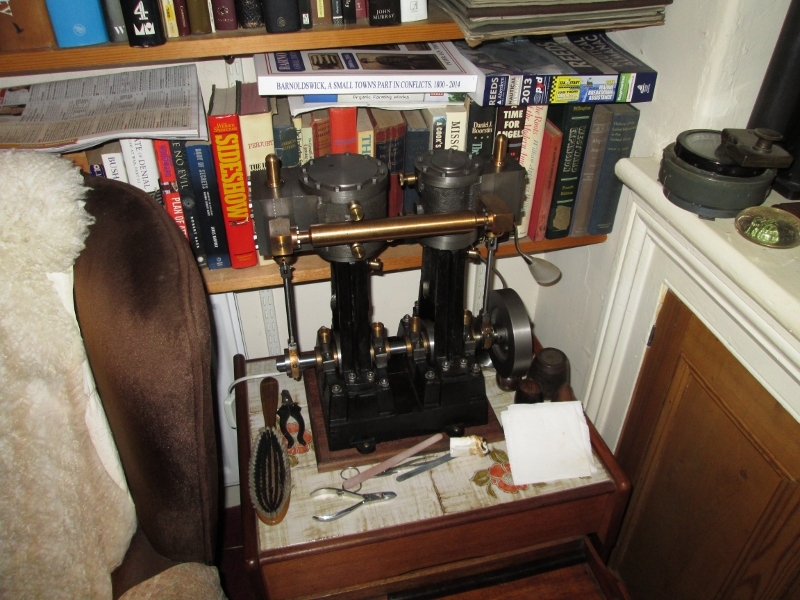
Only one pic needed to cover this morning's shed work. I went through the engine checking all the nuts, cutting back excess length on studs and bolts and generally cleaning it up. Then onto the sideboard in the kitchen. Both these engines are Margaret's. At some point in the future she'll get her hands on them!
I know where I am going next and think I know what engine to build..... Let's see how it pans out.
Re: Shed Matters 3
Posted: 25 Jan 2021, 09:29
by BobH
How about a horizontal engine next time Stanley? I don’t have many horizontals in my collection which is the reason for building the 10H.
Re: Shed Matters 3
Posted: 25 Jan 2021, 11:05
by Stanley
Could be Bob, I am not under any pressure to make my mind up. It will be bigger!
Re: Shed Matters 3
Posted: 27 Jan 2021, 08:40
by Stanley
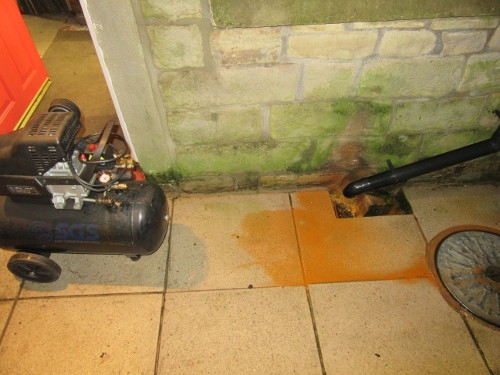
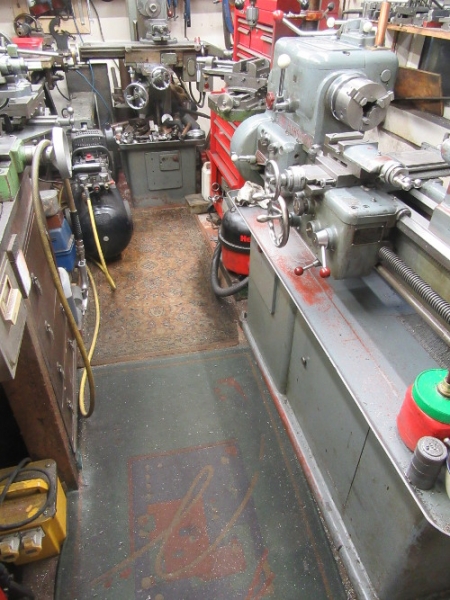
Bit different this morning we were out in the yard at 06:00. The compressor has a leak and is losing its pressure so we have to sort it. First job was normal maintenance, check the oil and drain the condensate from the tank, that's the orange water.
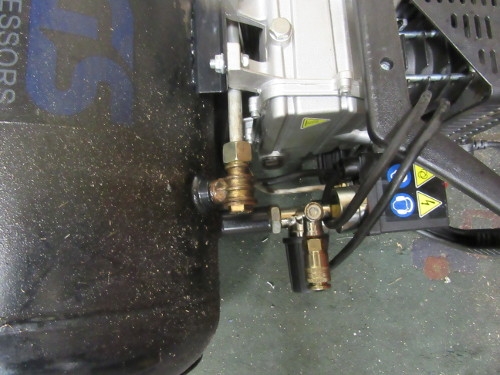
This is the focus, the leak is in this pipework and it all needs removing cleaning and refitting with proper sealant and most importantly, all the union nuts tightened up! They were all loose.
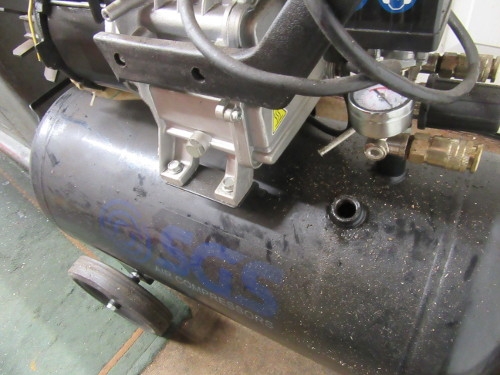
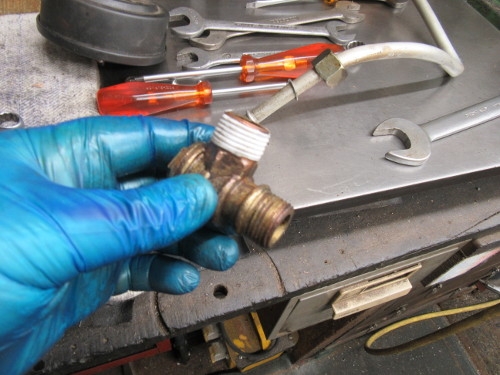
I think these three pics give the general idea. It was easier than I thought (but still too bloody hard, all that lifting and bending!) It's back in place at the end of the shed and fully charged. I shall be interested to see if it holds its charge, I'll report tomorrow.
As a last blow I swept the carpet. Tomorrow I'll clean the machines and then I have to check Mrs Harrison. Do you remember that smash I had? I want to do all my checks and make certain that I didn't do any damage. You should check your machines ever six months anyway! But that's for tomorrow.
Re: Shed Matters 3
Posted: 28 Jan 2021, 08:48
by Stanley
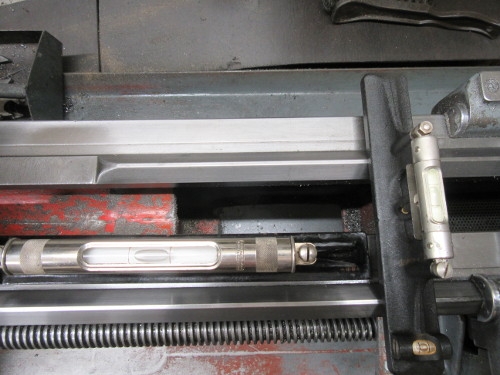
This first pic tells the story about the lathe in that as far as level is concerned, the lathe is fine and needs no correction. I did another check as well on the compressor. I was pleased to see that while the pressure has dropped a bit, there is plenty of pressure left. This should be the situation for about three days, we'll see. So I put the machinist's levels away and got on with it.
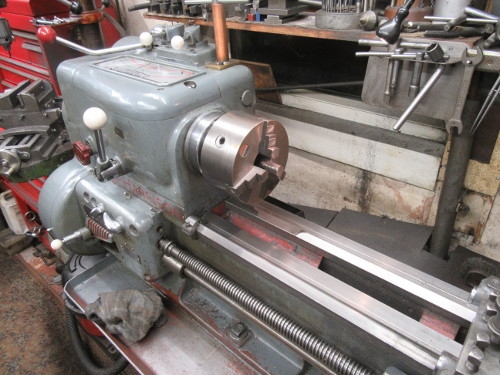
I forgot to mention, I had cleaned Mrs Harrison. Next job was to put a bigger chuck on as I am dealing with heavier stock. This is the original Pratt 3 jaw SC chuck that came with the lathe. A good chuck!

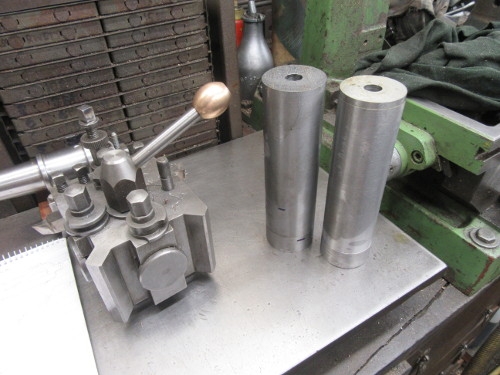
Here's a clue about my next job, I want to make at least one of these. I measured it and the piece of stock I dug out for the test will do for making these.
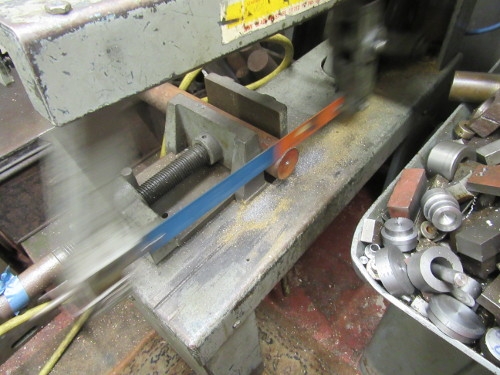
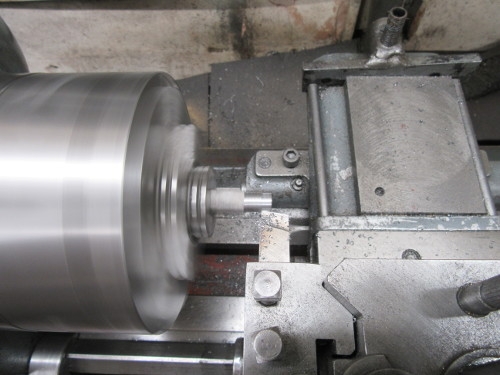
The stock I got out is very rusty, from the look of the read paint on the end I think it will be what used to be called EN8, I'm sure there will be another designation now. I wanted a clean end and so into Mrs McMaster. What a lovely noise she makes....
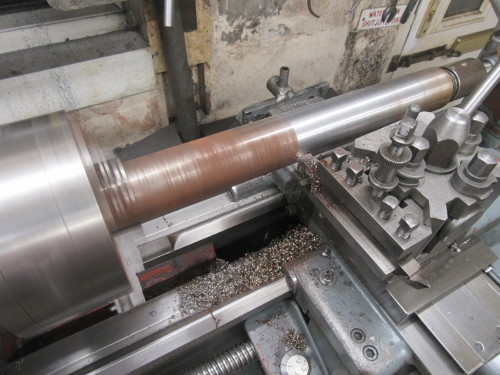
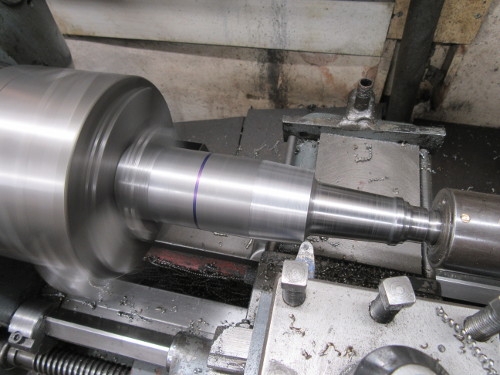
Here we are set up and cutting. A lot more of this and at knocking off time I had a quick measure. The piece I have turned is 14" long and the difference between the ends is just half a thou. I think we can say that the smash I had hasn't done any damage. This is well within expected limits. Try it with your lathe and see what results you get. That was it for this morning, tomorrow I'll cut my stock for the project. Very pleased with my checks....
Re: Shed Matters 3
Posted: 29 Jan 2021, 08:09
by Stanley
Re: Shed Matters 3
Posted: 30 Jan 2021, 08:37
by Stanley
Re: Shed Matters 3
Posted: 30 Jan 2021, 12:25
by BobH
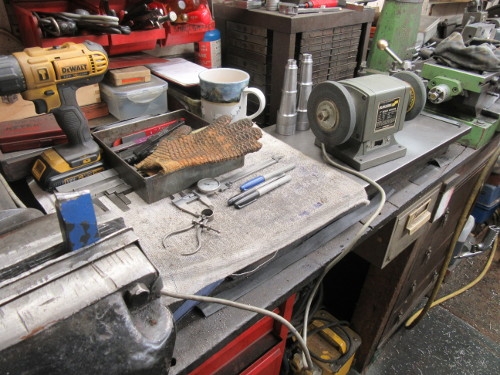
Stanley, I see you wear the blue gloves, are they better than the simple latex gloves? Hands take quite a bashing from oil and swarf. Cast iron dust seems to stick in the skin even after a good soapy wash.
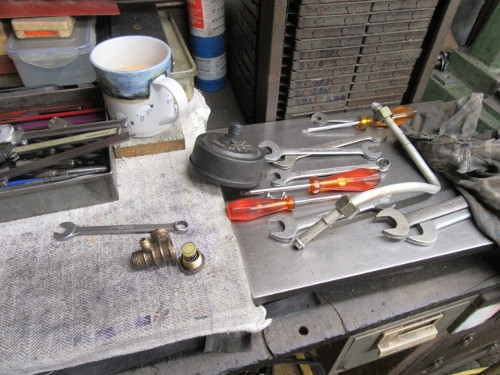
Some good taps and a die arrived this morning.
4F1F7381-196E-4DBB-AEE4-5D82CA8F6061.jpeg
I was cleaning up the threads in my clamp set for the mill and found that not only was the tap blunt but it was carbon steel. So now I have a proper set, There is nothing quite like Sheffield tools.
Re: Shed Matters 3
Posted: 30 Jan 2021, 13:07
by Stanley
You're right about the HSS taps but the bloody cost! I have replaced several of my old taps lately and what a difference!
Latex gloves are useless in the shed Bob. I made the mistake of buying some before I knew about gloves. Latex are too grippy and you can't use hand wheels on the lathe that are fixed and they won't stand oil and solvents. Blue Vinyl Safe Touch are the best I've found and if you search and don't take the recommended entry on Amazon you can find medium powdered ones for less than £8 per 100 ambidextrous gloves.
Re: Shed Matters 3
Posted: 31 Jan 2021, 09:02
by Stanley
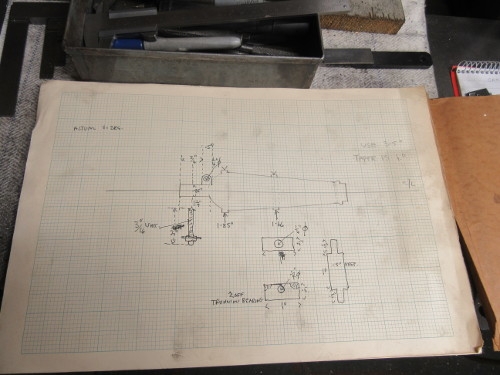
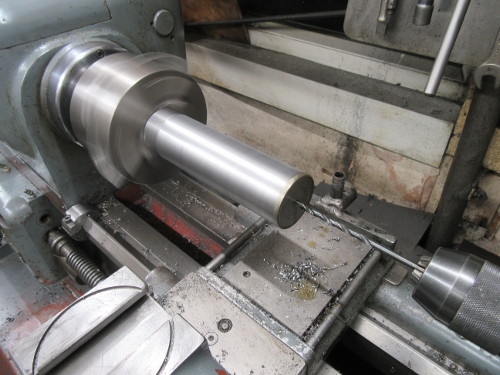
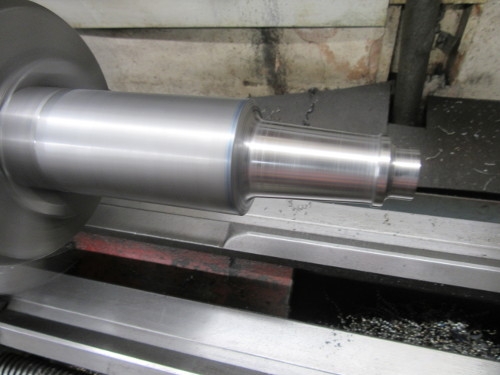
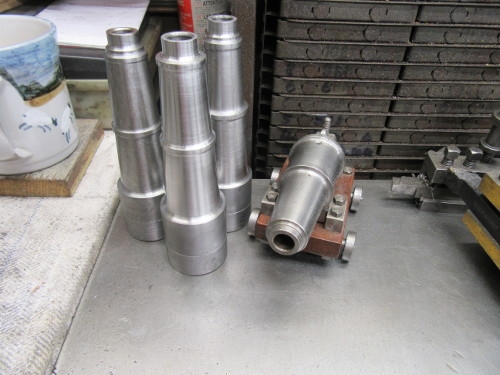
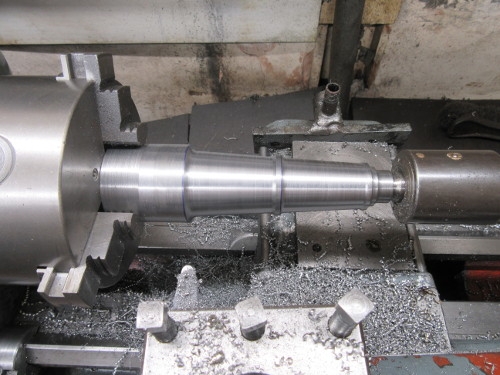
I started the morning by getting my original drawings out as they are based on the research I did. What I am making are scale replicas of the standard 68lbs Naval Carronade. Mine are one sixteenth scale. So the original 8" bore for the 68lb ball becomes 1/2" and everything else in proportion. I also wanted a reminder of how many degrees taper I turned the stock at. Not sure whether its four degrees or three and a half. The latter looks better I think.
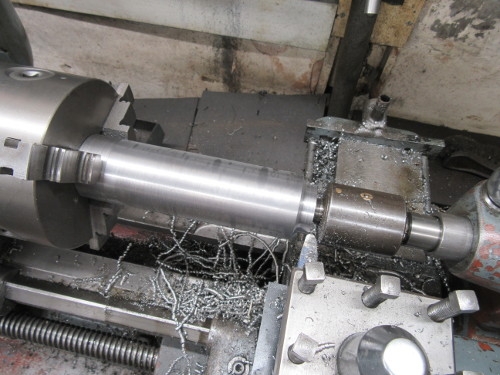
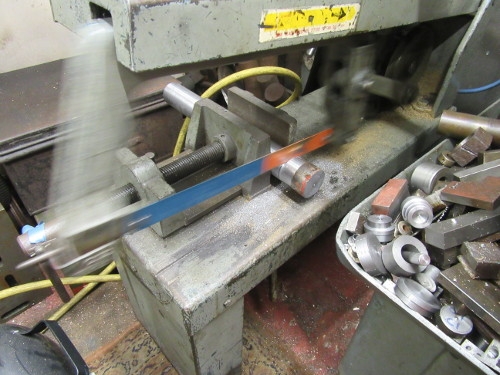
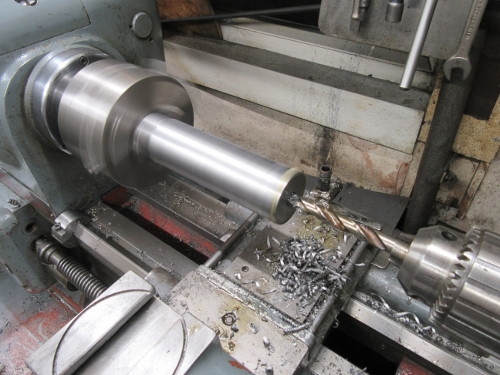
I sorted out a small round nose cutter that Mick McAbe gave me, it's a carbide tip so it will stand up to it. I set up and made the first cuts to make the parallel bit on the muzzle. I realised that I needed to clean the swarf off the lathe so I took time out to do that.
After a lot of hand turning with the cross slide offset I have made a lot more swarf and needed another clean up. Then I gave the cutter a deep sharpen and diamond honing and swept the floor.
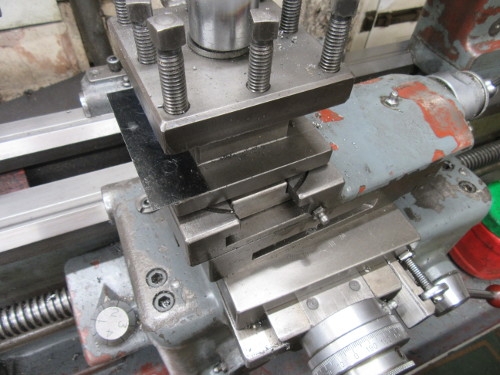
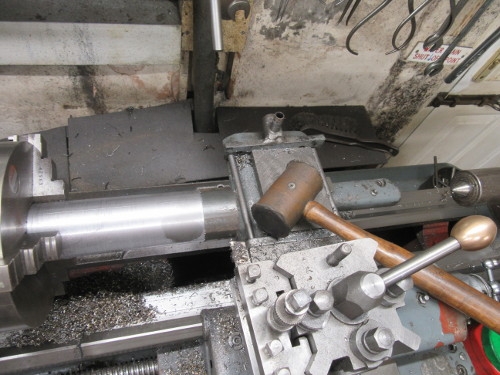
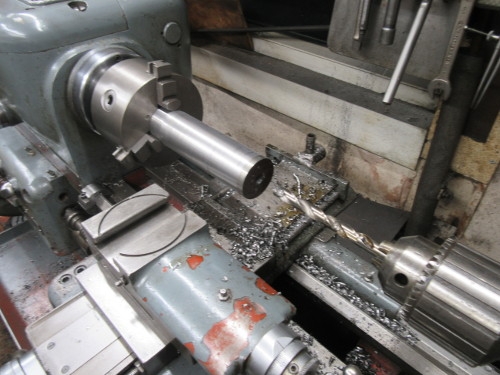
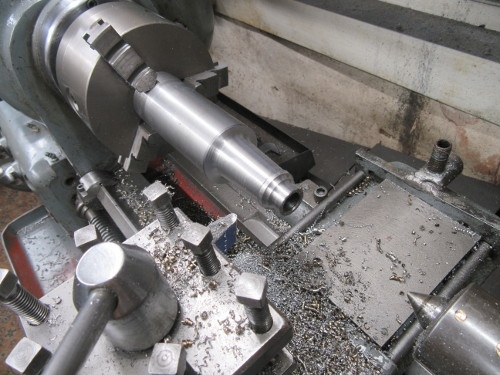
One last pic that illustrates how inventive you have to be at times. If you look carefully you'll see that the tool holder is slid forward a bit in the top slide. This is where I slipped up and had a smash not too long ago but done within reason like this it gives me room to turn the handle on the top slide. Good progress and I think I am on track. A good two hours.....
Re: Shed Matters 3
Posted: 01 Feb 2021, 08:37
by Stanley
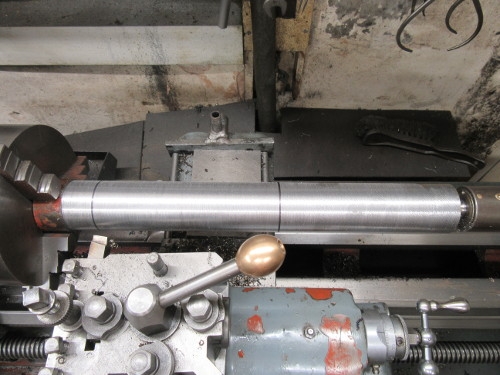
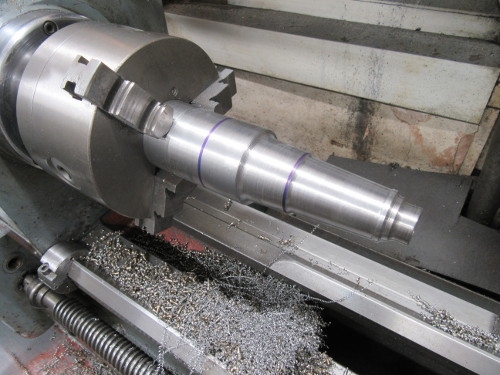
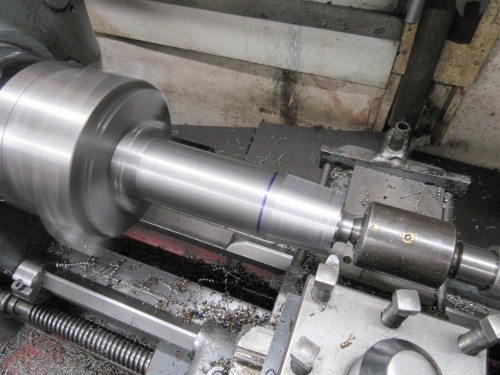
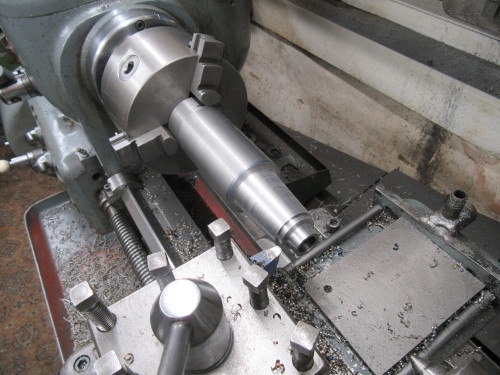
I started where I left off yesterday, half way through shaping the barrel of the first carronade.
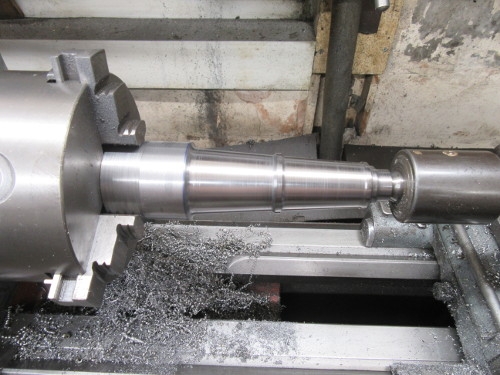
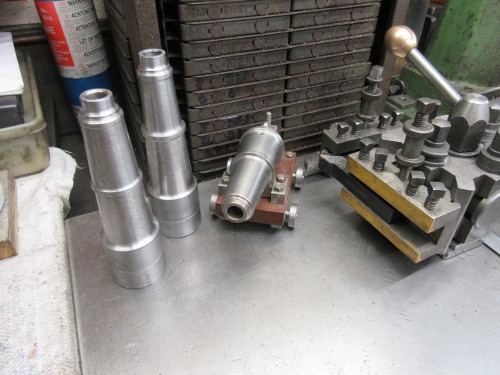
Three pics that tell the story. The 3.5 degrees was right and the taper has fitted the length. I've given this one a bit more detail than the original , I think you can see that in the third pic. I had to make a decision here, carry on with this one or bring the other two to the same stage. I decided on the latter, it encourages me to refine the process as everything is fresh in my head. So into the next one, one of the EN8 ones!
This was where I am at at Knocking off time. A good start on the second cannon. I think I need to clean up!
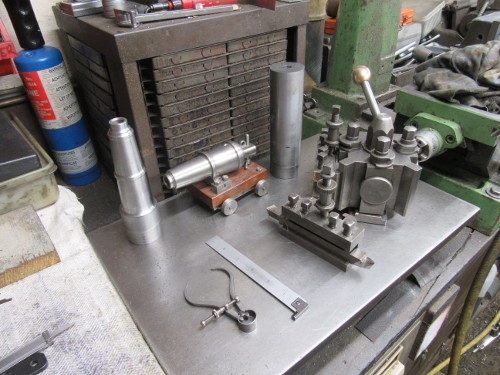
Here's the bench, looking good! By the way, I had to turn the compressor on to charge up this morning. It's held it's charge since I breathed on it 5 days ago. Nice.
Re: Shed Matters 3
Posted: 02 Feb 2021, 08:34
by Stanley

I polished the completed part of the carronade before honing the cutter and getting set up again.
Quietly away, it's muck shifting!
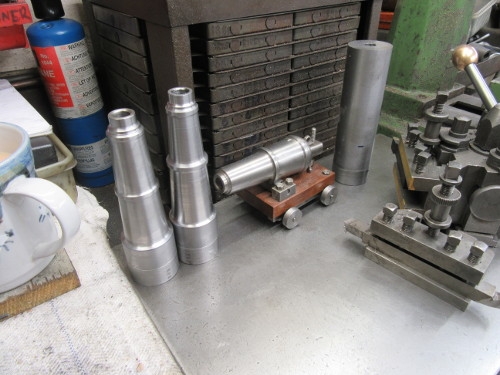
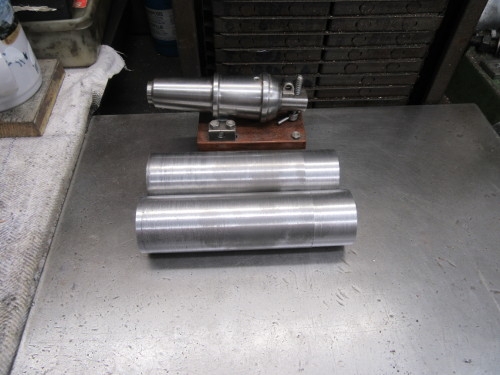
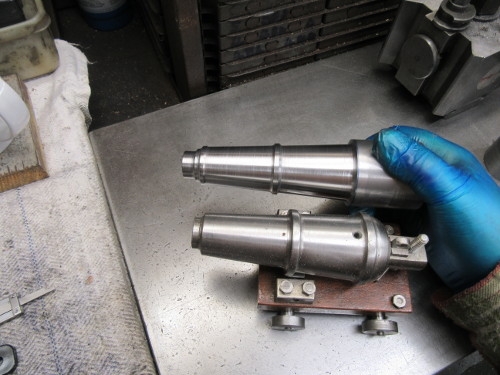
After a while we were at this stage. Two finished with in the first stage and ready to start on the second EN8 slug.
More quiet hand turning and refining the muzzle. I ended up at knocking off time at almost the same stage I was yesterday. I know exactly where I am starting in the morning!
Straight edge.
Re: Shed Matters 3
Posted: 03 Feb 2021, 08:42
by Stanley
Re: Shed Matters 3
Posted: 04 Feb 2021, 06:57
by Stanley

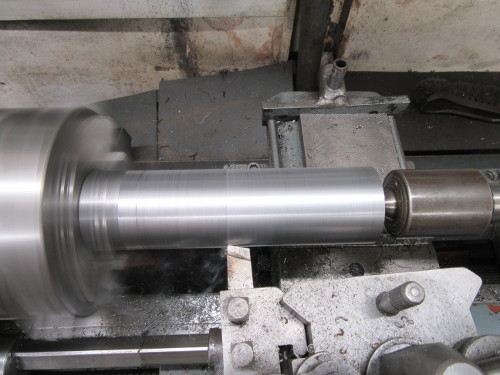
This morning is a short shift because I have to go the Co-op early doors before others are in there. I am getting ready for turning the back end of the carronades and so I need to do some measuring, I need to know the exact depth of the bore and where I need to cut the back end off to. Here are the slugs measured up and marked.
Here's the first one set up in the lathe ready for cutting. I have extended the depth of the centre drilling so that when I cut off the surplus I still have a viable centre. I knocked off here as I have to go shopping now.... All set up for tomorrow!
Re: Shed Matters 3
Posted: 05 Feb 2021, 05:42
by Stanley
I shall be AWOL from the shed today. I am free from serious side effects but feel a bit achy so I am playing safe and having a quiet day. See you tomorrow I hope!
Re: Shed Matters 3
Posted: 06 Feb 2021, 12:10
by Stanley
Having another quiet day and no shed. But these turned up...
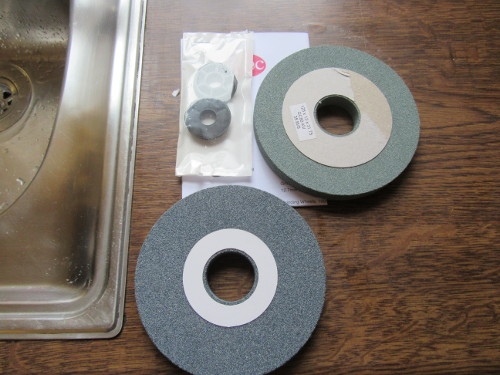
Two 5" grinding wheels for my small Burgess grinder. One for steel, the other green grit for carbide. Only problem is they have only sent reducing bushes for one wheel. I have mailed them. So what's triggered this?
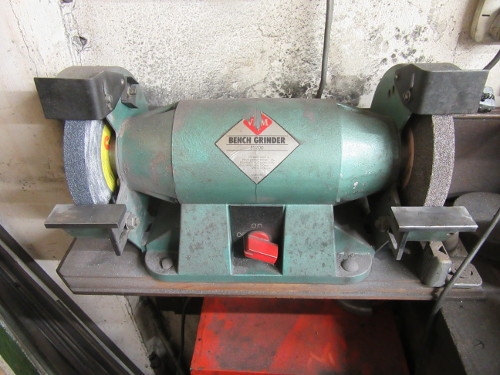
I've lost count of the number of times I have attempted to get my 8" grinder to run without vibrating. The small Burgess grinder runs in perfect balance and I have decided it's big enough for what I do and if it isn't I can always clamp the big grinder to the bench outside and use it there. Easier than another attempt on the 8" and two very good grade wheels into the bargain.
 . That it where the university of life pays off.