Woodcarving a hare
Posted: 06 Oct 2013, 23:11
Hi all , well I have been starting to do some more woodcarvings, I hate the laying out and band sawing part so have done a few bits at the same time once the gear for doing that stage was out, then I will have enough to last me a while.
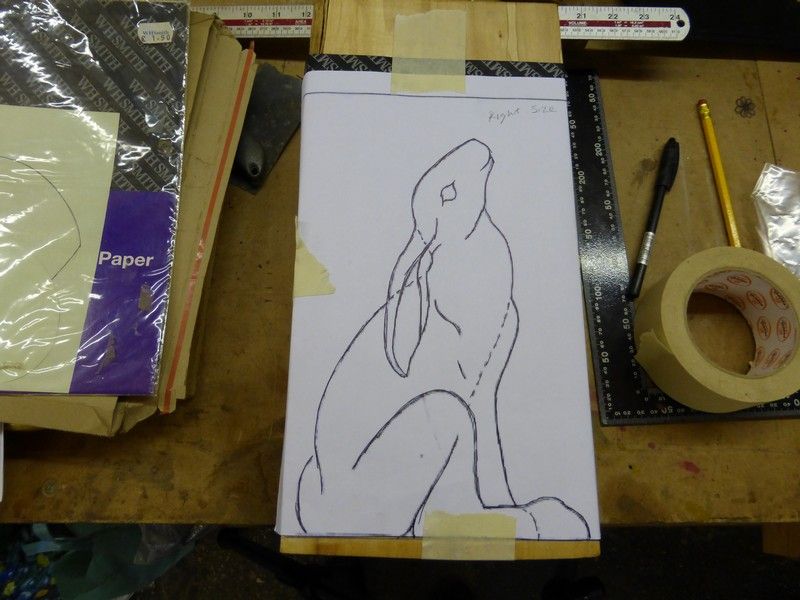
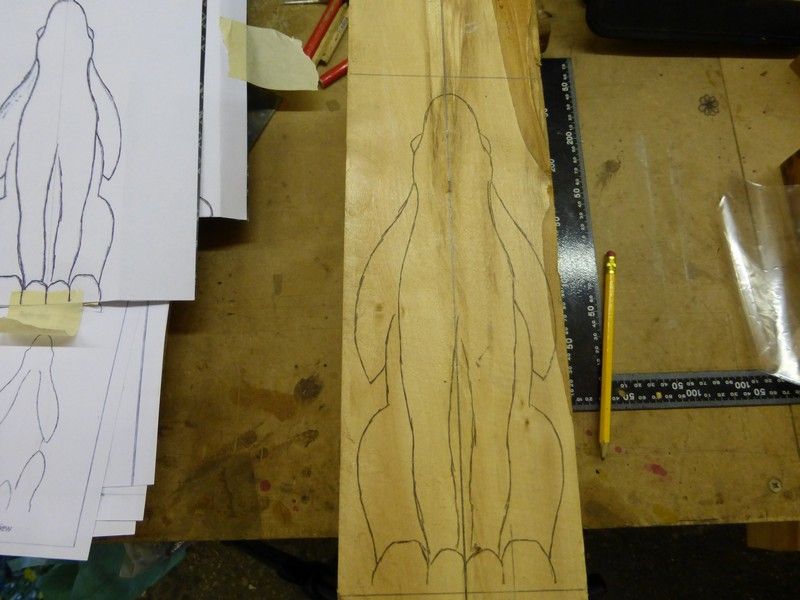
My first subject is a sitting hare, the design is from the woodcarver magazine. First the drawing is expanded to fit the wood on the computer then the print taped on with carbon paper under it and traced onto the wood, The wood I am using is Lime wood.
This is done for both the front view and side view, this is then cut around with the bandsaw, once the first direction is cut the scrap wood is tapped back so the wood becomes a block again so the other direction can also be cut while remaining stable on the saw table.
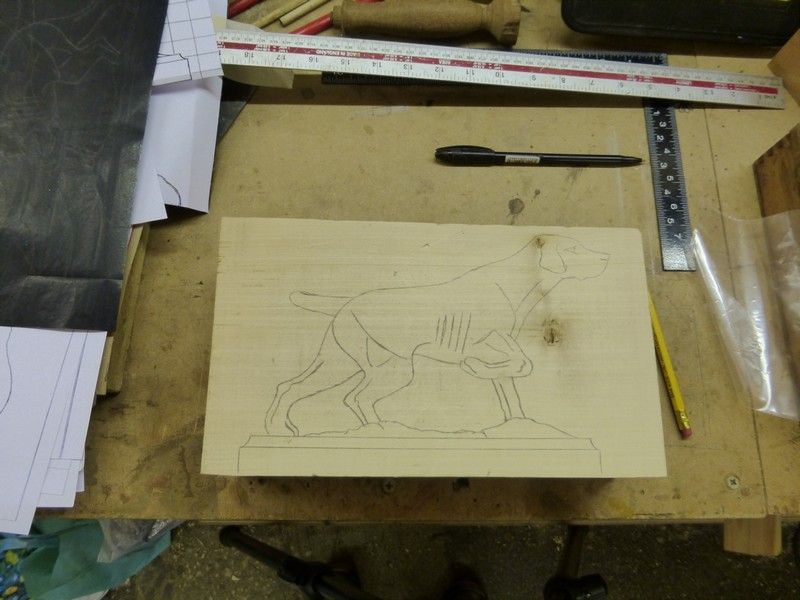
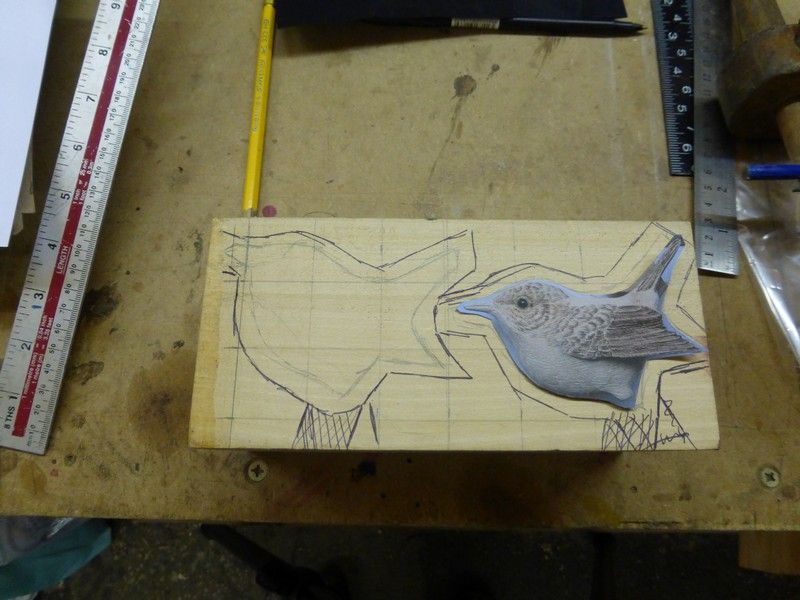
I am also cutting out a pointer dog and two wrens, these were laid out in the same manner but I do not have decent views from the above so will have to carve away rather than bandsaw for these items.
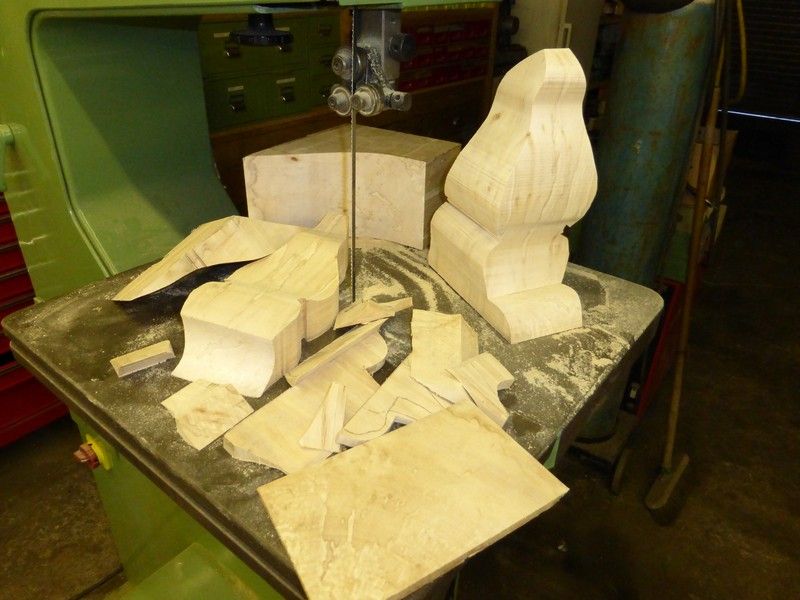
This is the hare and all the bits of scrap from cutting it out in the two planes , you end up with some weird shapes, I also managed to cut it out in such a way that it left a decent size and shape bit of scrap that will do for two walking stick handles once split down the middle, I intend doing a ducks head and a pheasants head with these. You can see this at the back of the table.
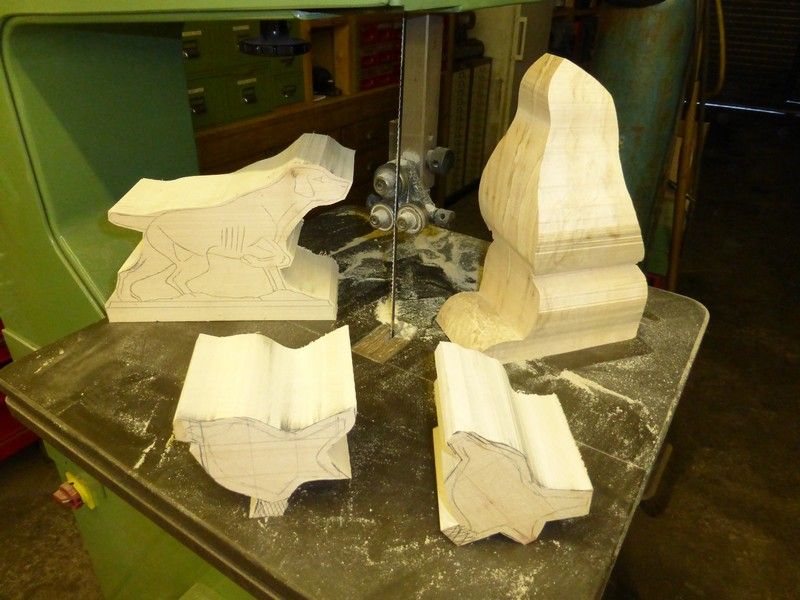
This shot shows all the blanks cut out.
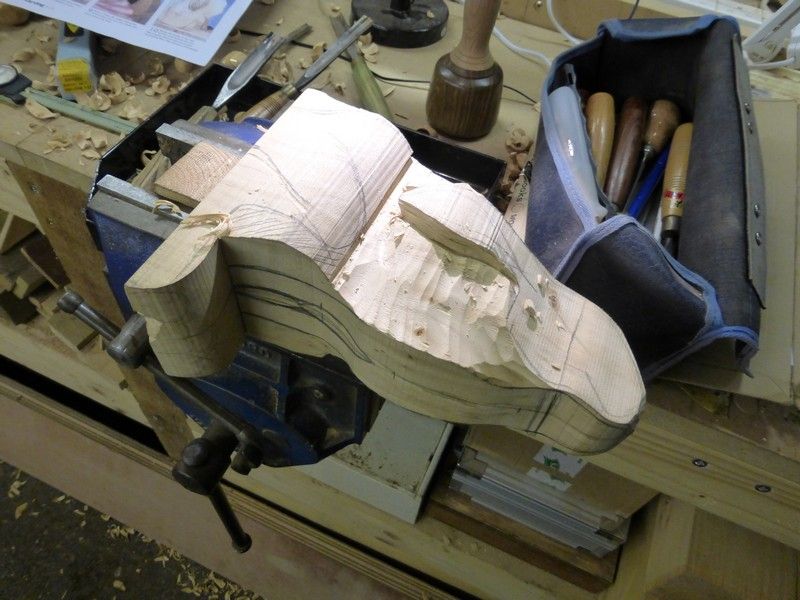
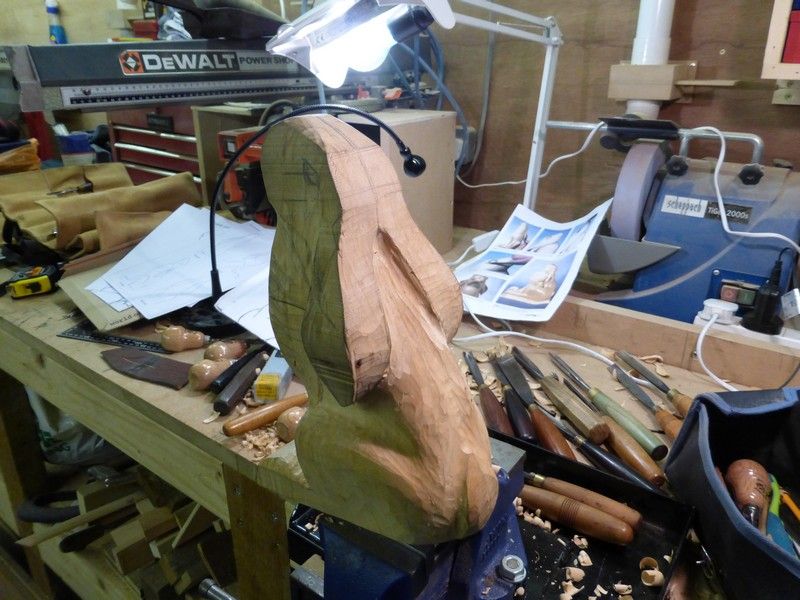
This is the hare staring to be carved out, its tricky getting your head around what is safe to remove at this stage as it still does not look much like the finished thing and with the wood unlike clay or metal , once its taken off, thats it , its gone !!
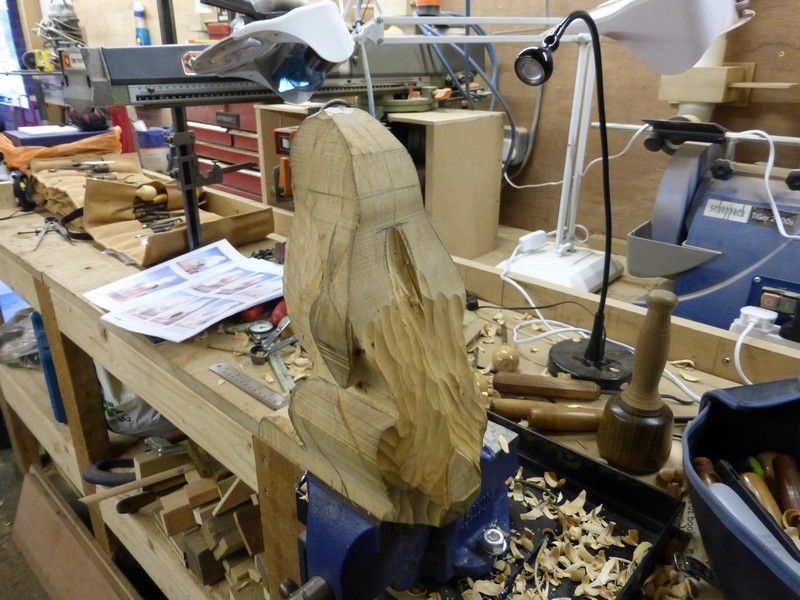
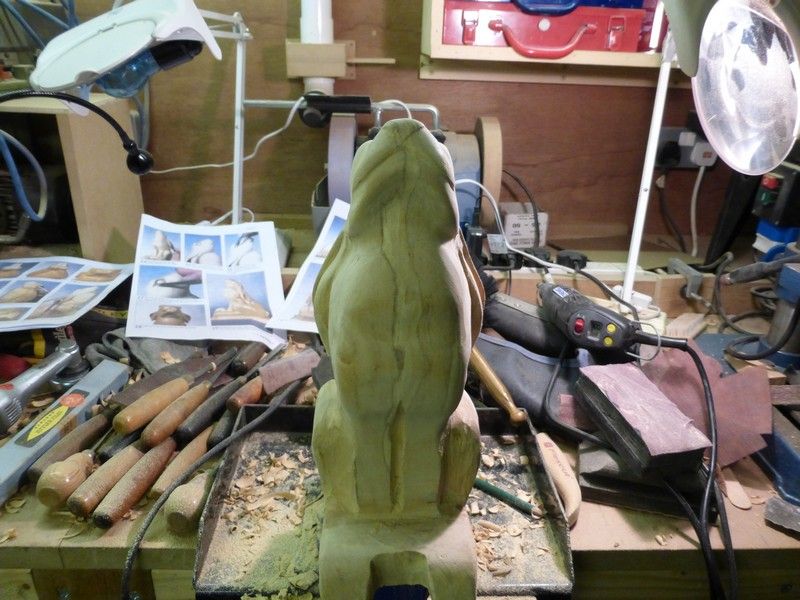
Then its just more of the same , keep refering to the drawings and slowly carving away , then checking again and carving more. This Lime wood I am using for the hare is slightly spalted which gives the interesting markings ( lime is normally very bland and no visible grain ) You can see this in the photo of the hare front on here. Spalting is caused by a fungus in the wood, it can make patches of the wood soft but does not seem to bad so far.

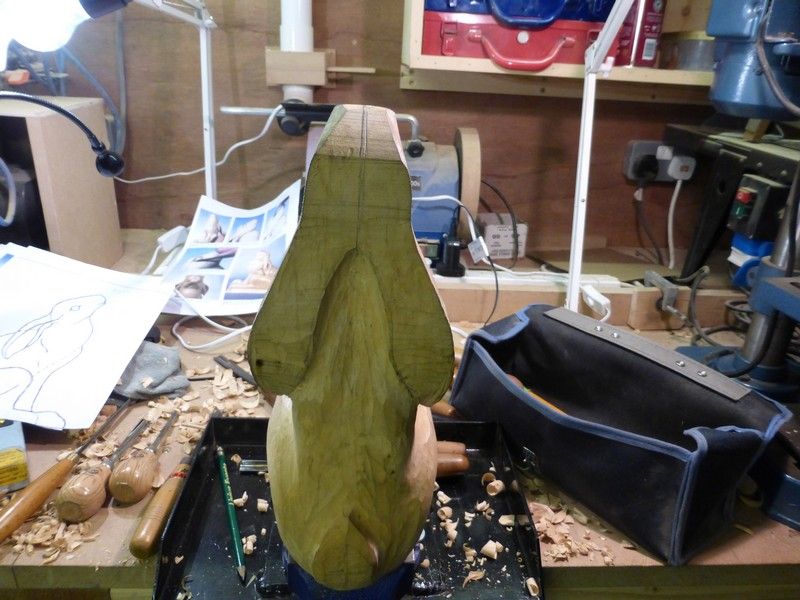
Once it starts to take shape it gets easier to know what is really safe to take off but still tricky to know how far you dare go in some areas and there is less of a safety margin for error the closer to size it gets too.
I decided to do some sanding and dremel work to smooth the shape out as I was having a hard time deciding what was right and what was not.

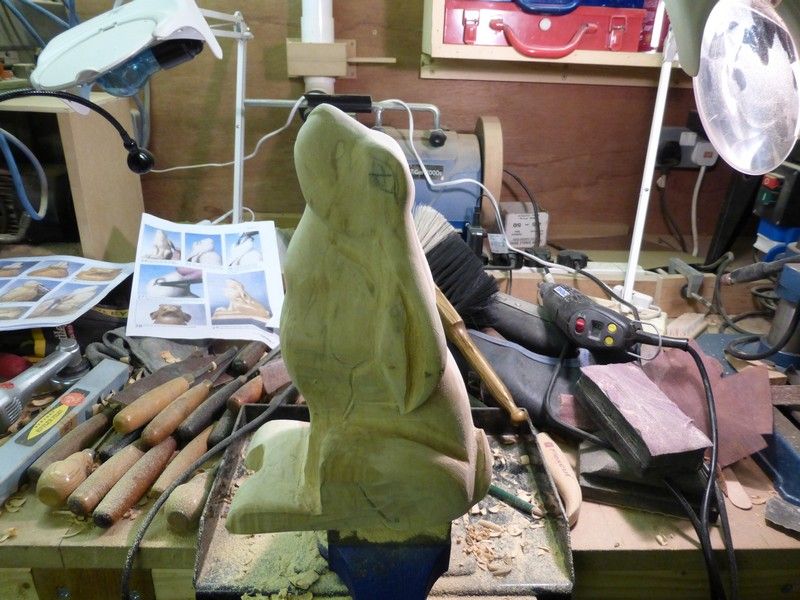
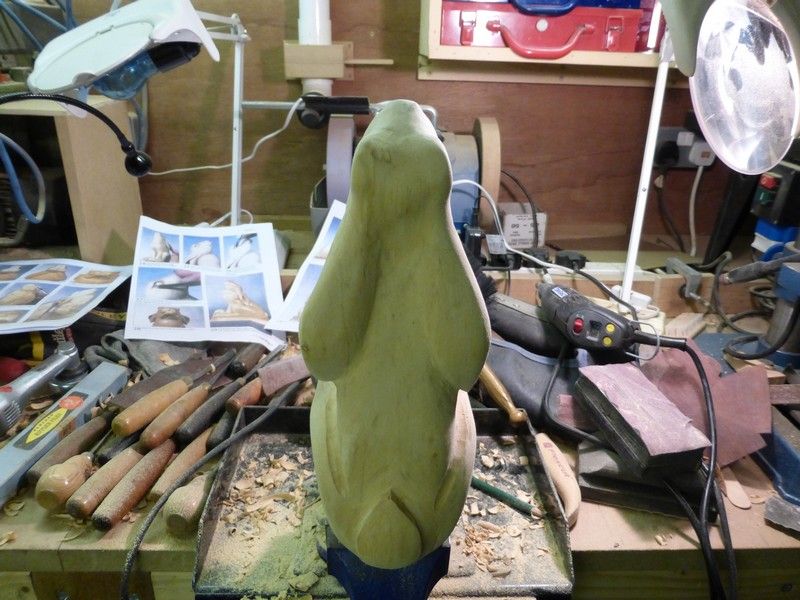
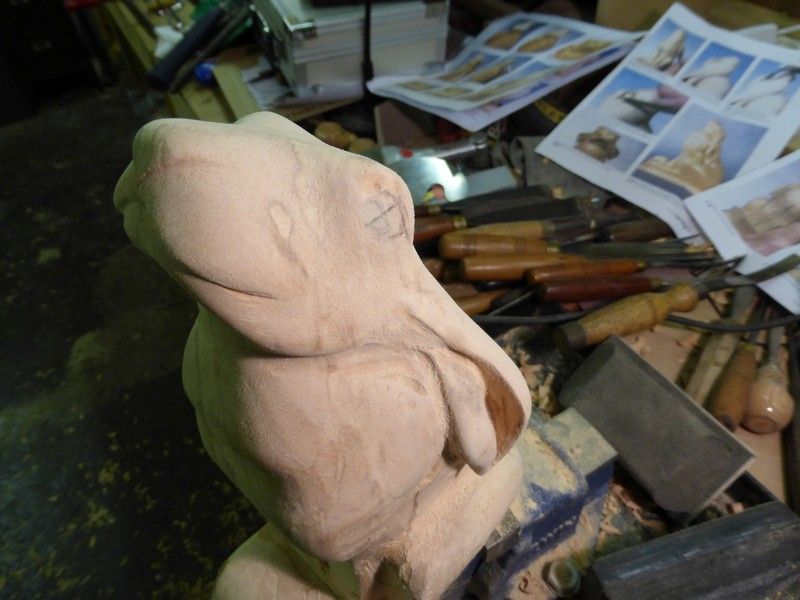
This is the stage I have reached so far, I can already tell it will not end up exact to the drawing, which wont really matter as long as I think it still looks nice or not wrong, sometimes its best to leave it a day or two then look at it with 'fresh eyes' and it can seem easier to work out which bits need work and what areas are safe to take more wood off.
So watch this space............More to come soon.
Cheers Mick
My first subject is a sitting hare, the design is from the woodcarver magazine. First the drawing is expanded to fit the wood on the computer then the print taped on with carbon paper under it and traced onto the wood, The wood I am using is Lime wood.

This is done for both the front view and side view, this is then cut around with the bandsaw, once the first direction is cut the scrap wood is tapped back so the wood becomes a block again so the other direction can also be cut while remaining stable on the saw table.

I am also cutting out a pointer dog and two wrens, these were laid out in the same manner but I do not have decent views from the above so will have to carve away rather than bandsaw for these items.


This is the hare and all the bits of scrap from cutting it out in the two planes , you end up with some weird shapes, I also managed to cut it out in such a way that it left a decent size and shape bit of scrap that will do for two walking stick handles once split down the middle, I intend doing a ducks head and a pheasants head with these. You can see this at the back of the table.

This shot shows all the blanks cut out.

This is the hare staring to be carved out, its tricky getting your head around what is safe to remove at this stage as it still does not look much like the finished thing and with the wood unlike clay or metal , once its taken off, thats it , its gone !!

Then its just more of the same , keep refering to the drawings and slowly carving away , then checking again and carving more. This Lime wood I am using for the hare is slightly spalted which gives the interesting markings ( lime is normally very bland and no visible grain ) You can see this in the photo of the hare front on here. Spalting is caused by a fungus in the wood, it can make patches of the wood soft but does not seem to bad so far.


Once it starts to take shape it gets easier to know what is really safe to take off but still tricky to know how far you dare go in some areas and there is less of a safety margin for error the closer to size it gets too.

I decided to do some sanding and dremel work to smooth the shape out as I was having a hard time deciding what was right and what was not.


This is the stage I have reached so far, I can already tell it will not end up exact to the drawing, which wont really matter as long as I think it still looks nice or not wrong, sometimes its best to leave it a day or two then look at it with 'fresh eyes' and it can seem easier to work out which bits need work and what areas are safe to take more wood off.
So watch this space............More to come soon.
Cheers Mick


